Front Lowering Spring DIY (without spring compressor)
#1
 09-20-2012, 09:56 AM


Front Lowering Spring DIY (without spring compressor)
Here's a quick DIY I put together after doing my front springs last night. I took some tips I read on here and took a few pics. Please excuse the quality of pictures but hopefully you get the idea:
1.) Remove the shrouds over battery and over top hats.
2.) I jacked up each side of the car at a time and removed one wheel at a time. It's up to you how you want to jack the car up.
3.) Remove the wheel, and you CAN remove the brake and rotor but you don't have to.
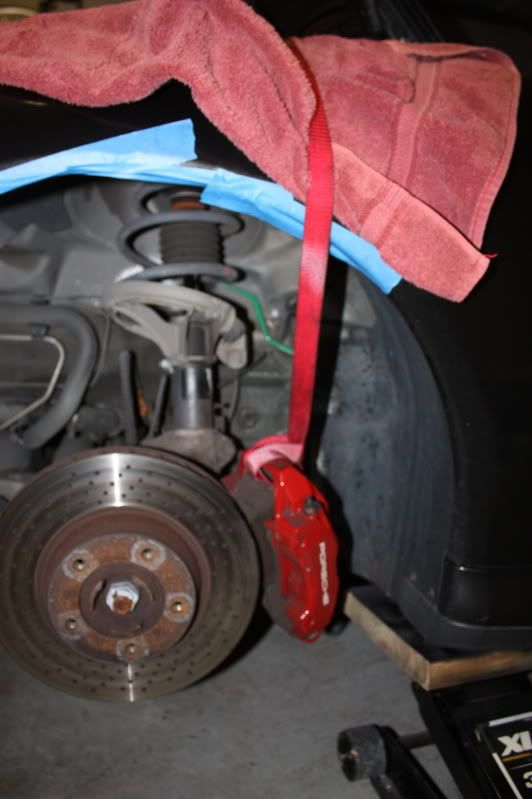
4.) Do yourself and your car a favor and use blue painters tape to tape up your inner fender well and put a towel over the fender.
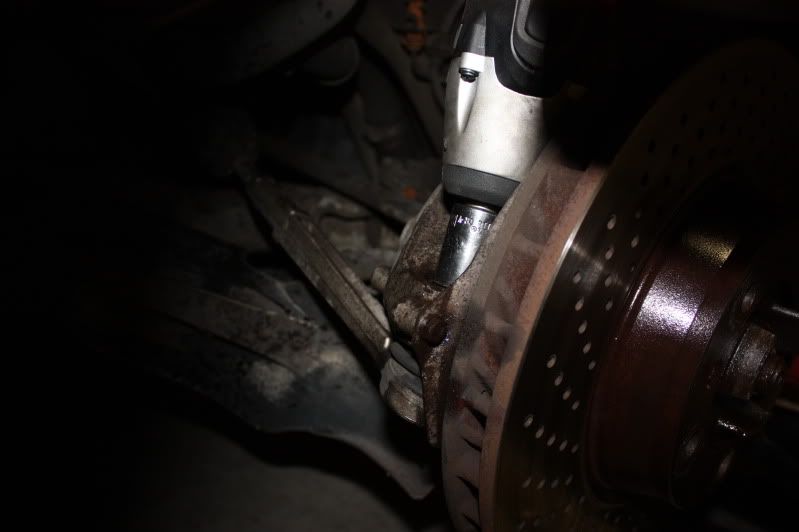
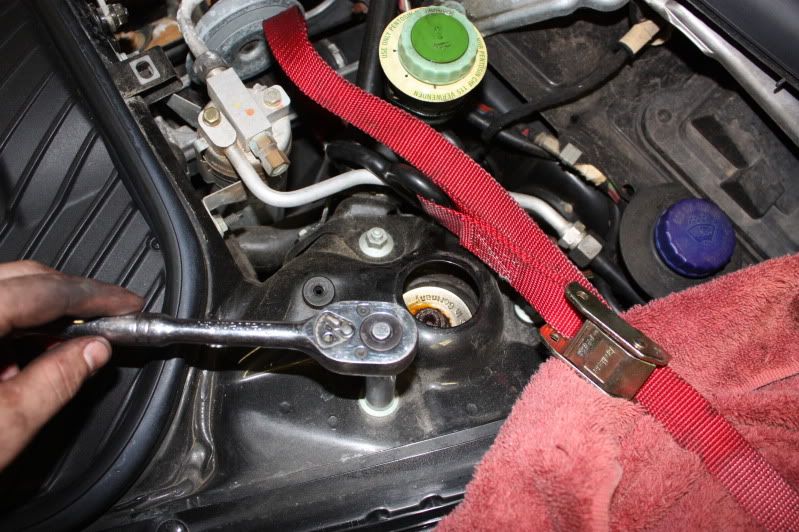
5.) With a 18mm socket go ahead and take out the tie rod end. It may require you to use a Star bit to keep the bolt from spinning:
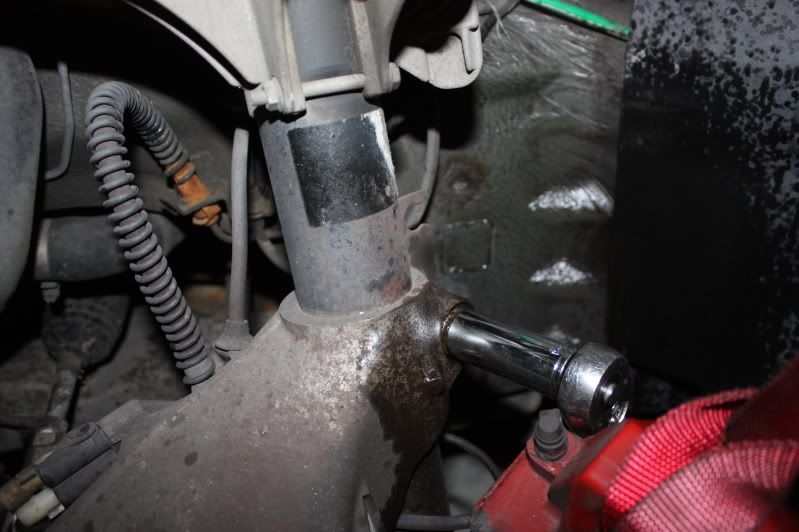
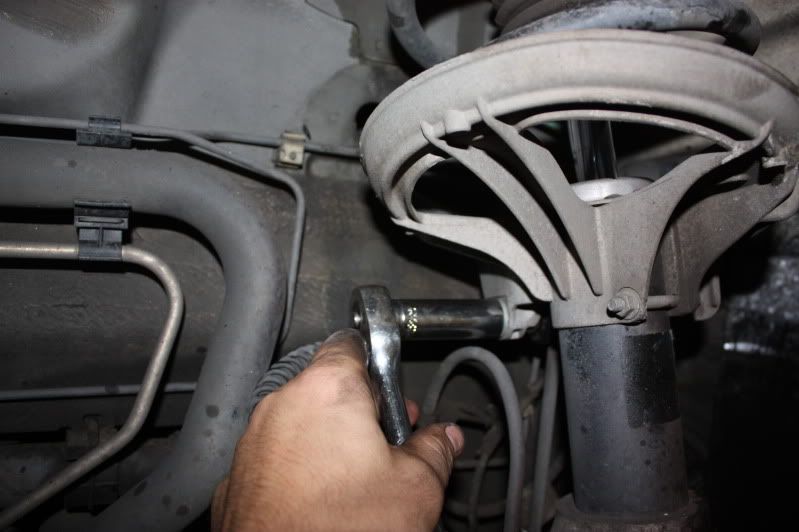
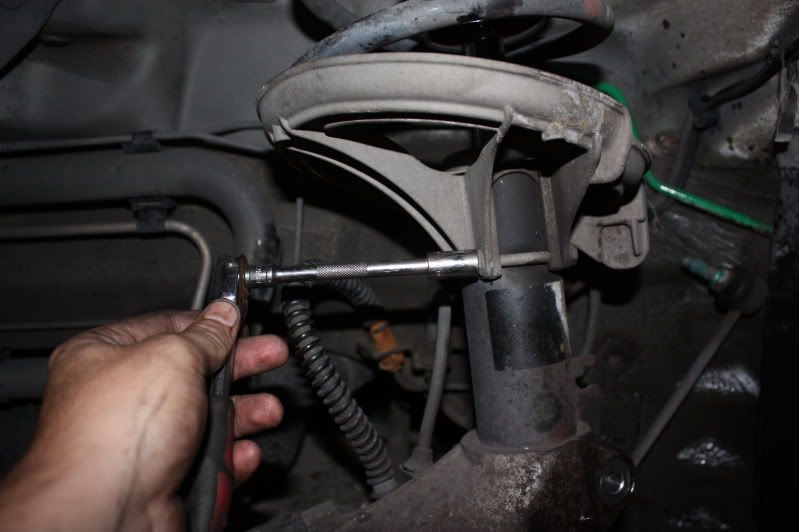
6.) Take out all of the bolts on the strut itself. You should have one 17mm on the back for the end link. One small 10mm bolt which keeps the spring carrier from swiveling. And one 18mm bolt that runs through the outside of the strut.
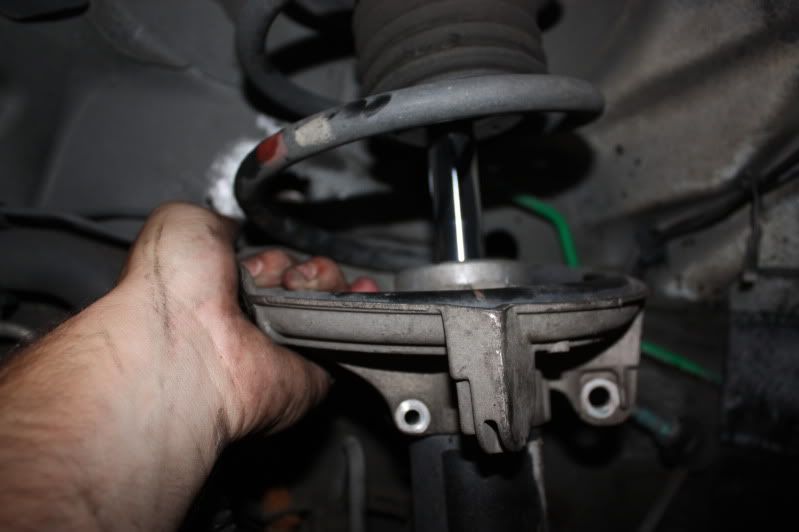
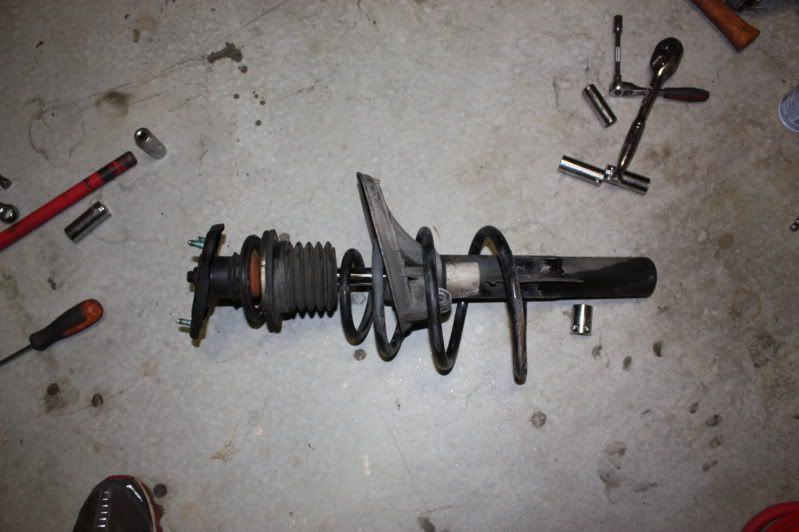
7.) Swivel the spring carrier around and you will see a handy groove in the base. You should then take a prying instrument and just pry the spring over the edge.
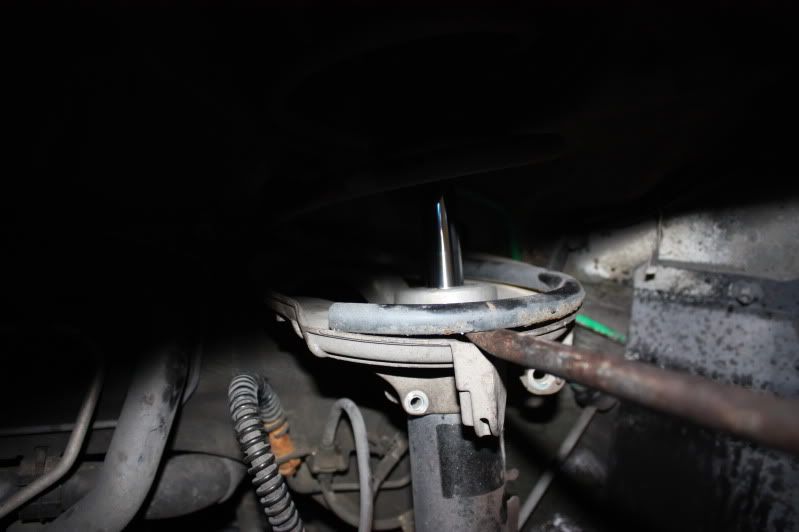
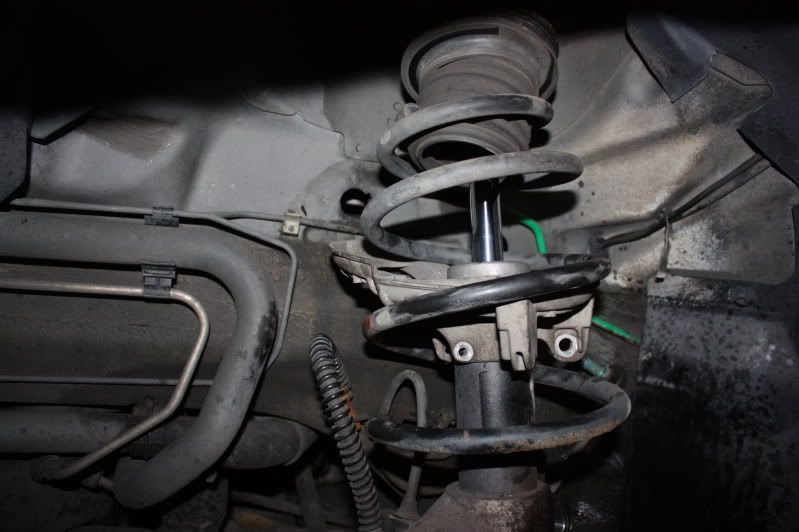
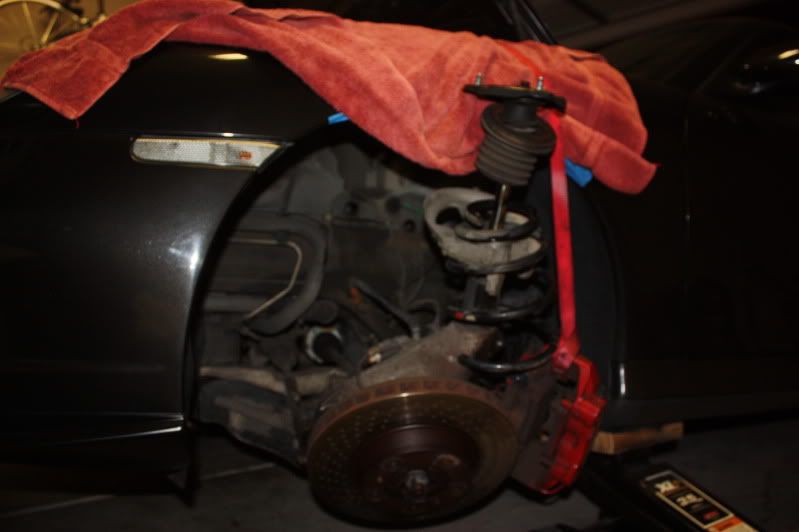
8.) With the spring off the carrier you can just wind it down the strut itself. This relieves tension on the strut and you should unbolt the three bolts at the top of the strut.
9.) The strut should now be loose and you can bend it down, compress the shock and pull it out from under your fender.
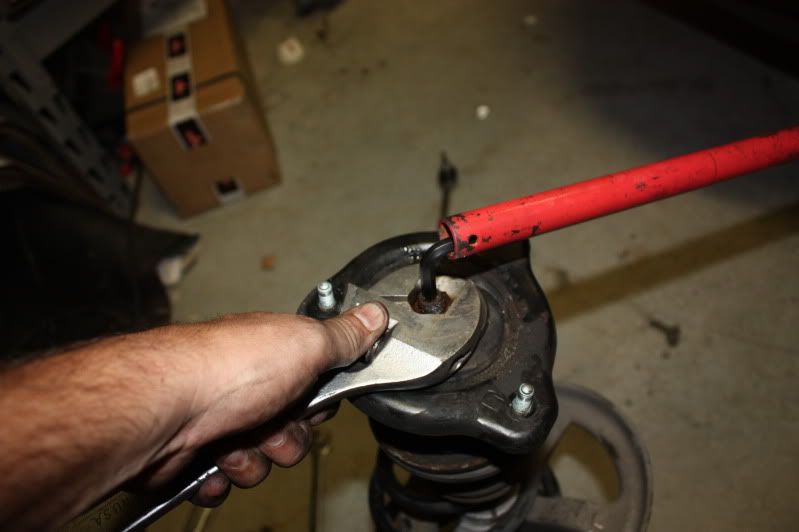
10). Take a #7 allen wrench and a 21mm open ended wrench and undo the top bolt, remove top hat and strut bearing, and take off old springs, put on new springs and screw them down the strut body just like they were when you took them off.
From here everything should be fairly easy to install in reverse. My only issue or AHA moment was that when you pull down to get the strut out you will probably pull the axle out of the transmission in the front. This can be very frustrating to get lined up again. I had to have my wife come out and compress the strut and manipulate it while I tried to line the axle shaft back up with the tranny. I don't have any pics of this, but again it can be frustrating.
Otherwise I think you will find this method quite simple and hopefully this post is helpful.
1.) Remove the shrouds over battery and over top hats.
2.) I jacked up each side of the car at a time and removed one wheel at a time. It's up to you how you want to jack the car up.
3.) Remove the wheel, and you CAN remove the brake and rotor but you don't have to.
4.) Do yourself and your car a favor and use blue painters tape to tape up your inner fender well and put a towel over the fender.
5.) With a 18mm socket go ahead and take out the tie rod end. It may require you to use a Star bit to keep the bolt from spinning:
6.) Take out all of the bolts on the strut itself. You should have one 17mm on the back for the end link. One small 10mm bolt which keeps the spring carrier from swiveling. And one 18mm bolt that runs through the outside of the strut.
7.) Swivel the spring carrier around and you will see a handy groove in the base. You should then take a prying instrument and just pry the spring over the edge.
8.) With the spring off the carrier you can just wind it down the strut itself. This relieves tension on the strut and you should unbolt the three bolts at the top of the strut.
9.) The strut should now be loose and you can bend it down, compress the shock and pull it out from under your fender.
10). Take a #7 allen wrench and a 21mm open ended wrench and undo the top bolt, remove top hat and strut bearing, and take off old springs, put on new springs and screw them down the strut body just like they were when you took them off.
From here everything should be fairly easy to install in reverse. My only issue or AHA moment was that when you pull down to get the strut out you will probably pull the axle out of the transmission in the front. This can be very frustrating to get lined up again. I had to have my wife come out and compress the strut and manipulate it while I tried to line the axle shaft back up with the tranny. I don't have any pics of this, but again it can be frustrating.
Otherwise I think you will find this method quite simple and hopefully this post is helpful.
Last edited by HIX; 09-20-2012 at 09:57 AM. Reason: pic

#5
02-07-2013, 11:05 AM
Thanks for the writeup. I assume the same technique of unwinding the spring can be used for coilover instals as well, right? That way you don't need to find a spring compressor to remove the front struts.
Trending Topics
#10
02-11-2013, 09:21 PM

I had the same ah ha moment. I would recommend unbolting the shafts to ensure you don't damage the seals in the differential.
#11
02-12-2013, 09:28 AM
Just a heads up for those just changing springs.
I left the tie rod attached and only removed the bolts on the shock and the sway bar end link. I pulled the spring off the shock by depressing the shock while still in the fender well. I also didn't remove the fender liner. It was a bit tough at first, but quite manageable. A wood block between the top hat and upper fender body helps hold the shock down while you undo the top hat nut.
I did it this way to avoid undoing the tie rod end, and the whole differential issue.
Worked great for me, hope it helps.

Thread
Thread Starter
Forum
Replies
Last Post
3WDistributing
Automotive Parts & Accessories For Sale/Wanted
31
10-27-2017 01:26 PM
I'mAllIn
Automotive Parts & Accessories For Sale/Wanted
4
09-11-2015 06:38 AM