

PlastiDip Experiments - Stock Side Mirrors

Thread Starter
|
Registered User
Joined: Dec 2013
Posts: 675
From: Chalfont, PA
Rep Power: 55


PlastiDip Experiments - Stock Side Mirrors
Thought I'd experiment a bit with some cans of Plastidip that I had left-over from another project. I previously changed my rear badging to matte black from chrome using PlastiDip, and was impressed with how good it came out as well as how easy it was to work with Plastidip spray.
So, the following project is a bit more ambitious than changing the color of badging.... I decided to change the color of my side mirrors to the same matte black (I have a theme going with GT Silver and Matte Black).
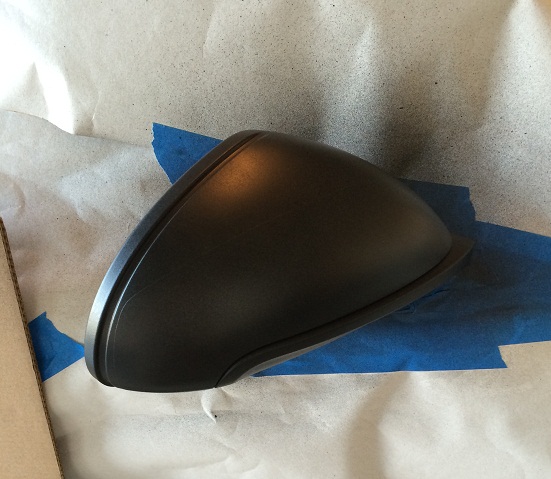
I started with thoroughly cleaning the mirror shells and removing any surface contaminants. I have some Prep spray that I use when preparing surfaces for vinyl wrapping, and after claying a bit used the Prep spray as a final step.

Cleaned mirror housing:
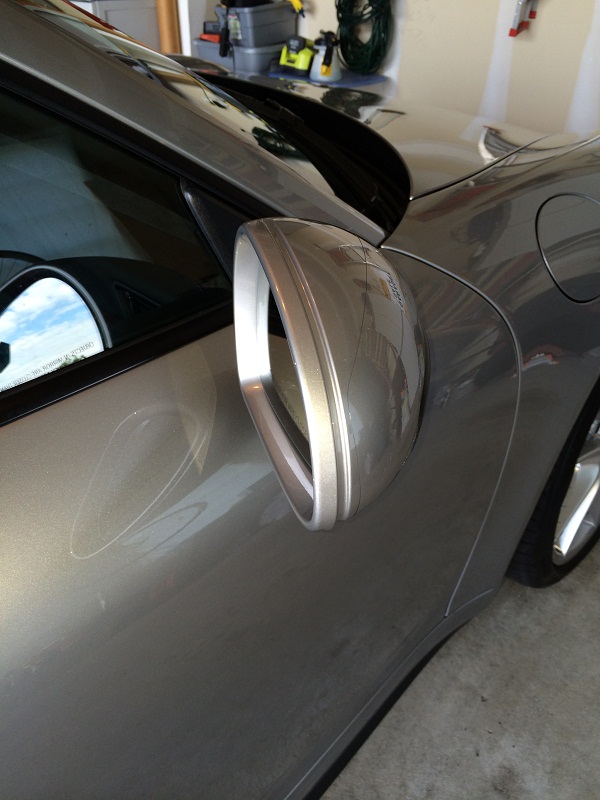
And one last view before I begin masking...
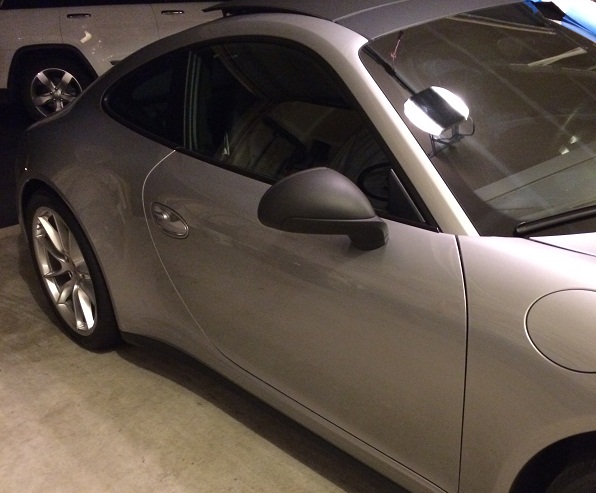
It's important to point out that my mirrors have a clear bra applied - it's a relatively thin clear film, and doesn't cover the entire surface. I decided to spray right over the film (after researching quite a bit about doing so!).
Also, the stock mirror shells are a combination of GT Silver body color and black plastic. I decided to spray over the black portions as well, to provide a consistent color and finish ( I also wasn't 100% sure that the PlastiDip matte black would match-up with the stock black plastic, which has a slight gloss to it!). I only left the base stock black -- this is the base piece that is fixed to the car door.
Masking:
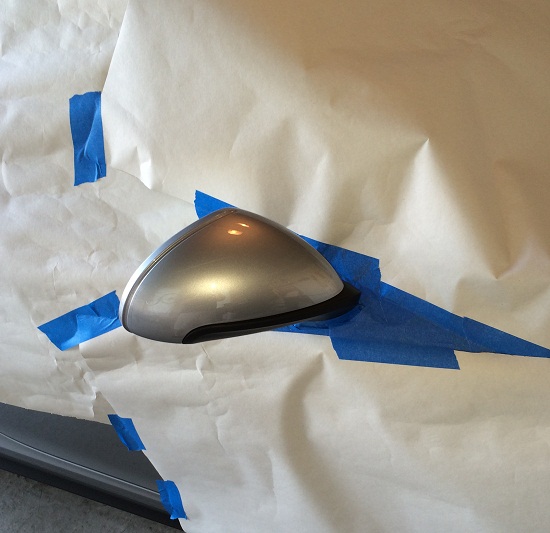
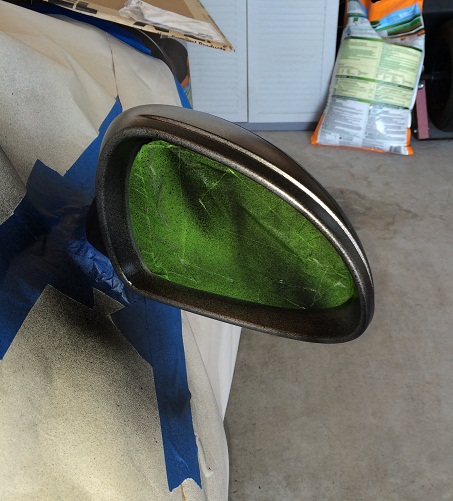
I also taped-off the mirror face, but wanted the black to extend into the opening so that you wouldn't see any silver....
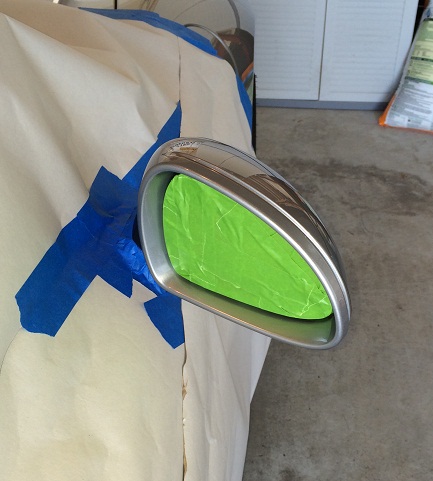
I've used PlastiDip spray before, so knowing how the misting drifts, I did this in my enclosed garage so there was no uncontrollable air movement. I masked only the sides of the car and used a "shield" while spraying to catch most of the overspray. I do know that if any spray sticks to an exposed surface, it is very easy to remove with microfiber towel.
First coat on:
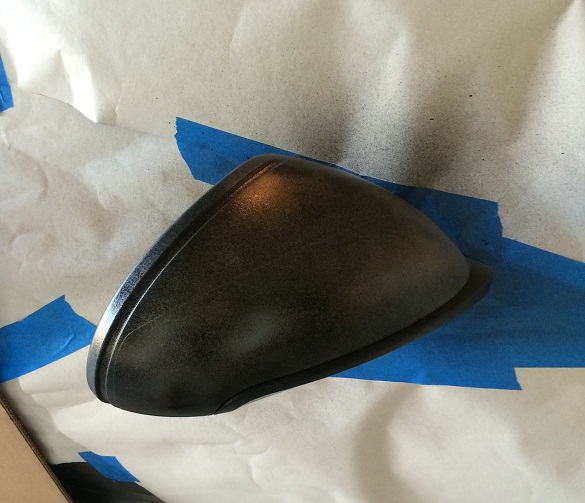
Second coat:
Third coat:
In all, I used a 5-coat strategy. Wait 30 minutes between coats.
I've found that the thicker you can apply the dip, the easier it is to peel-off later. So the first layer can be very thin, making sure to cover all surfaces. With each layer I spray at different angle pattern to catch any thin spots. I also found that between coats, I was able to move the mirror housing to expose each area - the spots between window and shell are tough to spray if you don't.
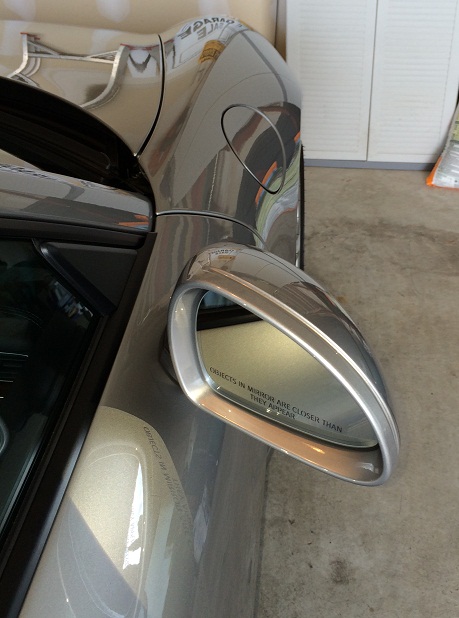
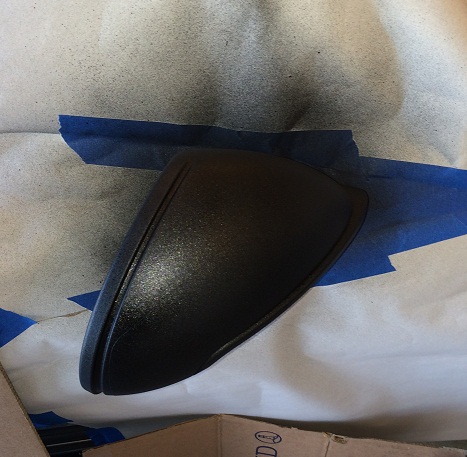
5th coat:
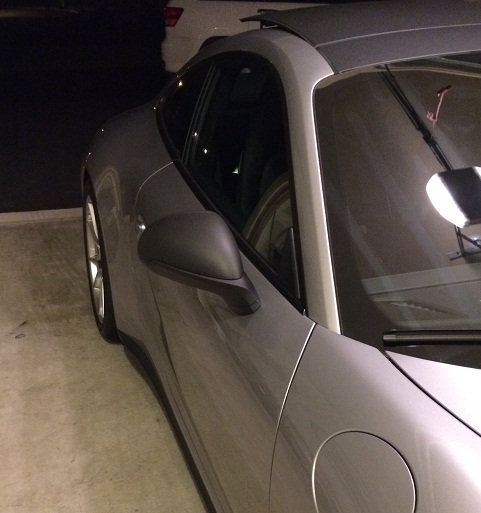
In this shot you can pick-out the line where the clear bra runs across the top of the mirror housing. But in most lighting conditions, it is barely noticeable.
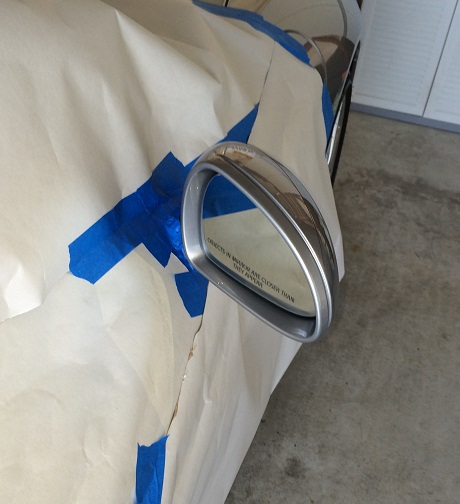
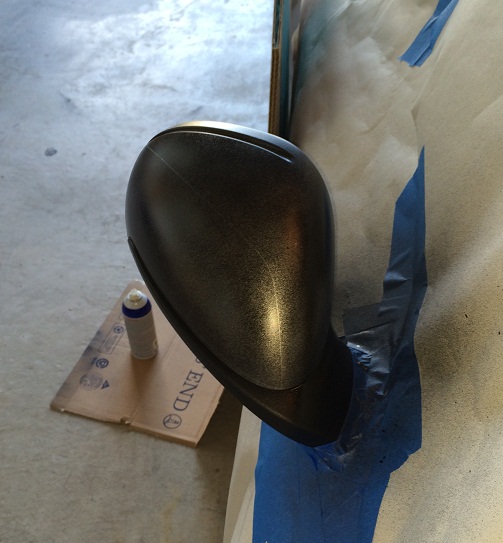
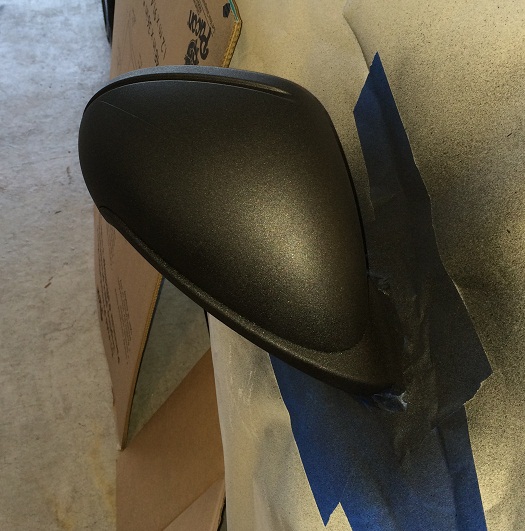
Then removed all the masking, after letting it dry for about an hour. The PlastiDip when first goes on is a bit glossy, but then dries to a very matte finish. If you like gloss, PlastiDip has a clear "glossifier" that you can apply.
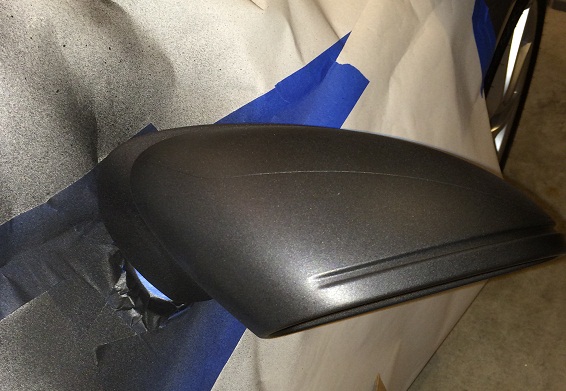
I found that this worked-out better than I expected! The surface has a texture to it that is "grippy" since it is rubberized -- but it is very close to matching the black plastic stock pieces and blends-in.
I used maybe 3/4 can of the Plastidip spray. Most of the time spent on this project was cleaning, masking, and waiting. The spraying is very simple and anyone with steady finger-hand control can get great results!
I would also suggest that between sprays you clear the nozzle, and when you are about to spray the next coat first spray something else ( I used a piece of cardboard) to make sure you don't get globs shooting onto the surface.
Stay tuned -- I have more cans of this stuff and will likely be spraying other bits soon!
So, the following project is a bit more ambitious than changing the color of badging.... I decided to change the color of my side mirrors to the same matte black (I have a theme going with GT Silver and Matte Black).
I started with thoroughly cleaning the mirror shells and removing any surface contaminants. I have some Prep spray that I use when preparing surfaces for vinyl wrapping, and after claying a bit used the Prep spray as a final step.
Cleaned mirror housing:
And one last view before I begin masking...
It's important to point out that my mirrors have a clear bra applied - it's a relatively thin clear film, and doesn't cover the entire surface. I decided to spray right over the film (after researching quite a bit about doing so!).
Also, the stock mirror shells are a combination of GT Silver body color and black plastic. I decided to spray over the black portions as well, to provide a consistent color and finish ( I also wasn't 100% sure that the PlastiDip matte black would match-up with the stock black plastic, which has a slight gloss to it!). I only left the base stock black -- this is the base piece that is fixed to the car door.
Masking:
I also taped-off the mirror face, but wanted the black to extend into the opening so that you wouldn't see any silver....
I've used PlastiDip spray before, so knowing how the misting drifts, I did this in my enclosed garage so there was no uncontrollable air movement. I masked only the sides of the car and used a "shield" while spraying to catch most of the overspray. I do know that if any spray sticks to an exposed surface, it is very easy to remove with microfiber towel.
First coat on:
Second coat:
Third coat:
In all, I used a 5-coat strategy. Wait 30 minutes between coats.
I've found that the thicker you can apply the dip, the easier it is to peel-off later. So the first layer can be very thin, making sure to cover all surfaces. With each layer I spray at different angle pattern to catch any thin spots. I also found that between coats, I was able to move the mirror housing to expose each area - the spots between window and shell are tough to spray if you don't.
5th coat:
In this shot you can pick-out the line where the clear bra runs across the top of the mirror housing. But in most lighting conditions, it is barely noticeable.
Then removed all the masking, after letting it dry for about an hour. The PlastiDip when first goes on is a bit glossy, but then dries to a very matte finish. If you like gloss, PlastiDip has a clear "glossifier" that you can apply.
I found that this worked-out better than I expected! The surface has a texture to it that is "grippy" since it is rubberized -- but it is very close to matching the black plastic stock pieces and blends-in.
I used maybe 3/4 can of the Plastidip spray. Most of the time spent on this project was cleaning, masking, and waiting. The spraying is very simple and anyone with steady finger-hand control can get great results!
I would also suggest that between sprays you clear the nozzle, and when you are about to spray the next coat first spray something else ( I used a piece of cardboard) to make sure you don't get globs shooting onto the surface.
Stay tuned -- I have more cans of this stuff and will likely be spraying other bits soon!
Wow...simply wow! like the color contrast ALOT!
Thank you for a very informative post, and very detailed aspects I never knew (more coats = easier to remove)
Do you think it will look as good on a Amaranth Red car?
I have loads of spare time and would try it lol
Thank you for a very informative post, and very detailed aspects I never knew (more coats = easier to remove)
Do you think it will look as good on a Amaranth Red car?
I have loads of spare time and would try it lol
Thread Starter
|
Registered User
Joined: Dec 2013
Posts: 675
From: Chalfont, PA
Rep Power: 55
I actually did the roof in vinyl wrap... after I did CF and didn't think it came out well. I will leave the roof in matte black vinyl for a while, then probably change to another color eventually. One of my next projects is to go to black wheels, either plastidip'd or powder coat. But I really really like the ability to switch colors whenever I want. I've don't it enough times, and enjoy doing it. Just can't help myself -- have to be unique!!! While I don't go for the "ricier" colors, you can experiment and do some really cool things. Here's what I did to my rear badging not long ago -- used a bit of red PD. When I want, I can just peel the color off and go back to chrome!
Registered User
Joined: Oct 2013
Posts: 626
From: Southeast US
Rep Power: 43
I think you did a great job on the actual work, but I don't like the look myself. I prefer the original GT Silver with the smaller bits of black. My TTS has the sportdesign mirrors, which are solid GT Silver.
Last edited by 991TurboS; Jun 20, 2014 at 05:28 PM.
Trending Topics
Let's leave that to BMW!
Beautiful TTS! One suggestion, clear side markers. Other than that, don't touch perfection.
Registered User
Joined: Oct 2013
Posts: 626
From: Southeast US
Rep Power: 43
This was a Launch Car, and I didn't order the side stickers. $300 for vinyl, gotta love Porsche options!
Registered User
Joined: Dec 2010
Posts: 759
From: Brasil
Rep Power: 59
Now option XAJ for the Turbo.
Registered User
Joined: Oct 2013
Posts: 626
From: Southeast US
Rep Power: 43
I think the look would be nice except they would get sandblasted in short order. You'd want to have those filmed.
