
Alternator DIY Remove and Replace


Thread Starter
|
Registered User

Joined: Jul 2005
Posts: 550
From: Palos Verdes, California
Rep Power: 72


Alternator DIY Remove and Replace
Well Gents,
I've learned alot from all the other Enthusiasts here and would like to contribute to the knowledge base.
Recently, my car's PSM/ ABs lights kept coming on, despite going through about 3 new MAF's!
Another board member, tjj7ff recommended checking the alternator as a cause of the problem. In fact, my alternator was bad- not putting out enough amps and creating large voltage swings. Hence, I sought to remove and replace my alternator and create a DIY for fellow 6speedsters.
Instructions
1- disconnect battery
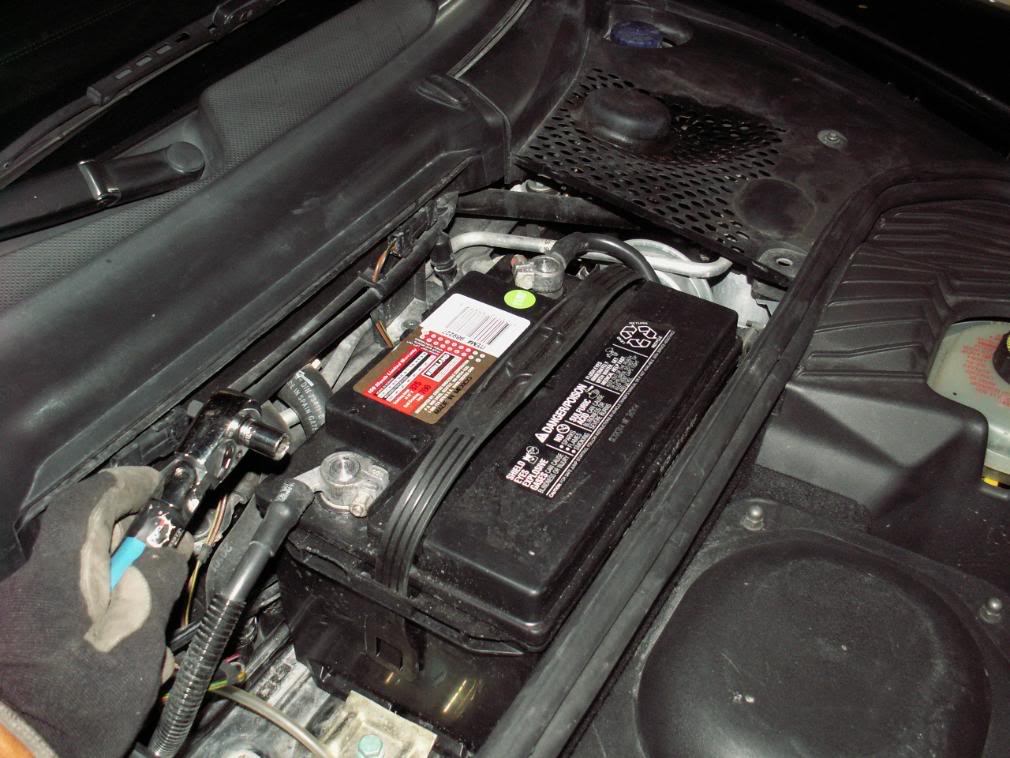
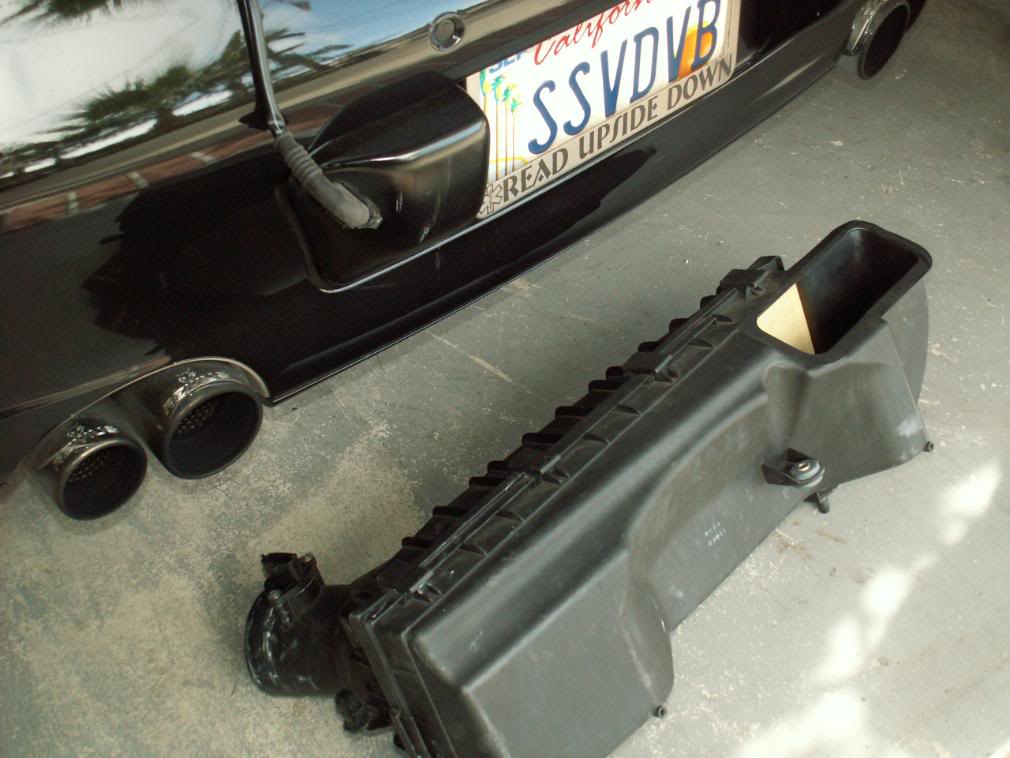
2- remove airbox
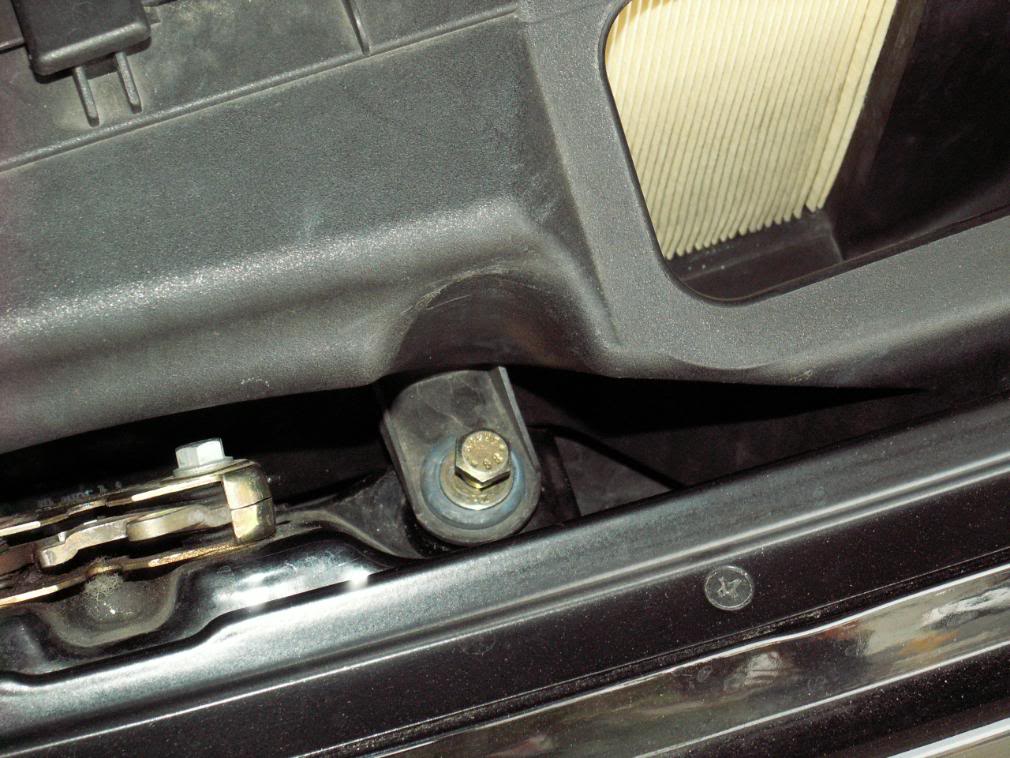
3- remove boost hoses
4- remove 3 bolts on Y pipe
5- disconnect F pipe from Y pipe
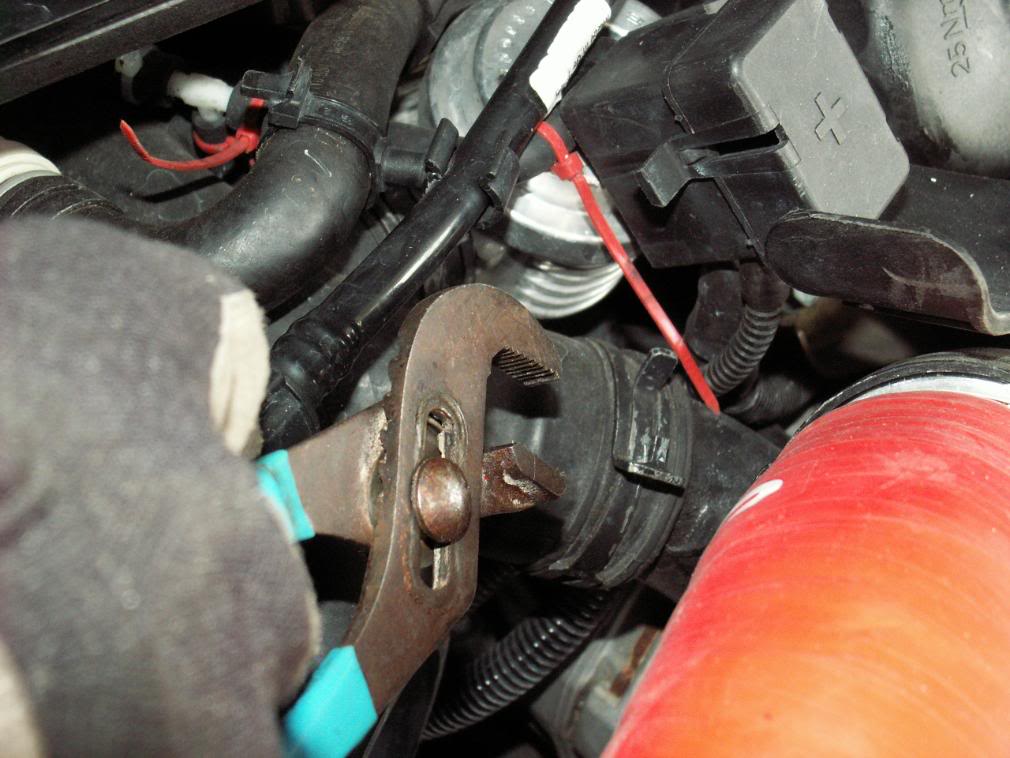
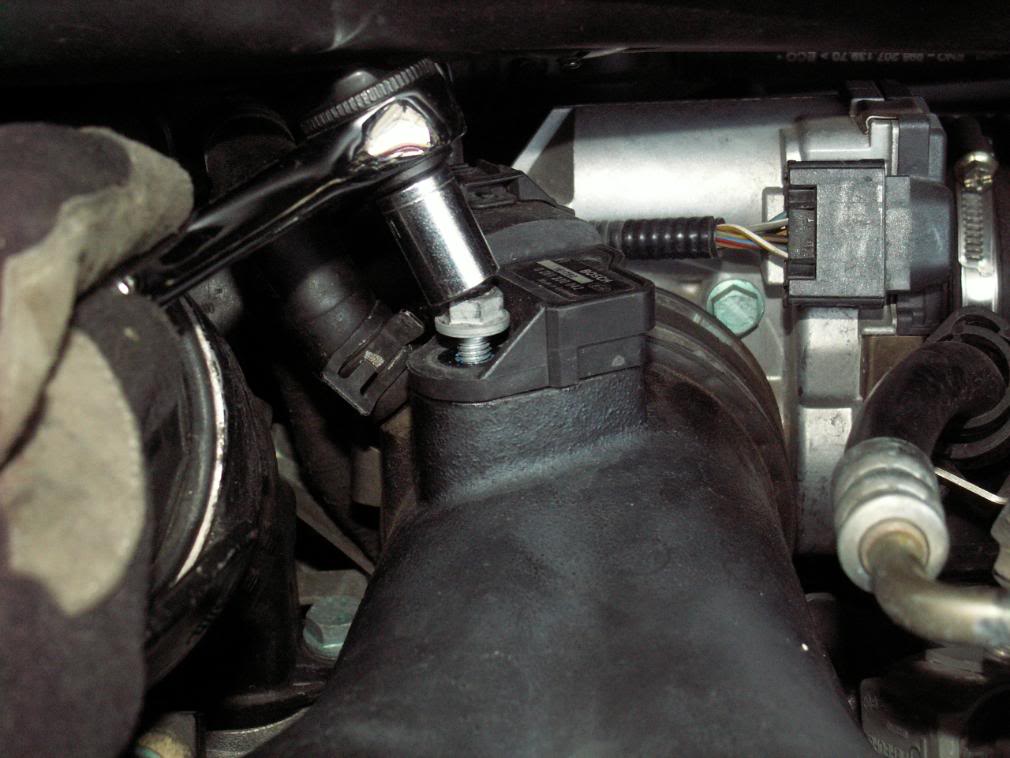
6- disconnect sensor on top of Y pipe
I've learned alot from all the other Enthusiasts here and would like to contribute to the knowledge base.
Recently, my car's PSM/ ABs lights kept coming on, despite going through about 3 new MAF's!
Another board member, tjj7ff recommended checking the alternator as a cause of the problem. In fact, my alternator was bad- not putting out enough amps and creating large voltage swings. Hence, I sought to remove and replace my alternator and create a DIY for fellow 6speedsters.
Instructions
1- disconnect battery
2- remove airbox
3- remove boost hoses
4- remove 3 bolts on Y pipe
5- disconnect F pipe from Y pipe
6- disconnect sensor on top of Y pipe
Thread Starter
|
Registered User
Joined: Jul 2005
Posts: 550
From: Palos Verdes, California
Rep Power: 72
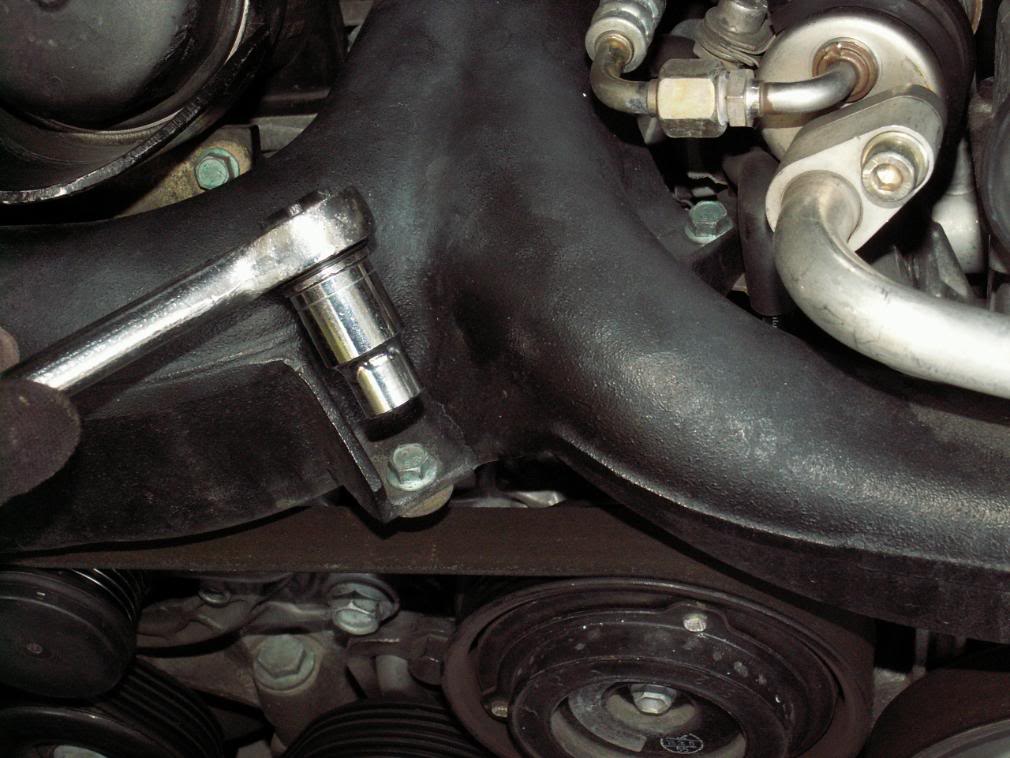
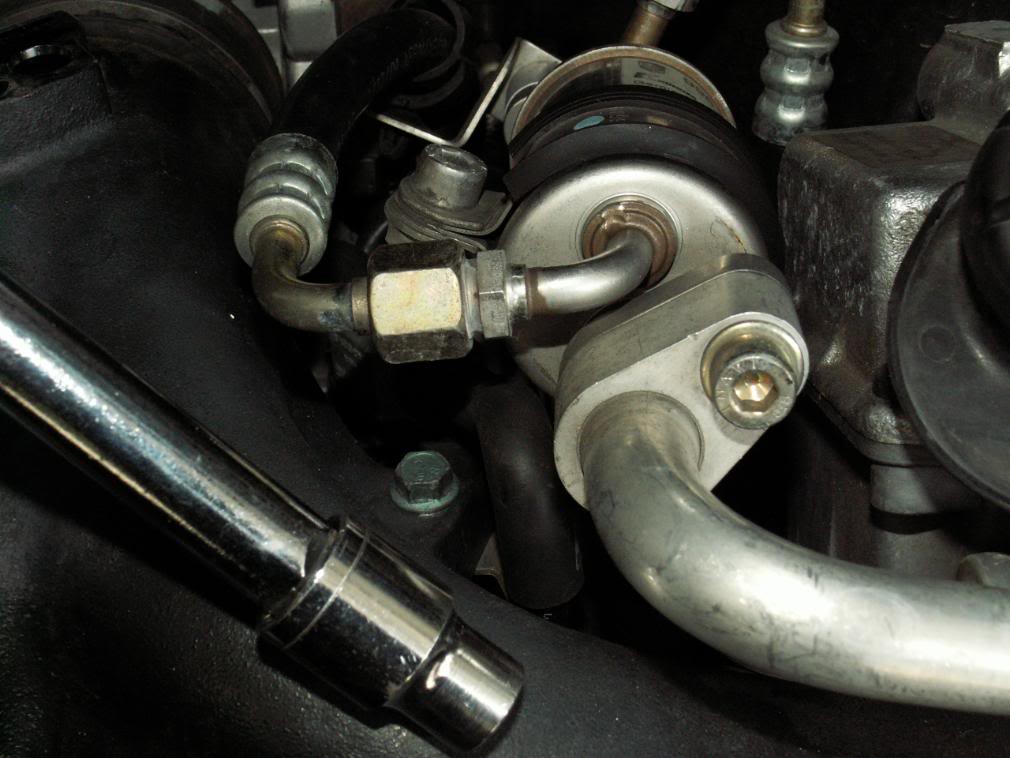
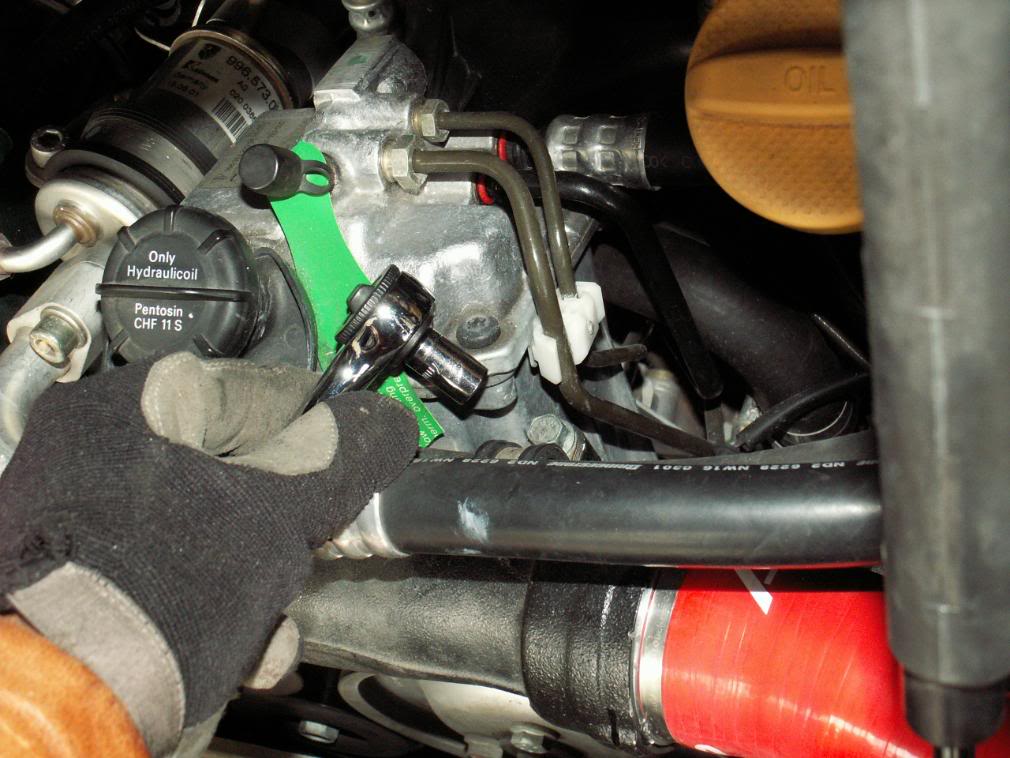
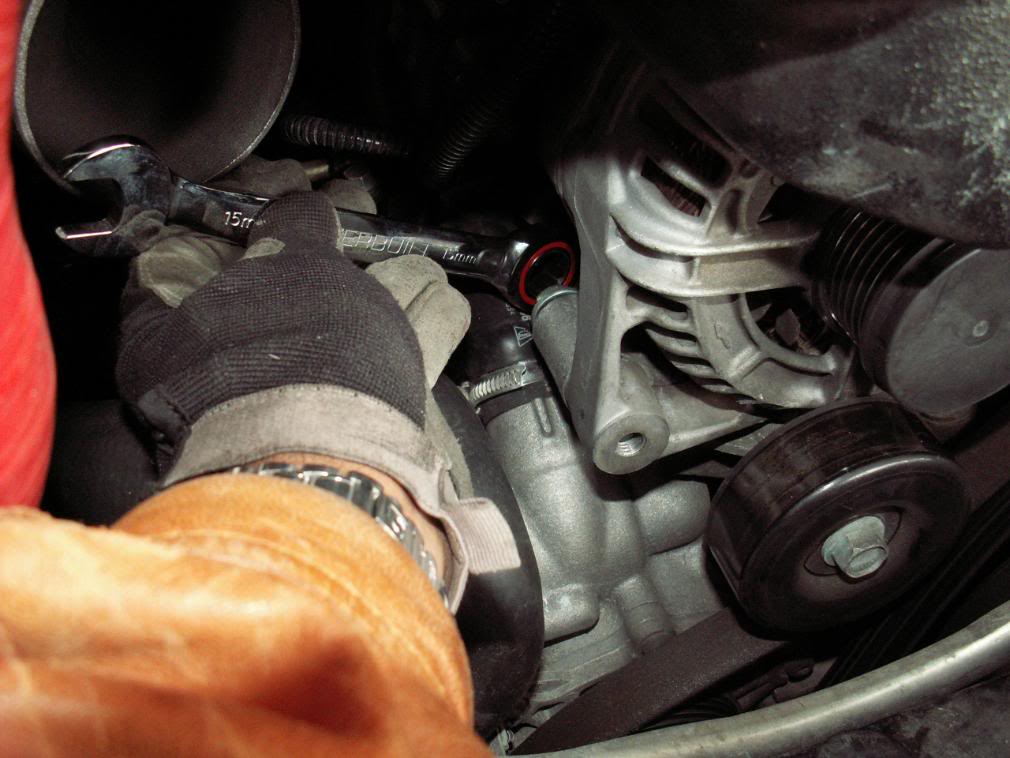
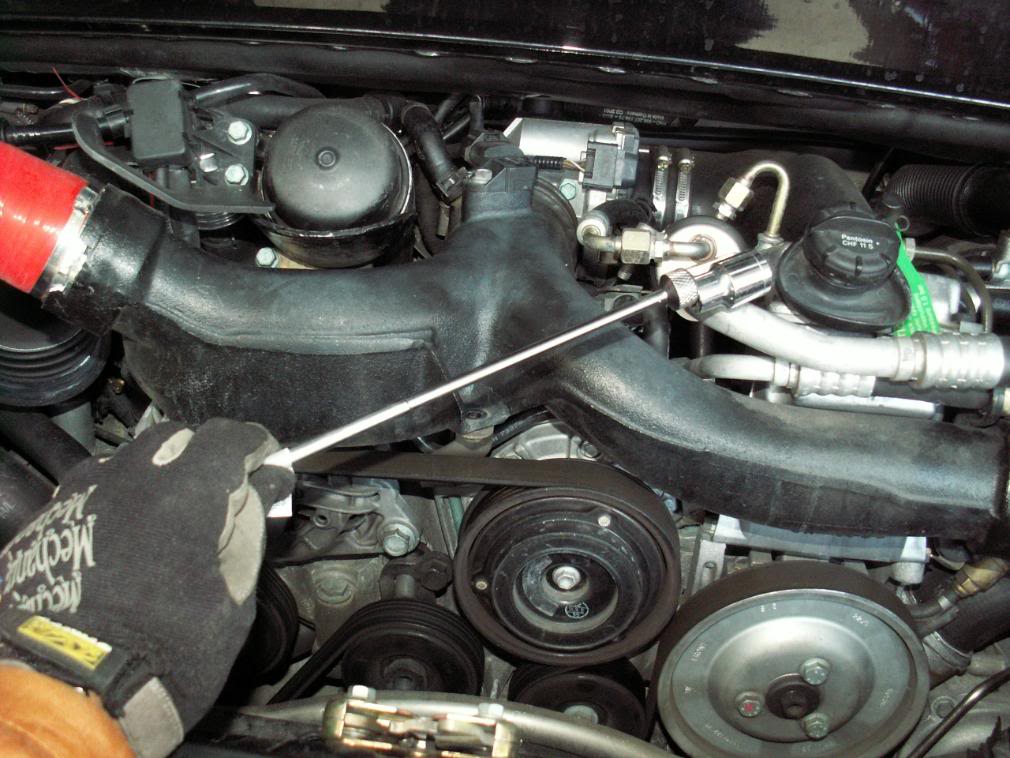
7- disconnect 2 hoses at end of Y pipe and pull Y pipe backwards from plenum
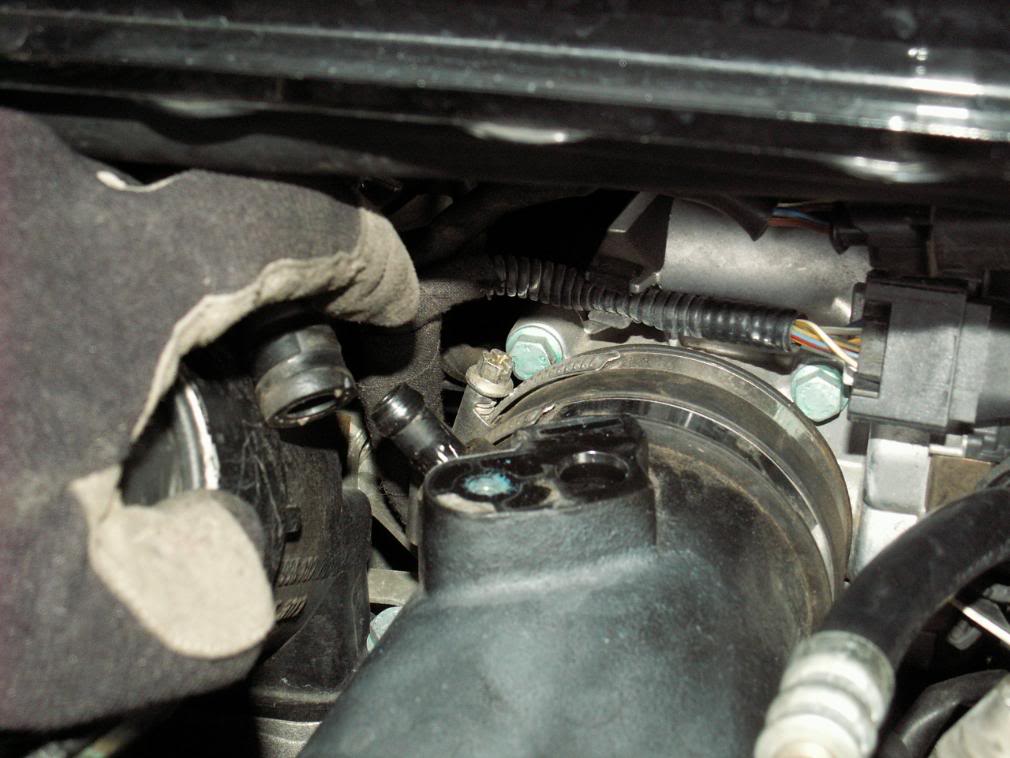
8- My boost hose were so tight I couldn't pull them off the Y pipe- thanks Dan at Vivid! So instead, I left them on and just pushed the Y pipe up with a spare wrench to I could get access to the altenator behind
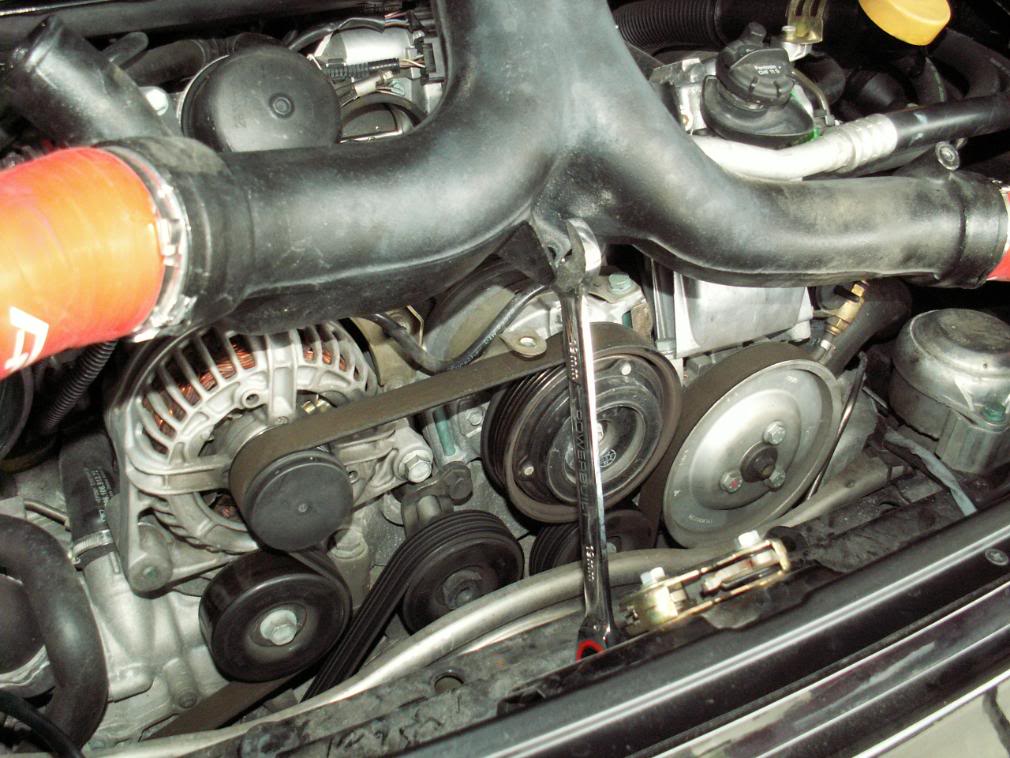
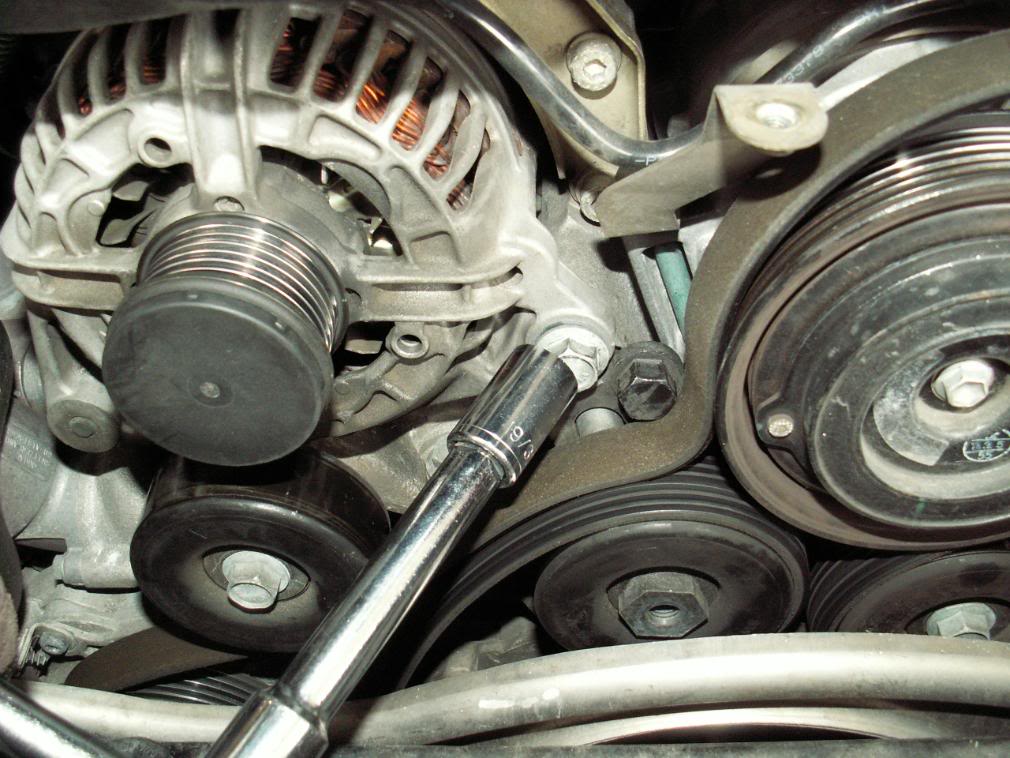
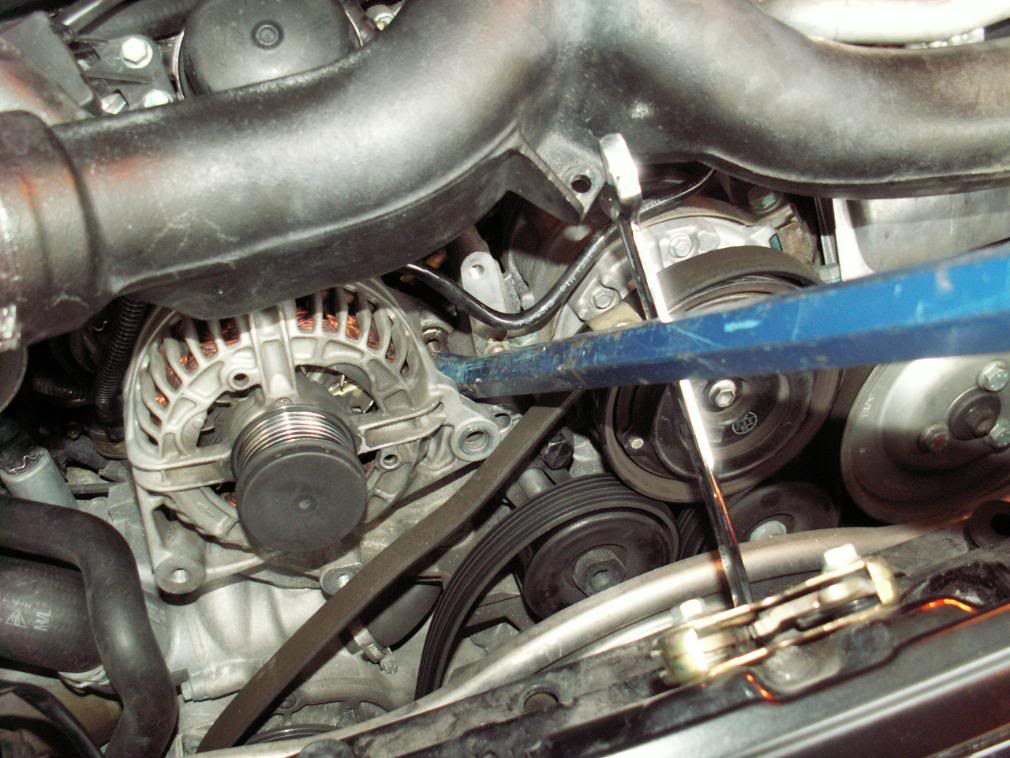
9- crank belt tensioner clockwise to loosen serpentine belt and slip belt off alternator

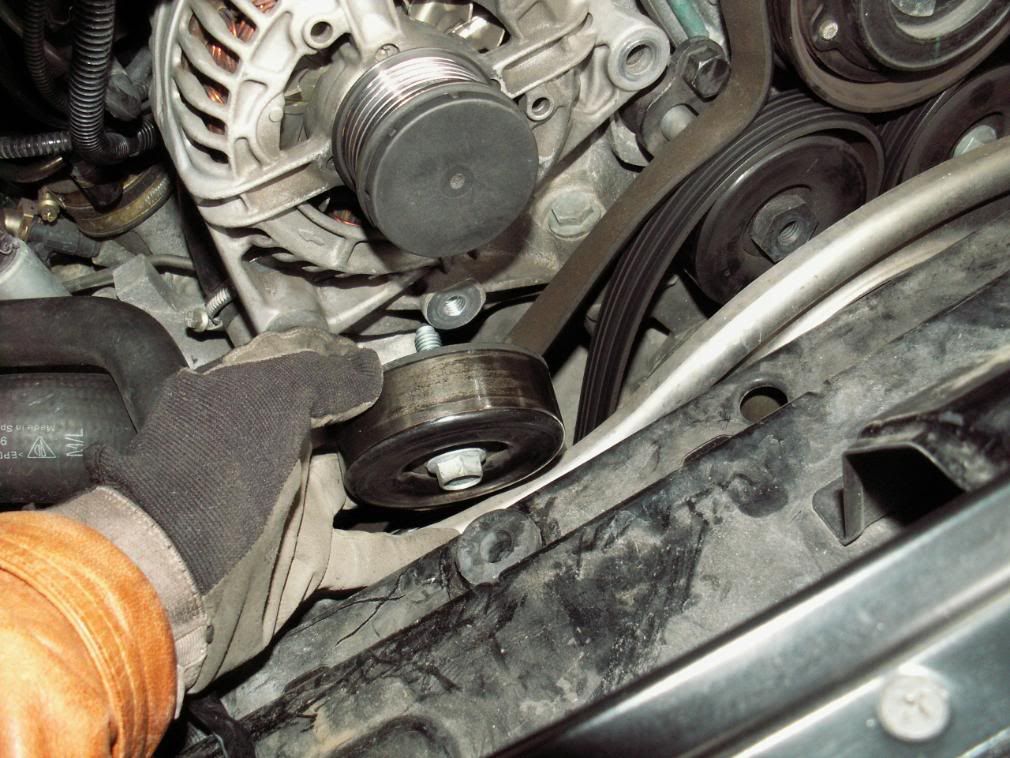
10- remove pulley in front of alternator
Sameer
8- My boost hose were so tight I couldn't pull them off the Y pipe- thanks Dan at Vivid! So instead, I left them on and just pushed the Y pipe up with a spare wrench to I could get access to the altenator behind
9- crank belt tensioner clockwise to loosen serpentine belt and slip belt off alternator
10- remove pulley in front of alternator
Sameer
Thread Starter
|
Registered User
Joined: Jul 2005
Posts: 550
From: Palos Verdes, California
Rep Power: 72
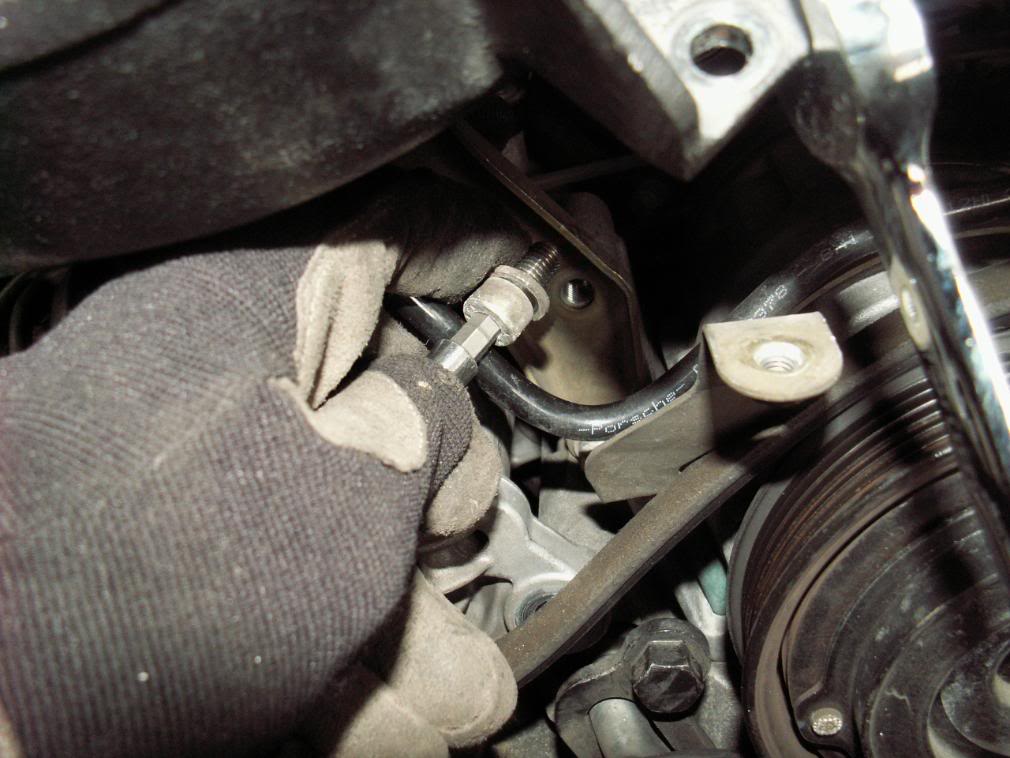
11- remove 2 alternator bolts- the one on the right is behind the alternator and is easier to access if the rubber airbox connector hose is also removed
12- remove oilfilter bracket

13- I used a pry bar to move the alternator left laterally
14- disconnect 2 wires at back of alternator
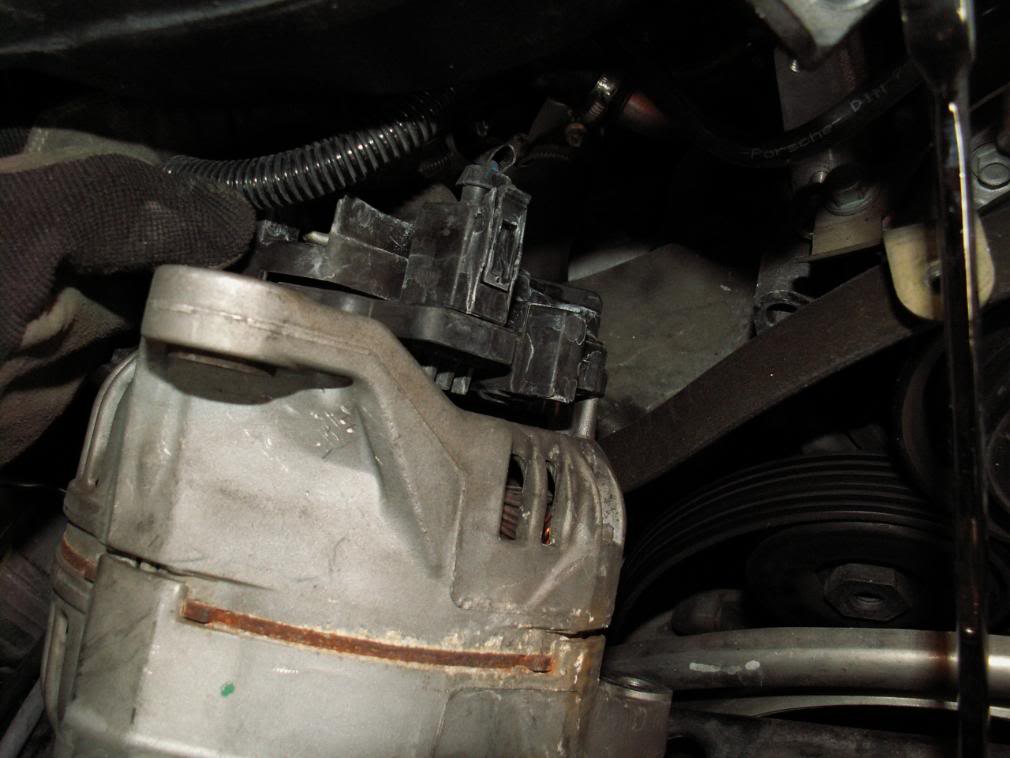
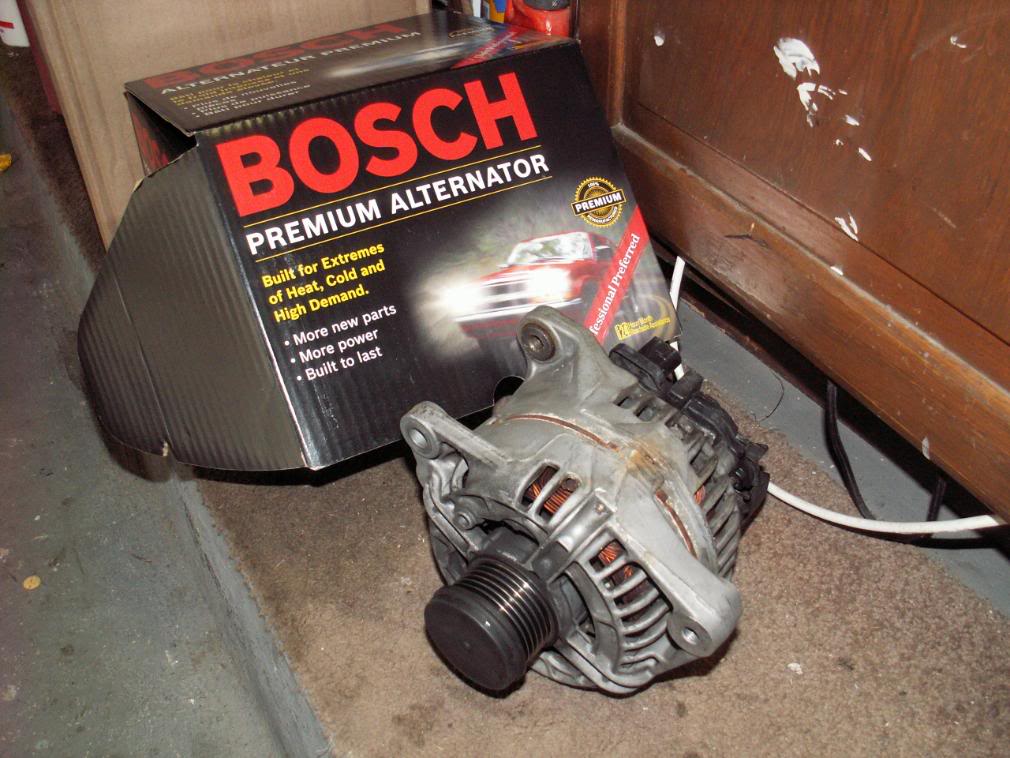
15- I bought a remanufactured unit from Autohauz in Arizone- $350- it came in a Bosch box and looked identical to the original- the one in the pic is the old original, not the new/ remanu unit
16- put everything back in reverse. I used a mallot and wood stick to tap the new alternator back in place!
17- reconnect battery and you're good to go!
Couple of things to simplify the task. Obviously, have a good set of metric sockets and hex set as well as small, swivel rachets. Also, rachet extensions are needed as are mechanics gloves, mallot, pry bar and chair/ stool. Lastly, a telescopic mirror and telescopic magnetic pickup makes it easy to pick up bolts and sockets that drop.
Tear down time was about 3- 4 hrs- I was going slow and photographing everything. Putting it all back together was about 1 hr! On a scale of 1- 10, this was a solid 6-7.
Hope this helps any other DIY'selfers!
Regards
Sameer
12- remove oilfilter bracket
13- I used a pry bar to move the alternator left laterally
14- disconnect 2 wires at back of alternator
15- I bought a remanufactured unit from Autohauz in Arizone- $350- it came in a Bosch box and looked identical to the original- the one in the pic is the old original, not the new/ remanu unit
16- put everything back in reverse. I used a mallot and wood stick to tap the new alternator back in place!
17- reconnect battery and you're good to go!
Couple of things to simplify the task. Obviously, have a good set of metric sockets and hex set as well as small, swivel rachets. Also, rachet extensions are needed as are mechanics gloves, mallot, pry bar and chair/ stool. Lastly, a telescopic mirror and telescopic magnetic pickup makes it easy to pick up bolts and sockets that drop.
Tear down time was about 3- 4 hrs- I was going slow and photographing everything. Putting it all back together was about 1 hr! On a scale of 1- 10, this was a solid 6-7.
Hope this helps any other DIY'selfers!
Regards
Sameer


Registered User
Joined: Feb 2007
Posts: 146
From: Tennessee
Rep Power: 25
Trending Topics
Registered User
Joined: Feb 2007
Posts: 167
From: Virginia Beach
Rep Power: 26
Thanks for the great pictures. I noticed that there is a little rust on the inner portion of the center alternator plate. It would be interesting to see what it looks like inside to see if there are any signs of water damage or shorting. I noticed when I'm sitting at a light in heavy rain or sometimes after washing the TT that I will get a batter failure message. This tells me that water is getting inside the alternator. The battery error message resets after the engine RPMs are brought up. I wonder if this is a drainage problem with some of the 996s TT. The air vents on the top deck of the 996 TT are more open than the vents on the normally aspirated 996. Has anybody looked into this?

Registered User
Joined: Aug 2007
Posts: 130
From: Charlotte, NC
Rep Power: 24
Nice write-up, gotta love these compact engine compartments.. I changed the alternator on my discovery in 10 mintues the other day, 3 bolts and 1 quarter turn on the serpentine belt tensioner..
Thread Starter
|
Registered User
Joined: Jul 2005
Posts: 550
From: Palos Verdes, California
Rep Power: 72
Thanks for the great pictures. I noticed that there is a little rust on the inner portion of the center alternator plate. It would be interesting to see what it looks like inside to see if there are any signs of water damage or shorting. I noticed when I'm sitting at a light in heavy rain or sometimes after washing the TT that I will get a batter failure message. This tells me that water is getting inside the alternator. The battery error message resets after the engine RPMs are brought up. I wonder if this is a drainage problem with some of the 996s TT. The air vents on the top deck of the 996 TT are more open than the vents on the normally aspirated 996. Has anybody looked into this?
Registered User
Joined: Oct 2007
Posts: 961
From: Elk Grove, CA
Rep Power: 89
I always open both the engine compartment lid and the front hood after washing to dry any drips inside. I can tell you that a lot of water does leak down into the engine compartment. What I do is have a large towel ready and open the engine hood and immediately put in a towel to start soaking up the water. Most of the water will drip down on either side onto the engine and also will fill the cups on the lip of the spouts for the oil filter and the hydraulic fluid reservoir filler. I see some pooling on top of the stock air filter box, but not into the opening on the right side....which tells me that the folks who run the open aftermarket intakes are prone to getting some water on the filters and in the filter box. Some of the water comes in as a result of just opening the engine compartment lid....so to some degree, just the act of opening the lid can be attributed to being the cause. YOu will also see quite a bit of water collect on the inside of the front passenger side of the hood to the left of the battery. There's sort of a dip there that serves to pool the water. I always take a towel and soak up that water too. I do drive my car in the rain so I'm pretty well up on what gets wet.
Last edited by Chuck Jones; Feb 25, 2008 at 12:40 PM. Reason: add info