
DIY: Precision Porsche Techart rear skirts install

Thread Starter
|
Registered User

Joined: Nov 2005
Posts: 1,146
From: Houston, Tx
Rep Power: 86


DIY: Precision Porsche Techart rear skirts install
After getting MISHA's Techart bumper, I decided to get Precision Porsche's techart rear peices to see how they fit.
Here's the details:
Precision Porsche techart style rears includes:
Left skirt
Middle trim piece (some companies do not include the middle piece so make sure you ask if they do or not)
Right skirt
As I always do before I purchase a replica kit, I asked around with people that had bought this kit and asked about the quality of fitment. Two people told me that one of the rear skirts had to be "trimmed" b/c it stuck out too much so I was prepared to spend a few hours trimming and fitting to get it sit right.
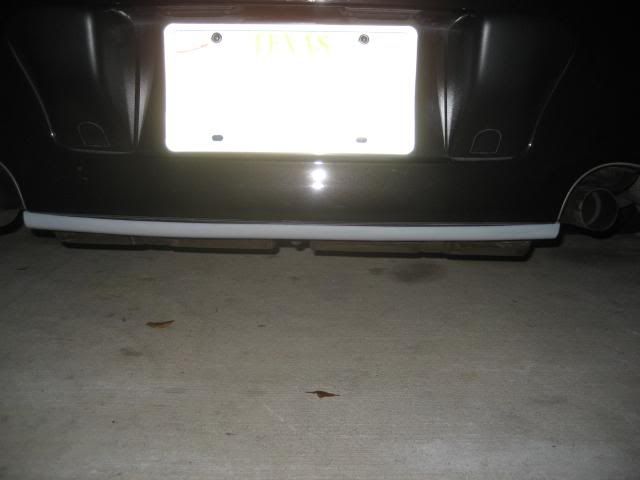
Here are the pics:
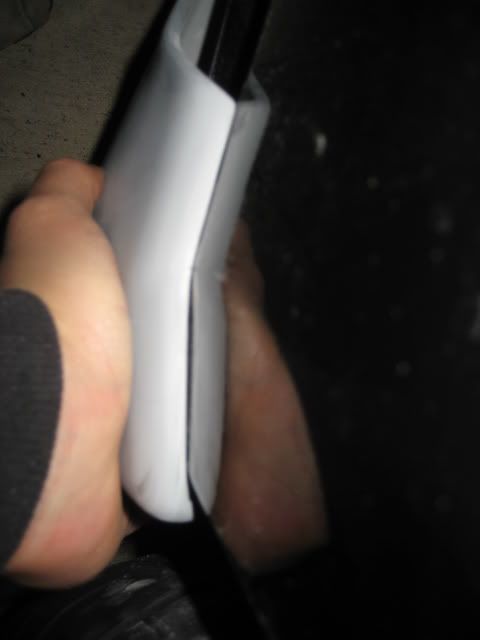
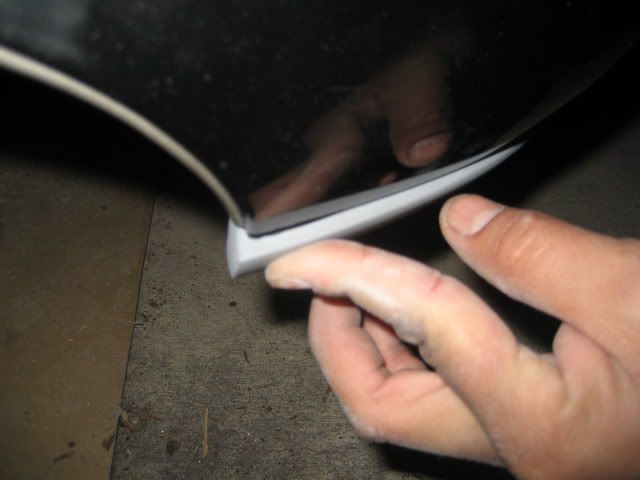
First we installed the left side skirt
First impressions: Nice fitment... we did no trimming at all and just put it in place.
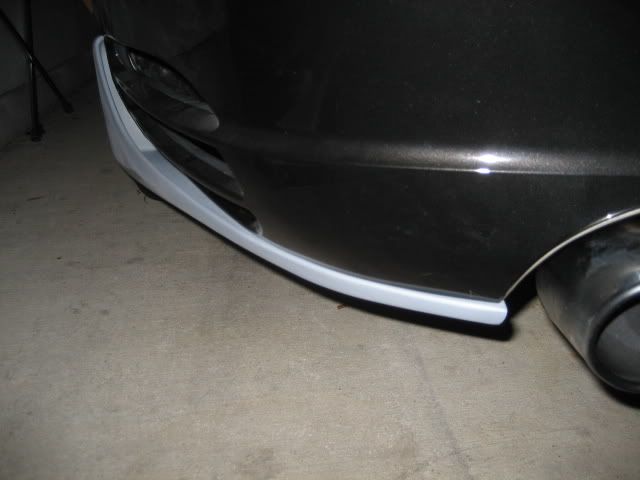
Not bad at all...sits really flush. I guess this isn't the bad side.
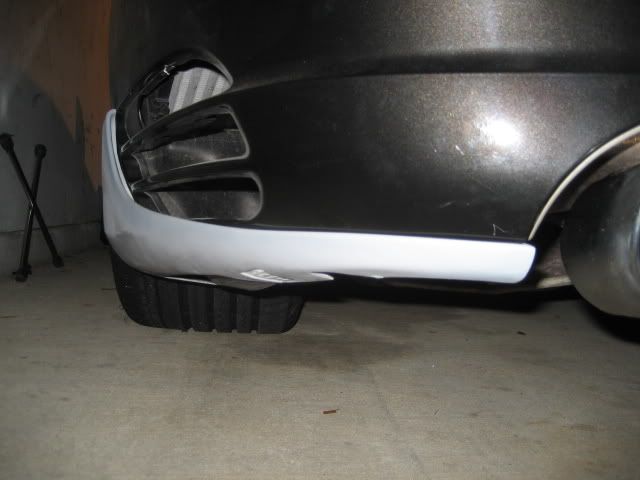
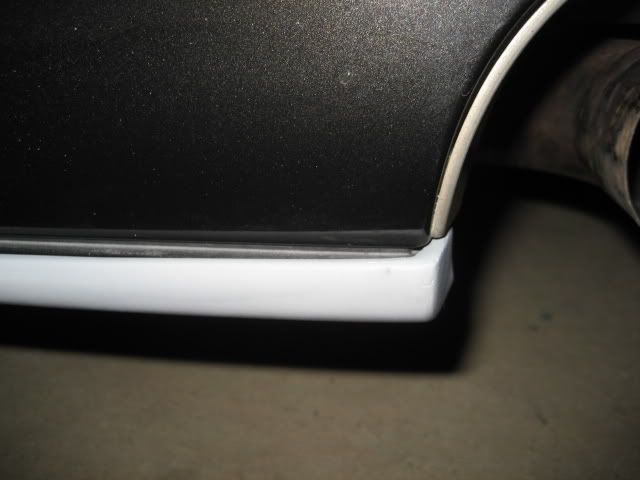
Here's where the sides meet
...but if you push down as you will when you tape/glue it and add a screw, it should look like this
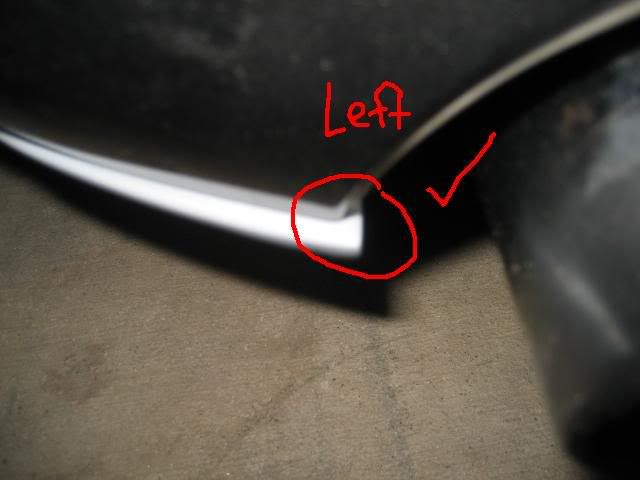
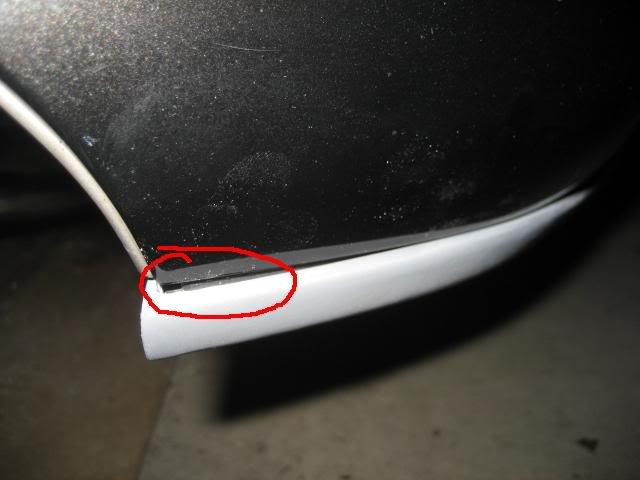
Only problem area is this:
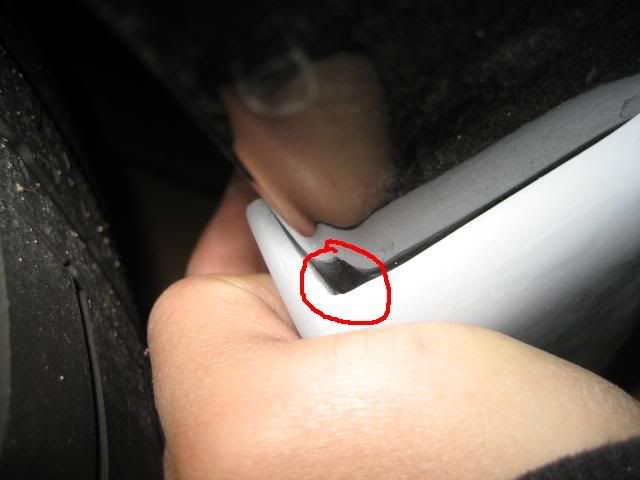
The bumper has a rounded edge while the skirt has sharp corners. Not too bad but something worth mentioning
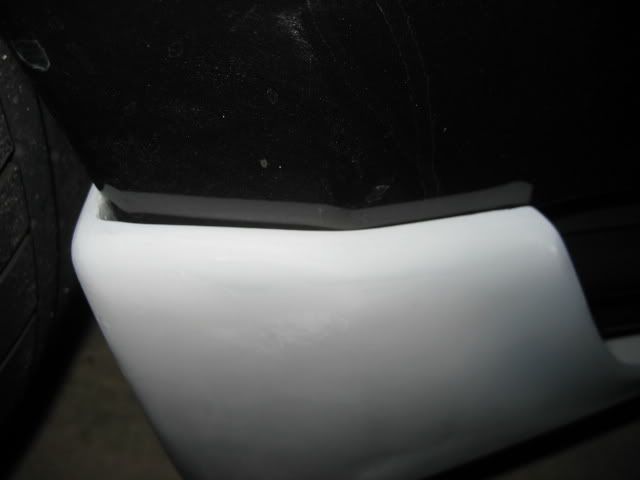
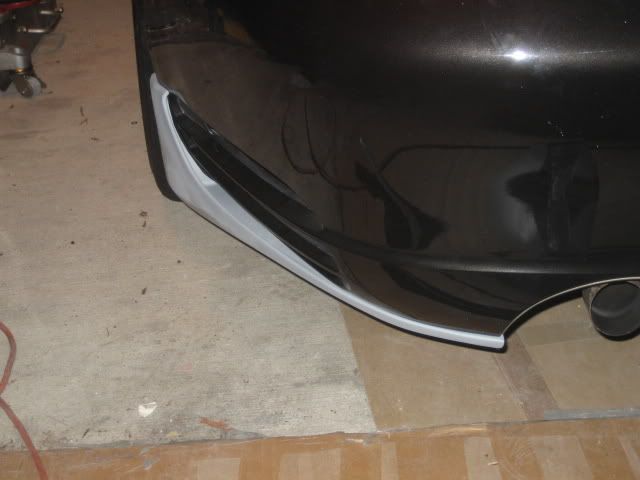
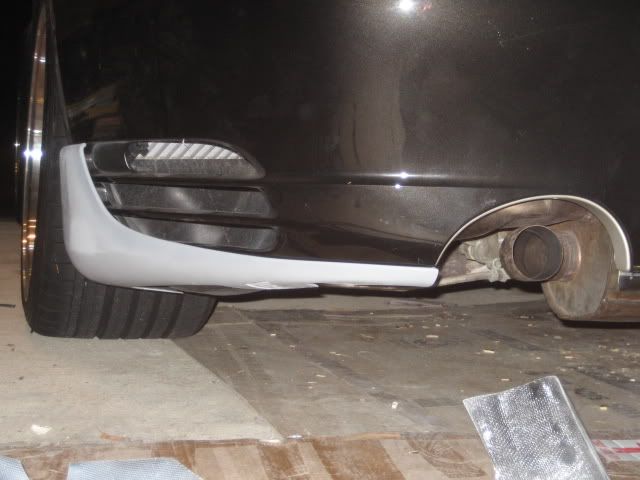
Couple more fitment pics
Here's the details:
Precision Porsche techart style rears includes:
Left skirt
Middle trim piece (some companies do not include the middle piece so make sure you ask if they do or not)
Right skirt
As I always do before I purchase a replica kit, I asked around with people that had bought this kit and asked about the quality of fitment. Two people told me that one of the rear skirts had to be "trimmed" b/c it stuck out too much so I was prepared to spend a few hours trimming and fitting to get it sit right.
Here are the pics:
First we installed the left side skirt
First impressions: Nice fitment... we did no trimming at all and just put it in place.
Not bad at all...sits really flush. I guess this isn't the bad side.
Here's where the sides meet
...but if you push down as you will when you tape/glue it and add a screw, it should look like this
Only problem area is this:
The bumper has a rounded edge while the skirt has sharp corners. Not too bad but something worth mentioning
Couple more fitment pics
Thread Starter
|
Registered User
Joined: Nov 2005
Posts: 1,146
From: Houston, Tx
Rep Power: 86
Onto the right side
Initial test fit

Not bad… hmmm…
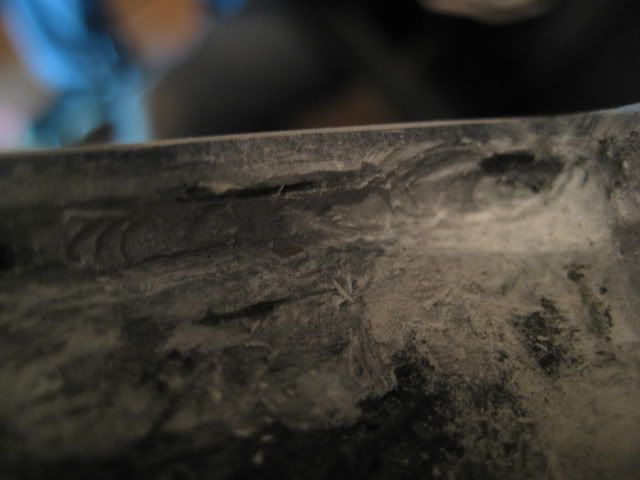
This was probably the aforementioned problem area. After examining it, my friend got the grinder and went to work.
The main problem area was there was too much fiberglass buildup in the corner which wasn’t allowing the piece to sit flush with the bumper so he chiseled it away and this is the final product

He also trimmed the lining a little
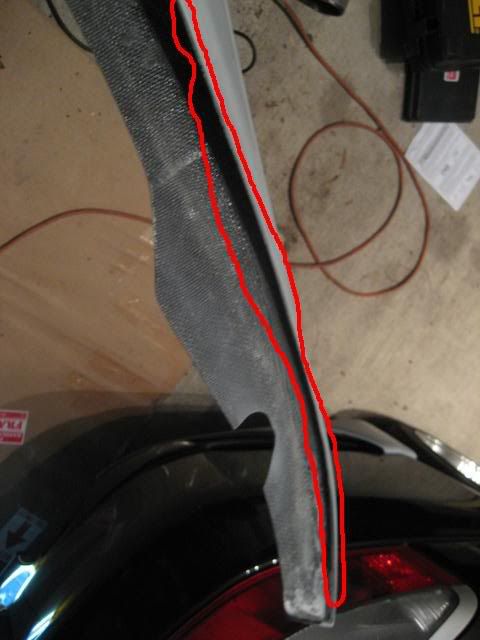
I don’t have any after/final pics of the right side but it’s flush now and much better.
Onto the middle piece…which was pretty uneventful
Test fit:
How the corners lined up
We did clean up the back a little of the middle pieces.
Funny thing… we spent less than 30 minutes cleaning up the pieces and fitting. I was semi-shocked/relieved when he said “ok, it’s ready for paint. That was easy”
My thoughts:
After the MISHA front bumper, I was concerned about fitting these fiberglass pieces but I was also very interested in seeing how the fitment of Precision Porsche pieces compared to MISHAs. Now I know that it’s not an apples to apples comparison (front bumper vs rear pieces) but one thing I can tell you… I am pleasantly surprised and am glad that it didn't take much at all to get ready.
Going into paint this weekend…will post pics of the finished product.
Edwin
Initial test fit
Not bad… hmmm…
This was probably the aforementioned problem area. After examining it, my friend got the grinder and went to work.
The main problem area was there was too much fiberglass buildup in the corner which wasn’t allowing the piece to sit flush with the bumper so he chiseled it away and this is the final product
He also trimmed the lining a little
I don’t have any after/final pics of the right side but it’s flush now and much better.
Onto the middle piece…which was pretty uneventful
Test fit:
How the corners lined up
We did clean up the back a little of the middle pieces.
Funny thing… we spent less than 30 minutes cleaning up the pieces and fitting. I was semi-shocked/relieved when he said “ok, it’s ready for paint. That was easy”
My thoughts:
After the MISHA front bumper, I was concerned about fitting these fiberglass pieces but I was also very interested in seeing how the fitment of Precision Porsche pieces compared to MISHAs. Now I know that it’s not an apples to apples comparison (front bumper vs rear pieces) but one thing I can tell you… I am pleasantly surprised and am glad that it didn't take much at all to get ready.
Going into paint this weekend…will post pics of the finished product.
Edwin
Last edited by M32; Dec 9, 2008 at 10:48 PM.


Thread Starter
|
Registered User
Joined: Nov 2005
Posts: 1,146
From: Houston, Tx
Rep Power: 86

Edwin
Registered User
Joined: Jun 2006
Posts: 2,240
From: NY & LA
Rep Power: 121
Edwin, awsome post and pictures bros +1 rep for you
hey Adam if you're interested in the rear set (3 pcs) I have a few sets in my garage that i'm willing to sell for less
and Edwin, just for thought, when your bodyshop does the install, make sure they screw in the rear center piece with some screws. i think mine was 3M taped before or glued and it actually fell off at a run without me knowing
Thread Starter
|
Registered User
Joined: Nov 2005
Posts: 1,146
From: Houston, Tx
Rep Power: 86
Edwin, awsome post and pictures bros +1 rep for you
hey Adam if you're interested in the rear set (3 pcs) I have a few sets in my garage that i'm willing to sell for less
and Edwin, just for thought, when your bodyshop does the install, make sure they screw in the rear center piece with some screws. i think mine was 3M taped before or glued and it actually fell off at a run without me knowing
hey Adam if you're interested in the rear set (3 pcs) I have a few sets in my garage that i'm willing to sell for less
and Edwin, just for thought, when your bodyshop does the install, make sure they screw in the rear center piece with some screws. i think mine was 3M taped before or glued and it actually fell off at a run without me knowing
Thanks for the rep bro. Yeah, I spoke to my guy and we are going to use rivets on the sides.
Edwin
Trending Topics
Thread Starter
|
Registered User
Joined: Nov 2005
Posts: 1,146
From: Houston, Tx
Rep Power: 86
Thanks
Thanks for the rep Adam.
I should have the car done by this weekend so I can FINALLY take some "after" pics
Edwin
I should have the car done by this weekend so I can FINALLY take some "after" pics
Edwin

Thread
Thread Starter
Forum
Replies
Last Post
joseph_number1
Automotive Parts & Accessories For Sale/Wanted
12
Jul 19, 2018 05:45 PM
AJUSA.com
997 Vendor Classifieds
4
Oct 8, 2015 05:50 PM

