DIY Head Light Switch Remove and Replace

#76
 12-30-2014, 05:25 PM

One of my lights stopped working this week, well it works but you have to move the switch back and forth a few time before it keeps the light from going out. Not sure if its the switch or just the igniter for that one side....any input appreciated. Both sides have new bulbs so I know they are not the issue.
#77
12-31-2014, 11:29 AM
Registered User
Join Date: Mar 2008
Location: Montreal Canada
Age: 69
Posts: 2,804
Rep Power: 266 

From previous posts on TT forums, the light switch seems to fail often but it can also be the ignition switch. The light switch part#99661353500 is about $120.00 and the ignition switch can be found at the Audi or Volks dealers for about $10.00! But in your case if your are playing with the switch and the light work, don't look further replace the light switch…. The diy from smistry007 is your best tool!
Last edited by jpflip; 12-31-2014 at 11:33 AM.
#78
01-01-2015, 09:50 AM
IMO it's the igniter if you have to fiddle to get a single light working. If it were both I'd say switch! I've got a retro set of projector HID on another car and occasionally one ballast doesn't fire and I have to cycle power. I'd be surprised if each light is fed on a separate circuit from the switch vs the switch telling a relay to send power to both lights. When you fiddle the switch to get them both working does the working light also power cycle?
Is it possible to swap ballasts side to side? Might help track down the issue?
Is it possible to swap ballasts side to side? Might help track down the issue?
#79
01-02-2015, 01:09 AM
IMO it's the igniter if you have to fiddle to get a single light working. If it were both I'd say switch! I've got a retro set of projector HID on another car and occasionally one ballast doesn't fire and I have to cycle power. I'd be surprised if each light is fed on a separate circuit from the switch vs the switch telling a relay to send power to both lights. When you fiddle the switch to get them both working does the working light also power cycle?
Is it possible to swap ballasts side to side? Might help track down the issue?
Is it possible to swap ballasts side to side? Might help track down the issue?
")
#80
07-15-2015, 12:19 PM

replace headlight switch
[
these instructions & pics were perfect. thanks a lot. the connection that open and shuts the vent broke when I pulled out the vent assembly, I just drilled a hole in the plastic arm, used a bread tie!!! to join them & it works great. I don't know about this only taking an hour but great instructions
911 george!!!!!
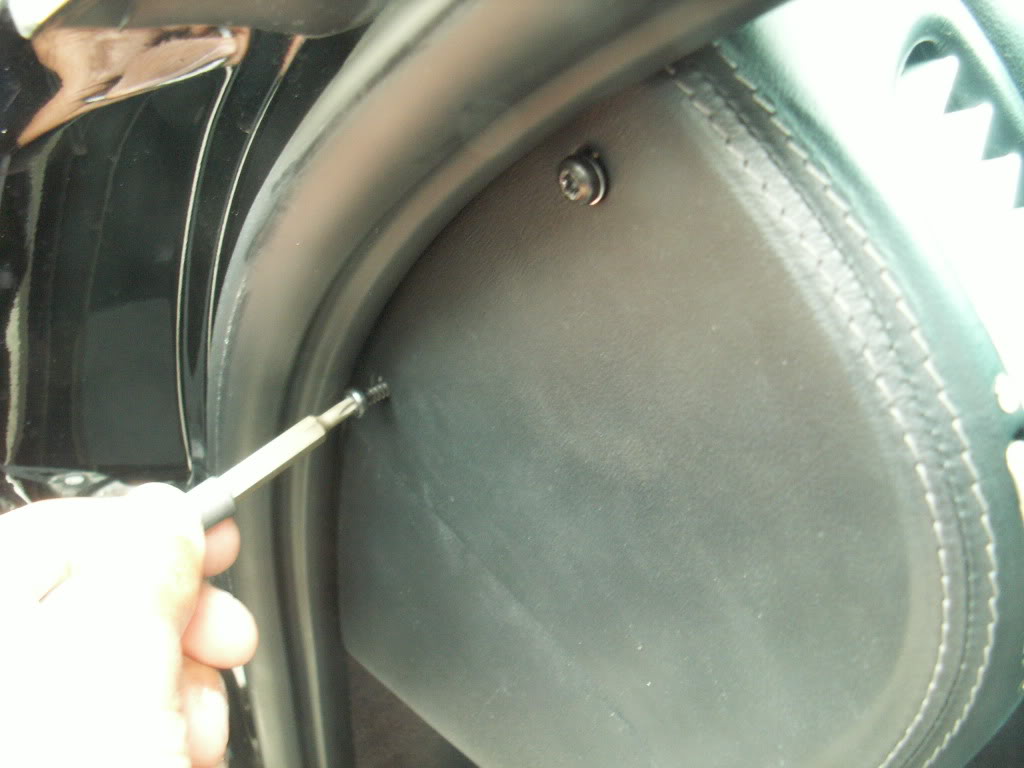
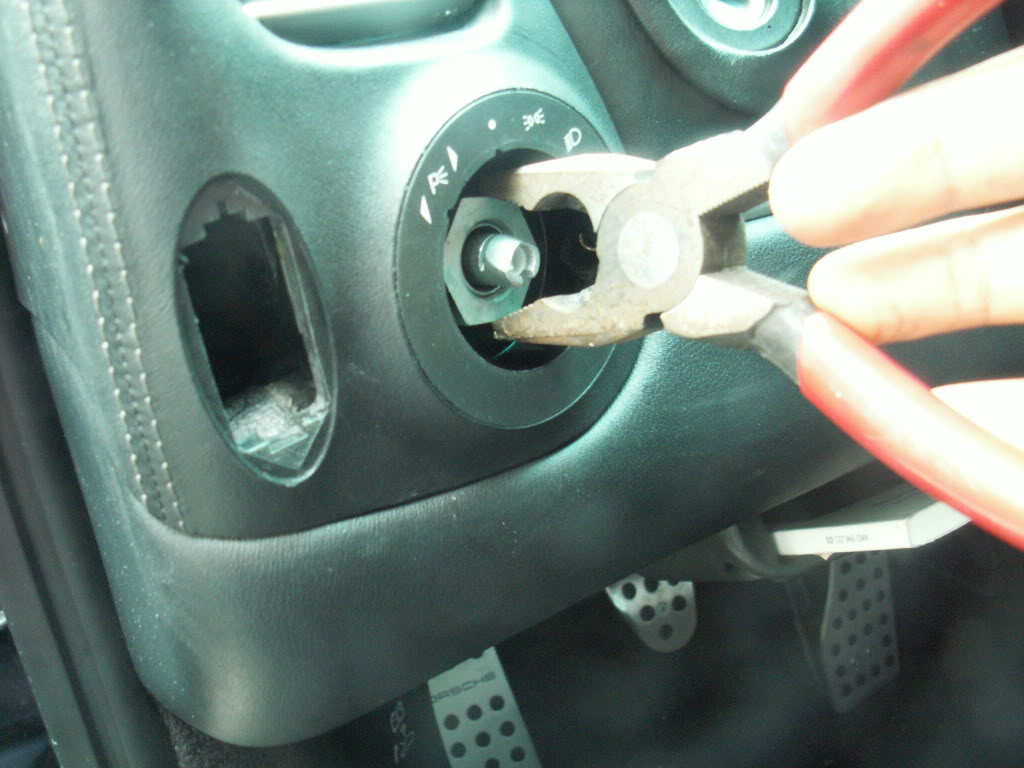
2- remove the light switch **** by pushing in the lock under the **** with a small screw driver and pulling
3- remove 3rd tork screw in medial aspect, behind ****:
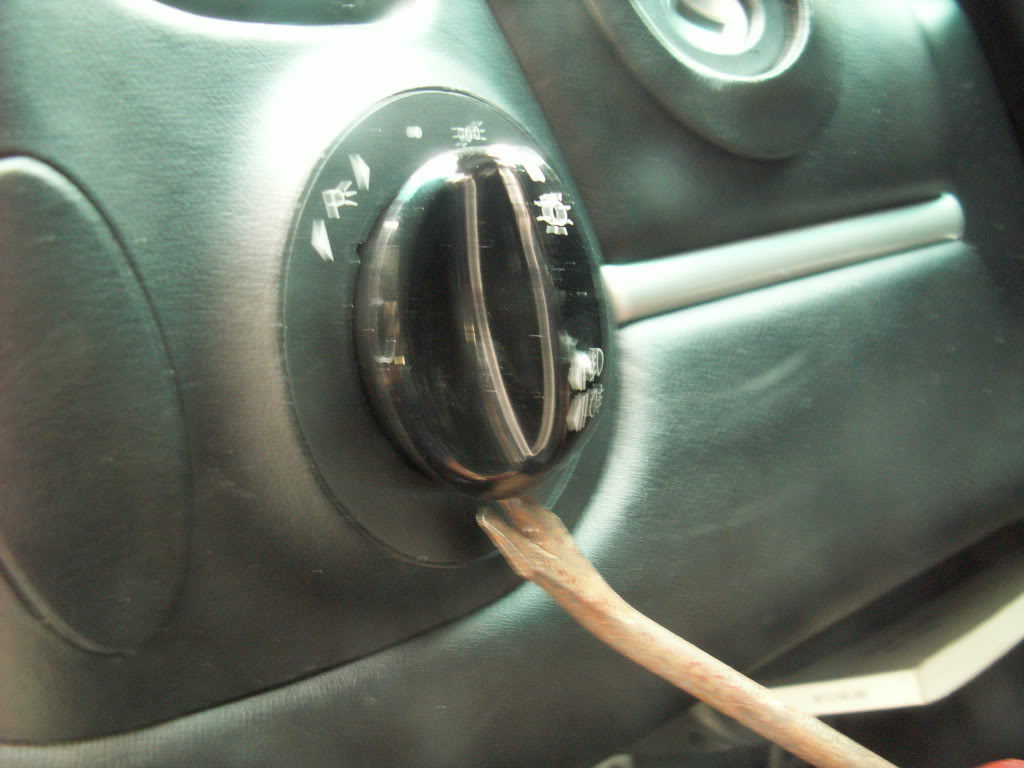
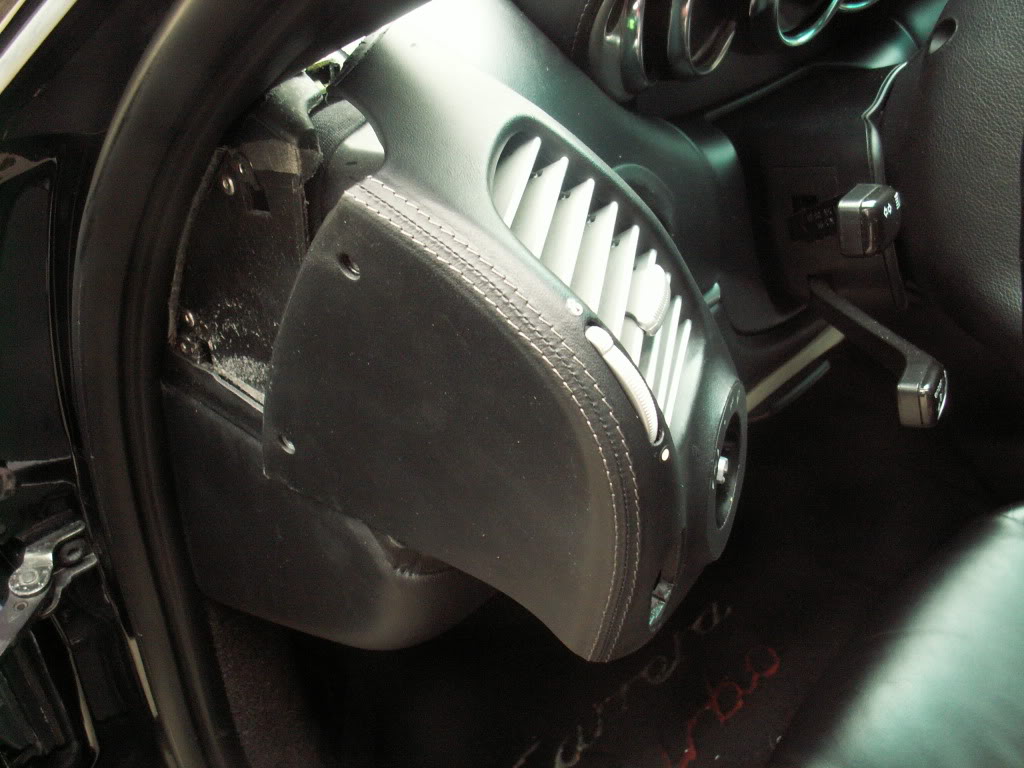
4- pull AC vent straight back- surprisingly snug- requires a firm pull
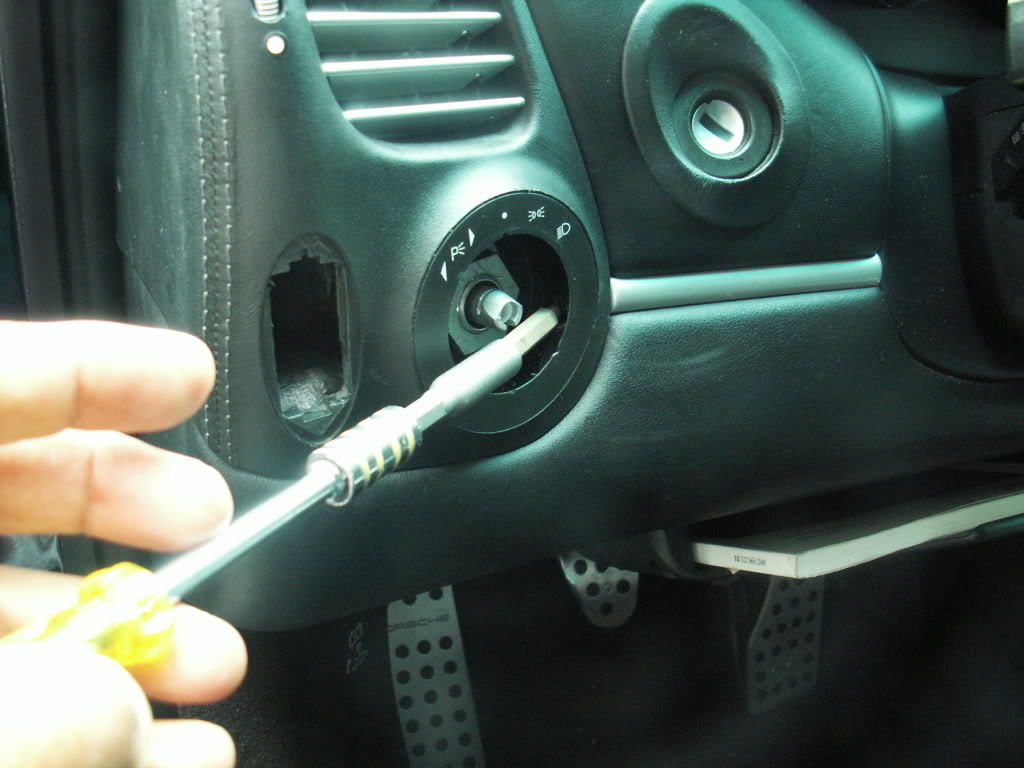
5- remove nut around light switch
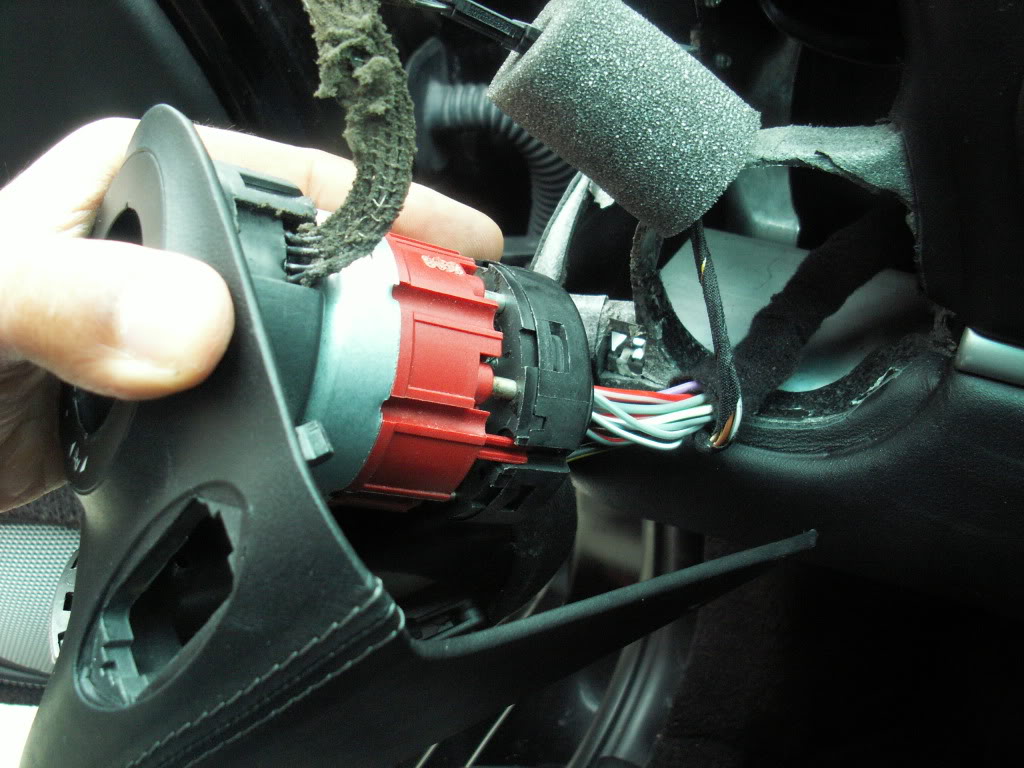
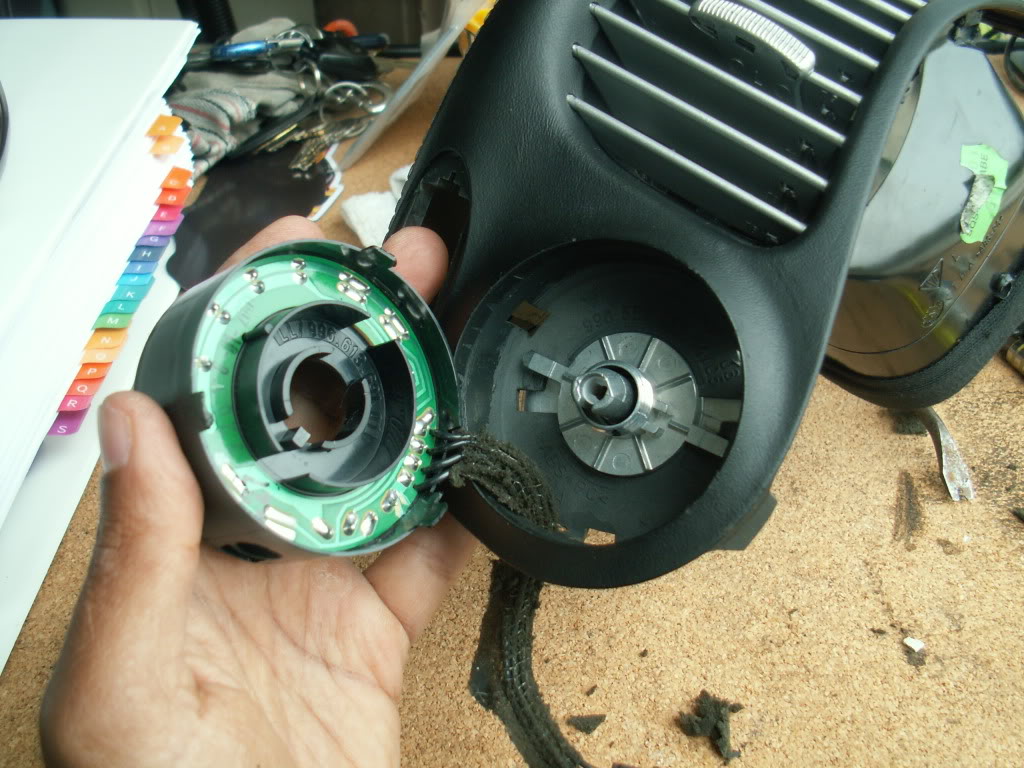
6- disconnect electrical connections
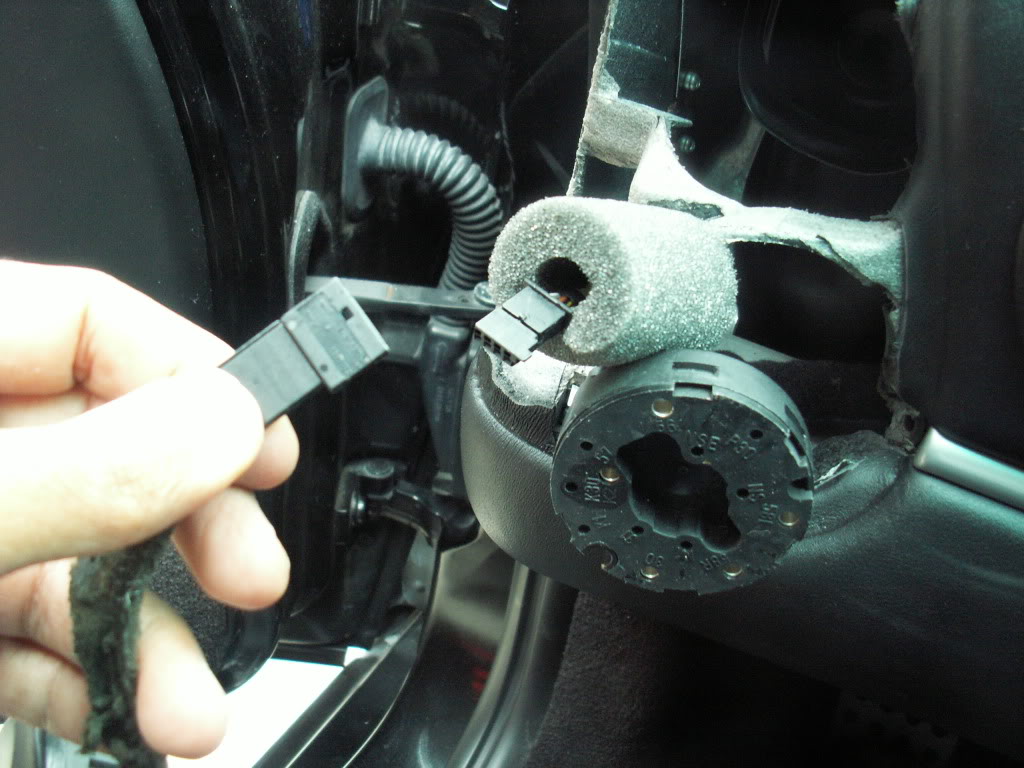
7- remove bezel around **** and switch
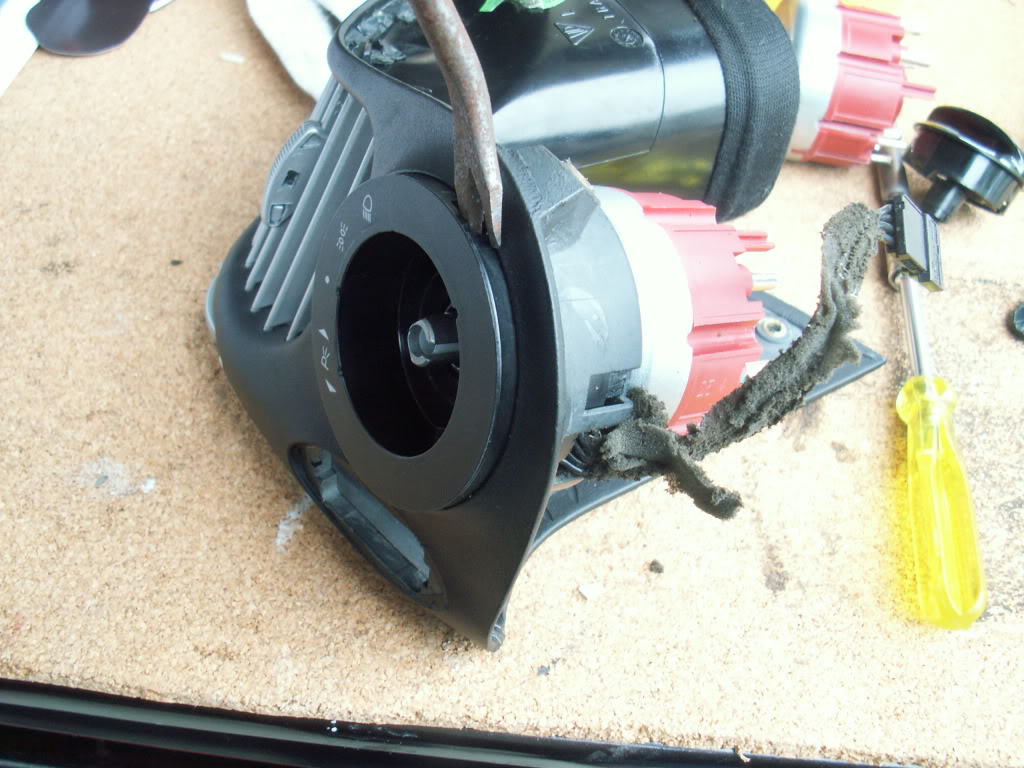
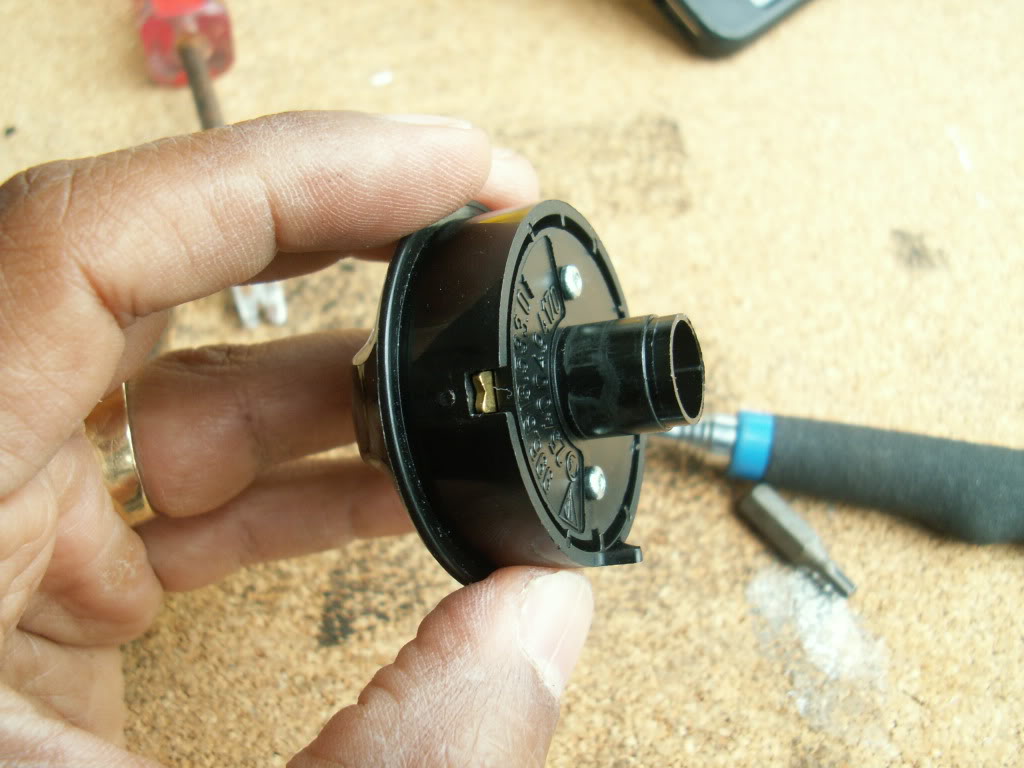
8- twist switch to remove
9- when replacing make sure groove in switch lines up with grove in bezel or else bezel will not seat flush.
10- reconnect battery and off to Mexico for some late night runs!
6-
 [/QUOTE]
these instructions & pics were perfect. thanks a lot. the connection that open and shuts the vent broke when I pulled out the vent assembly, I just drilled a hole in the plastic arm, used a bread tie!!! to join them & it works great. I don't know about this only taking an hour but great instructions
911 george!!!!!
2- remove the light switch **** by pushing in the lock under the **** with a small screw driver and pulling


3- remove 3rd tork screw in medial aspect, behind ****:

4- pull AC vent straight back- surprisingly snug- requires a firm pull

5- remove nut around light switch

6- disconnect electrical connections


7- remove bezel around **** and switch

8- twist switch to remove

9- when replacing make sure groove in switch lines up with grove in bezel or else bezel will not seat flush.
10- reconnect battery and off to Mexico for some late night runs!

6-
[/QUOTE]
#81
01-21-2016, 12:36 AM

Hi, I am new to the forum. I found these instructions and pictures very useful. I am in the process of replacing my headlight switch by following these instructions. Unfortunately I am stuck on step 7. I am not able to remove the bezel around the **** to free the switch from the back. Is there a trick to this? Thank you!
#82
01-21-2016, 06:50 AM
I first put a piece of heavy tape(like duct or alum hvac tape) over trim where flat screw driver will hit trim so as not to mess up dash trim, then with a wide flat screw driver work it off all around-and try to twist back & forth a bit and it should come off.
good luck
good luck
#83
01-21-2016, 10:03 AM

Hi, I am new to the forum. I found these instructions and pictures very useful. I am in the process of replacing my headlight switch by following these instructions. Unfortunately I am stuck on step 7. I am not able to remove the bezel around the **** to free the switch from the back. Is there a trick to this? Thank you!
When I did it, it took a whole lot of pressure to remove the vent trim. I thought it would break the connection point. It didn't.
Check out page 2 pics in the attached. They show the connections.
Good luck,
Rick
#86
01-28-2018, 07:13 PM

Registered User
Join Date: Jun 2016
Location: Los Angeles, CA
Age: 42
Posts: 60
Rep Power: 0
I know this is a really old thread, but I'm doing this on my car. I'm stuck at step 7. The plastic bezel feels VERY stuck in place. I've tried separating it from the switch and it won't budge. I've watched videos and seen pictures and it seems like most people don't have many problems removing it, and can do it simply with two fingers. Any advice?
#87
01-28-2018, 07:45 PM
Join Date: Jul 2005
Location: Palos Verdes, California
Age: 58
Posts: 550
Rep Power: 70
make sure you've taken the nut out as in pic #5. after that use something to pry the bezel off. maybe rock it back and forth a little to break the seal. good luck and let us know how it goes
Sameer
Sameer
#88
01-28-2018, 07:54 PM
Registered User
Join Date: Jun 2016
Location: Los Angeles, CA
Age: 42
Posts: 60
Rep Power: 0
I took the nut off, and have been trying my hardest to break that seal to get it free. Not much to really grab onto for leverage. Thanks for your reply, I'll just keep at it.
#89
07-22-2018, 09:18 PM

Broken Light Switch?
Right high beam went out and the switch cannot turn the **** to Parking lights (stuck). Also when I pull the **** to turn the high beam it goes back inside. When I shake the switch it rattles like there's a broken piece inside. Used multimeter to measure voltage on headlight assembly connectors 2 (ground) and 4 (high beam) there's no voltage reading. Is this a broken switch that cleaning will not fix?
#90
09-12-2018, 07:34 PM

As usual this group helped me out. Than you.
The full leather interior causes the bezel to fit very tightly into the outer ring. Without the pictures in this thread I would never have dared to apply as much pressure as was required to remove the bezel.
The full leather interior causes the bezel to fit very tightly into the outer ring. Without the pictures in this thread I would never have dared to apply as much pressure as was required to remove the bezel.