
DIY - CV Boot replacement

Thread Starter
|
Registered User

Joined: Apr 2010
Posts: 2,164
From: Victoria, BC
Rep Power: 217


DIY - CV Boot replacement
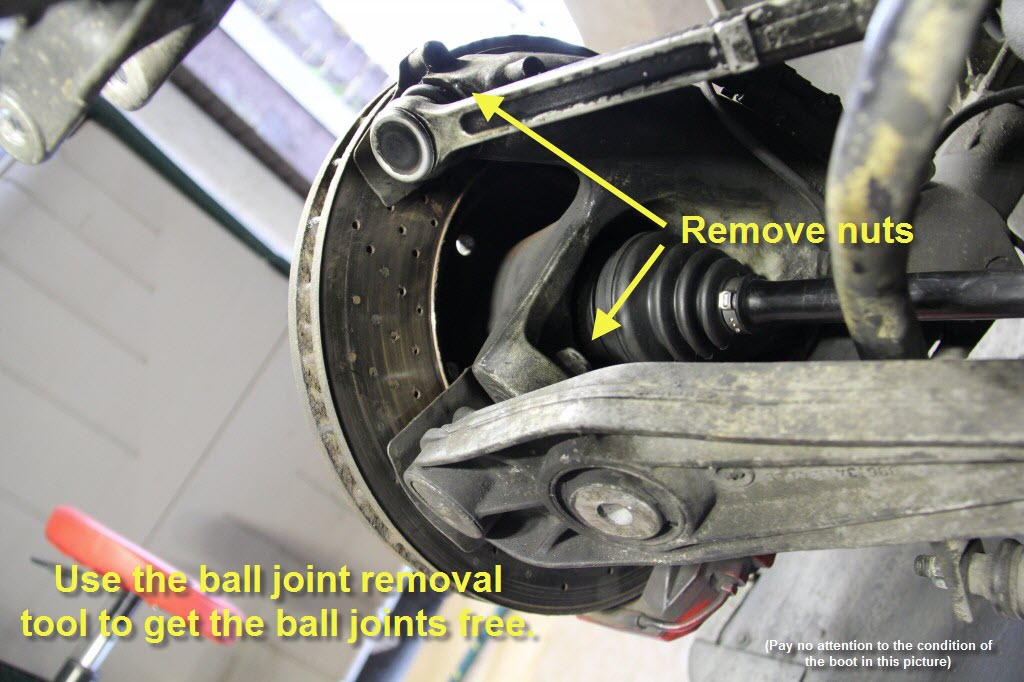
With the help of some members at 6SP, I was able to replace my outer boots without a trip to the dealer. I have detailed the experience here in the hopes that the next guy knows when he is in for before he starts...


Registered User
Joined: Nov 2013
Posts: 1,052
From: Florida
Rep Power: 154
I just did this the drivers side last weekend and sure could have used this write up then! The only problem I had was the clamps. How did you get them off and back on without destroying them? I got them off but couldn't get them on. I changed the wheel bearing while I had it apart also. I ordered that fancy Schwaben air boot expander and busted two boots trying to get over the abs ring So I took my inside joint apart and slid the front one on. I would be doing the right side tomorrow but ECS screwed up my shipping and I'm very frustrated with them.
So I took my inside joint apart and slid the front one on. I would be doing the right side tomorrow but ECS screwed up my shipping and I'm very frustrated with them.
Last edited by Vantaredoc; Jan 6, 2014 at 08:54 AM.


Thread Starter
|
Registered User
Joined: Apr 2010
Posts: 2,164
From: Victoria, BC
Rep Power: 217
To take them off, poke a screwdriver into the crimped area to pry it apart. Once uncrimped, the overlap should just unhook. If it doesn't, you can help it a bit with a screwdriver. When you reuse them, just crimp again. It should be good for a couple of uses before another crimp will break it.
Last edited by Slider; Jan 3, 2014 at 09:41 PM.
Trending Topics
Registered User
Joined: Nov 2013
Posts: 1,052
From: Florida
Rep Power: 154
The clamps are a friction fit to start - You just wrap them around the boot, squeeze and they hook and lock onto the overlap. Then, you use a special tool to crimp the last millimetre or so tighter. (Look t the clamp picture above...)
To take them off, poke a screwdriver into the crimped area to pry it apart. Once uncrimped, the overlap should just unhook. If it doesn't, you can help it a bit with a screwdriver. When you reuse them, just crimp again. It should be good for a couple of uses before another crimp will break it.
To take them off, poke a screwdriver into the crimped area to pry it apart. Once uncrimped, the overlap should just unhook. If it doesn't, you can help it a bit with a screwdriver. When you reuse them, just crimp again. It should be good for a couple of uses before another crimp will break it.
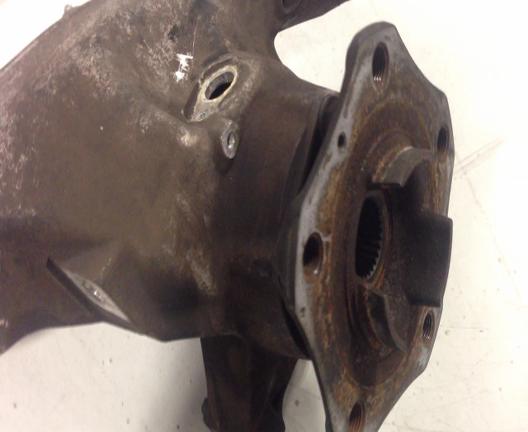
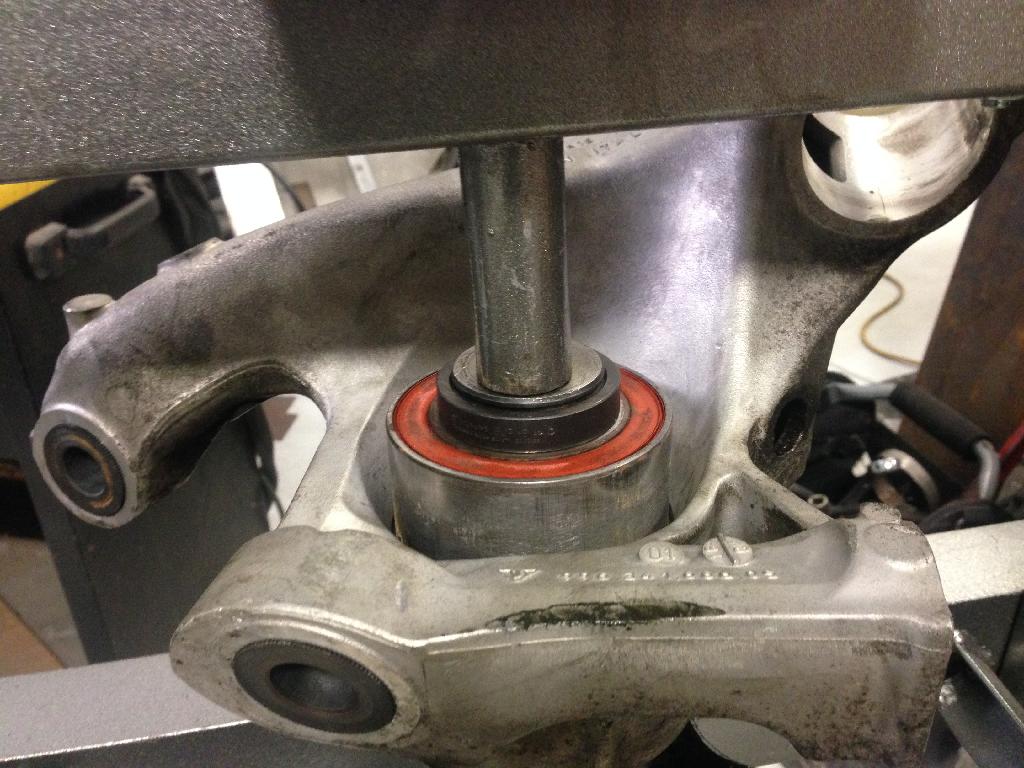
I would like to add, while replacing the cv shafts or boots I read it is also a good time to replace wheel bearings. I replaced the drivers side bearing by purchasing a 12 ton press from Harbor Freight. Instead of fabricating weird shaped pieces to hold carrier in press due to its shape, I simply turned carrier upside down, pressed out old hub and bearing and then placed new bearing (which I had in freezer for a day) on the press first and then set carrier on top of new bearing then used old bearing on the opposite side. I made a piece to cover old bearing and just pressed the carrier down onto new bearing. It worked like a charm! I could probably take pictures of the right side when I do it this weekend.


Registered User
Joined: Nov 2013
Posts: 1,052
From: Florida
Rep Power: 154
I will, but don't expect no fancy write up...lol It was quite easy and I was hesitant after reading several DIY's showing different pieces people made to hold the carrier due to its odd shape. Took longer to assemble the cheap press than to press out old bearing and press in new one! On the back side of the carrier there is a lip that the bearing seats on from the front side. I started the new bearing in the carrier by lightly tapping it and then set the carrier on the press with new bearing down. I placed the old bearing on the lip from the back side and centered my press on some pieces of steel over the old bearing and pressed the carrier down onto the new bearing.
Registered User
Joined: Nov 2013
Posts: 1,052
From: Florida
Rep Power: 154
As promised
Click on the first picture as it is a video! If the fronts are this bad, Now I am wondering about the rear bearings! I guess 80K miles is high mileage for these cars!!


Click on the first picture as it is a video! If the fronts are this bad, Now I am wondering about the rear bearings! I guess 80K miles is high mileage for these cars!!


Last edited by Vantaredoc; Jan 13, 2014 at 06:49 AM.