
Just Refinished My Headlight

Thread Starter
|
Registered User

Joined: Feb 2011
Posts: 1,075
From: Lewisville, NC
Rep Power: 110


As I'm sure some of you are starting to discover, the UV coating on our headlights is starting to age. Interestingly, one of my headlights looks like new, but the driver side headlight was starting to show its age.
Let me start by saying, DO NOT do this if your headlight is in good shape. You will be sanding off the factory UV coating which is very thick and durable. After you have removed this coating, you will have to "maintain" your headlights. You will need to polish them up every once in a while and apply an aftermarket UV coating.
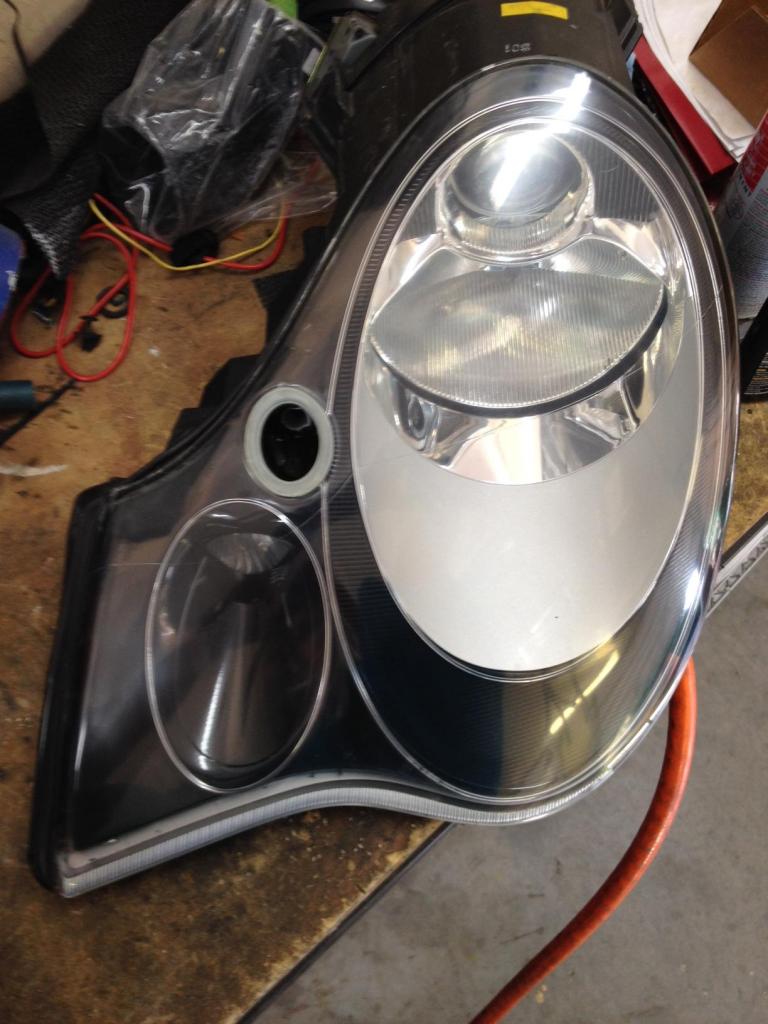
Mine was on its way out and the black housings made all the imperfections more visible, so it was time.
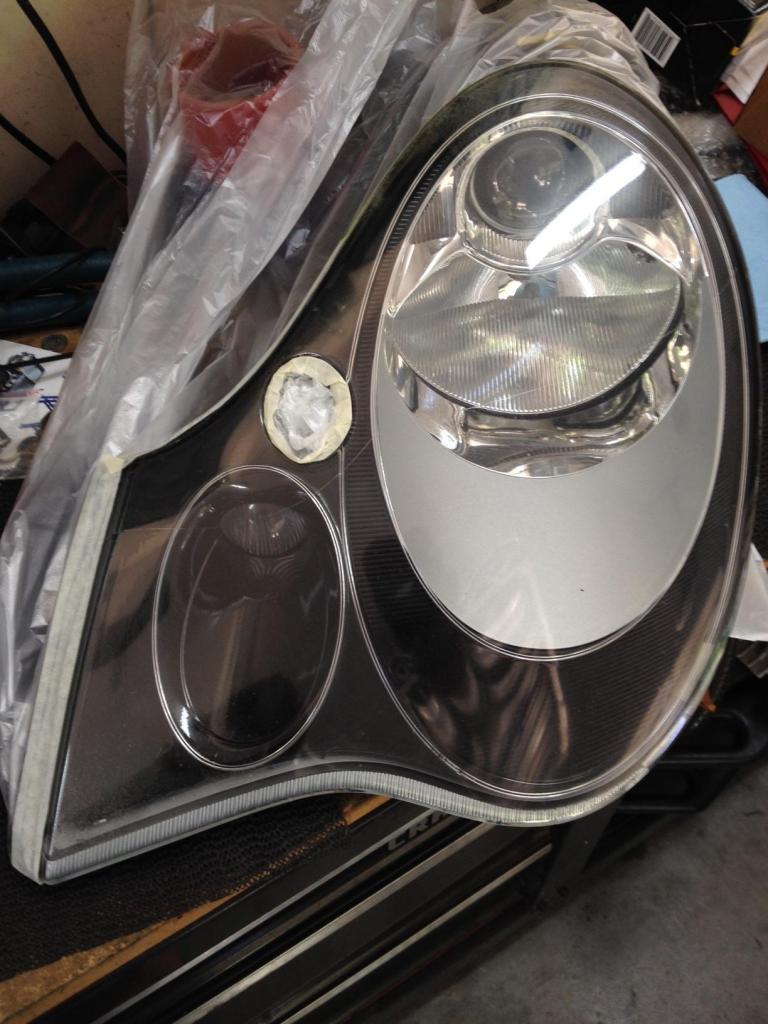
Here's a shot before I started.
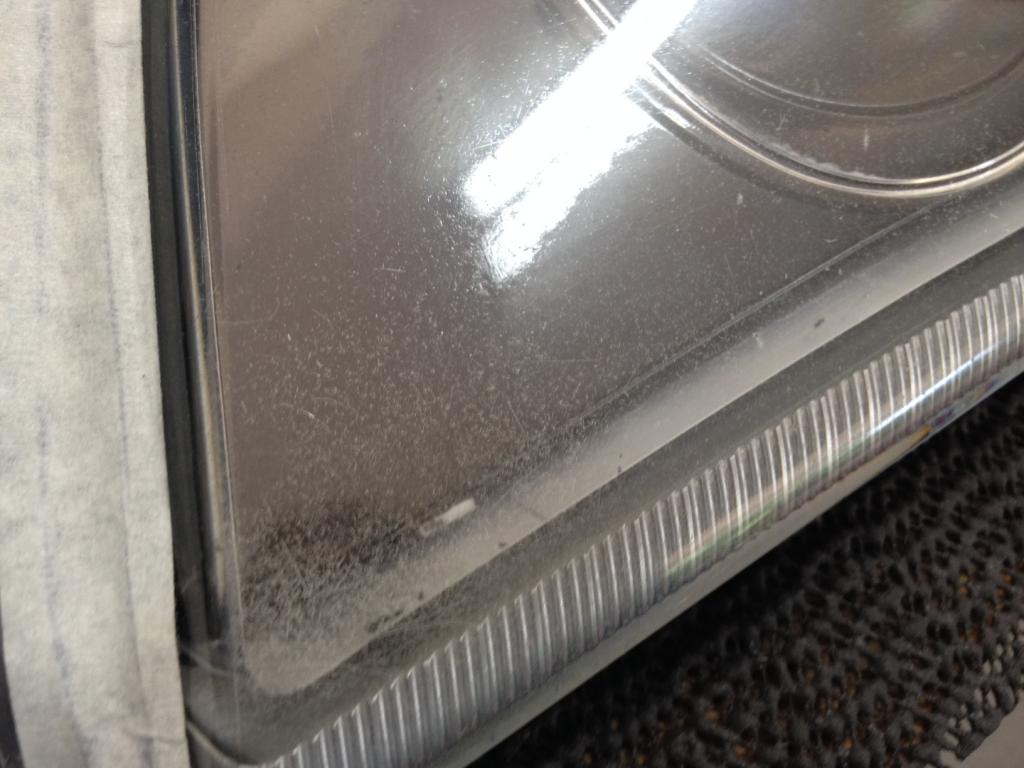
Here's a shot of some pitting in the lower corner of my headlight.
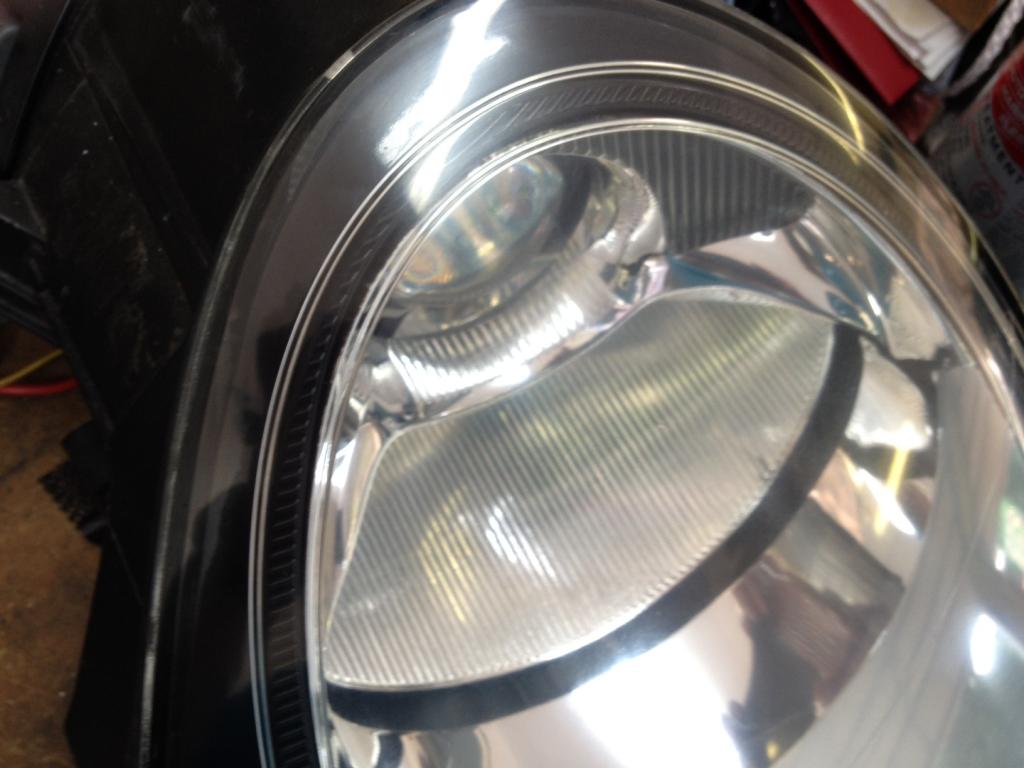
Here, you can see the cracking and yellowing near the top of the headlight.
[IMG]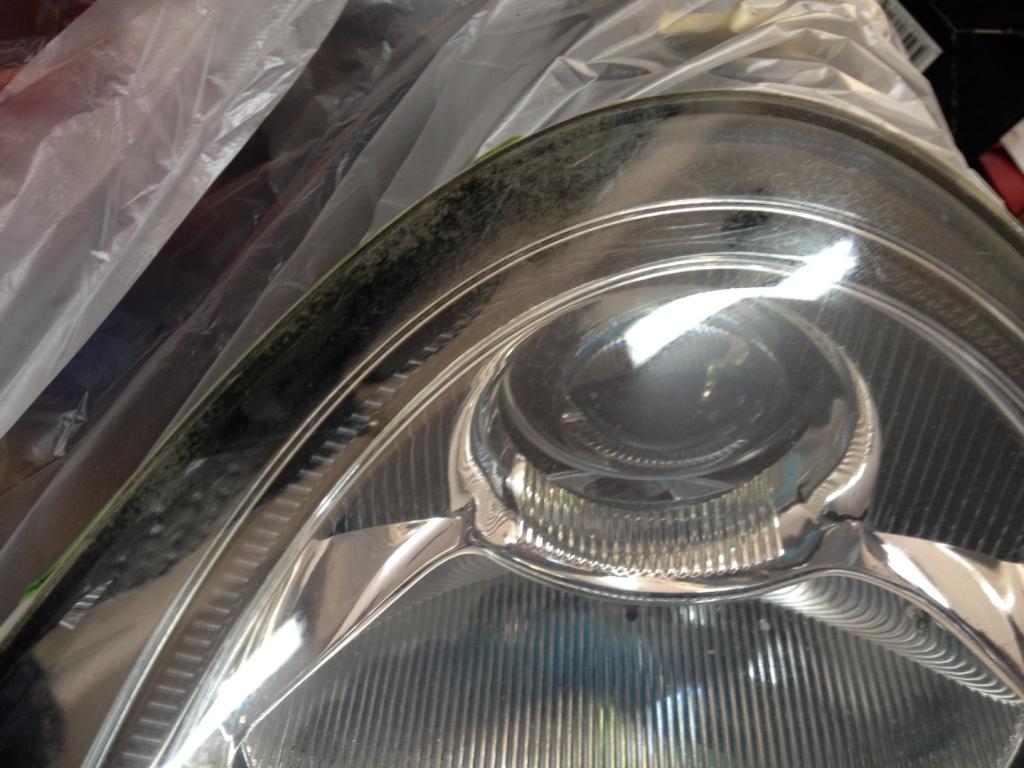 [/IMG]
My car was originally from Arizona, so this may have contributed to the damage.
Let me start by saying, do not use the product below. This kit starts with 1,000 grit sandpaper that uses a hand applicator and that's not nearly enough to cut through the factory coating.
DON'T USE THIS

Make sure to use the product below. It starts with 500 grit sandpaper and an applicator that uses a home drill.
USE THIS

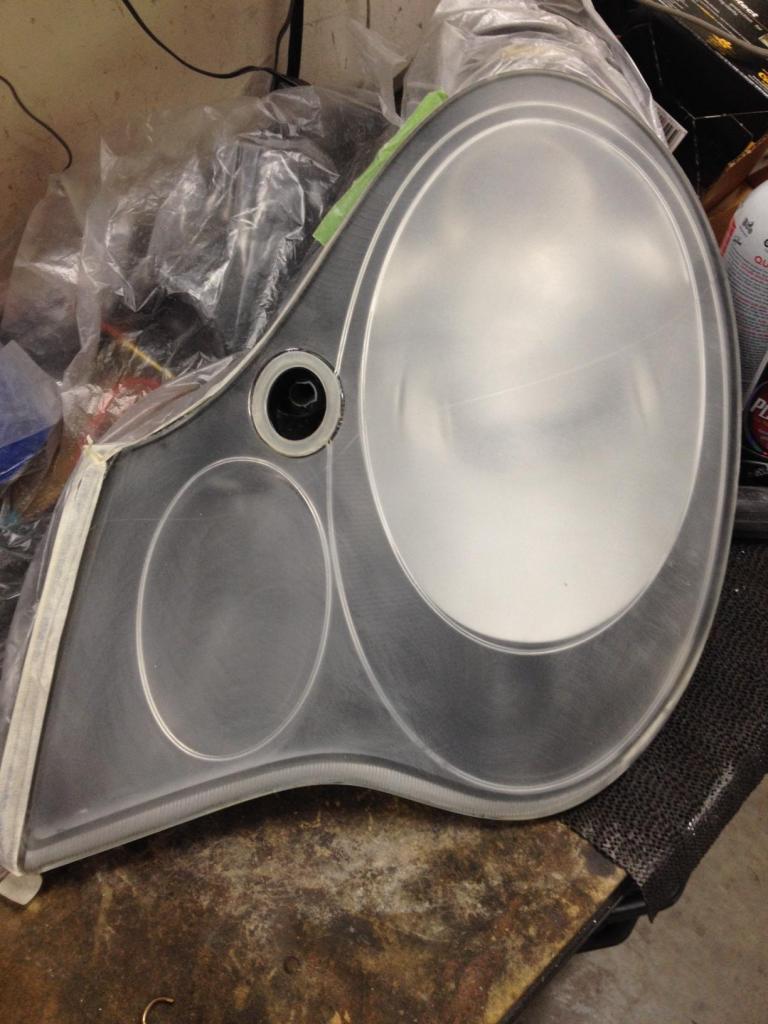
When you start sanding, make sure to continue until you have an even frosted finish. It took me four sanding disks before mine was ready. The kit come with six 500 grit disks, so you may want to buy two kits if you're doing both headlights.
Here's the point where you ask yourself "what have I done?", but don't worry, it will all work out.
You will follow the instructions and follow up the 500 grit with 800 grit and then 3,000 grit. Finally you will use the buffing compound and your nice clear headlight will return.
It's hard to get a good shot with the glare and reflection, but here's a shot of the cracked/yellowing area.
After your complete, you will need to apply a UV coating. This is not included in the kit, but they do give you the name/number for the proper UV coating in the directions.
Hopefully this will give everyone hope and the confidence to know they can do it themselves. I purchased the kit a Advance Autoparts for approximately $25, with a $10 rebate.
Good luck,
Steve
Let me start by saying, DO NOT do this if your headlight is in good shape. You will be sanding off the factory UV coating which is very thick and durable. After you have removed this coating, you will have to "maintain" your headlights. You will need to polish them up every once in a while and apply an aftermarket UV coating.
Mine was on its way out and the black housings made all the imperfections more visible, so it was time.
Here's a shot before I started.
Here's a shot of some pitting in the lower corner of my headlight.
Here, you can see the cracking and yellowing near the top of the headlight.
[IMG]
 [/IMG]
My car was originally from Arizona, so this may have contributed to the damage.
Let me start by saying, do not use the product below. This kit starts with 1,000 grit sandpaper that uses a hand applicator and that's not nearly enough to cut through the factory coating.
DON'T USE THIS
Make sure to use the product below. It starts with 500 grit sandpaper and an applicator that uses a home drill.
USE THIS
When you start sanding, make sure to continue until you have an even frosted finish. It took me four sanding disks before mine was ready. The kit come with six 500 grit disks, so you may want to buy two kits if you're doing both headlights.
Here's the point where you ask yourself "what have I done?", but don't worry, it will all work out.
You will follow the instructions and follow up the 500 grit with 800 grit and then 3,000 grit. Finally you will use the buffing compound and your nice clear headlight will return.
It's hard to get a good shot with the glare and reflection, but here's a shot of the cracked/yellowing area.
After your complete, you will need to apply a UV coating. This is not included in the kit, but they do give you the name/number for the proper UV coating in the directions.
Hopefully this will give everyone hope and the confidence to know they can do it themselves. I purchased the kit a Advance Autoparts for approximately $25, with a $10 rebate.
Good luck,
Steve
Last edited by Steve Jarvis; May 27, 2014 at 10:59 PM.

Registered User
Joined: Sep 2010
Posts: 319
From: New Hope, PA
Rep Power: 37
Well done! I did a similar job on my 2003 E39 with a lot more damage to the light housings, they came up almost like new.
Trending Topics
Thread Starter
|
Registered User
Joined: Feb 2011
Posts: 1,075
From: Lewisville, NC
Rep Power: 110
Thanks guys.
I sent my headlight out to get the housings painted. The company didn't realize the paint would out gas and cause the lens to look foggy. I ended up removing the lenses and cleaning the inside if the lenses myself.
I'll try to get a front end picture up tomorrow.
Later, Steve
I sent my headlight out to get the housings painted. The company didn't realize the paint would out gas and cause the lens to look foggy. I ended up removing the lenses and cleaning the inside if the lenses myself.
I'll try to get a front end picture up tomorrow.
Later, Steve

Registered User
Joined: Apr 2008
Posts: 136
From: Texas
Rep Power: 27
Thanks guys.
I sent my headlight out to get the housings painted. The company didn't realize the paint would out gas and cause the lens to look foggy. I ended up removing the lenses and cleaning the inside if the lenses myself.
I'll try to get a front end picture up tomorrow.
Later, Steve
I sent my headlight out to get the housings painted. The company didn't realize the paint would out gas and cause the lens to look foggy. I ended up removing the lenses and cleaning the inside if the lenses myself.
I'll try to get a front end picture up tomorrow.
Later, Steve
Steve - Great write up but I've got a question about this statement - Are you saying you removed the lenses from the rest of the assembly? How'd you do that? How'd you seal them back? My lens discoloration appears to be on the inside, so I'd like to try cleaning inside before I "ruin" the outside.
Thread Starter
|
Registered User
Joined: Feb 2011
Posts: 1,075
From: Lewisville, NC
Rep Power: 110
Steve - Great write up but I've got a question about this statement - Are you saying you removed the lenses from the rest of the assembly? How'd you do that? How'd you seal them back? My lens discoloration appears to be on the inside, so I'd like to try cleaning inside before I "ruin" the outside.
The fogging I had on the inside is because the lens was removed so the housing inside could be painted black.
Later, Steve
Registered User
Joined: Apr 2008
Posts: 136
From: Texas
Rep Power: 27
I bought the 3M product, used it, and love my new headlights. Mine were really bad - far worse than the ones in this post. The first grit in the 3M product is 500. I worked and worked and worked with those pads until all 6 (or were there 8?) clogged up and most of my cloudiness was still there. So I cut a piece of my 220 grit woodworking sandpaper and went back to work. Finally, I started seeing the cloudiness disappear. When I got an even finish everywhere, I switched to some 600 grit paper I had (in place of the used up 500), then continued with the 3M process. Everything went perfectly after that. Now it's just a matter of seeing how often I'll have to reapply the UV protectant. Thanks to Steve for a great recommendation.