
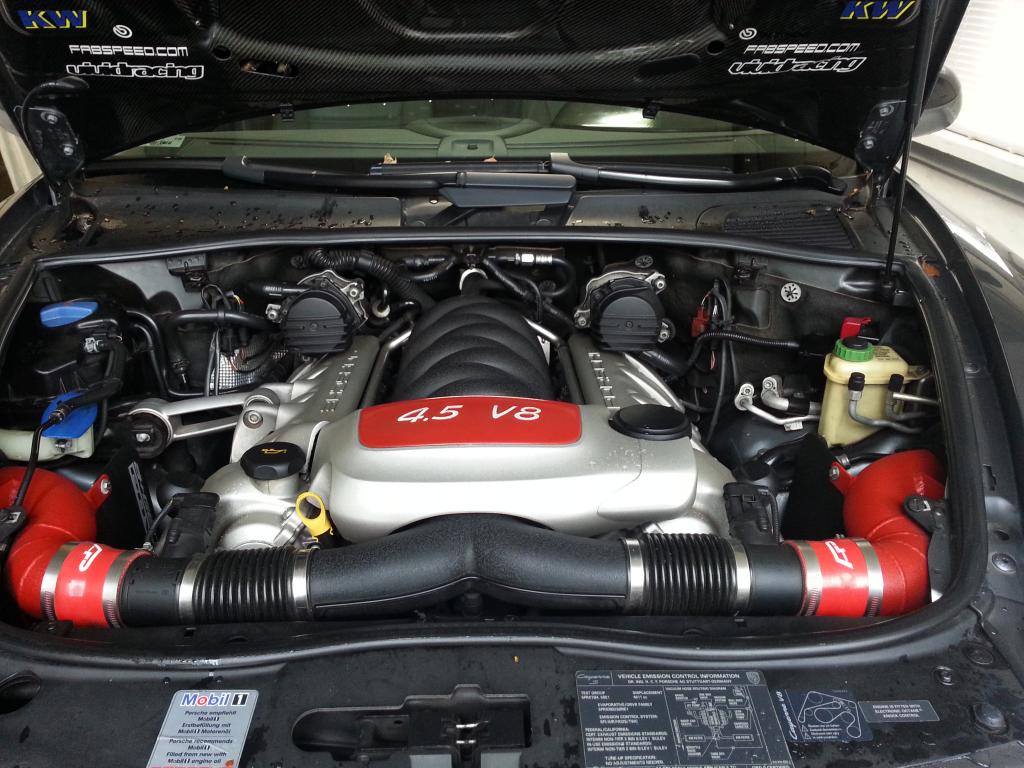
BOOM!!!! Goes the coolant pipes ! Lots of pics and observations

Thread Starter
|
Registered User
Joined: Mar 2009
Posts: 927
From: NJ
Rep Power: 70


BOOM!!!! Goes the coolant pipes ! Lots of pics and observations
Somehow I thought I would magically skate the issue. I take care of my C and having been involved with the lawyers over the coolant pipe class action suit, I figured that I would somehow not fall victim to the German curse..... WRONG !!!!
I floored it to jump into traffic the other day and the second I let off the happy pedal the " Low Coolant Warning" light came on (They should just replace this warning with a picture of dollar signs). I pulled over and sure enough the peppers juice was dripping from its underbelly. Fortunately I was very close to home so all good there. Anyway, I put it on ramps and headed over to Autozone for their coolant test kit rental. They basically charge you $200 for the kit and you can return it when you like for a full refund. I included pics of the kit below - the blue #2 is the one that fits the Cayenne's coolant reservoir.
I pressure tested it and by the time I got to 1 bar it was pissing pretty heavily from the bell housing weep hole and the upper half of the engine. So next step was to drain the system, dump in a few gallons of water and flush it all by applying the pressure test kit which forced all the coolant and water out. I stopped this process when everything came out clear.
Next step was to buy the parts and hope for an overnight option that did not cost the $170 that most sites show by default. Well, ECSTuning.com to the rescue. A few bucks more on the base price then Suncoast, but overnight shipping from Ohio to NJ was only $60.
So - The pics below represent where I am now. It took me approx 6 hours to get everything apart with the exception of the lower plastic tube. I will pull this out in the AM.
So far the biggest PIA has been:
1. The rear intake bolt on the passenger side. I had to use 3 extensions, a swivel and 20 minutes for 1 bolt. Not fun.
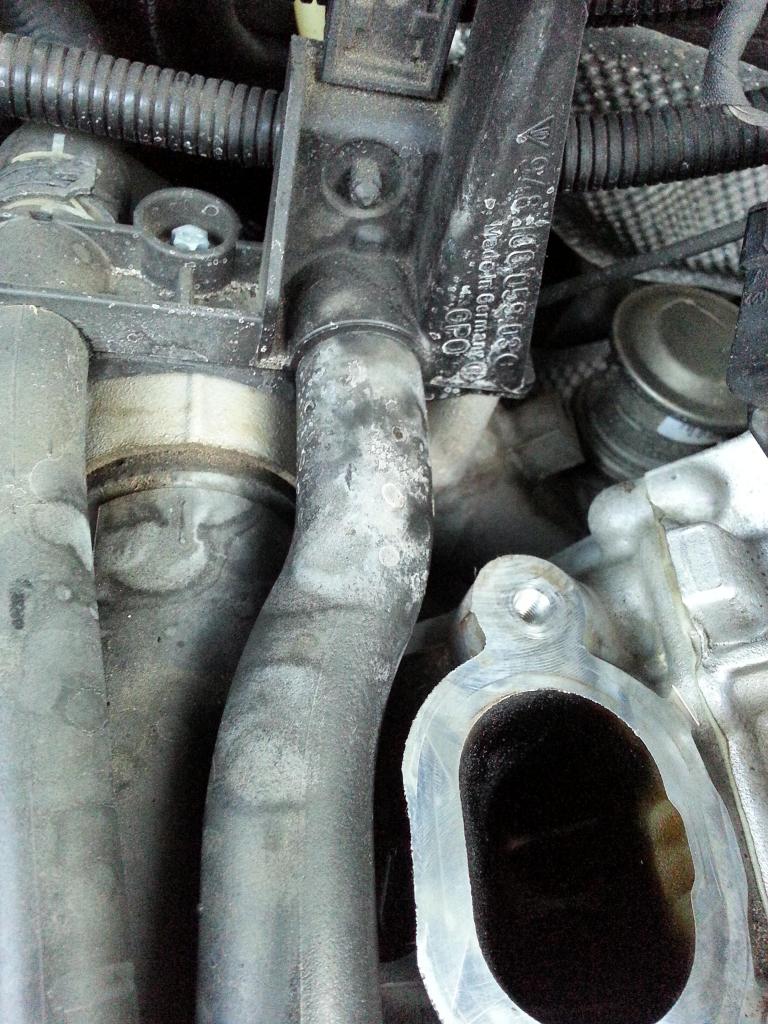
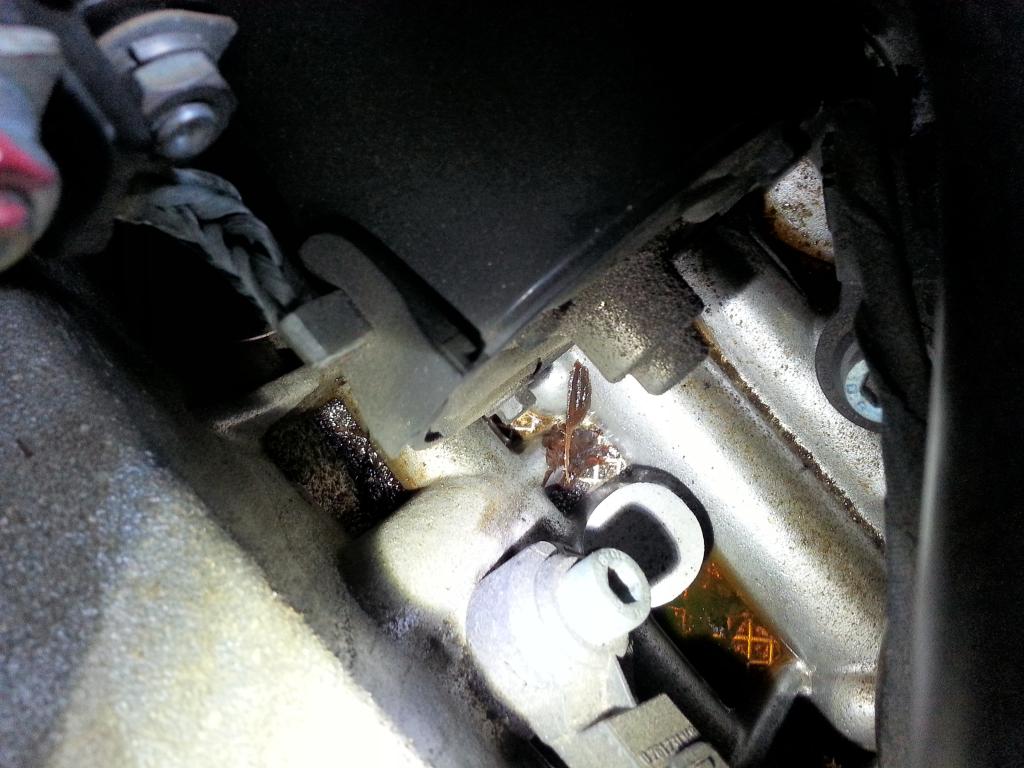
2. The old tubes all snapped in the water pump side receiver. I tried wiggling, twisting, and eventually vicegrips with a twist and push motion. No mater, they all snapped and I had to dig out what was left behind by carefully using a small flat head screwdriver. In the end, I was able to get all the plastic out, but you can see in the one pic below, the receiving end is not super clean. I will have to emery cloth that hole before I insert the new pipes.
WHAT I AM DREADING !
Inserting the new pipes! If the old ones came out as hard as they did, I can't imagine how much pressure the new ones will take to get in place. The instructions from ECS states that they had a tough time with their demo model, specifically:
"Ours were a very tight fit, and needed to helped along with small pry bars inserted between metal bosses on the pipe assembly and the face of
the rear plenum."
That sounds to me like 2 hours and a lot of sailor language.
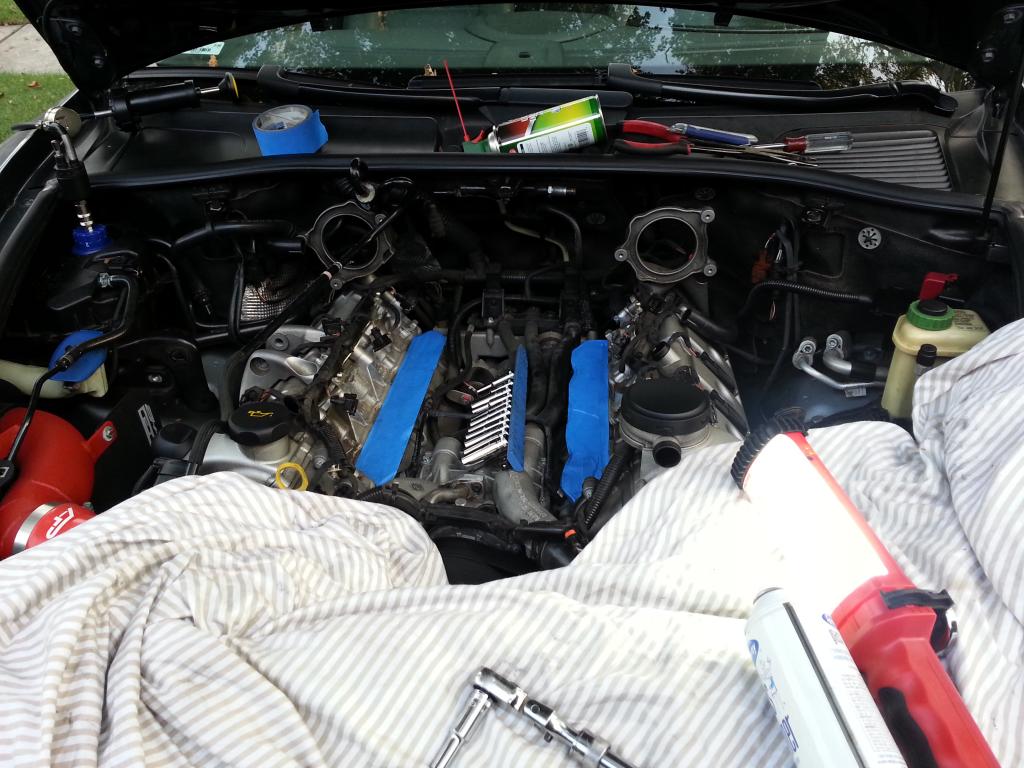
Anyway, enjoy the pics for now. I will update this with a post-install summary once I am done. So far, no major snags and definitely doable by anyone with problem-solving mechanical skills.
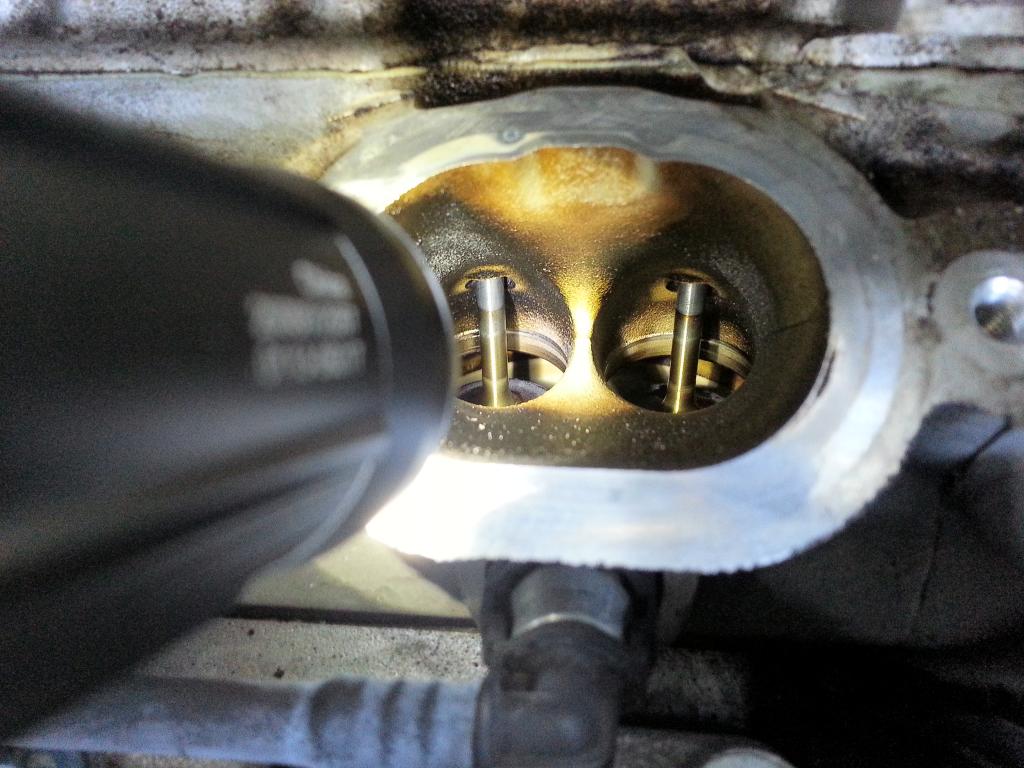
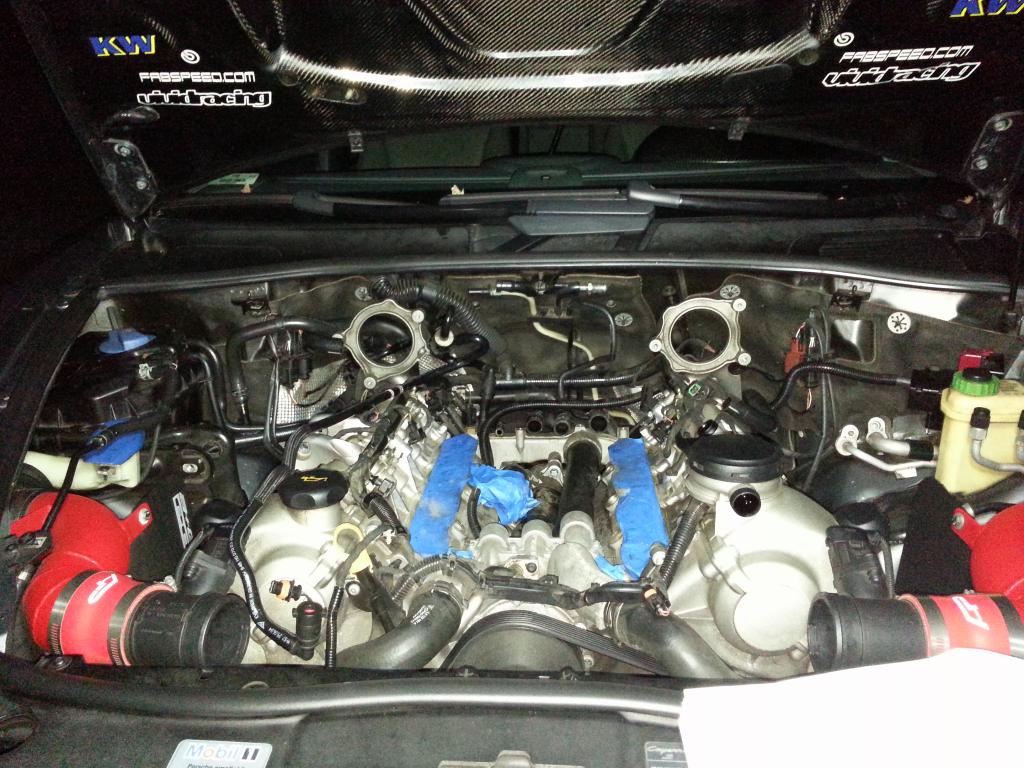
If you drop something down one of the intakes, and the value is open like in this pic, you are pretty much screwed! This is why you see the blue painters tape in the following pictures.
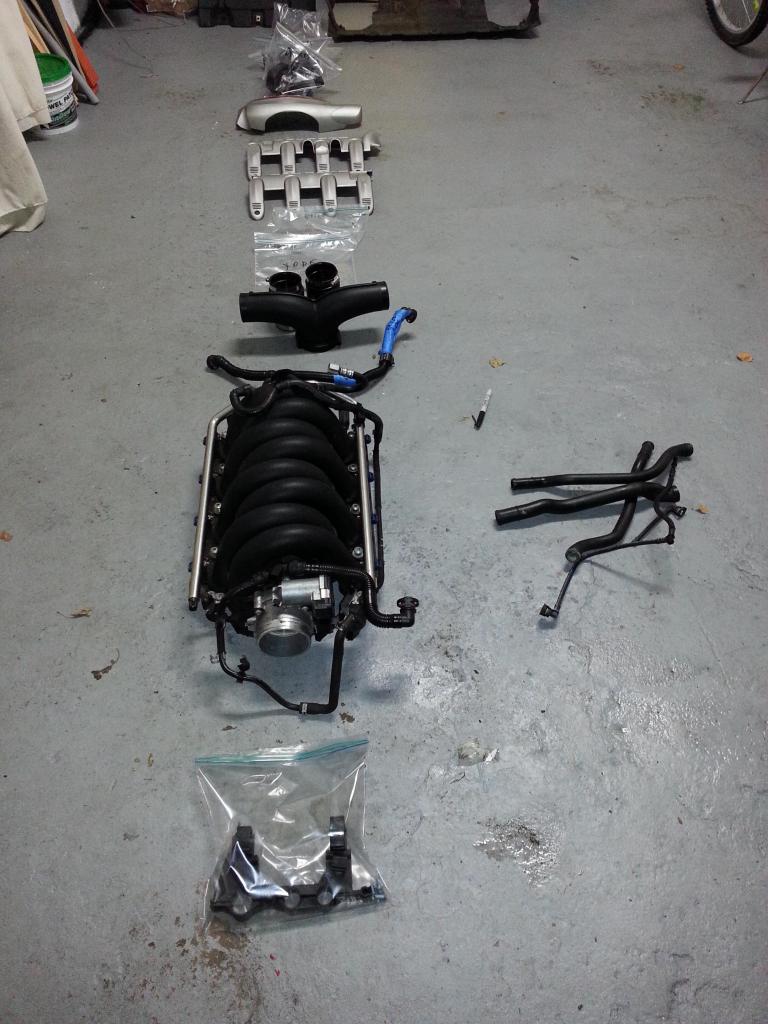
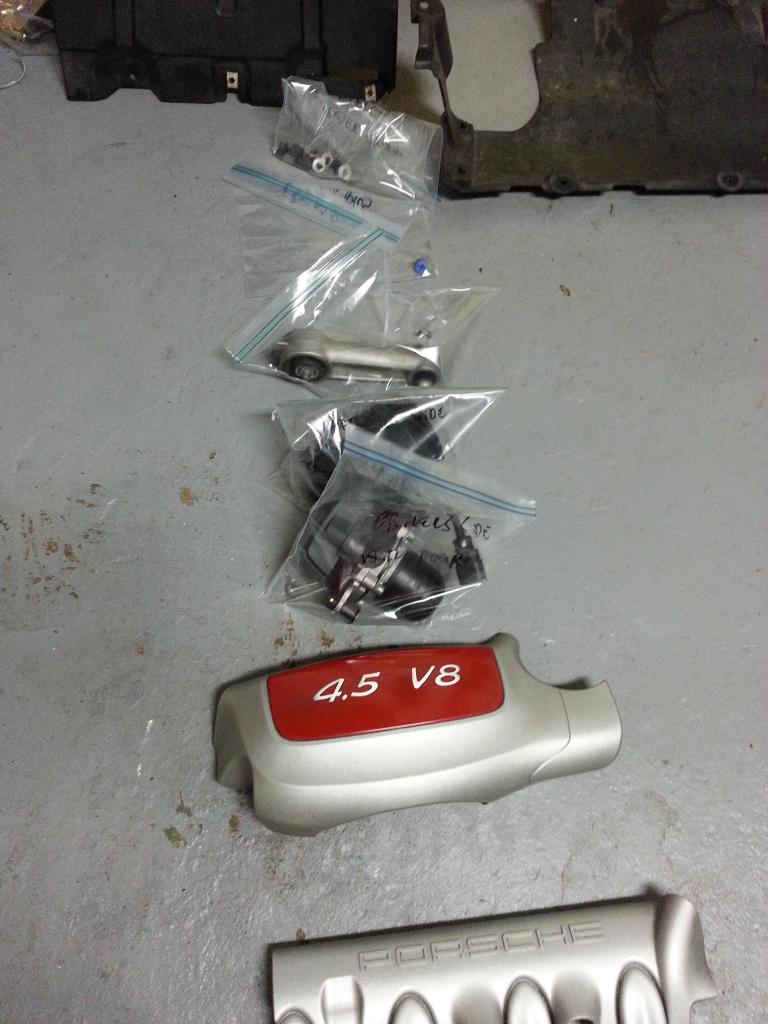
Here are the dirty little #@&$$^@()$_ !!!!!

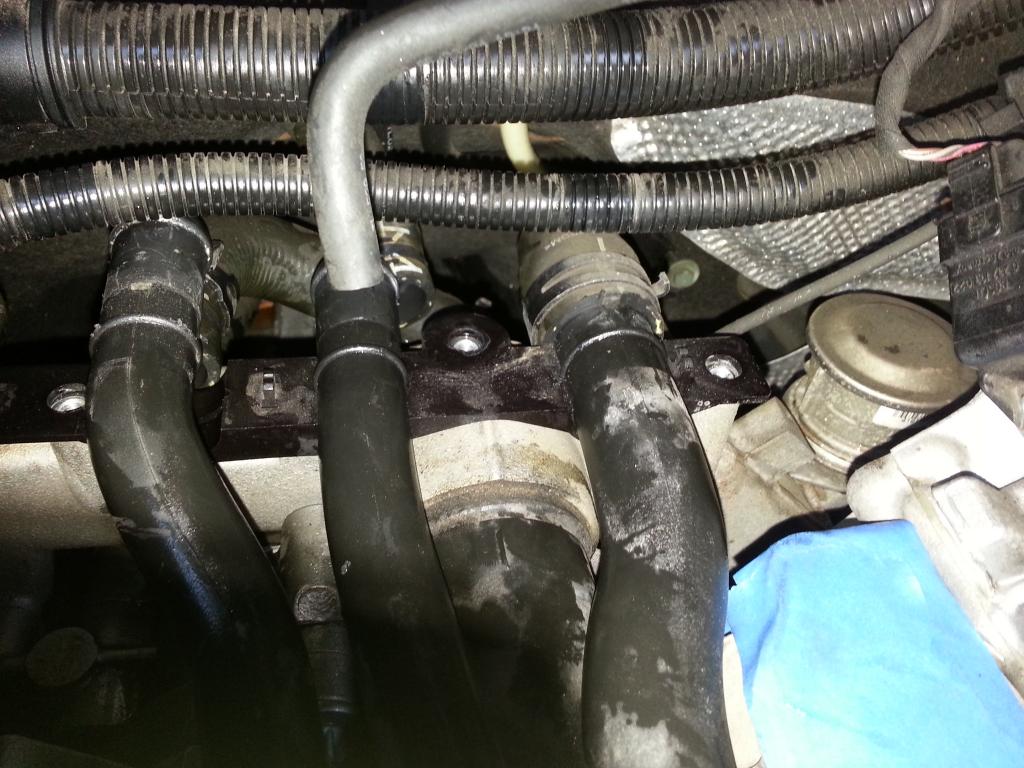
You can see the remnants of the leak in the following pictures:
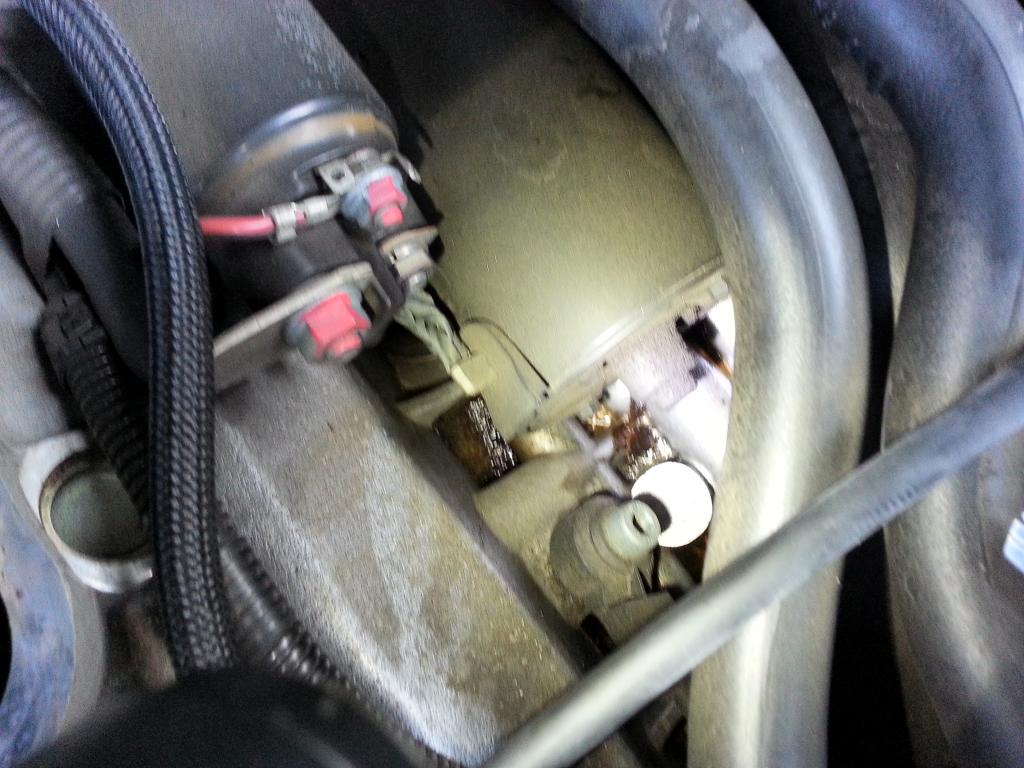
If you do not disconnect the battery like the instructions recommend, tape over the electrical contacts on the starter. One misplaced tool and BIZZZ...POP...Buzzzzzzz !
OH LOOK!!! Hans Gr�bber decided to install the right clamp with the spring retention tabs facing down !!!! I had to remove the other 2 pipes and the back retaining bracket before I could twist this pipe far enough to get at the factory clamp.
Inspection of the water pump housing holes where the old pipes where seated shows a bunch of loveliness that needs to be cleaned up.

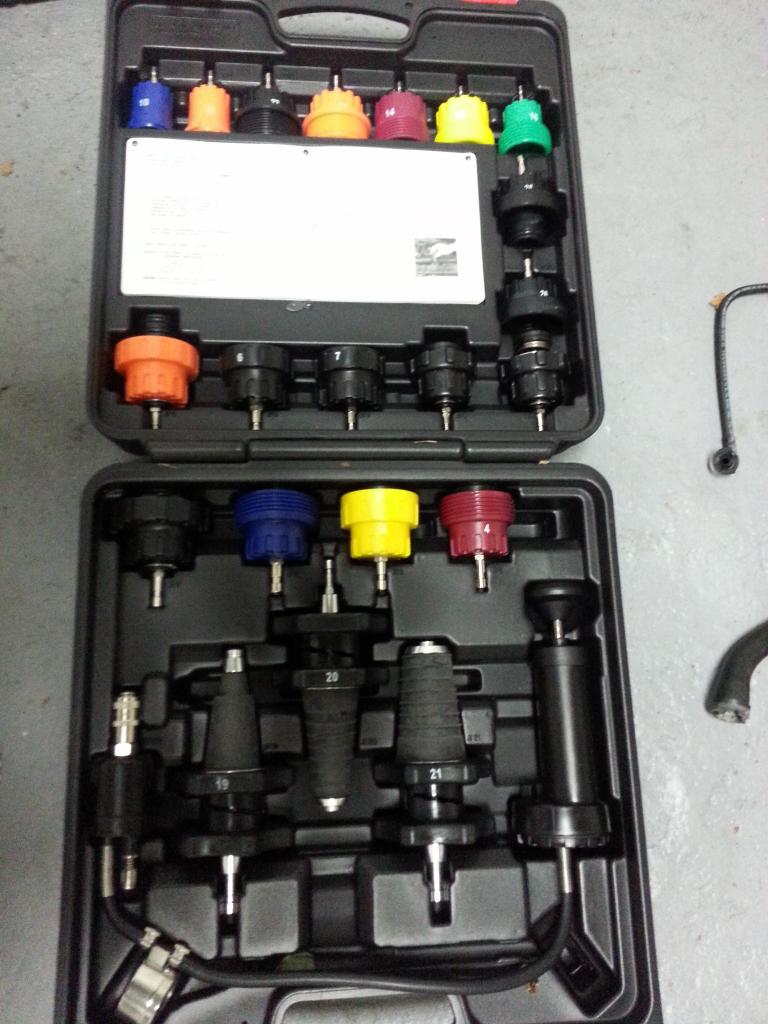
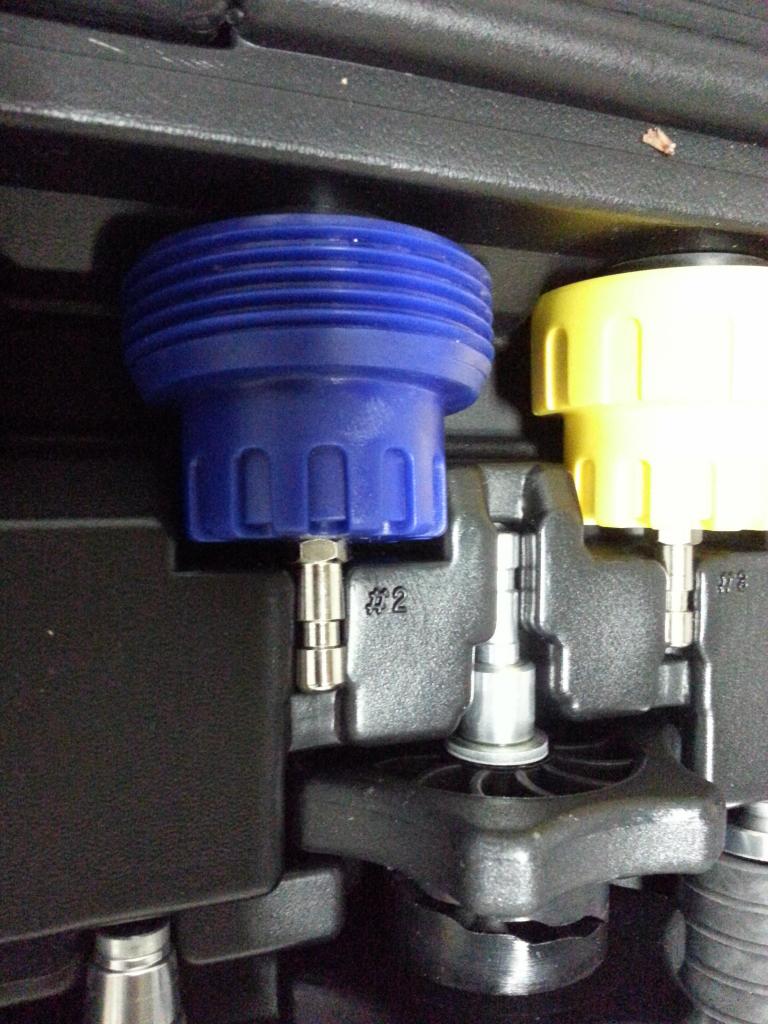
I floored it to jump into traffic the other day and the second I let off the happy pedal the " Low Coolant Warning" light came on (They should just replace this warning with a picture of dollar signs). I pulled over and sure enough the peppers juice was dripping from its underbelly. Fortunately I was very close to home so all good there. Anyway, I put it on ramps and headed over to Autozone for their coolant test kit rental. They basically charge you $200 for the kit and you can return it when you like for a full refund. I included pics of the kit below - the blue #2 is the one that fits the Cayenne's coolant reservoir.
I pressure tested it and by the time I got to 1 bar it was pissing pretty heavily from the bell housing weep hole and the upper half of the engine. So next step was to drain the system, dump in a few gallons of water and flush it all by applying the pressure test kit which forced all the coolant and water out. I stopped this process when everything came out clear.
Next step was to buy the parts and hope for an overnight option that did not cost the $170 that most sites show by default. Well, ECSTuning.com to the rescue. A few bucks more on the base price then Suncoast, but overnight shipping from Ohio to NJ was only $60.
So - The pics below represent where I am now. It took me approx 6 hours to get everything apart with the exception of the lower plastic tube. I will pull this out in the AM.
So far the biggest PIA has been:
1. The rear intake bolt on the passenger side. I had to use 3 extensions, a swivel and 20 minutes for 1 bolt. Not fun.
2. The old tubes all snapped in the water pump side receiver. I tried wiggling, twisting, and eventually vicegrips with a twist and push motion. No mater, they all snapped and I had to dig out what was left behind by carefully using a small flat head screwdriver. In the end, I was able to get all the plastic out, but you can see in the one pic below, the receiving end is not super clean. I will have to emery cloth that hole before I insert the new pipes.
WHAT I AM DREADING !
Inserting the new pipes! If the old ones came out as hard as they did, I can't imagine how much pressure the new ones will take to get in place. The instructions from ECS states that they had a tough time with their demo model, specifically:
"Ours were a very tight fit, and needed to helped along with small pry bars inserted between metal bosses on the pipe assembly and the face of
the rear plenum."
That sounds to me like 2 hours and a lot of sailor language.
Anyway, enjoy the pics for now. I will update this with a post-install summary once I am done. So far, no major snags and definitely doable by anyone with problem-solving mechanical skills.

If you drop something down one of the intakes, and the value is open like in this pic, you are pretty much screwed! This is why you see the blue painters tape in the following pictures.

Here are the dirty little #@&$$^@()$_ !!!!!

You can see the remnants of the leak in the following pictures:


If you do not disconnect the battery like the instructions recommend, tape over the electrical contacts on the starter. One misplaced tool and BIZZZ...POP...Buzzzzzzz !


OH LOOK!!! Hans Gr�bber decided to install the right clamp with the spring retention tabs facing down !!!! I had to remove the other 2 pipes and the back retaining bracket before I could twist this pipe far enough to get at the factory clamp.

Inspection of the water pump housing holes where the old pipes where seated shows a bunch of loveliness that needs to be cleaned up.


Registered User
Joined: Jan 2012
Posts: 710
From: South FLA
Rep Power: 208
Wow, looks like fun...not. What a pain in the butt. Sorry to hear about this. How many miles did your CTT make it before this finally happened?
Thankfully mine has already been converted to the metal pipes. Good luck with the rest, I'm sure you will get it done and be back on your way!
Thankfully mine has already been converted to the metal pipes. Good luck with the rest, I'm sure you will get it done and be back on your way!
Thread Starter
|
Registered User
Joined: Mar 2009
Posts: 927
From: NJ
Rep Power: 70
XR4 - I am def am going to pull the thermostat housing off as the kit included a gasket and I can already see that the lower pipe will be much easier.
GoPhaster - just a tad over 50K
Cord - YES I KNOW - You would think I would take my own advice. Lets just say I have been working on my 3rd lightning strike and it has been taking up all my time.
JSAV - About 40 minutes from you with the hammer down (near the meadowlands) - and I could use a drinking buddy. You will see why in a my next post.
Trending Topics
Thread Starter
|
Registered User
Joined: Mar 2009
Posts: 927
From: NJ
Rep Power: 70
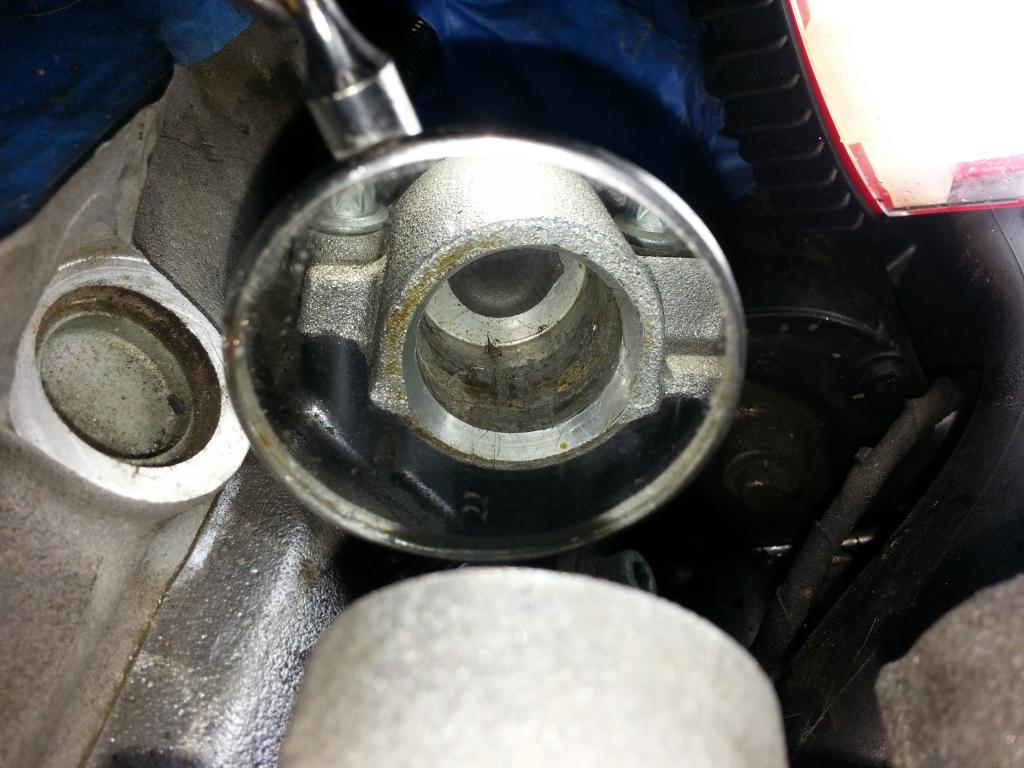
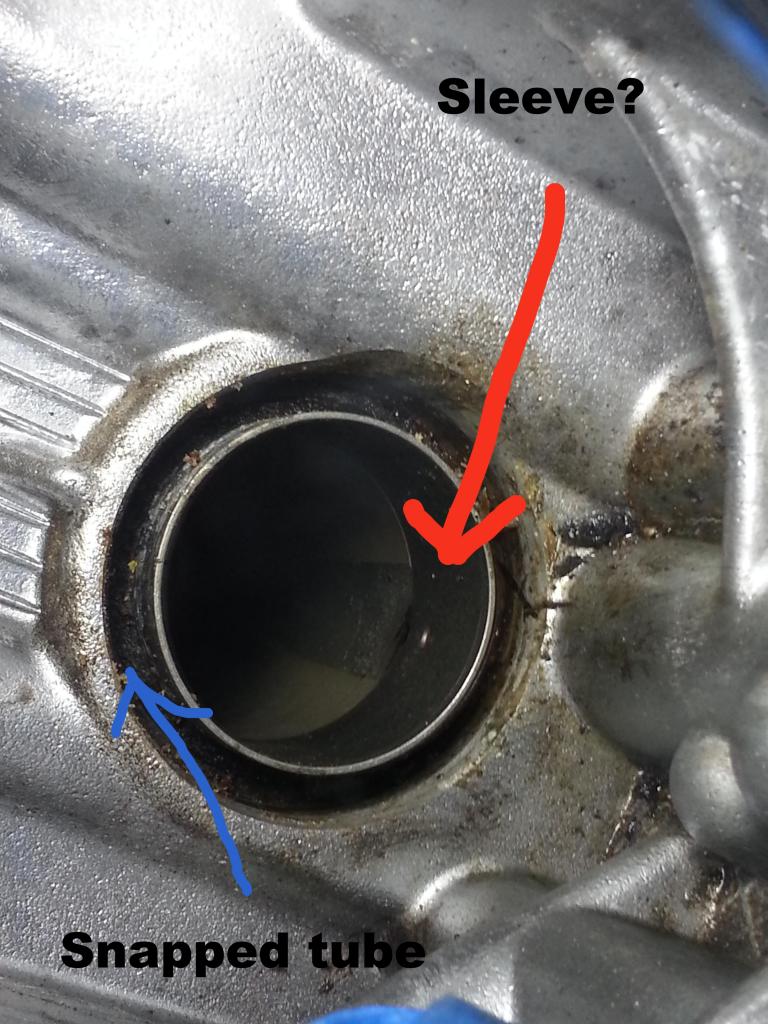
Parts showed up at 10:00 am (dam that was fast) but I was already heading out for a day of kayaking. Jumped back under the hood at 5 and spent the next 3 hours dealing with the lower tube. After I cut it with a dremel, I was able to twist it and it did appear to come out cleanly...... I was wrong. Both ends snapped and left about 4 cm of plastic in the hole.
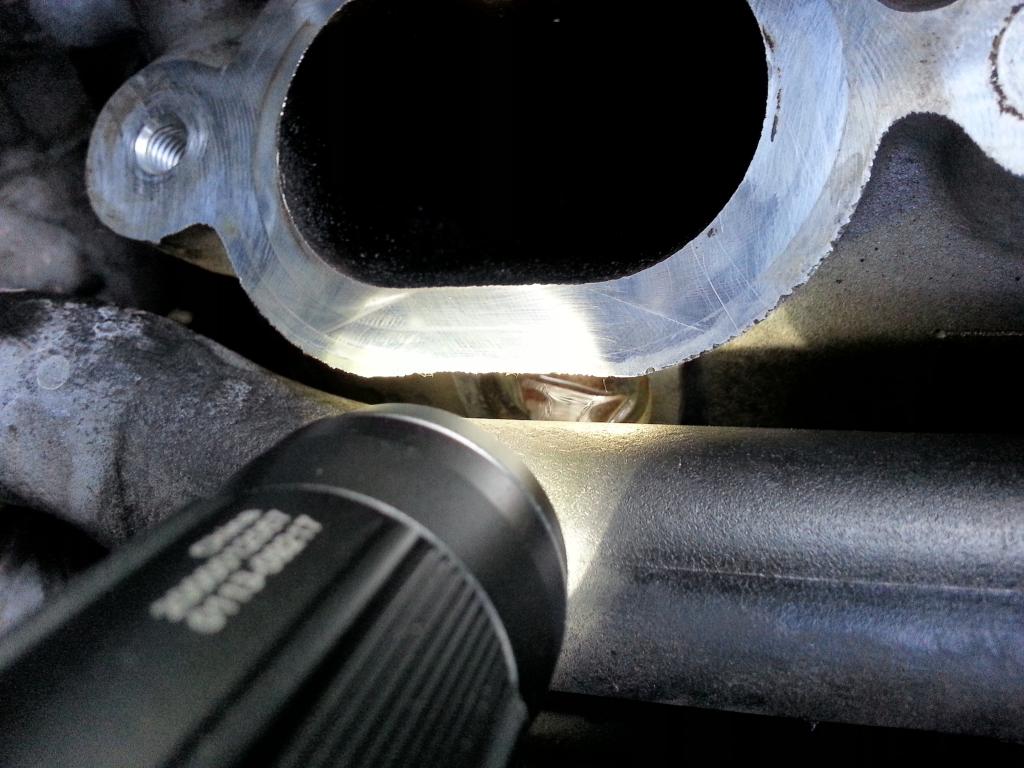
What I am hoping is that the piece I labeled a sleeve, is just that and was part of the original plastic tube. If it is, then I will cut that and the remnant of the old tube will be easy to get out. If its NOT part of the old tube, then I need to keep digging out the plastic that's in the gap. I have been using pics and my dremel with a bit that will not harm the aluminum. Its VERY slow going and if someone can validate that that is a sleeve, I will be done with both ends in 15 minutes (vs hours). I am emailing ECS now to see if they know.
What I am hoping is that the piece I labeled a sleeve, is just that and was part of the original plastic tube. If it is, then I will cut that and the remnant of the old tube will be easy to get out. If its NOT part of the old tube, then I need to keep digging out the plastic that's in the gap. I have been using pics and my dremel with a bit that will not harm the aluminum. Its VERY slow going and if someone can validate that that is a sleeve, I will be done with both ends in 15 minutes (vs hours). I am emailing ECS now to see if they know.


Registered User
Joined: May 2011
Posts: 34
From: Troy, Michigan
Rep Power: 16
Look at the new part you are going to insert into the hole/opening and you can decide for yourself if the metal ring stays - I say it does not but I did mine last fall.
Thread Starter
|
Registered User
Joined: Mar 2009
Posts: 927
From: NJ
Rep Power: 70
That's my guess also. I can insert any of the new parts far enough to see if they would hit that sleeve as they hit the broken plastic first. If I can get a second to your comment, I will have the dremel out first thing !
The sleeve is part of the old pipe. A (carefully used) torch will be your best friend in the removal process, as it will break down all of the plastic remaining in there, and the sleeve will pull right out.
Thread Starter
|
Registered User
Joined: Mar 2009
Posts: 927
From: NJ
Rep Power: 70
Ok boys - thanks much! I will be hacking away soon and suspect i will first start with a dremel and move to a micro torch if the dremel fails. I get a tad concerned with the fuel fumes that I might make an accidental IED !!!!
Registered User
Joined: Sep 2005
Posts: 72
From: NJ
Rep Power: 23
I'm sure you know about this already, but it's good time to change the coolant T pipes as well. 955 106 323 50 and 948 106 035 51.
Let me know if you need a hand as well, I'm not far, right outside NYC
edit: it's for TT only...for some reason I thought that's what you have..now I look at the pics again...my bad~
Let me know if you need a hand as well, I'm not far, right outside NYC
edit: it's for TT only...for some reason I thought that's what you have..now I look at the pics again...my bad~
Last edited by imola; Aug 15, 2013 at 08:51 AM.