
Removing a 958's Steering Wheel and disconnecting the battery:

Thread Starter
|
Registered User
Joined: Oct 2008
Posts: 920
From: Seattle
Rep Power: 71


Removing a 958's Steering Wheel and disconnecting the battery:
So my first project (anyone who knows me, knows I can't leave a stock vehicle stock for long) for my '13 GTS is swapping out the stock steering wheel for a custom one from MACarbon. I LOVE MACarbon wheels and have done this upgrade on my two prior 997 Turbos. For me, the steering wheel mod is just something that gives satisfaction back immediately and constantly... I mean, you use the thing every time you drive the car, make it as awesome as possible! 
I snapped a few pics along the way, sorry I'm not better at it, but once I'm in a project I just like to get it done and I often forget to grab pics... plus it's been crazy cold here in Seattle this week and working in a 28 degree garage is not fun.
So, step one in a project like this is disconnecting the battery. As I posed in another thread, this is not as straight forward as I thought... it is not easy to get to like a 997, it's buried under the drivers seat (or left seat if your car is RHD). However it's not really difficult, just takes time.. 4 extra bolts and a seat to deal with that likes to be in the way.
So, begin by removing four bolts on the drivers seat. These are accessed by popping out four plastic tabs that cover them. I did the front two first with the seat all the way back, and then moved the seat all the way forward to access the rear two. You'll need a special "star" socket head, you can somewhat see it in the picture.
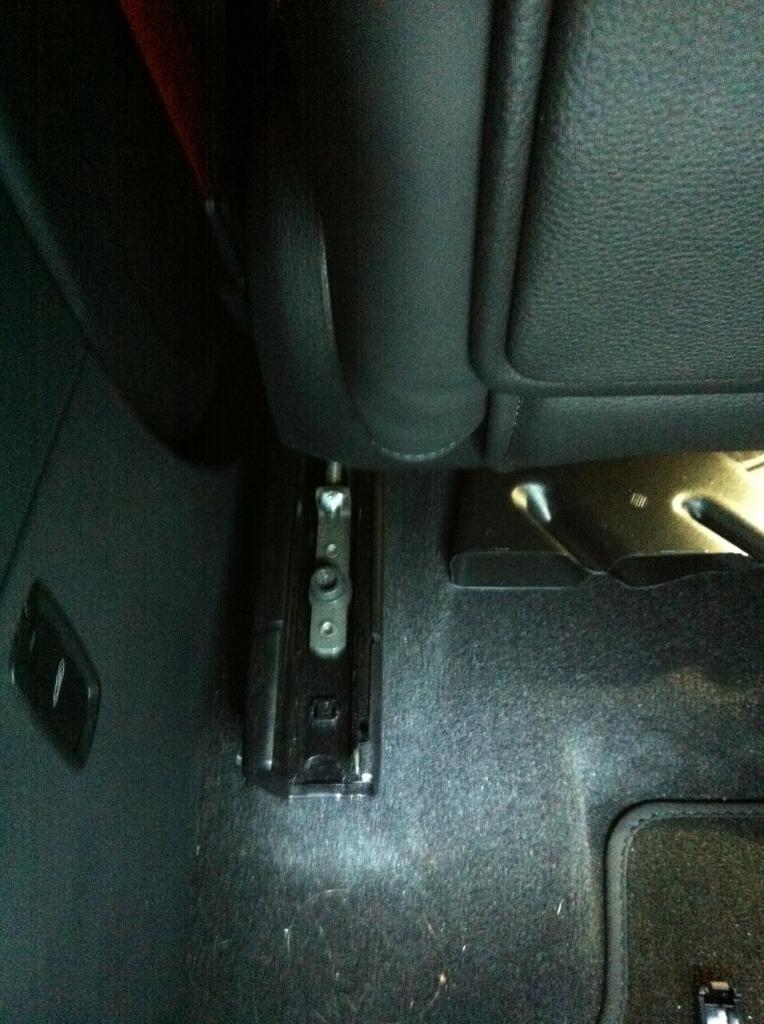
Once you get all of those suckers out, you can tilt the seat back somewhat and get to the battery. I used a bungee cord from the headrest of the seat to the headrest of the rear seat to keep it tilted back... There's wires under there that will give you some slack, but I didn't want to detach those as they're hard to get to.
The battery itself is under the carpet, with an access panel that at least in my car was still attached where it seemed like it shouldn't have been... so I kinda tore one corner of it to open it fully instead of removing all the carpet back under the side sills/etc. It appeared perforated but not cut... that's the best I can describe it.
The battery sits in a box with a lid that has 4 hinge clip things.. they operate in a rocker fashion like on a special german beer bottle.. not too tricky.. you'll have to unscrew one screw that holds the under seat plastic air vent to fully remove the lid. Here's the battery with lid removed:
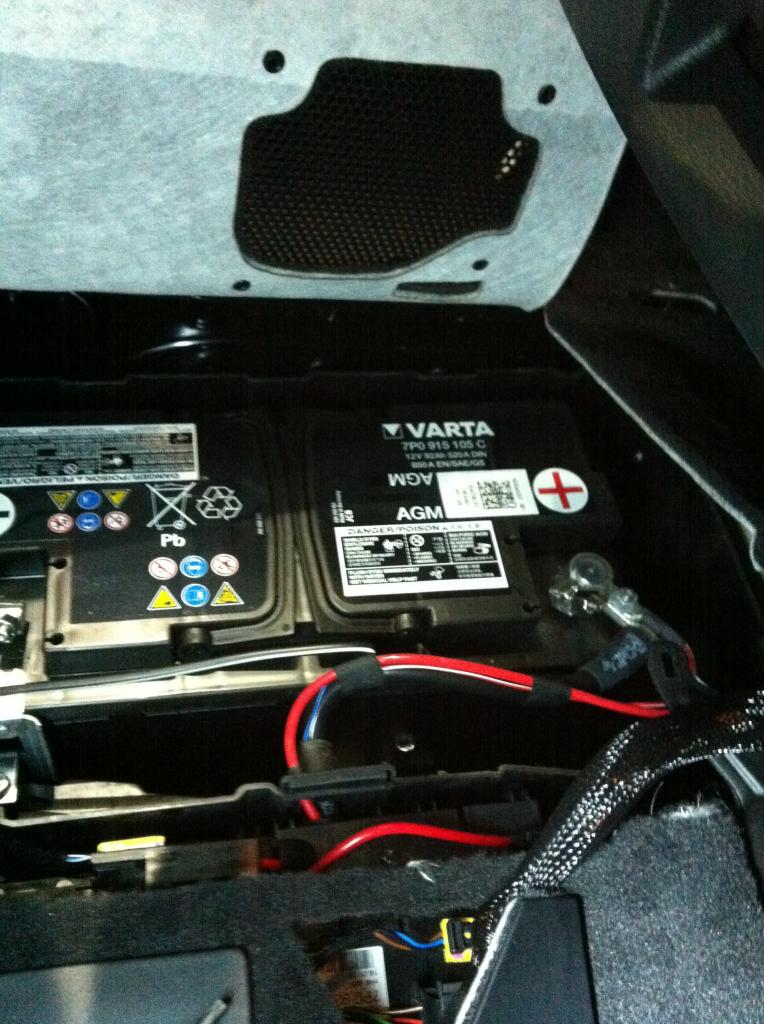
So from there it's easy... remove the red cable and wait 20mins.
Next step, pop out the airbag from the wheel. On my other two Porsches, there was a hole on the bottom of the wheel housing.. on this one, there was only an indentation... where the hole should be..
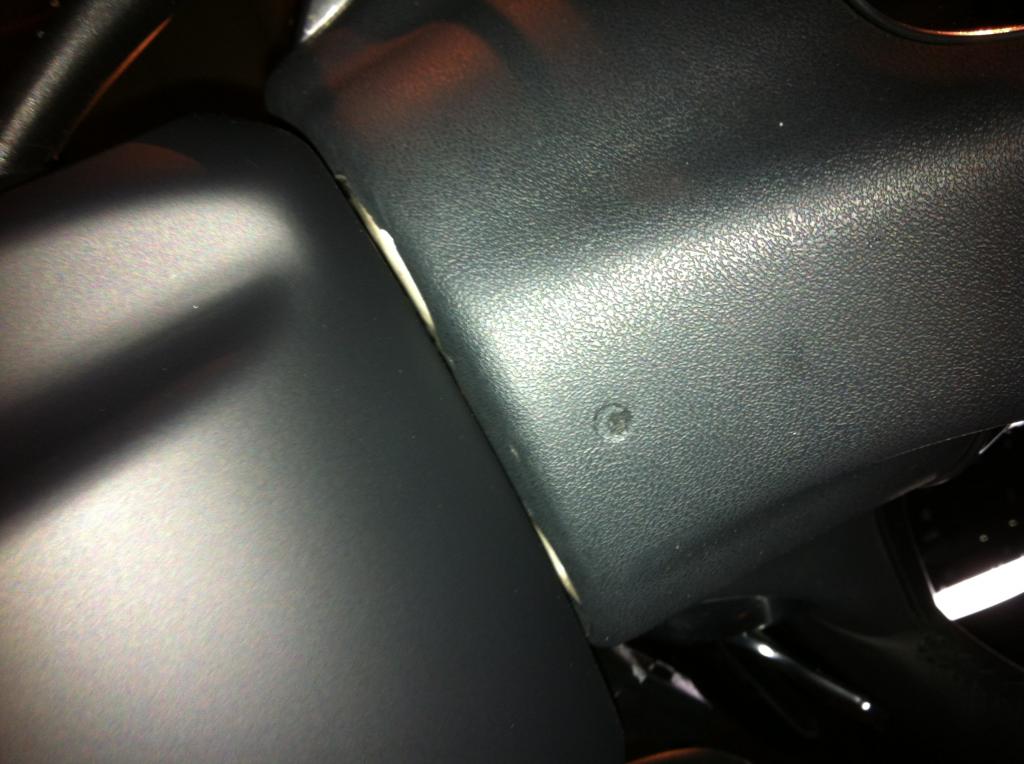
So, with a bit of faith, I perforated it with a small allen wrench... and just like the other porsche wheels, pushed it up until I could feel it hit the bar inside the wheel... a little more pressure pushes the bar up and releases the airbag... the airbag will then pop out enough where you can grab it.
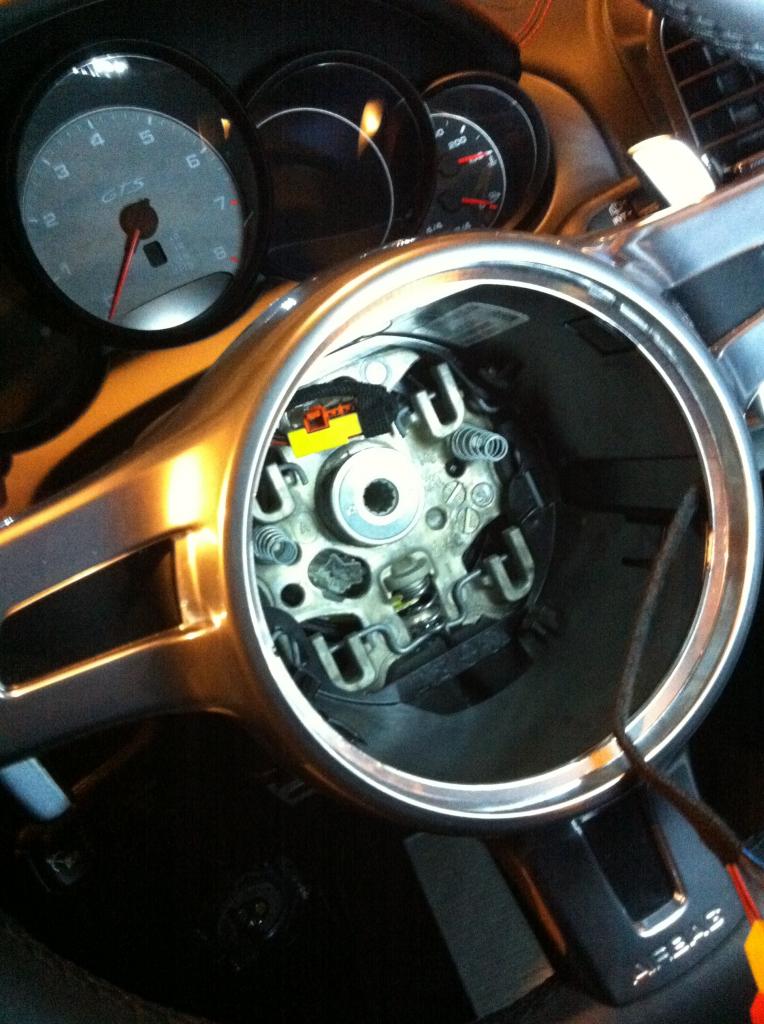
You'll see two yellow plugs with orange tabs and a ground. Pop up the orange tabs and then remove the yellow plugs... then remove the ground. Airbag is now in your hand...set that aside.
Inside the wheel is another yellow plug... pop that out.
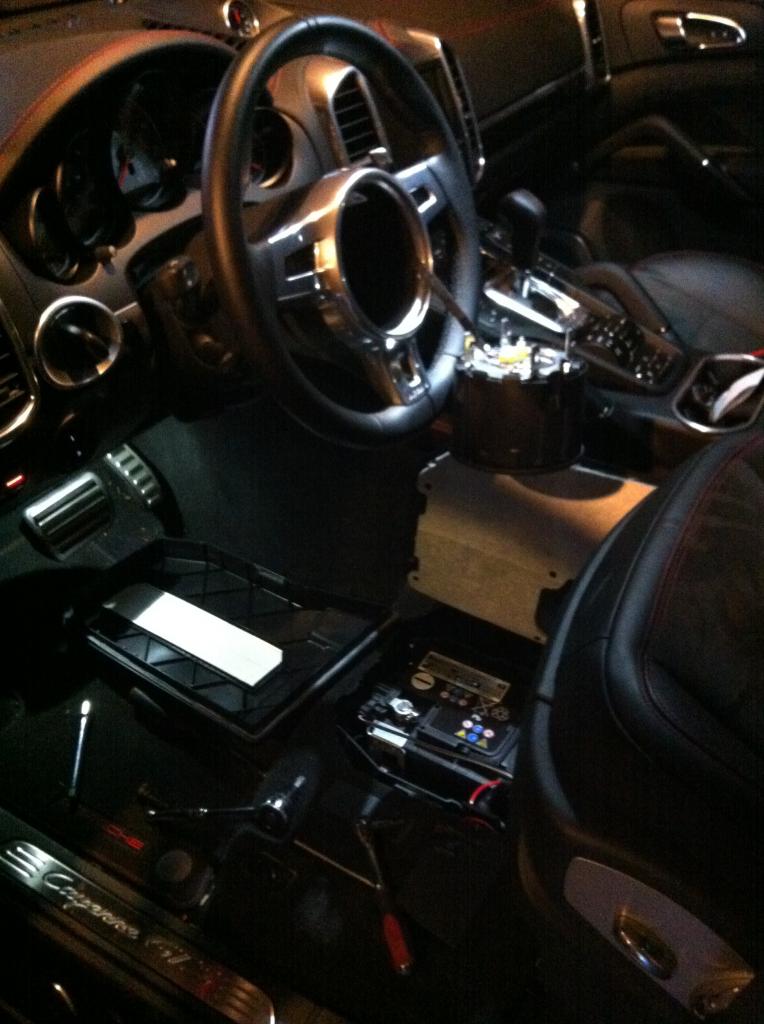
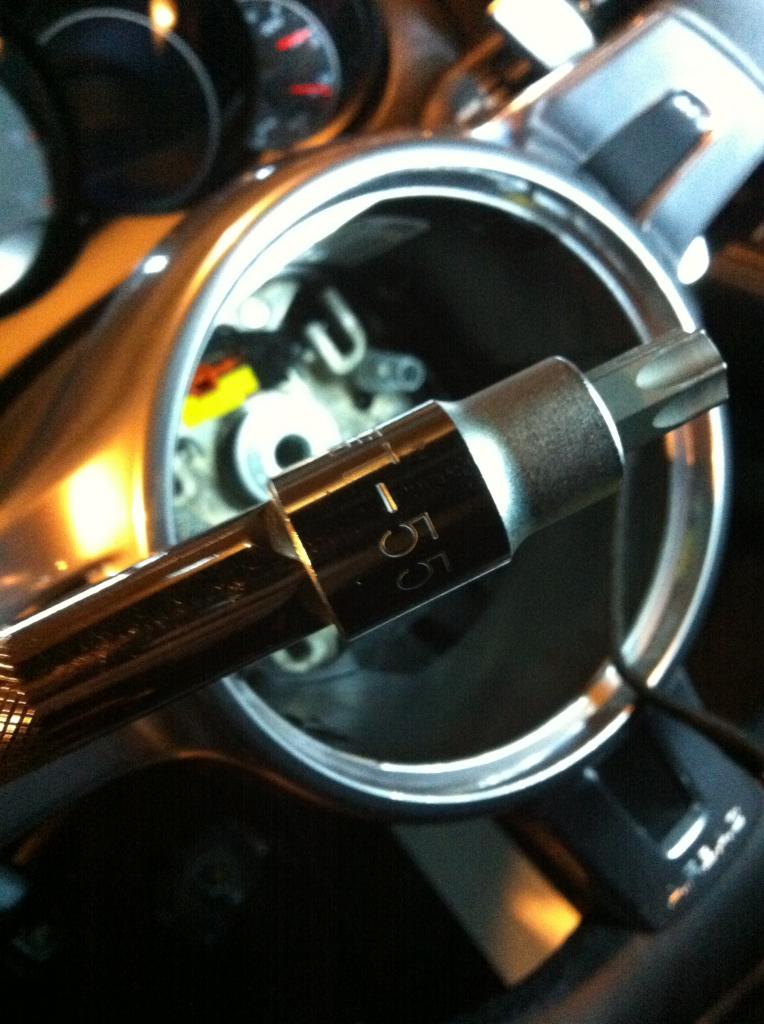
Ok, now you're read to remove the wheel... use your T55 head and make SURE you have the wheel in a spot where you know you can put the new wheel back on in the exact spot, or you'll be off dead center. I had my buddy hold the wheel tight as I wrenched on the bolt, because obviously wrenching the bolt makes the wheel turn... Anyhow, it's pretty simply from there... once the bolt is removed, tug gently or wiggle the wheel a bit and it will slide off.
So my wheel is in a box and sitting in my office to be over nighted to MACarbon. I'll post final pics when I get the wheel back in a few days...
Sorry for the crappy iPhone pics... if ANYONE wants any other pictures or any close ups of anything, let me know and I'll see what I can do. Also, I'll always answer any questions if there's anything you might need. Happy motoring!

I snapped a few pics along the way, sorry I'm not better at it, but once I'm in a project I just like to get it done and I often forget to grab pics... plus it's been crazy cold here in Seattle this week and working in a 28 degree garage is not fun.
So, step one in a project like this is disconnecting the battery. As I posed in another thread, this is not as straight forward as I thought... it is not easy to get to like a 997, it's buried under the drivers seat (or left seat if your car is RHD). However it's not really difficult, just takes time.. 4 extra bolts and a seat to deal with that likes to be in the way.
So, begin by removing four bolts on the drivers seat. These are accessed by popping out four plastic tabs that cover them. I did the front two first with the seat all the way back, and then moved the seat all the way forward to access the rear two. You'll need a special "star" socket head, you can somewhat see it in the picture.
Once you get all of those suckers out, you can tilt the seat back somewhat and get to the battery. I used a bungee cord from the headrest of the seat to the headrest of the rear seat to keep it tilted back... There's wires under there that will give you some slack, but I didn't want to detach those as they're hard to get to.
The battery itself is under the carpet, with an access panel that at least in my car was still attached where it seemed like it shouldn't have been... so I kinda tore one corner of it to open it fully instead of removing all the carpet back under the side sills/etc. It appeared perforated but not cut... that's the best I can describe it.
The battery sits in a box with a lid that has 4 hinge clip things.. they operate in a rocker fashion like on a special german beer bottle.. not too tricky.. you'll have to unscrew one screw that holds the under seat plastic air vent to fully remove the lid. Here's the battery with lid removed:
So from there it's easy... remove the red cable and wait 20mins.
Next step, pop out the airbag from the wheel. On my other two Porsches, there was a hole on the bottom of the wheel housing.. on this one, there was only an indentation... where the hole should be..
So, with a bit of faith, I perforated it with a small allen wrench... and just like the other porsche wheels, pushed it up until I could feel it hit the bar inside the wheel... a little more pressure pushes the bar up and releases the airbag... the airbag will then pop out enough where you can grab it.
You'll see two yellow plugs with orange tabs and a ground. Pop up the orange tabs and then remove the yellow plugs... then remove the ground. Airbag is now in your hand...set that aside.
Inside the wheel is another yellow plug... pop that out.
Ok, now you're read to remove the wheel... use your T55 head and make SURE you have the wheel in a spot where you know you can put the new wheel back on in the exact spot, or you'll be off dead center. I had my buddy hold the wheel tight as I wrenched on the bolt, because obviously wrenching the bolt makes the wheel turn... Anyhow, it's pretty simply from there... once the bolt is removed, tug gently or wiggle the wheel a bit and it will slide off.
So my wheel is in a box and sitting in my office to be over nighted to MACarbon. I'll post final pics when I get the wheel back in a few days...
Sorry for the crappy iPhone pics... if ANYONE wants any other pictures or any close ups of anything, let me know and I'll see what I can do. Also, I'll always answer any questions if there's anything you might need. Happy motoring!
Thread Starter
|
Registered User
Joined: Oct 2008
Posts: 920
From: Seattle
Rep Power: 71
I made one with a combo of alcantara and leather, red stitching to match the rest of the car and the 12 o clock ring in red CF.
Should look cool... I'll have pics up next week when I get the wheel... normally they send you their wheel and you send back yours, but due to the complexity of the newer wheels, they recommend sending in yours first so they can take the alumiplastic parts off without damaging them.

Registered User
Joined: Aug 2013
Posts: 259
From: CA
Rep Power: 30
Trending Topics

Registered User
Joined: Dec 2012
Posts: 1,197
From: NoVA
Rep Power: 76
How did I not thank you for this thread yet???
Finally got around to pulling my trim to get it painted and while I was nervous about popping the airbag, your instructions were spot on.
For the record, I'm a bit more cavalier and don't bother disconnecting the battery when pulling the steering wheel AB.
Anyone know how to get the airbag surround off the MF wheel? (The 3 spoke piece that the MF controls sit in)
I was hoping it would be simple without actually removing the wheel, but no. So now I have to run out and get a T55 to pull the wheel (wtf is wrong with a plain old hex nut? h
h
Finally got around to pulling my trim to get it painted and while I was nervous about popping the airbag, your instructions were spot on.
For the record, I'm a bit more cavalier and don't bother disconnecting the battery when pulling the steering wheel AB.
Anyone know how to get the airbag surround off the MF wheel? (The 3 spoke piece that the MF controls sit in)
I was hoping it would be simple without actually removing the wheel, but no. So now I have to run out and get a T55 to pull the wheel (wtf is wrong with a plain old hex nut?
h
Registered User
Joined: Dec 2012
Posts: 1,197
From: NoVA
Rep Power: 76
WARNING WARNING WARNING
The Mulitfunction wheel apparently has an extra cable compared to the sport wheel described here.
I saw it first but it didn't occur to me that there might be a difference given the MF controls. Not knowing the wheel I made the bad assumption that it was plugged into the wheel itself and not the clock spring. It's attached to the clock spring...
So when I pulled the wheel off, the clock spring came apart too
Luckily this has got to be the easiest spring I've ever worked with so it went back together easy. Still, lots of clinching thinking about what Porsche would charge for a new one and what my wife would have to say (been getting dirty looks all day...).
So if you have a MF wheel, after the AB is out (exactly as described above) there is a yellow plug at the top (there is a catch at the top you press toward the plug body then you can pull it out). Then there is a black plug at the bottom that I think just pulls out with no clip (it just fell out when the clock spring was torn apart and the pins it plugs into were left behind). After that the wheel will come free once the bolt is removed.
Last edited by gnat; May 26, 2015 at 07:36 AM. Reason: "bolt is made" wtf does that even mean???
Registered User
Joined: Dec 2012
Posts: 1,197
From: NoVA
Rep Power: 76
Oohh I hate Porsche
I couldn't find anything on the web so I paid Porsche $2 to get pissed off. To get the trim off you have to pry off the shift buttons which according to PIWIS breaks them. According to them this is ok as they come with the new ($700 I think) trim piece
I'll take the whole wheel to my guy tomorrow to see what he thinks about painting it in place.
Registered User
Joined: Dec 2012
Posts: 1,197
From: NoVA
Rep Power: 76
Getting the airbag back in correctly can apparently be touchy. I apparently had it twisted just a shade and it got stuck when it was fully inserted. It wouldn't pop out and the horn wasn't working as there was no movement.
I took it by my Indy to see if they knew a trick, but it was the first time they needed to remove a newer airbag so I had to show them this thread and the pics and explain how it worked. After some fiddling they used a thin trim tool to press a wire (18ish gauge) in around the airbag and did two loops. Then while I operated the mechanism they were able to pull the module free. To boot they only charged me $37 (and that was after I insisted I owed them something) vs the $300 my dealer wanted just to look at it.
So the moral is, make sure you have it lined up correctly and if it does get stuck, don't panic.
Registered User
Joined: Dec 2012
Posts: 1,197
From: NoVA
Rep Power: 76
There is a second cable in the lower left quadrant that needs to be unplugged as well on the Multi-function wheel. Otherwise it's exactly as DrVolk describes and pictures.

Thread
Thread Starter
Forum
Replies
Last Post
STAGGERED M3
Automobiles For Sale
1
Sep 11, 2015 12:00 AM

