
INSTALL: Cayenne TTS + Methanol Injection = Persistent Race Fuel - Lots of Pics!


Thread Starter
|
Moderator

Joined: Jan 2011
Posts: 1,504
From: (in my garage welding something vicious)
Rep Power: 105


As the name of this thread implies, I have recently added methanol injection to my CTTS. My arm was twisted by member, Mayhem996TT (Jason) to take the jump with him and add methanol injection to the 4.8 DFI injection platform. Since Jason is also in the 700+ Cayenne Club, he is running similar power levels, so the assumption was that we should see similar gains.
DISCLAIMER
This thread is not intended for anyone to copy or imitate. I am not endorsing any products or companies. I am merely showing the steps I went through to get this working for me. If you think you want to do something similar, contact your local Porsche dealer and ask for recommendations and proceed at your own risk. I assume no responsibility for any work performed on your vehicle.
INTRODUCTION
For those who are unaware of the benefits of methanol, it is mainly two-fold: (1) it lowers air intake temps (2) raises octane rating of fuel
To expand on this, lower air intake temps are better since colder air is denser with more oxygen. This is why your car will feels "snappy" in 40 deg F temps vs 90 deg F temps. On a boosted application, your turbocharger/supercharger will be heating the incoming air as an unwanted consequence of the way they work. For instance, at my boost level of 16.8 PSI, the turbochargers are spinning at about 180,000 RPMS per turbo! That generates a lot of heat! Methanol (a NEAT alcohol) cools the air by absorbing heat as it evaporates. This is the same principle as when you pour isopropyl alcohol over your hand and it gets fairly cold.
Secondly, it raises the octane level of the fuel since it is an alcohol. Supposedly, the octane level should be comparable to 104 octane race fuel. That is over a 10 point octane bump, which means the car can run more timing (in some cases maxing it out) with less unwanted detonation (more controlled burn). More timing advance means a more responsive engine, better power band and faster exiting exhaust- which will spool up the turbochargers faster, which in turn means less lag. Sounds quick, huh?
Just imagine running race gas all the time, on the street, for a fraction of the cost. I ran the numbers and it came out to around an added $0.37 cents a gallon for approx 104 octane fuel with methanol, versus about $10 a gallon for Sunoco 104 race gas. That is over a 10 octane point jump for cents on a dollar and does not even take into account the lower air intake temp benefits.
For those on a more advanced level, we are deliberately not getting our ECU tune remapped to take full advantage of the higher timing. This was done to make sure that if we did not have access to methanol, like a long road trip, that we can empty the methanol tank and have the car's knock sensor "detect" the 91/93 octane fuel and SAFELY retard timing back towards stock levels. This also means that we did not need to setup any fail-safes since we are not on the bleeding edge of detonation. So in theory this is no different than driving to a track on 91/93 octane, filling up with 104 octane for your track day, then filling up on 91/93 octane for the ride back home. So more power, plus relatively safe.
Okay, you guys can sigh in relief, Science class is over for today ;-)
SPECIAL NOTE
Even though we believe in the product we used, and the results speak for themselves, we also found out that the manufacturer we choose had the worst support I have ever experienced. To give you an idea, imagine buying a highend product, like a McIntosh home stereo and having major issues with a sub-component on the first day. When you call to honor the "warranty", you are called incompetent and verbally insulted from the highend manufacturer. This isn't an exact parallel (although close), whereas Jason and I experienced two similar shades of the same behavior, multiple times - which is clearly unacceptable. As such, I cannot ethically recommend this company to anyone else.
In that vein, I have gone through the added work of pixelating out their vendor logo in all posted images. I do not want to unintentionally lead anyone down the path we took. If you can connect the dots of the manufacturer, then know you should stay as far as way as possible, in my opinion. If you want to know outright, shoot me a PM.
With that said, there are other methanol kit manufacturers you can go with. And the real value of this install/images is showing that a methanol kit can be added to this platform and there are worthy gains to be had.
CONTENTS
To make this big install easier to digest, I have broken it into five main categories/posts:
Last edited by Renaissance.Man; Nov 7, 2013 at 09:47 PM.
Thread Starter
|
Moderator
Joined: Jan 2011
Posts: 1,504
From: (in my garage welding something vicious)
Rep Power: 105
GAUGE - Replacement / Install
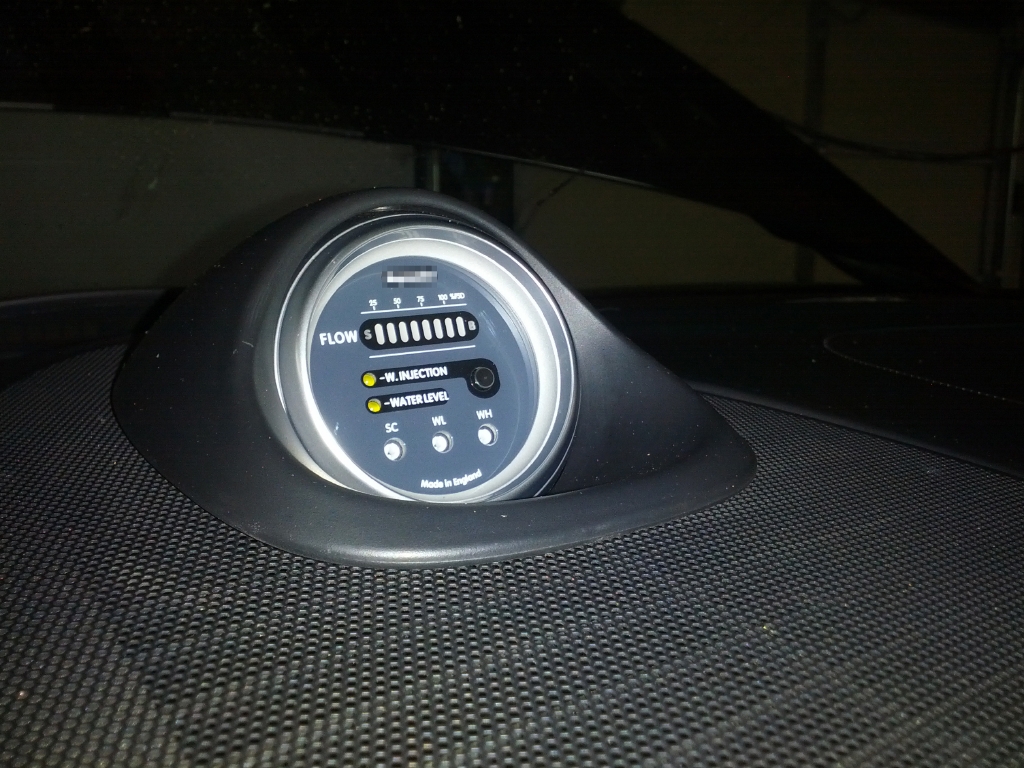
I am not a fan of the A-pillar gauge set or having multiple gauges on the dash. For some reason, they come off as non-OEM and trying too hard. So I dabbled with the idea of forgoing the methanol gauge all together, however, in the end I think it is very useful to see if you are currently spraying, about how much, fluid level, and the ability to turn the system on and off.
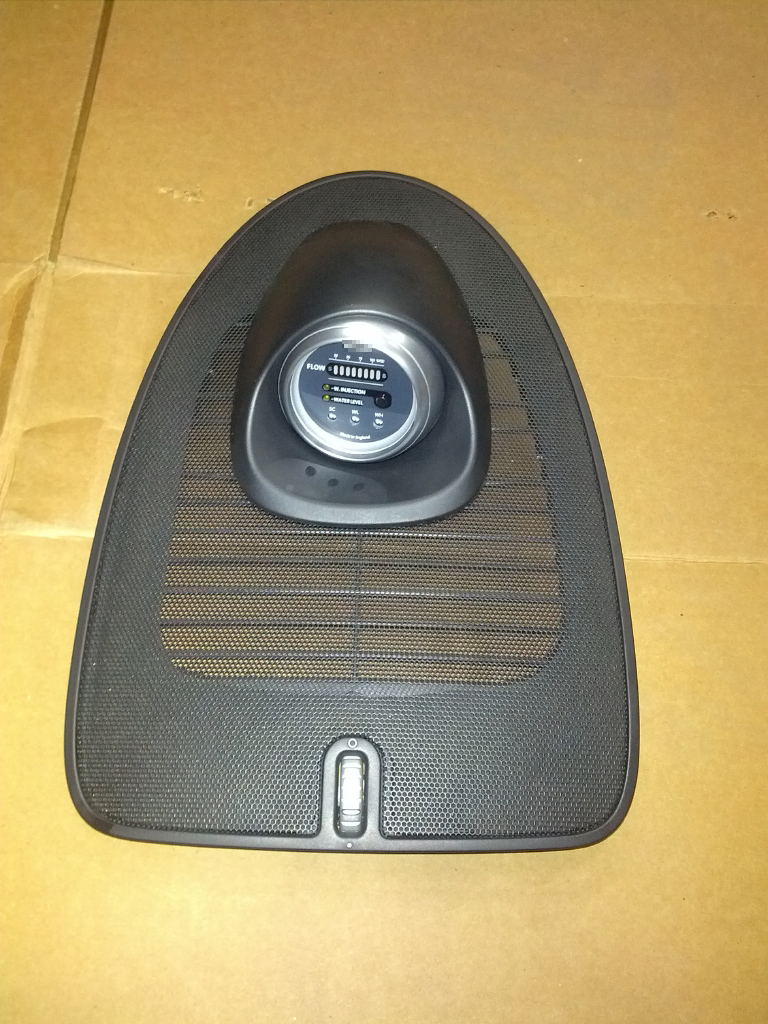
So begrudgingly, I had to decide on the best location to mount this inside the vehicle. After much deliberation, I decided that the top center dash speaker/vent cover was the prime location. Next, I had to decide on the housing. After spending hours online in vein looking for aftermarket gauge housings, I came to conclusion that they are all tacky and seem of cheap quality, IMO. In the research, I accidentally bumped into the 997 911 chronopod option. Since this was a tack on option, it was standalone and the build quality was up there. I did a little more digging and found out that some 997 owners were retrofitting these into their 911's. If they can put it in a 911 afterwards, how come I cannot put it in my 957 Cayenne? So I bought a used unit and decided to retrofit the 997 chronopod into my Cayenne...and then retrofit the methanol gauge into the chronopod. Can't be that hard, huh?
All I have to do is replace the inside gauge and set it in this panel at about this spot.....

Down to business - Gauge Replacement


Checkpoint reached.... all set here


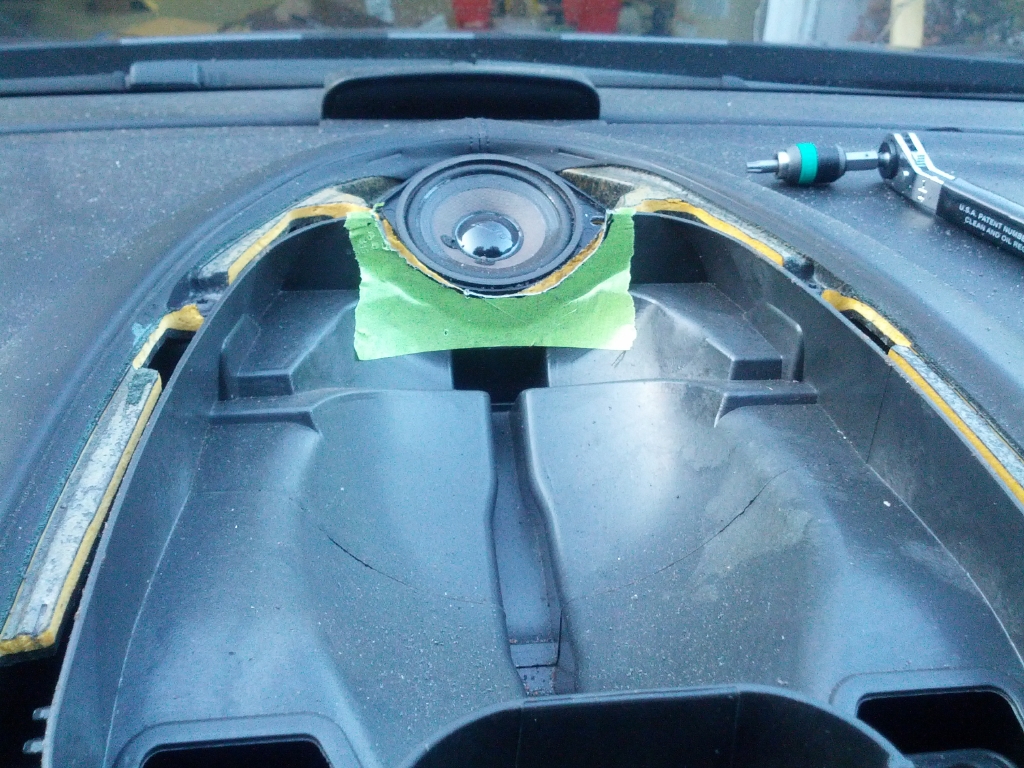
Now, I just have to get this pod installed into this panel... A little rough cutting

I finally have it sitting in its new home. I even used the factory pod spring clips


Since the bottom of the pod sticks out a little, a little trimming of the vent plastic is needed for relief
The gauge wire needs an exit to be able to get out of this area and under the dash, so I notched out a channel
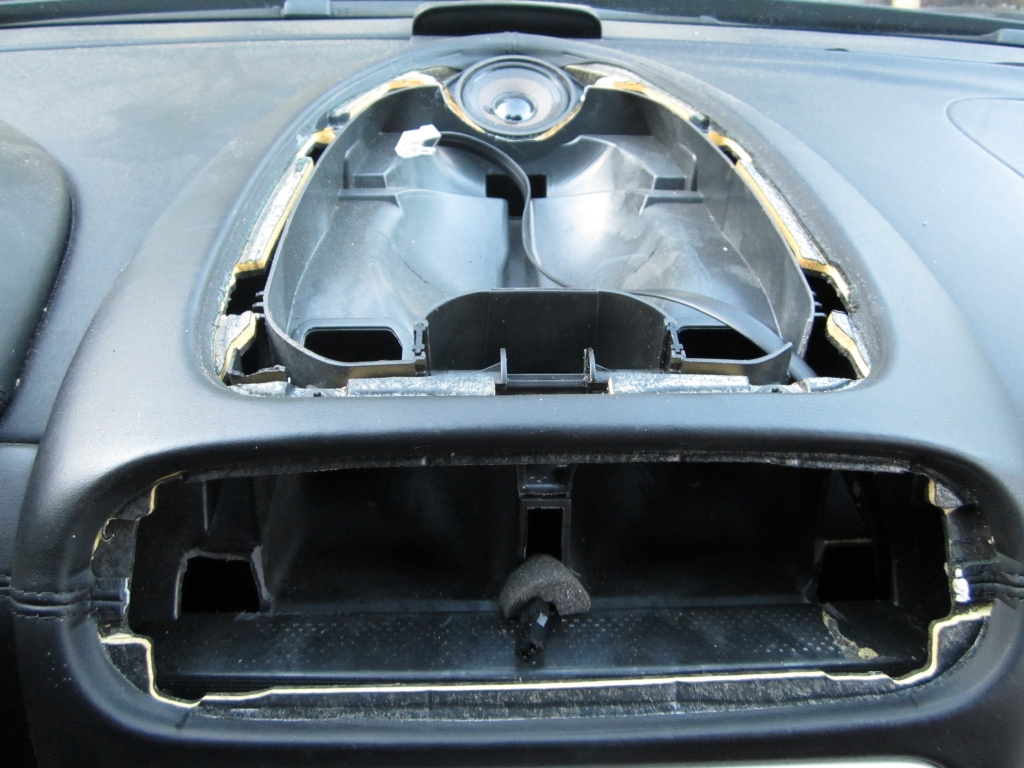

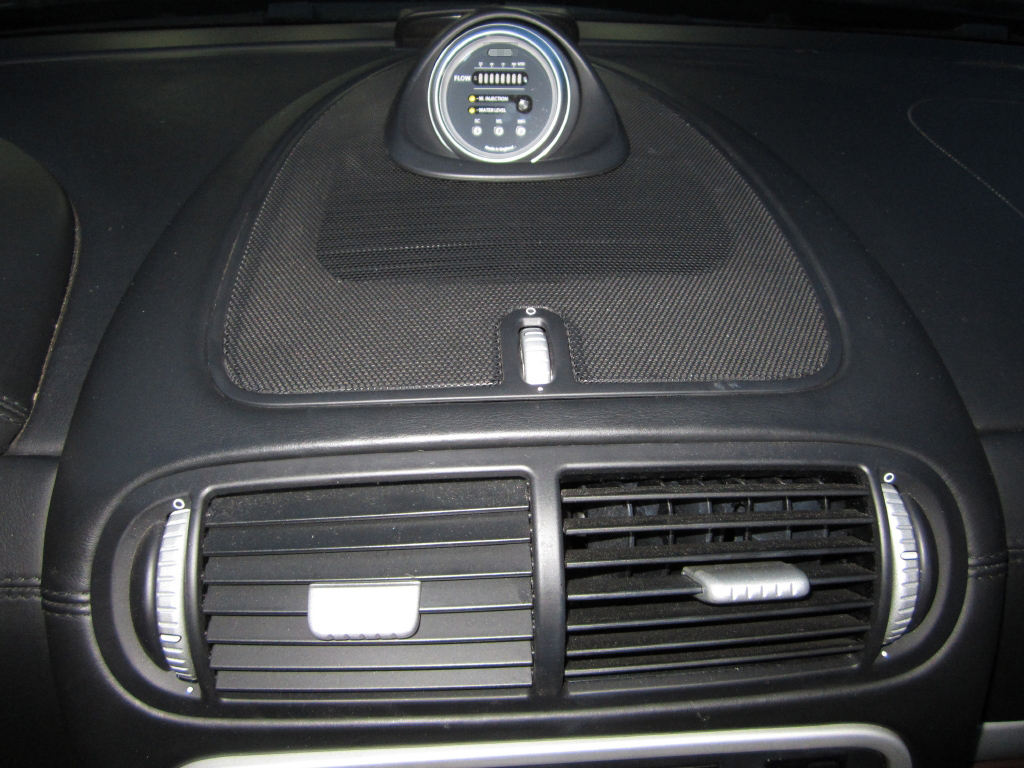
Checkpoint reached. Retrofit on retrofit complete. Looks OEM to me

I am not a fan of the A-pillar gauge set or having multiple gauges on the dash. For some reason, they come off as non-OEM and trying too hard. So I dabbled with the idea of forgoing the methanol gauge all together, however, in the end I think it is very useful to see if you are currently spraying, about how much, fluid level, and the ability to turn the system on and off.
So begrudgingly, I had to decide on the best location to mount this inside the vehicle. After much deliberation, I decided that the top center dash speaker/vent cover was the prime location. Next, I had to decide on the housing. After spending hours online in vein looking for aftermarket gauge housings, I came to conclusion that they are all tacky and seem of cheap quality, IMO. In the research, I accidentally bumped into the 997 911 chronopod option. Since this was a tack on option, it was standalone and the build quality was up there. I did a little more digging and found out that some 997 owners were retrofitting these into their 911's. If they can put it in a 911 afterwards, how come I cannot put it in my 957 Cayenne? So I bought a used unit and decided to retrofit the 997 chronopod into my Cayenne...and then retrofit the methanol gauge into the chronopod. Can't be that hard, huh?
All I have to do is replace the inside gauge and set it in this panel at about this spot.....
Down to business - Gauge Replacement
Checkpoint reached.... all set here
Now, I just have to get this pod installed into this panel... A little rough cutting
I finally have it sitting in its new home. I even used the factory pod spring clips
Since the bottom of the pod sticks out a little, a little trimming of the vent plastic is needed for relief
The gauge wire needs an exit to be able to get out of this area and under the dash, so I notched out a channel
Checkpoint reached. Retrofit on retrofit complete. Looks OEM to me
Last edited by Renaissance.Man; Nov 7, 2013 at 09:27 PM.
Thread Starter
|
Moderator
Joined: Jan 2011
Posts: 1,504
From: (in my garage welding something vicious)
Rep Power: 105
Tank - Methanol
For the tank reservoir, I couldn't simply put this in the trunk like the 911 guys - mainly for lack of said trunk. If I tried to put it in the equivalent, it would mean that I would have to put a tank in the cargo area in the passenger compartment. This did not go over well with me since I would be giving up needed space for a permanent fixture. Also putting a flammable liquid in the passenger compartment, is probably not the best decision- not too mention any splashes from trying to refill it.
For these two reasons, it was decided that the stock windshield washer tank would be repurposed and completely sealed. Meaning no more functioning windshield/glass fluid pumps (not that I think it was that useful). Since I had stock headlight cleaning system, I was bestowed with the larger 7.5L /1.98 Gallon tank. A 2 gallon tank is about perfectly 10% of the 21 gallon fuel tank. This is supposed to be the starting point for a methanol tank. So this should work out to less than 1 methanol fill up, per gas tank fill up.
So besides that, since I am running 100% methanol, I did not want those flammable fumes from the stock washer tank vent escaping under the passenger fender (in proximity to pass. turbocharger). So will have to seal it up with plastic epoxy.
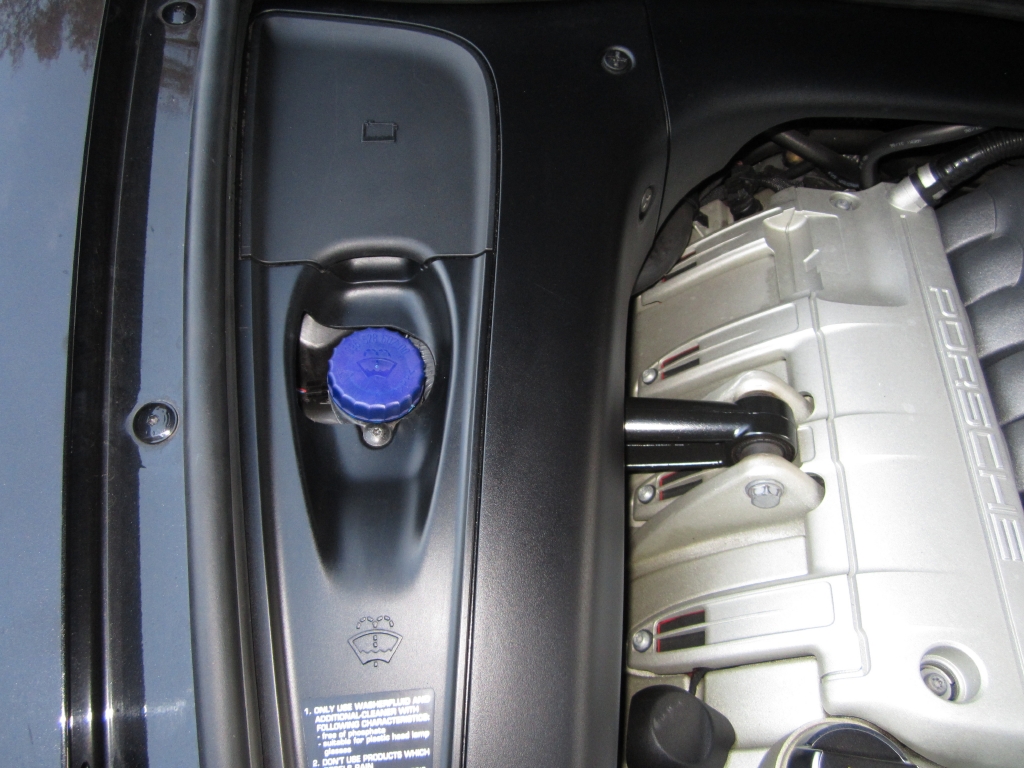
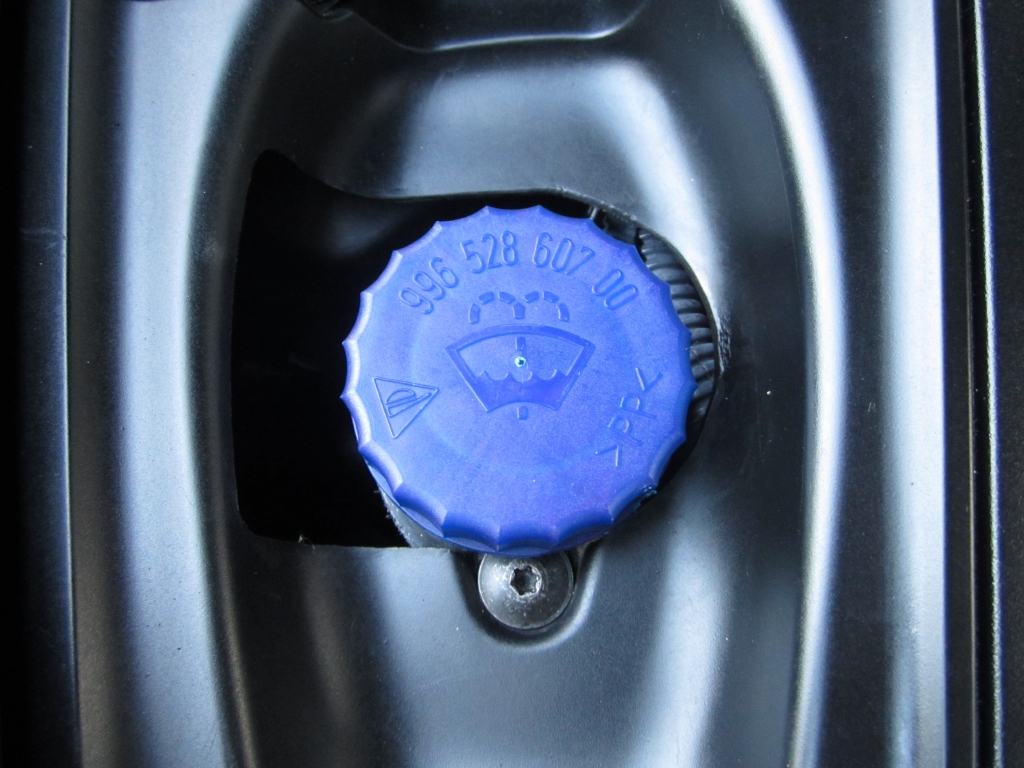
After the vent was sealed, I had to worry about the stock "pop" cap and would have to convert it to a screw cap to make sure everything would hold under pressure/expansion. For this, I found the Porsche Boxster window washer neck to have a screw on cap and would adapt it to my washer neck. How hard can it be?
So out came the stock tank and tank modifications began...
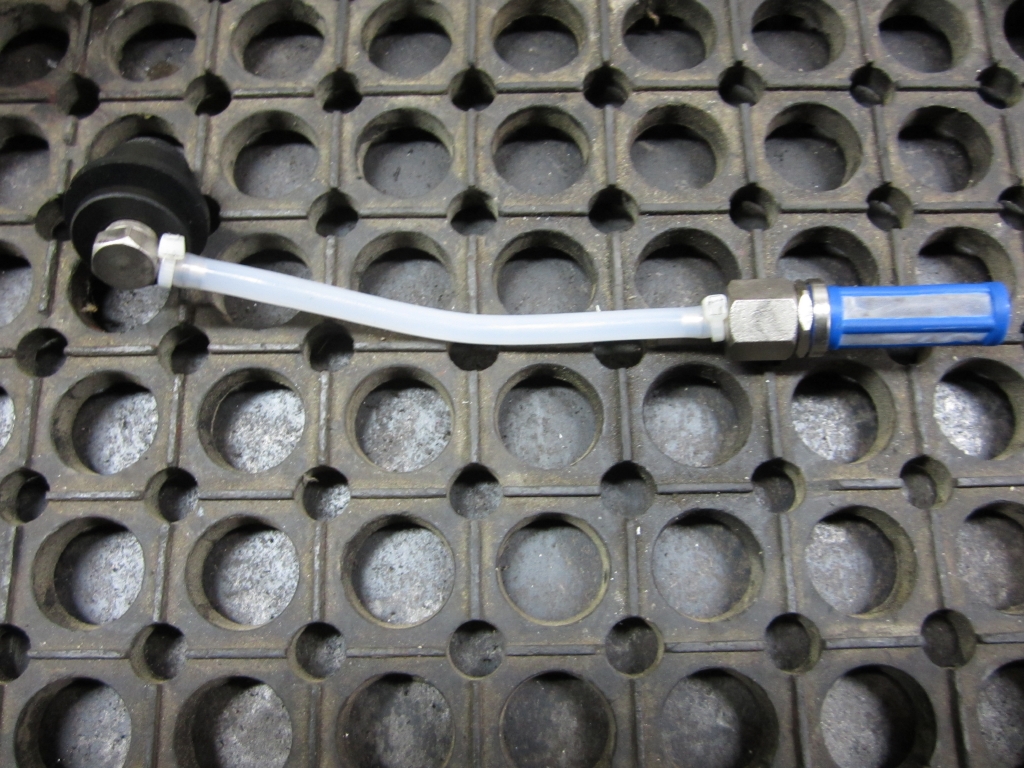
Methanol pickup adapter and filter
Stock sensors removed and two more holes added for pickup and kit level sensor

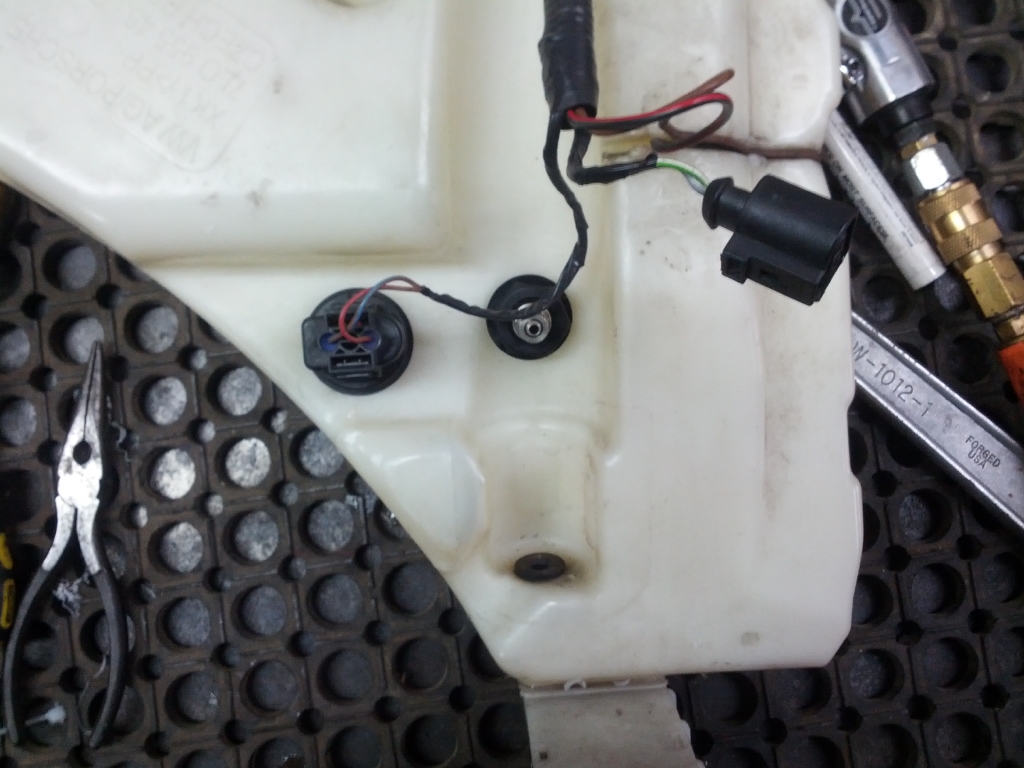
All sensors installed back (except front stock pump)
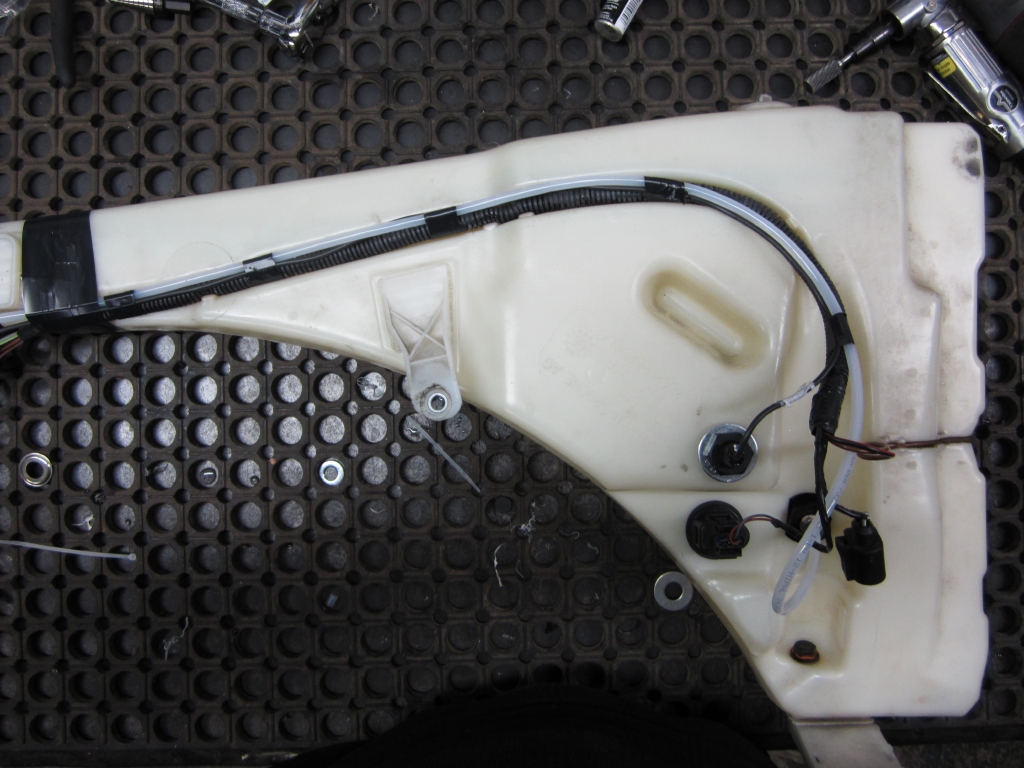
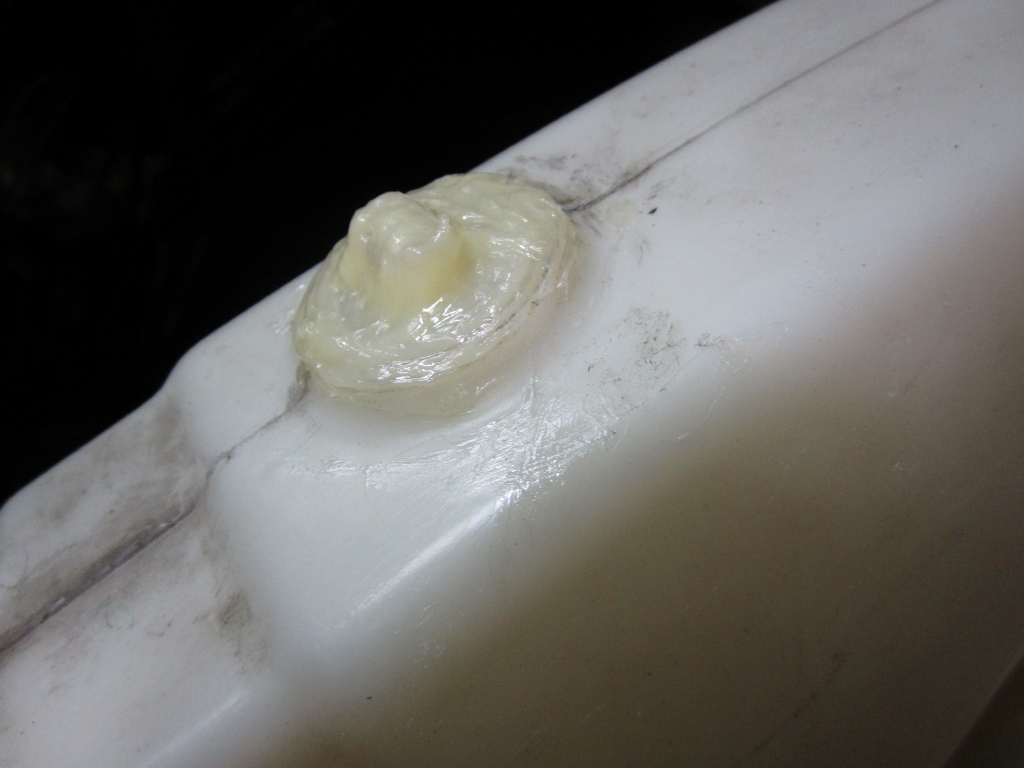
Tank vent sealed with plastic epoxy
Boxster neck next to stock washer tank neck. This is going to have to be perfect to work.....

..so I will just build a MDF jig
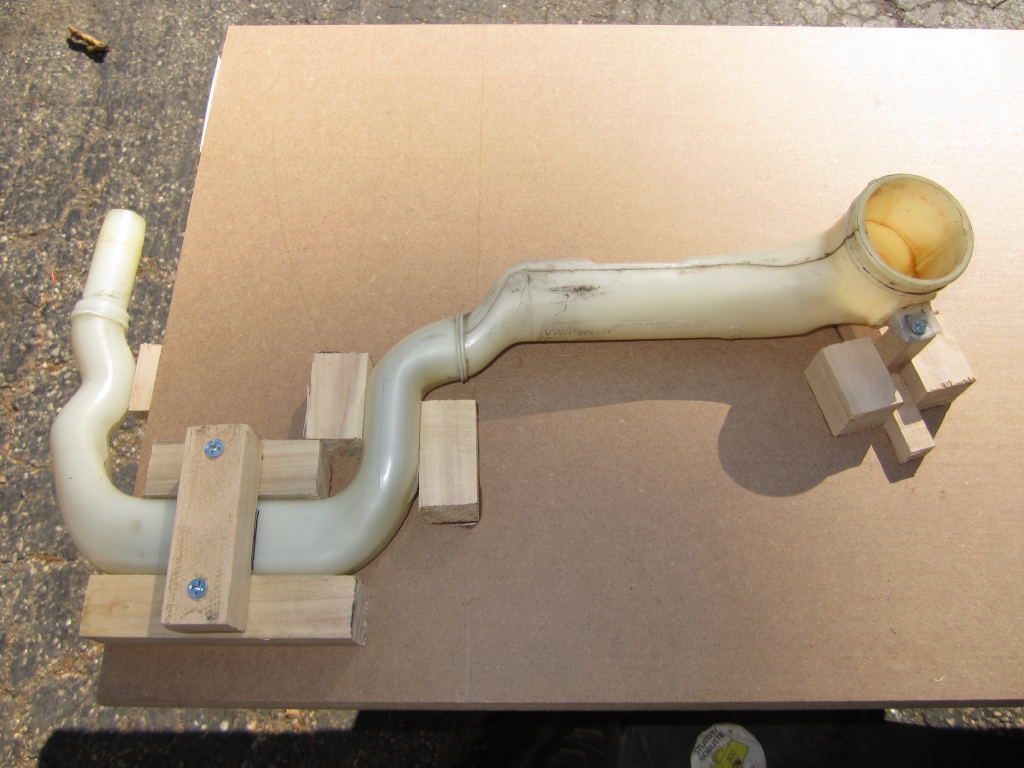
After making a cut and a little heat, I was able to get a slip fit. Then more plastic epoxy to seal the two together permanently....

All installed.... PERFECT!!

For the tank reservoir, I couldn't simply put this in the trunk like the 911 guys - mainly for lack of said trunk. If I tried to put it in the equivalent, it would mean that I would have to put a tank in the cargo area in the passenger compartment. This did not go over well with me since I would be giving up needed space for a permanent fixture. Also putting a flammable liquid in the passenger compartment, is probably not the best decision- not too mention any splashes from trying to refill it.
For these two reasons, it was decided that the stock windshield washer tank would be repurposed and completely sealed. Meaning no more functioning windshield/glass fluid pumps (not that I think it was that useful). Since I had stock headlight cleaning system, I was bestowed with the larger 7.5L /1.98 Gallon tank. A 2 gallon tank is about perfectly 10% of the 21 gallon fuel tank. This is supposed to be the starting point for a methanol tank. So this should work out to less than 1 methanol fill up, per gas tank fill up.
So besides that, since I am running 100% methanol, I did not want those flammable fumes from the stock washer tank vent escaping under the passenger fender (in proximity to pass. turbocharger). So will have to seal it up with plastic epoxy.
After the vent was sealed, I had to worry about the stock "pop" cap and would have to convert it to a screw cap to make sure everything would hold under pressure/expansion. For this, I found the Porsche Boxster window washer neck to have a screw on cap and would adapt it to my washer neck. How hard can it be?
So out came the stock tank and tank modifications began...
Methanol pickup adapter and filter
Stock sensors removed and two more holes added for pickup and kit level sensor
All sensors installed back (except front stock pump)
Tank vent sealed with plastic epoxy
Boxster neck next to stock washer tank neck. This is going to have to be perfect to work.....
..so I will just build a MDF jig
After making a cut and a little heat, I was able to get a slip fit. Then more plastic epoxy to seal the two together permanently....
All installed.... PERFECT!!
Last edited by Renaissance.Man; Nov 7, 2013 at 06:51 PM.
Thread Starter
|
Moderator
Joined: Jan 2011
Posts: 1,504
From: (in my garage welding something vicious)
Rep Power: 105
Plumbing
Initially, we were going to do add the methanol directly into the combustion chamber. However, after talking to a few credible sources and doing more research, we were sure that this was not a good idea. The main reason is that since methanol is a fuel source, the ECU fuel tables would have to be trimmed to compensate for added methanol fuel. However, once you do this you will be fully dependent on the methanol and running the system dry will not be an option. Also, since you are putting the methanol directly in the combustion chamber, it will not have an opportunity to cool down the intake air temps (post sensor). As a result, the best location was determined be at the intercooler. As such, twin methanol jets will be installed, one in each intercooler - drilled and tapped.
For the methanol pump, it will be hidden under the bumper on top of a thin plastic shelf. Since the plastic will not bear much weight, a custom bracket will be made to attach to the radiator carrier. Then each line will be ran through the headlight housing and down into the intercooler neck.
Not for the faint of heart!!
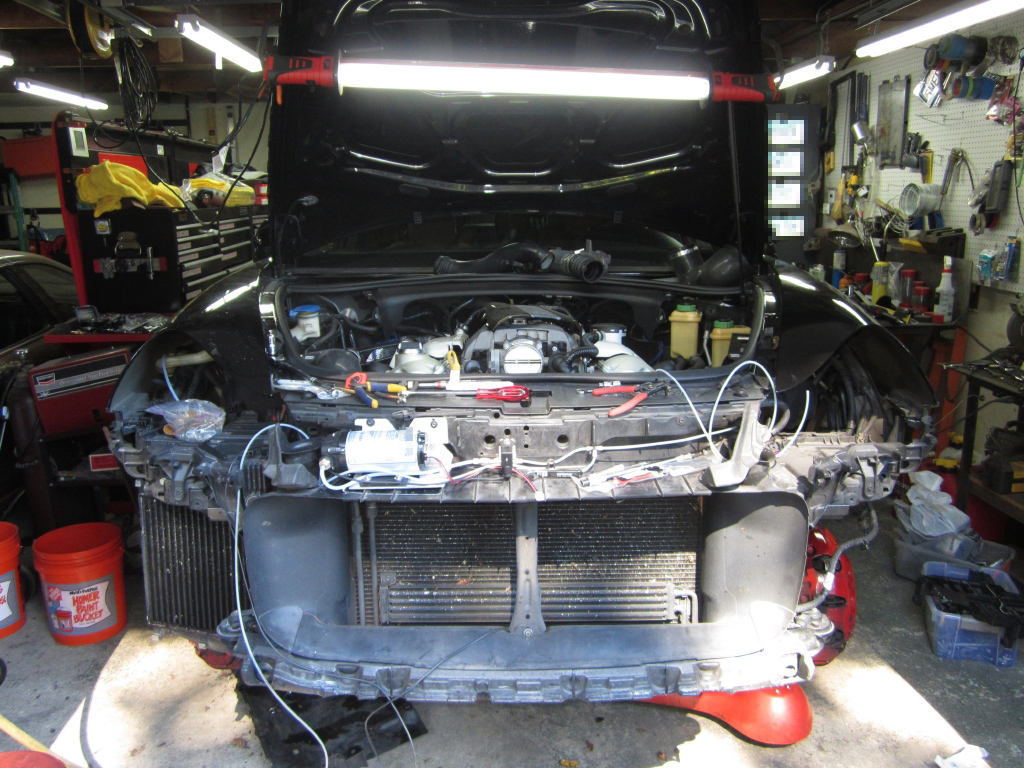
This is the stock shelf that will used for mounting

Bracket made..pump mounted...methanol lines ran....

Yeah.. that is close!

Check valve
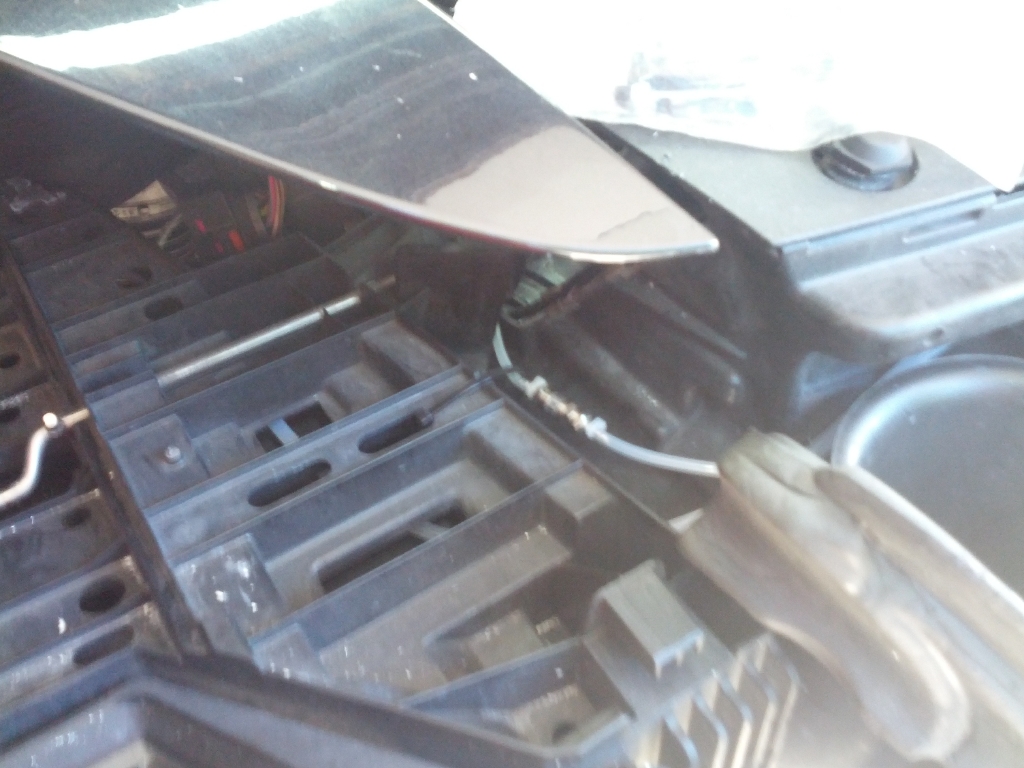
Pickup line from tank under headlight housing to pump

Intercooler(s) after getting drilled and tapped. Jet adapter installed.


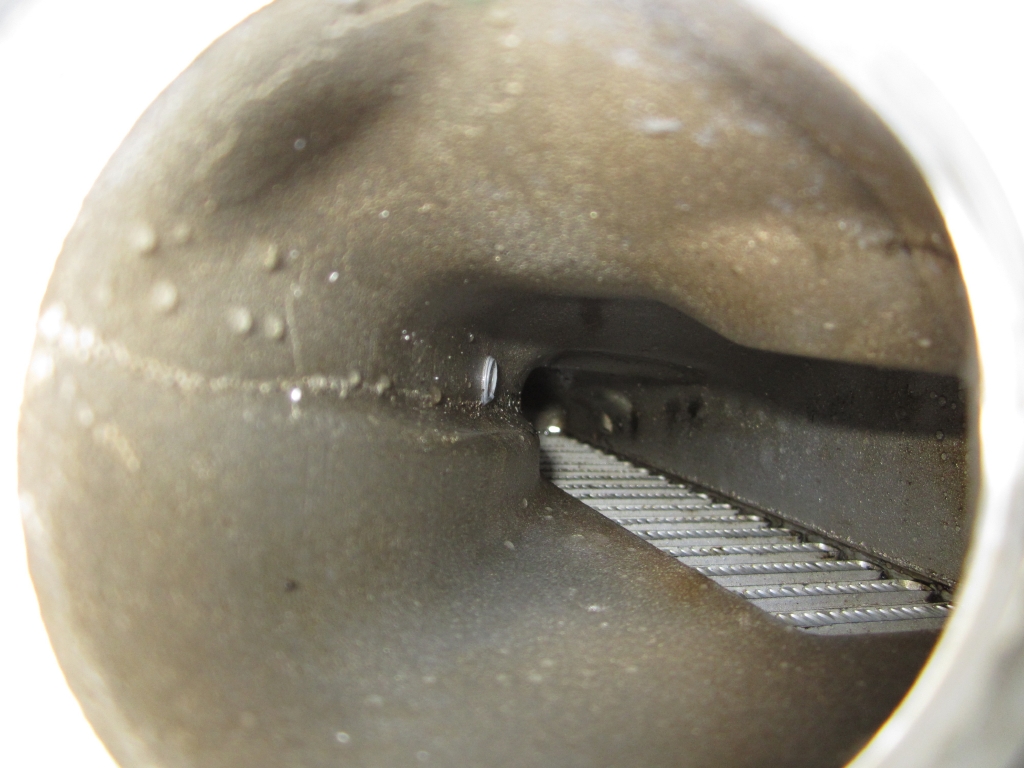
Just don't overtighten the jets or you will have this issue...

A look from the bottom passenger side - easily accessible

Look at fine spray mist and conical pattern!! Testing spray.

Initially, we were going to do add the methanol directly into the combustion chamber. However, after talking to a few credible sources and doing more research, we were sure that this was not a good idea. The main reason is that since methanol is a fuel source, the ECU fuel tables would have to be trimmed to compensate for added methanol fuel. However, once you do this you will be fully dependent on the methanol and running the system dry will not be an option. Also, since you are putting the methanol directly in the combustion chamber, it will not have an opportunity to cool down the intake air temps (post sensor). As a result, the best location was determined be at the intercooler. As such, twin methanol jets will be installed, one in each intercooler - drilled and tapped.
For the methanol pump, it will be hidden under the bumper on top of a thin plastic shelf. Since the plastic will not bear much weight, a custom bracket will be made to attach to the radiator carrier. Then each line will be ran through the headlight housing and down into the intercooler neck.
Not for the faint of heart!!
This is the stock shelf that will used for mounting
Bracket made..pump mounted...methanol lines ran....
Yeah.. that is close!
Check valve
Pickup line from tank under headlight housing to pump
Intercooler(s) after getting drilled and tapped. Jet adapter installed.
Just don't overtighten the jets or you will have this issue...
A look from the bottom passenger side - easily accessible
Look at fine spray mist and conical pattern!! Testing spray.
Last edited by Renaissance.Man; Nov 7, 2013 at 09:33 PM.
Thread Starter
|
Moderator
Joined: Jan 2011
Posts: 1,504
From: (in my garage welding something vicious)
Rep Power: 105
Wiring
The wiring is not too bad. Probably the most straight forward part of this process. However, due to cord restrictions, the best location for the controller box was in the panel behind the engine bay with the DME (ECU). I would just add another project box around the connectors, point the terminals down, and call it a day.
Also, finding a 12v ignition wire was harder than expected. We ended up tapping the fuse box on the right passenger side. The 10A fuse was labeled for the rear differential lock. So we added a "tap-a-fuse" splitter made for this purpose.
All ECU wiring was soldered to make it does not shake loose.
Fuse tap - Ignition 12v

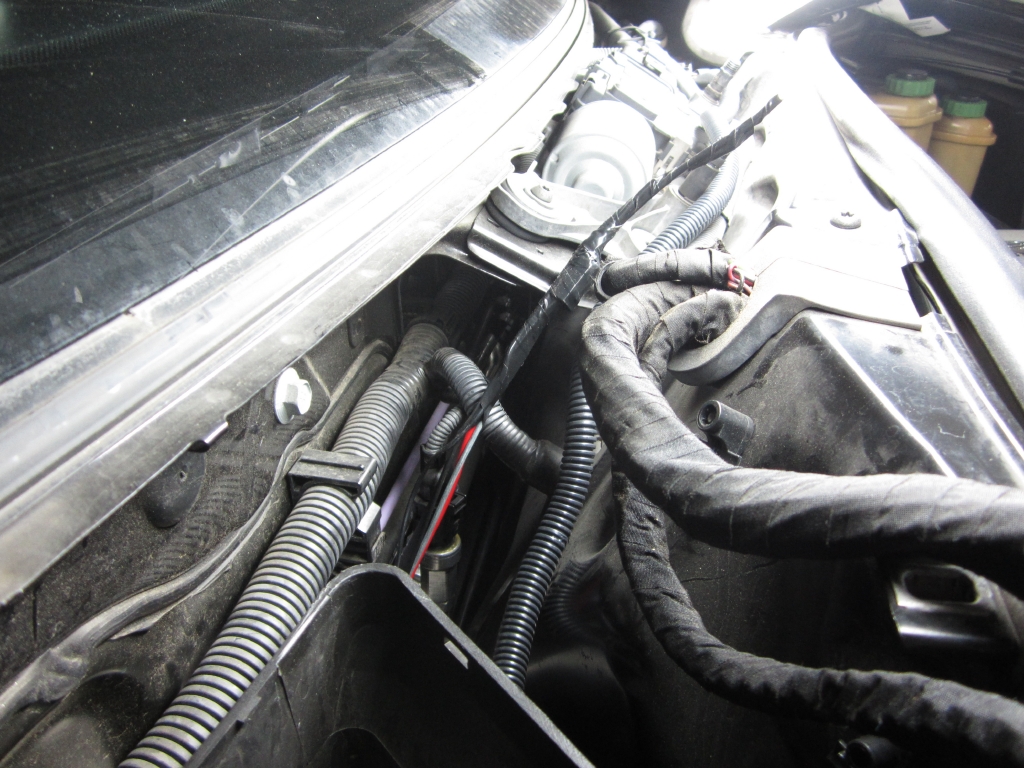
I was able to slip these wires between the freon AC lines and past the firewall into the engine bay

A piece of stiff wire leading the way for the wires into the engine bay

Rubber grommets installed

Relay added here and 12v constant added from the jumper terminal bank


Jumper terminal ground nut was tapped and wires installed in a loom to front pump


Controller box and added protective box - another grommet installed


All tucked in with velcro in its new home next to the cabin air intake

The wiring is not too bad. Probably the most straight forward part of this process. However, due to cord restrictions, the best location for the controller box was in the panel behind the engine bay with the DME (ECU). I would just add another project box around the connectors, point the terminals down, and call it a day.
Also, finding a 12v ignition wire was harder than expected. We ended up tapping the fuse box on the right passenger side. The 10A fuse was labeled for the rear differential lock. So we added a "tap-a-fuse" splitter made for this purpose.
All ECU wiring was soldered to make it does not shake loose.
Fuse tap - Ignition 12v
I was able to slip these wires between the freon AC lines and past the firewall into the engine bay
A piece of stiff wire leading the way for the wires into the engine bay
Rubber grommets installed
Relay added here and 12v constant added from the jumper terminal bank
Jumper terminal ground nut was tapped and wires installed in a loom to front pump
Controller box and added protective box - another grommet installed
All tucked in with velcro in its new home next to the cabin air intake
Last edited by Renaissance.Man; Nov 7, 2013 at 07:30 PM.
Thread Starter
|
Moderator
Joined: Jan 2011
Posts: 1,504
From: (in my garage welding something vicious)
Rep Power: 105
Conclusion
I am very very very pleased and have a huge grin when on WOT. Other than simple responses like "It's faster" , "It accelerates much better" or "punchier", I find it difficult to the right words to express the difference you see and experience.
For anyone who has ever used race gas (100 + octane), how would you describe the car responsiveness to someone else standing on the side?
I suppose I can turn to a few metrics and empirical evidence for a little corroboration.
Last week on my way home from work, ambient temps were about 45 degrees. When driving about 25-30 mph, the IAT were at 69 deg F according to my OBD2 data logging. When going WOT, the engine RPMS rise rapidly and the turbos spool up and create boost. Due to these things happening in parallel, you would expect your IAT to rise to at least 80 -90 deg F. With the methanol spraying, IAT did not rise AT ALL mitigating any increase in incoming air temperatures. As a matter of fact, they DROPPED to 47 deg F. That is over a 20 deg F dropped in incoming air temps which means denser air and more power.
For empirical evidence, when powerbraking up to about 3,000 RPMS with PSM off for a better launch, I used to experience the truck pulling timing right before I released the brake. The results was a slow rolling start. Now, consistently when I power brake, I get all four tiring spinning from a standstill. That is with one of the tallest gearing sets for a Cayenne, 3.23 gearing. It is a little surreal to feel the front tires searching for grip and the back tires letting loose with the 38 front:62 rear torque split. Out of curiosity, I did this after a little rain shower and the truck slid sideways, in place, about 8 degrees before I lost my nerve and lifted.
I also found myself "accidentally" having the truck trying to rotate the rear end when powering out of a few corners on my daily drive into work. Yes, that is right. A 3-ton vehicle, with approx 12" wide tires on all four, experiencing power -induced oversteer out of a corner. This happen twice within two days on a familiar course. This has to be the methanol...WOW.
This is what the gauge looks like when it is not spraying..
Last edited by Renaissance.Man; Nov 8, 2013 at 08:38 AM.
Registered User
Joined: Mar 2010
Posts: 505
From: SoCo.....in austin texas
Rep Power: 38
Trending Topics

Registered User
Joined: Feb 2009
Posts: 975
From: Southern Cali
Rep Power: 135
Kent, You have out done yourself once again man! Very helpful and informative thread for anyone wanting to go down the same path. Wish I had this write before my install. I couldn't agree more about going with a different manufacturer though. I know it was a long ordeal to get to this point but is it your favorite mod yet??
We might have to change the name to 800+hp Cayenne club
We might have to change the name to 800+hp Cayenne club

Registered User
Joined: Sep 2011
Posts: 1,266
From: Colorado
Rep Power: 94
Kent, badass! Glad to see you guys are not afraid of these mods and continue to push the envelope! Diggin that gauge install too...looks familiar! lol Get some dyno numbers when all done.
Thread Starter
|
Moderator
Joined: Jan 2011
Posts: 1,504
From: (in my garage welding something vicious)
Rep Power: 105
Kent, You have out done yourself once again man! Very helpful and informative thread for anyone wanting to go down the same path. Wish I had this write before my install. I couldn't agree more about going with a different manufacturer though. I know it was a long ordeal to get to this point but is it your favorite mod yet??
Thread Starter
|
Moderator
Joined: Jan 2011
Posts: 1,504
From: (in my garage welding something vicious)
Rep Power: 105
Dyno session coming soon, upgrading to a full 3" exhaust in the next week or so
