
Spark Plug Installation - Basic DIY Guide

Spark Plug Installation - Basic DIY Guide
Changing the Spark Plugs in the Porsche 996TT
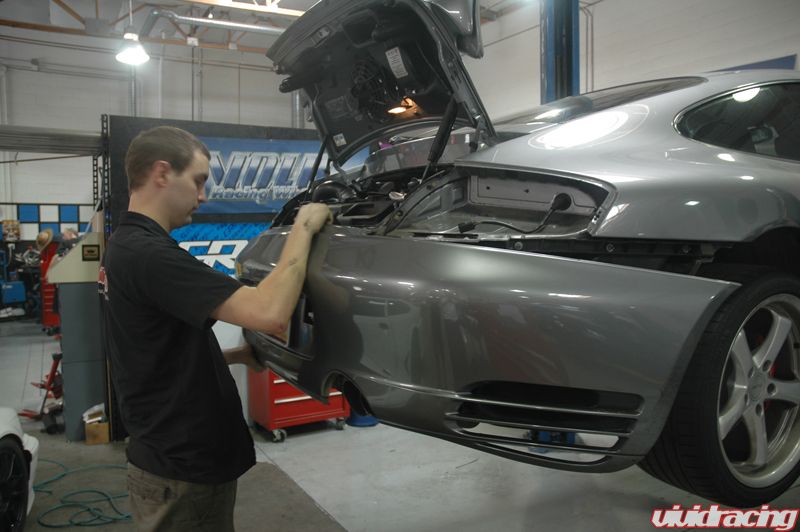
Remove Rear Bumper
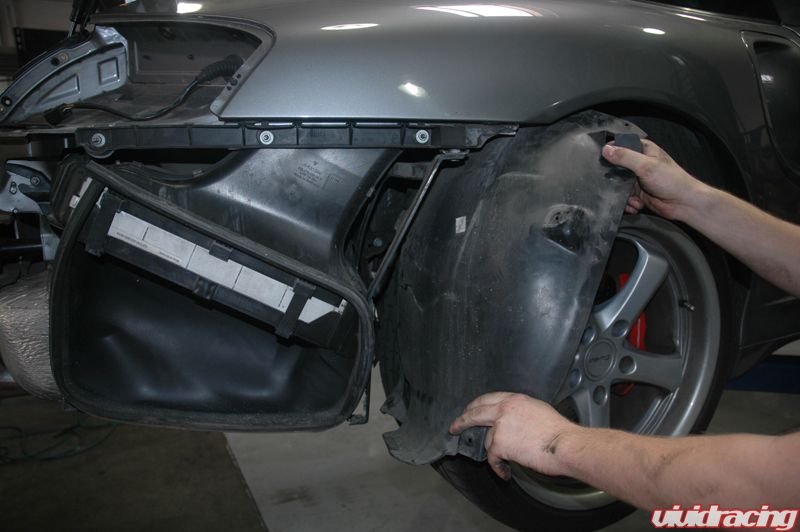
Remove Inner Wheel Well Guard
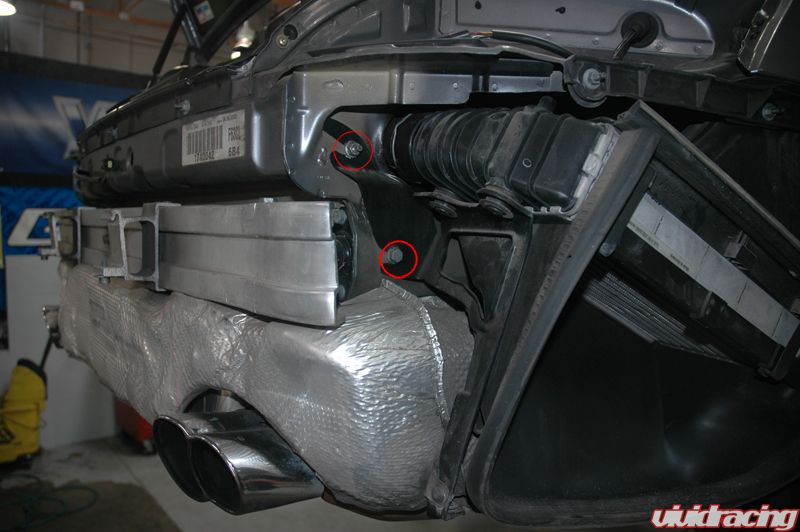
Remove Intercooler Bracket Bolts
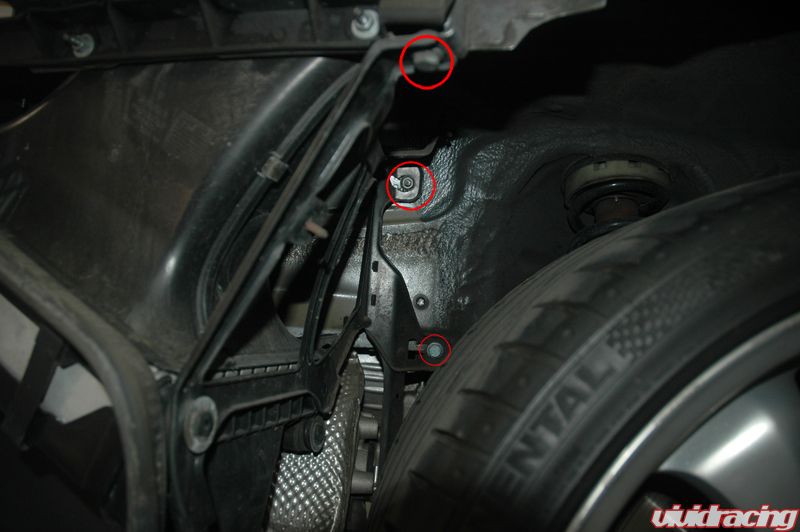

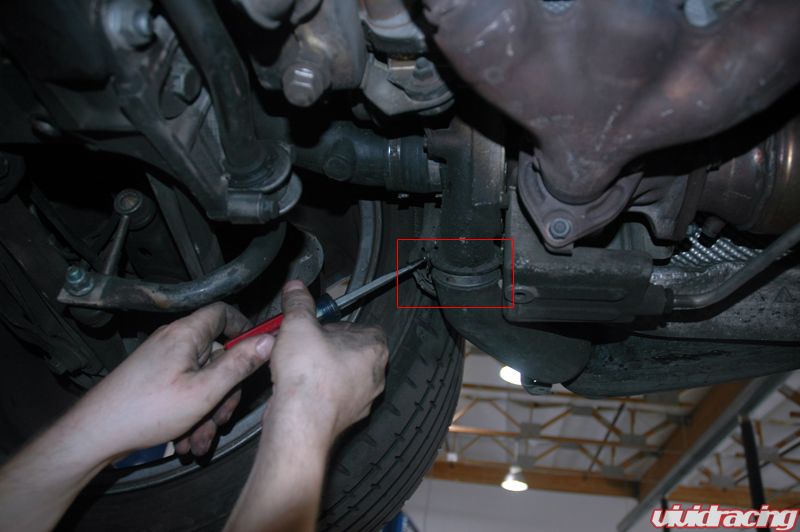
Remove Intercooler Upper and Lower Hose Clamps

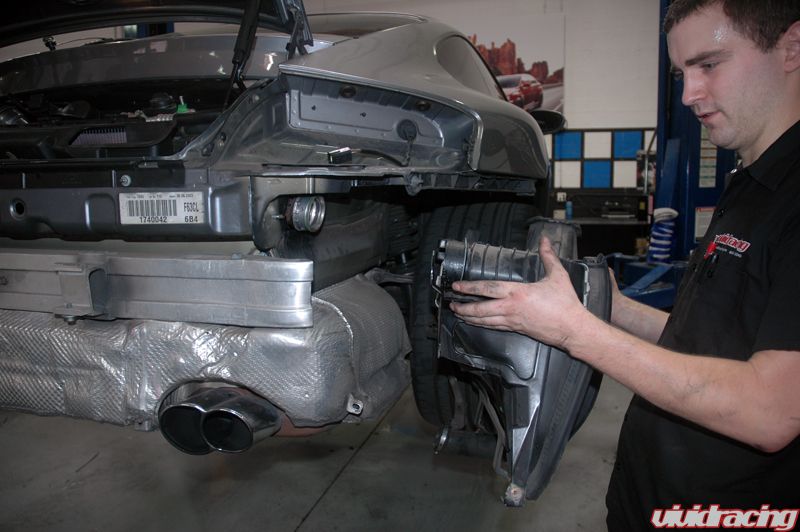
Remove Intercooler
Bend Heatshield out of the way

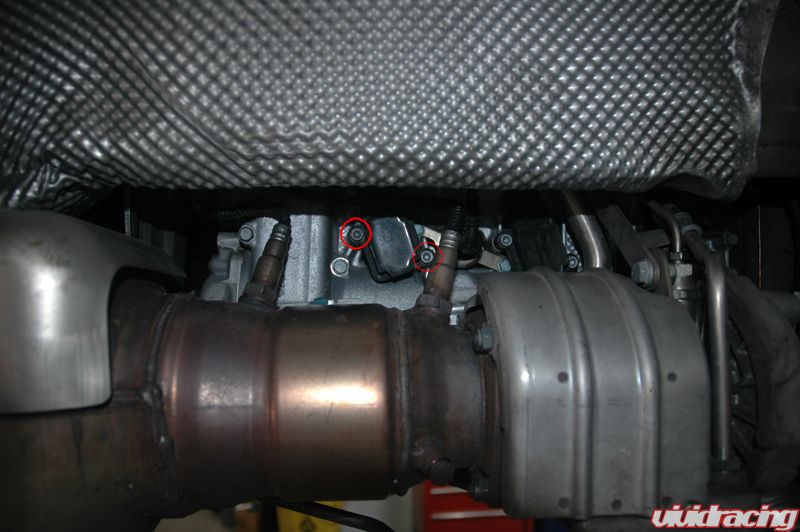
Remove Coilpack Bolts
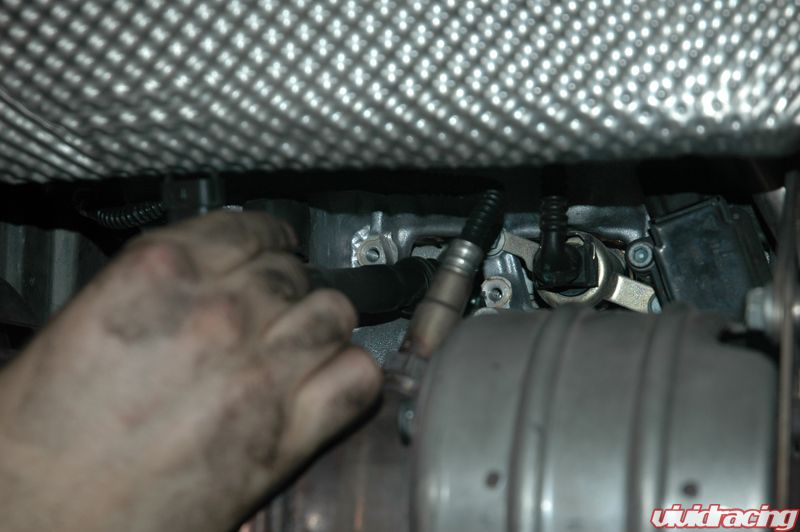
Remove Coilpack
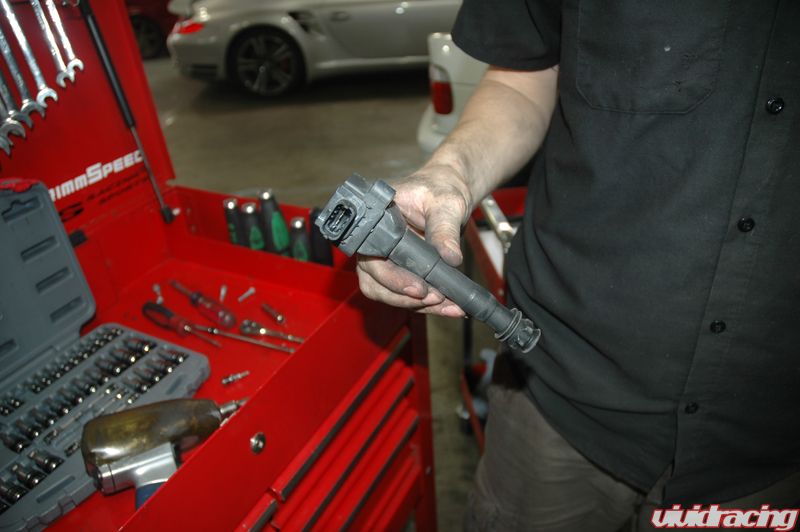
Remove Spark Plug

Change Spark Plugs and reverse the uninstall for re-assembly
Registered User

Joined: Apr 2010
Posts: 2,164
From: Victoria, BC
Rep Power: 217


Things look way too tight with the inter-coolers and heat shields in place, I would love to see a good writeup on how to pull that off...
Registered User
Joined: Apr 2009
Posts: 611
From: Portland OR
Rep Power: 52
Thats great, thaks Dan! And that reminds me, I need to check the sway bar discussion thread and see if you/others have any new development to that story!
Trending Topics
Registered User
Joined: Jul 2003
Posts: 490
Rep Power: 64
Slider ,yes...post your quicker way!

Registered User
Joined: Aug 2009
Posts: 80
From: Wayne/Passaic, NJ
Rep Power: 20
The 2 coil pack heat shield 10mm cover bolts are visible and so are all the 5mm coil pack bolts on both sides. If bolts are visible, they're removable in most cases. Just have to be good with hand tools. Swivels will be needed!! The toughest coil pack bolts to get to and reinstall is the middle coil on the passengers side. To remove spark plugs will require a different length extension at almost every plug. You must make due with what space you have at each cylinder. You MUST take advantage of every mm of space. The entire job is a SOLID 2 hours on intense labor. I have done it in 1.5 before. If you're not an "extremely" skilled tech, pull the bumper off. It will be faster for you in that case. It will take LONGER to do it without removing bumper if you're not an animal. 

No prob guys. Is this is the best way to do it without damaging anything, including your hands. I am sure there are other ways, but we happened to have a car that we did recently so took the step pics.
Sway bar thread? Link.
Dont have one for a non turbo, but I am sure someone does here on the board. Have you checked Renntech.org?
Sway bar thread? Link.
Dont have one for a non turbo, but I am sure someone does here on the board. Have you checked Renntech.org?