
Help me pinpoint my spoiler failure

Thread Starter
|
Registered User
Joined: Sep 2012
Posts: 281
From: New York
Rep Power: 31


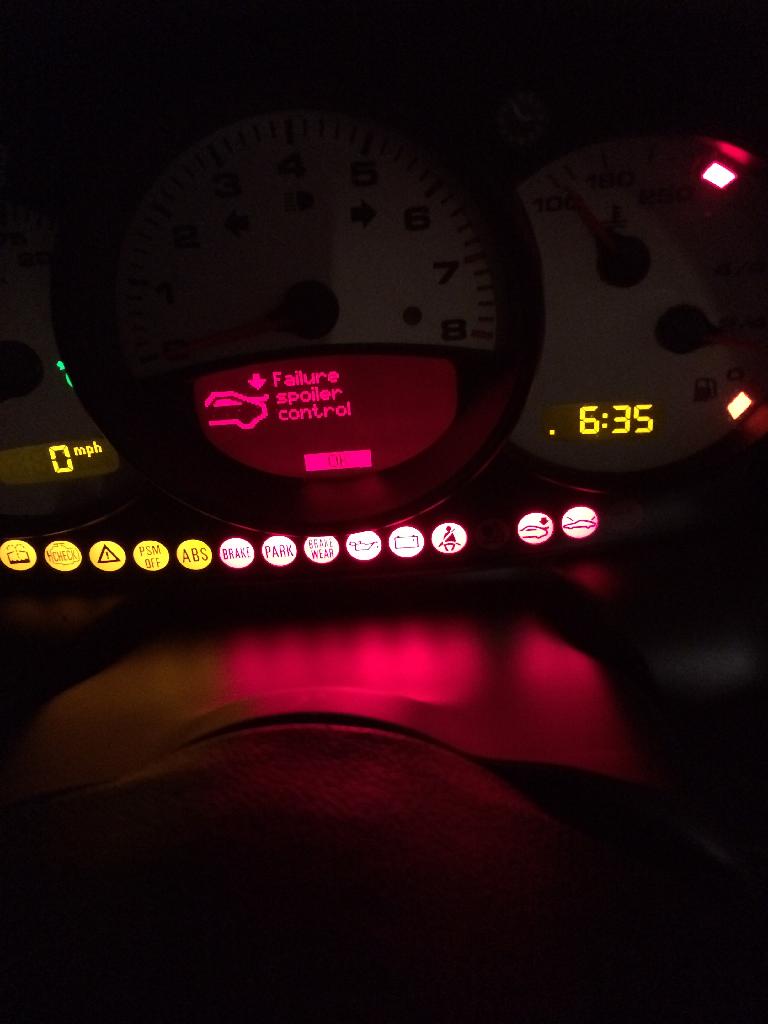
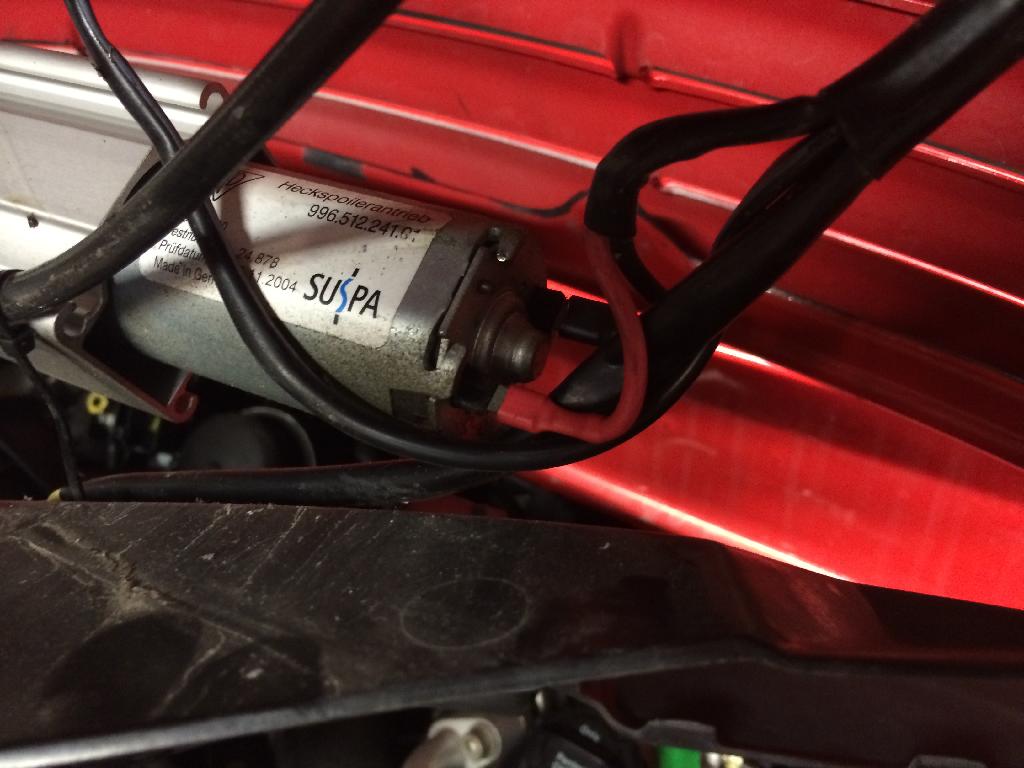
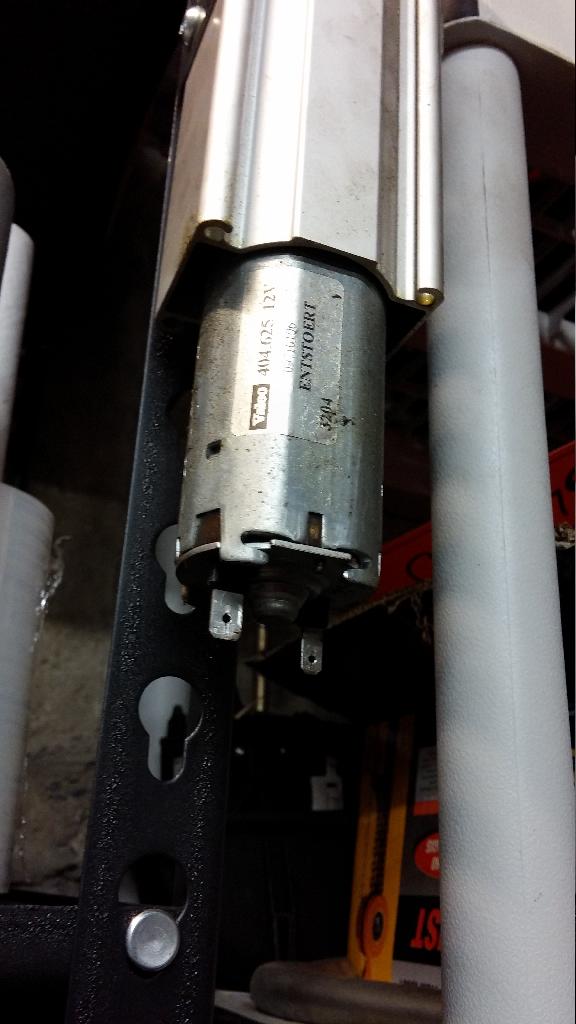
So I bought the car knowing it had a leaky and non working wing, since the weather is too crappy to joy ride I decided to tackle the spoiler issue now. From what I can see the passenger side banjo bolt is wet along with the banjo bolts on the motor. I was able to apply 12 volts using my power probe to both the positive and negetive terminals on the motor and can confirm it works both ways. Do you guys think the system just needs fluid? And if so how can I remove the pistons manually since the system is stuck in the down position?
Will this stuff work? It's power steering fluid that I have left over from my Audi
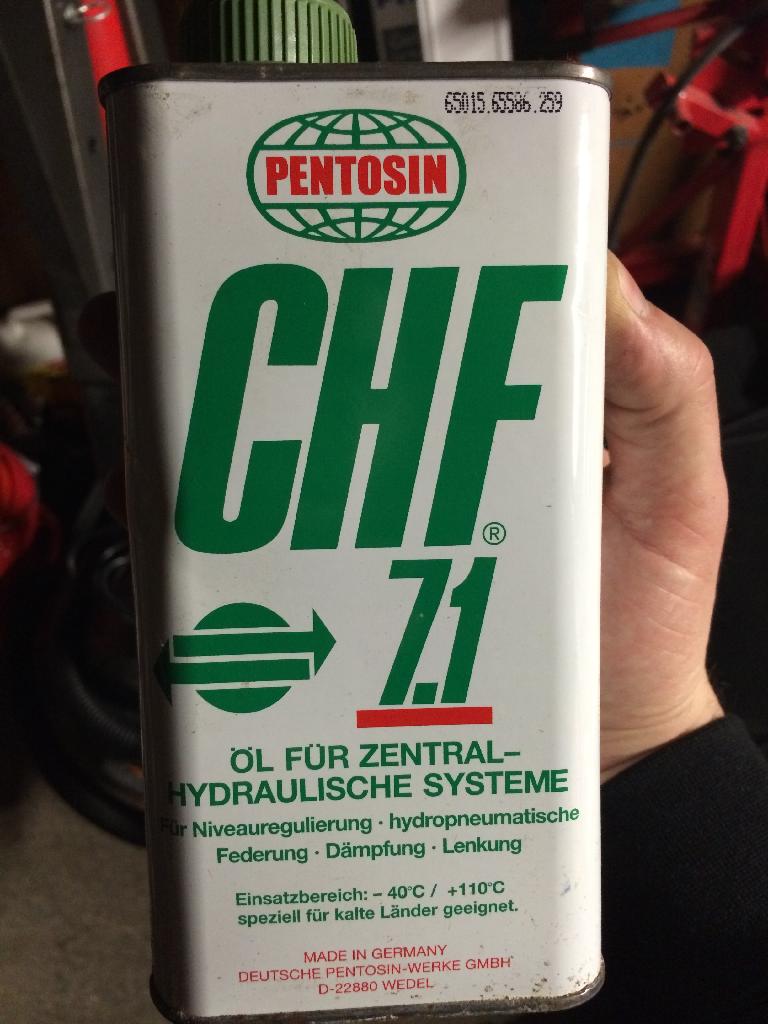
Will this stuff work? It's power steering fluid that I have left over from my Audi

Registered User

Joined: May 2010
Posts: 444
From: SC
Rep Power: 58
Tons of threads on this one, you probably didn't need to start a new one ") .
.
That being said, I suspect your micro switches need manipulating or replaced (do a search), I would also replace all the leaking joints with new washers and bleed the entire system. If you still have issues, consider a fixed wing which is what I am doing. And yes that pentosin will work. Good luck, pita I know.
.That being said, I suspect your micro switches need manipulating or replaced (do a search), I would also replace all the leaking joints with new washers and bleed the entire system. If you still have issues, consider a fixed wing which is what I am doing. And yes that pentosin will work. Good luck, pita I know.
Registered User

Joined: Feb 2011
Posts: 1,075
From: Lewisville, NC
Rep Power: 110
Your issue is old o-rings. The dry out and start leaking. They are pretty easy to replace in the pump, but the ones in the ram can't be replace without destroying the ram itself. I will hopefully get some time to find the right size brass tubing in the future, so these can be rebuilt by the owner.
This post will give you a lot of information.
https://www.6speedonline.com/forums/...-assembly.html
Later, Steve
This post will give you a lot of information.
https://www.6speedonline.com/forums/...-assembly.html
Later, Steve
Thread Starter
|
Registered User
Joined: Sep 2012
Posts: 281
From: New York
Rep Power: 31
Your issue is old o-rings. The dry out and start leaking. They are pretty easy to replace in the pump, but the ones in the ram can't be replace without destroying the ram itself. I will hopefully get some time to find the right size brass tubing in the future, so these can be rebuilt by the owner.
This post will give you a lot of information.
https://www.6speedonline.com/forums/...-assembly.html
Later, Steve
This post will give you a lot of information.
https://www.6speedonline.com/forums/...-assembly.html
Later, Steve
Registered User
Joined: May 2010
Posts: 444
From: SC
Rep Power: 58
Registered User
Joined: Jul 2013
Posts: 158
From: Sonoma County.
Rep Power: 20
I just got this failure message yesterday even though the spoiler still functions.
This car is keeping me very busy as I just fixed my ABS /PSM warning last week
This car is keeping me very busy as I just fixed my ABS /PSM warning last week
Trending Topics
Registered User
Joined: Apr 2010
Posts: 2,164
From: Victoria, BC
Rep Power: 217
If you are seeing fluid, your problem is most likely "low fluid". If the micro switches go before the seals, there won't be any fluid leaking out onto the other parts. You do not need to remove the rams to refill the fluid. Just be creative in finding a way to hold the rear deck at the correct angle to be able to remove the bolts to refill the ram and pistons. It can be done quite easily and should give you some time until you find the correct washers to fix the source of the leak.
Registered User
Joined: Jul 2013
Posts: 158
From: Sonoma County.
Rep Power: 20
I saw a small drop of oil/fluid at the bottom of one of the cylinders so I just thought it was low fluid, my indy said he knows of this issue very well so I guess I will leave it in his hands. The washers is the next journey to stop this leak for a few more years hopefully.
Thread Starter
|
Registered User
Joined: Sep 2012
Posts: 281
From: New York
Rep Power: 31
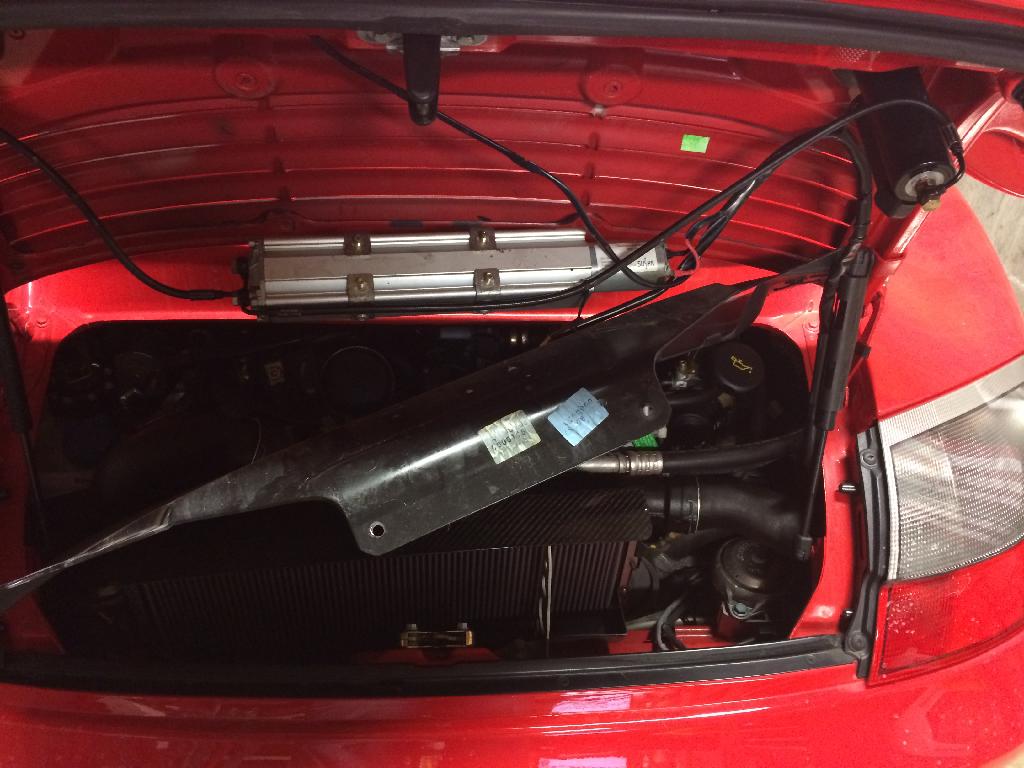
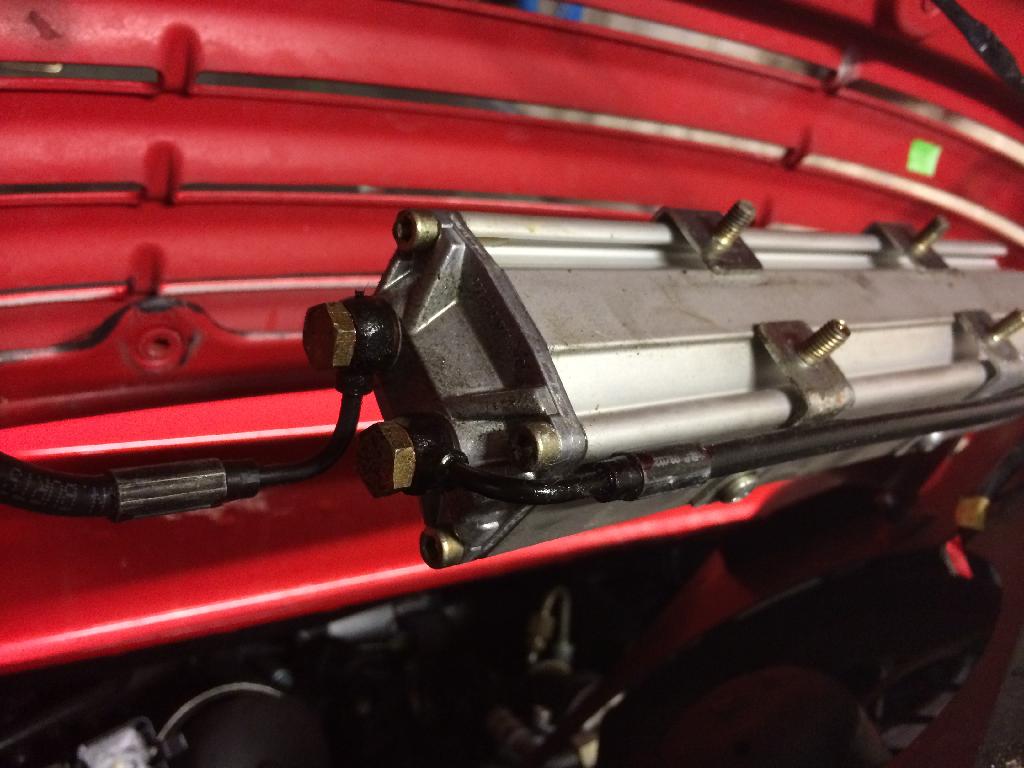
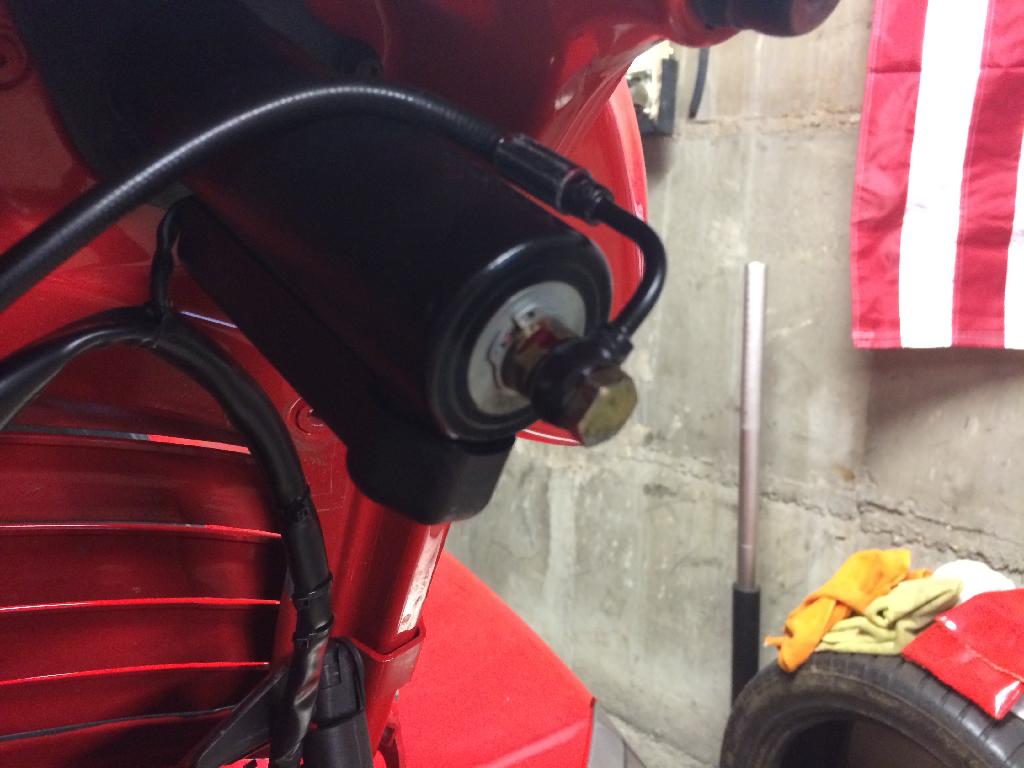
So I pulled the motor and removed the lines, I was also able to verify the pistons working properly after applying 12v and looking inside with a flash light. I went to Porsche yesterday and picked up some pentosin to do the job. Now I gotta pick up a pack of new washers and hope I can get some time after work today to put everything back together.
Registered User
Joined: Feb 2011
Posts: 1,075
From: Lewisville, NC
Rep Power: 110
The issue is when it get low and the rams start to go up unevenly, you will start to brake internal parts in the pump assembly. Not to mention all the fluid that will be leaking into your engine bay over time. I doubt it would start a fire, but it won't be good for paint, rubber or any other part it leaks on.
Take your pump apart, you will easily be able to see if the o-rings are leaking. If you have fluid in side the aluminum housing, it's your o-ring and not your brass washer that are leaking.
Later, Steve

Registered User
Joined: Dec 2013
Posts: 259
Rep Power: 35
Before you take everything down and apart, you can try this with everything in place....
1. If you have the wing tool, remove the wing, LOWER THE RAMS, remove the c-clip and clean out the assembly. Use some dry lube (not wd-40), reassemble.
2. Take the banjos off the ram ends, submerge it in a bowl of Pentosin (fwiw I think pentosin 11s is the new replacement fluid). Use your 12v source to cycle pump back and forth with the banjos submerged. You'll eventually not see any more air bubbles. At this point do a few more for good measure. Let the pump cool between cycles so you don't overheat it. Working one hose at a time (helps to have a friend, and a stool to sit on) try and reconnect each banjo to the ram quickly so you lose as little fluid as possible.
That worked to solve my problem, but when I was working with the pump I let it hang there for a bit and it pulled the upper microswitch out of the holder....whatever it did I think it broke the retaining mechanism because putting the switch back in place would still give me the error. I fixed this by putting some electrical tape around the switch and forced it into place. The tape made it thicker and the pressure seems to have solved the switch error.
If you decide you don't want to mess with it I have a fixed wing riser kit anodized in black that I can let you have for a good price.
Registered User
Joined: Feb 2011
Posts: 1,075
From: Lewisville, NC
Rep Power: 110
Your best option would probably be to use a mixture if Pentosin and "stop leak" and refill the system. This will swell the o-rings and should reseal everything for awhile.
If you do a search you will find a post on the mixture and brand of "stop leak".
Later, Steve
If you do a search you will find a post on the mixture and brand of "stop leak".
Later, Steve
Thread Starter
|
Registered User
Joined: Sep 2012
Posts: 281
From: New York
Rep Power: 31
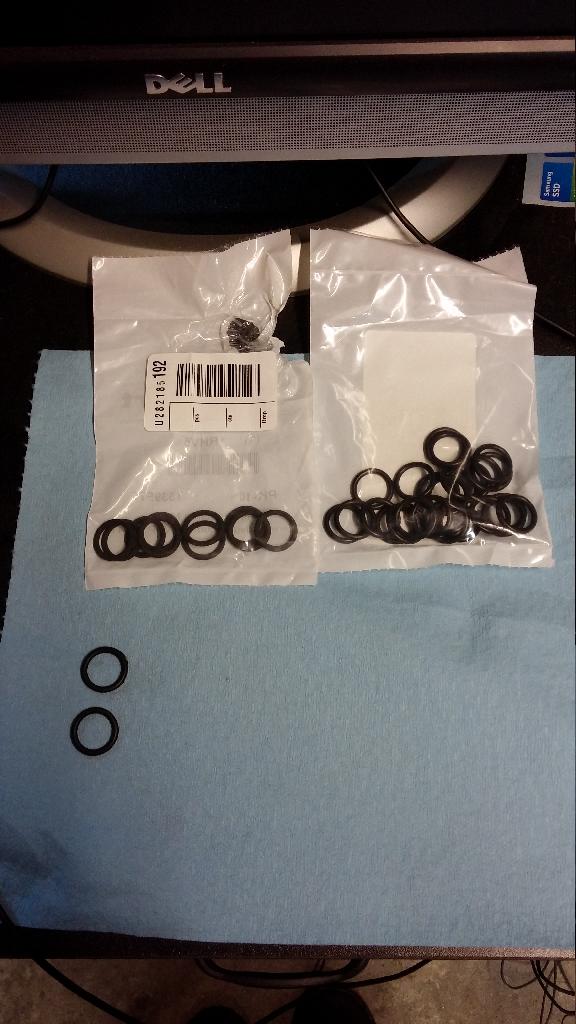
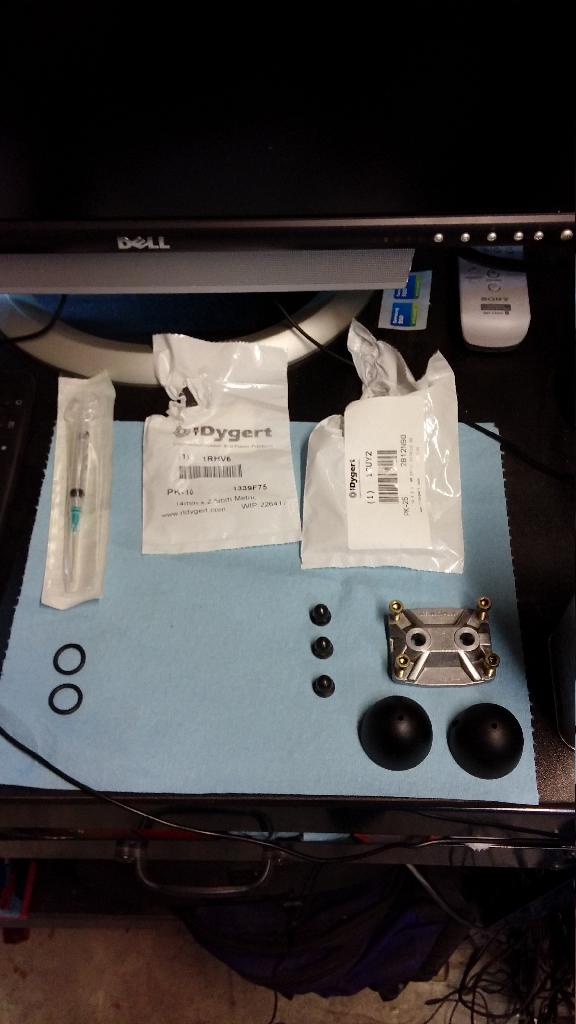
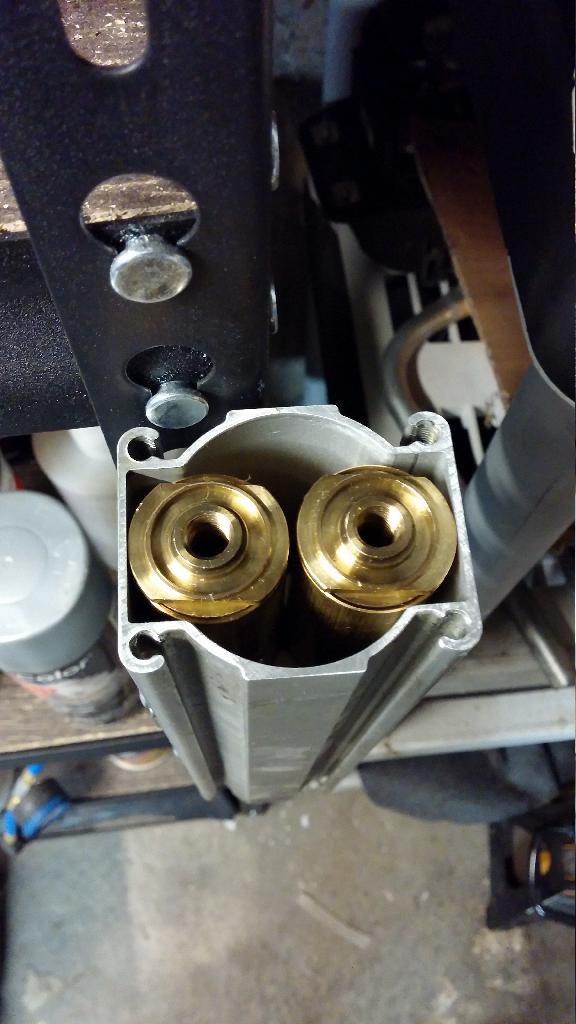
So per Steves directions I took apart the motor yesterday to discover the orings being the main cause of the leak, seems like one side of the oring flattened out a bit which made the seal between the cover and brass tubes weaker. I looked inside the housing and didn't see any signs of wetness, so I guess the internal seals are still good. I ordered new crush washers and orings from Grainger, I'm pretty sure that will solve the problem.
O-ring Size is 19mm grainger part number 1RHV6
Crush washer Size is 12mm od, 8mm id, 1mm thick grainger part number 5ZLU0
O-ring Size is 19mm grainger part number 1RHV6
Crush washer Size is 12mm od, 8mm id, 1mm thick grainger part number 5ZLU0
Thread Starter
|
Registered User
Joined: Sep 2012
Posts: 281
From: New York
Rep Power: 31
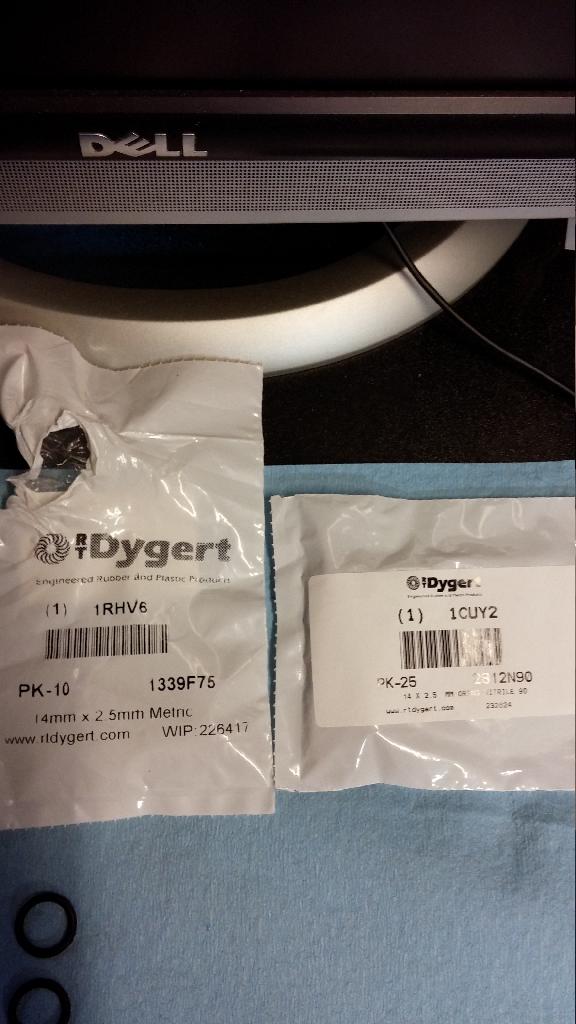
Small update, i got the orings in but the washers have still yet to come. Grainger had two different type of orings with different materials, different hardness, and different temperature thresholds. Here are the two different materials.
Material Buna N
SAE or Metric Metric
Actual Width 2.5mm
Actual Inside Dia. 14mm
Outside Dia. 19mm
Cross Section Shape Round
Durometer Rating Hard
Durometer 90 Shore A
Color Black
Temp. Range -40 Degrees to 250 Degrees F
Meets/Exceeds SAE J200, ASTM D2000
Material Viton
SAE or Metric Metric
Actual Width 2.5mm
Actual Inside Dia. 14mm
Outside Dia. 19mm
Cross Section Shape Round
Durometer Rating Medium Hard
Durometer 75 Shore A
Color Black
Temp. Range -15 Degrees to 400 Degrees F
Meets/Exceeds SAE J200, ASTM D2000
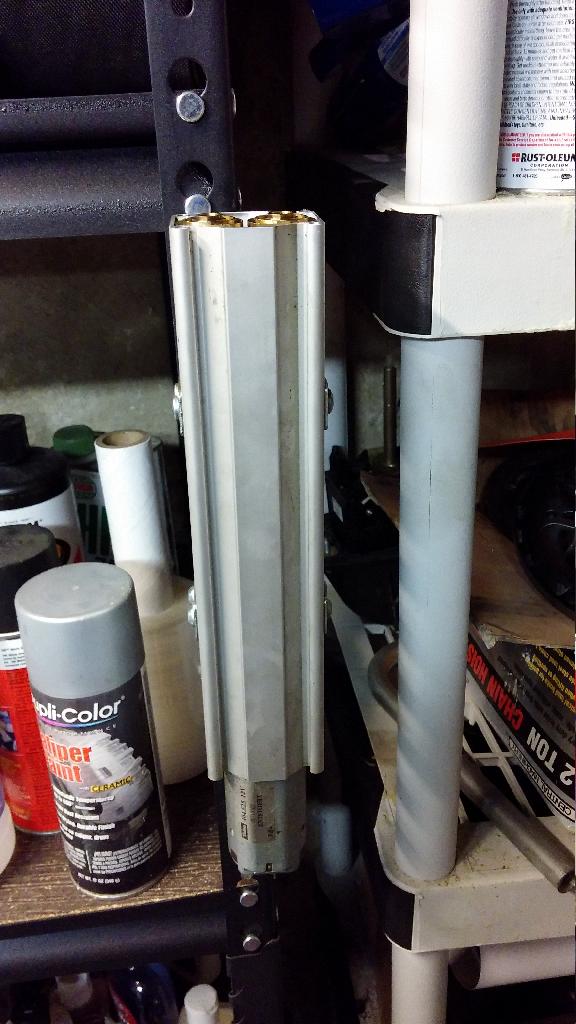
After comparing both new orings with the ones i pulled from the motor it seems like the orings made of viton are a perfect match, plus they have a higher heat threshhold than the other material. Hopefully the washers will get delivered within the next few days so i can finish this job. In the meantime i mounted the motor vertically and partially filled the cylinders with pentosin to see if there are any leaks. So far so good.
Material Buna N
SAE or Metric Metric
Actual Width 2.5mm
Actual Inside Dia. 14mm
Outside Dia. 19mm
Cross Section Shape Round
Durometer Rating Hard
Durometer 90 Shore A
Color Black
Temp. Range -40 Degrees to 250 Degrees F
Meets/Exceeds SAE J200, ASTM D2000
Material Viton
SAE or Metric Metric
Actual Width 2.5mm
Actual Inside Dia. 14mm
Outside Dia. 19mm
Cross Section Shape Round
Durometer Rating Medium Hard
Durometer 75 Shore A
Color Black
Temp. Range -15 Degrees to 400 Degrees F
Meets/Exceeds SAE J200, ASTM D2000
After comparing both new orings with the ones i pulled from the motor it seems like the orings made of viton are a perfect match, plus they have a higher heat threshhold than the other material. Hopefully the washers will get delivered within the next few days so i can finish this job. In the meantime i mounted the motor vertically and partially filled the cylinders with pentosin to see if there are any leaks. So far so good.