
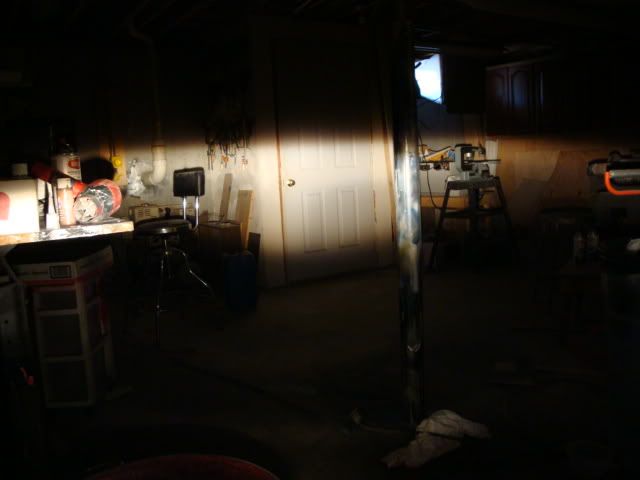
HOW TO: Make your Litronic Xenon [ Cut Off Line ] SHARPER !!! PICTURES !!!

Thread Starter
|
Registered User
Joined: Feb 2010
Posts: 599
From: Bay Area CA
Rep Power: 40

HOW TO: Make your Litronic Xenon [ Cut Off Line ] SHARPER !!! PICTURES !!!
This DIY is for 99-01 996 Litronic Xenon headlamps/headlights
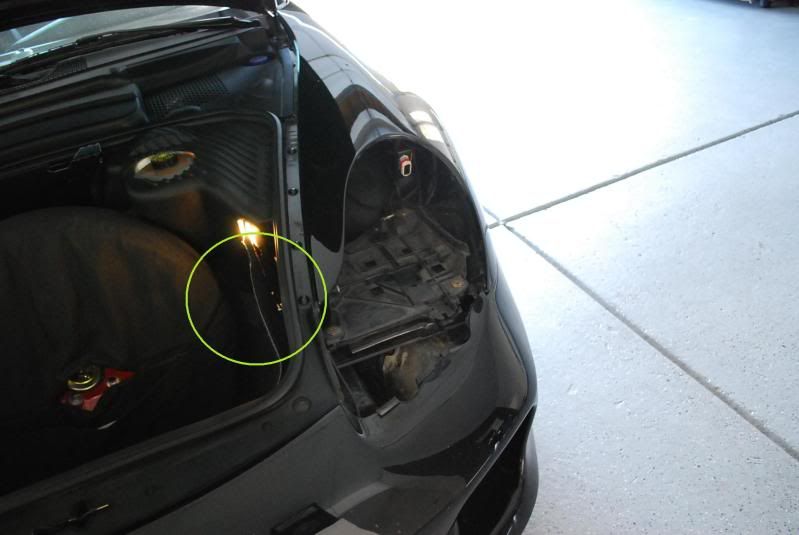
Unlock your headlights by using the tool key (female allen wrench) on the side. Use manuals for help.
Unscrew these 2 screws then pull the white box out of the way.
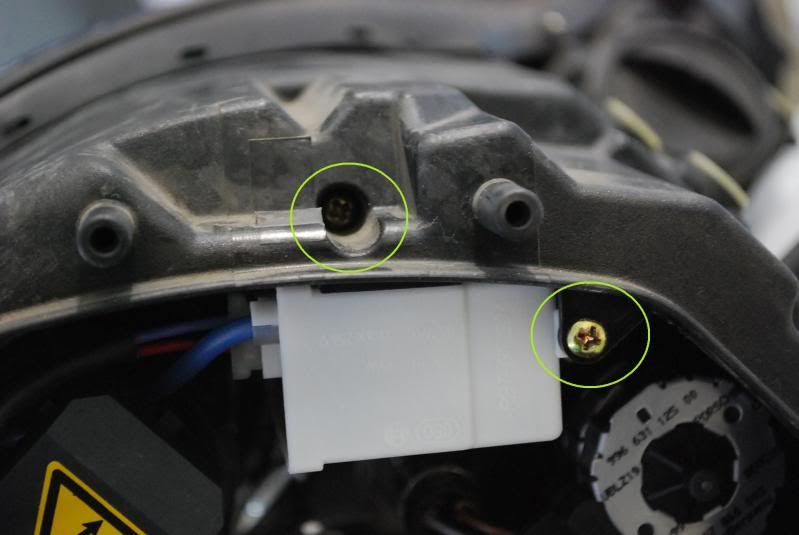
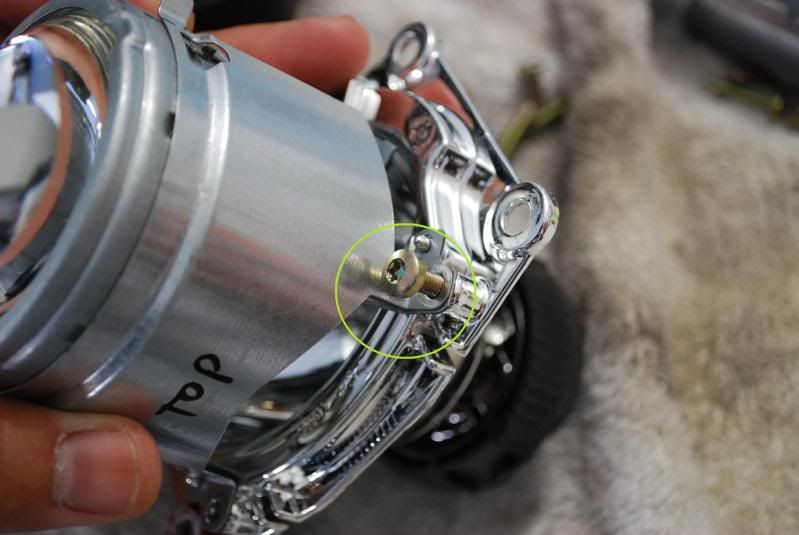
Once the white box is out of the way you can see behind the projectors. There should be (3) star bit screws (T-20 with security hole)
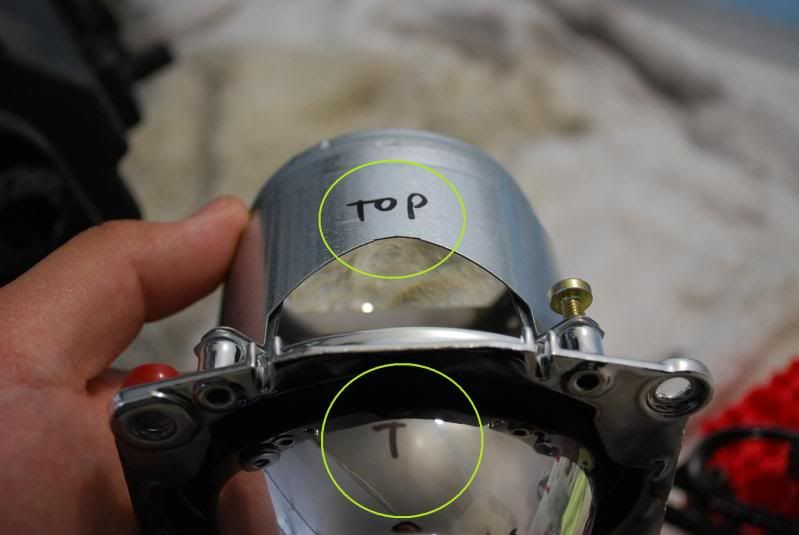
Make sure to mark the (TOP) just so you don't get confused when you put it back together.
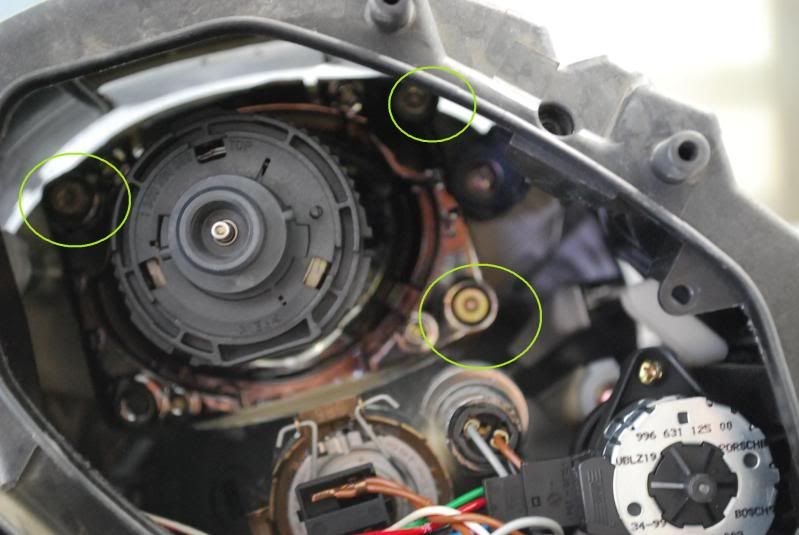
Unscrew 4 star bits around the projectors
Clear coat it then bake for 15 mins at 250 degrees then wait the next day to wet sand and buff.
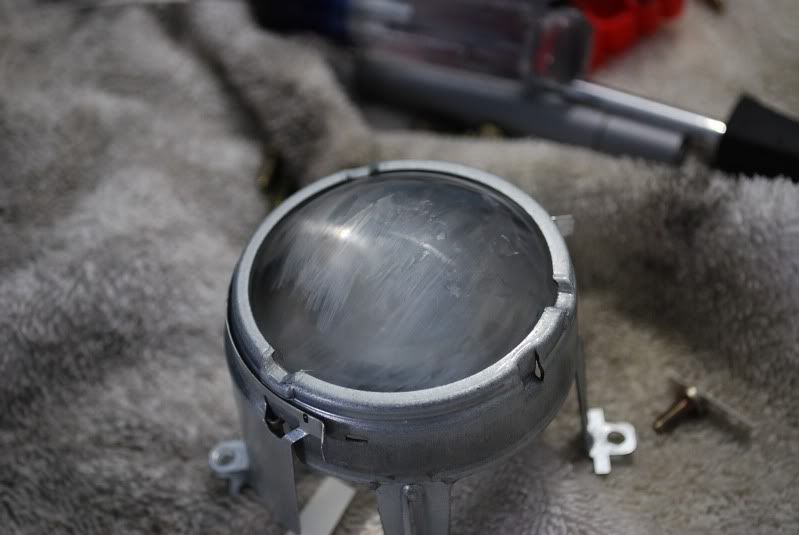
Wet sand all around until everything looks dull.
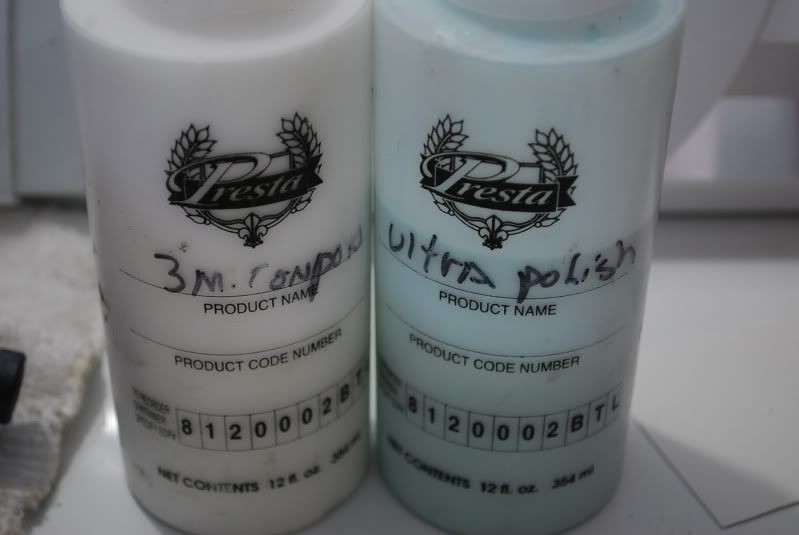
Use this 3M products
Mothers ball polisher after compound
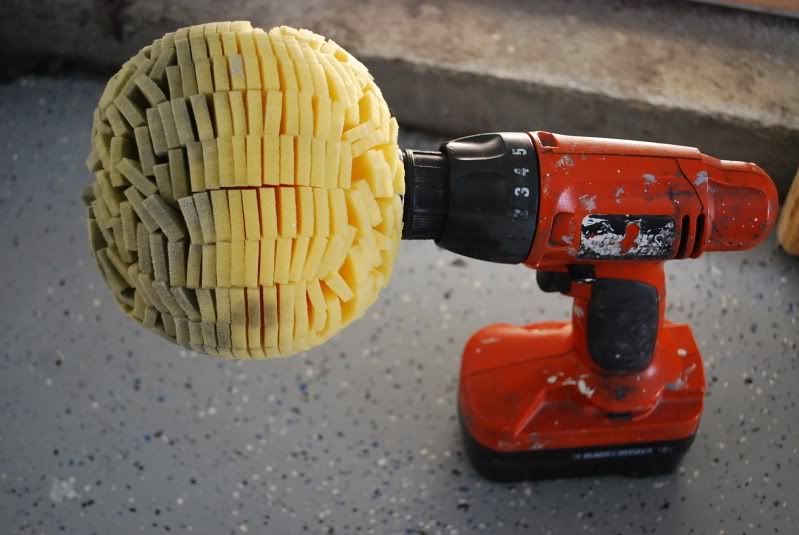
Compound (by hand) then polish (with mothers ball)
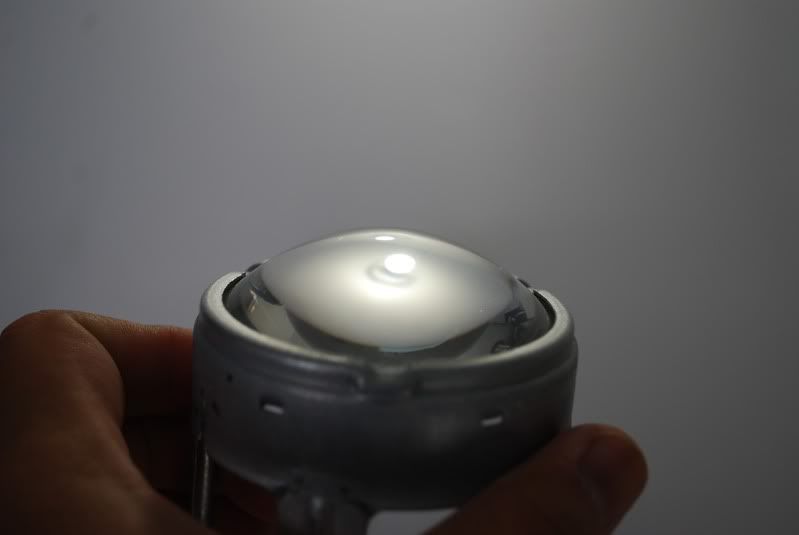
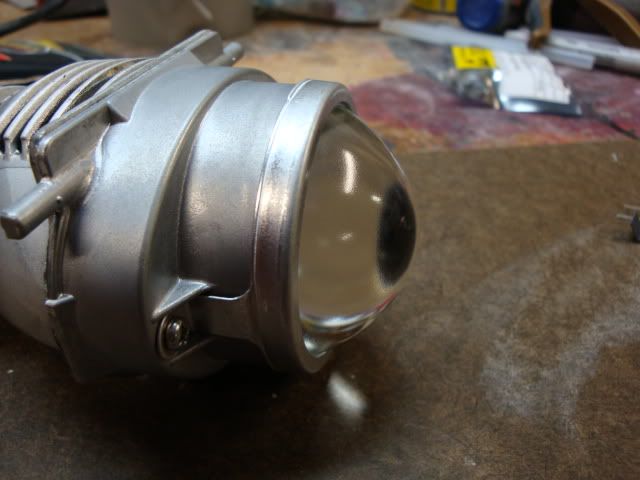
Crystal clear finish.
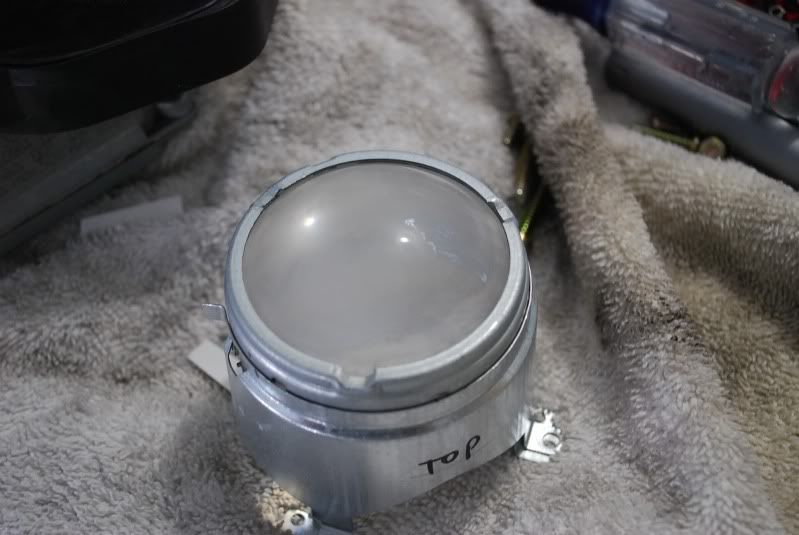
Factory lens with frosty finish
Factory lens with clear coat and buffed finish
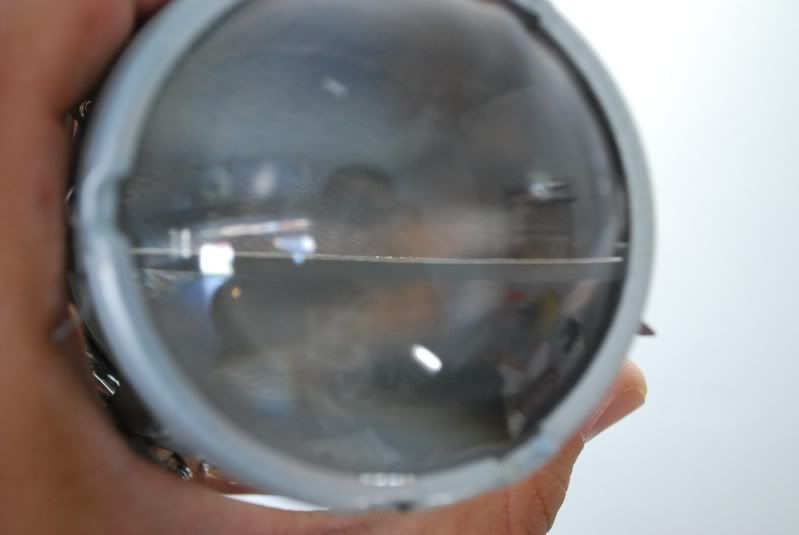
***NOTE*** This particular picture is not a Porsche projector. I'm showing a RX330 lens with FROST/ROUGH finish. That's why the cut off line isn't sharp on some factory lens. Only some comes factory clear such as TSX S2000 300ZX and some other cars.... *** IF YOU LOOK CLOSELY ON THIS LENS IT'S NOT CLEAR AT ALL. ***
ENJOY!
Unlock your headlights by using the tool key (female allen wrench) on the side. Use manuals for help.
Unscrew these 2 screws then pull the white box out of the way.
Once the white box is out of the way you can see behind the projectors. There should be (3) star bit screws (T-20 with security hole)
Make sure to mark the (TOP) just so you don't get confused when you put it back together.
Unscrew 4 star bits around the projectors
Clear coat it then bake for 15 mins at 250 degrees then wait the next day to wet sand and buff.
Wet sand all around until everything looks dull.
Use this 3M products
Mothers ball polisher after compound
Compound (by hand) then polish (with mothers ball)
Crystal clear finish.
Factory lens with frosty finish
Factory lens with clear coat and buffed finish
***NOTE*** This particular picture is not a Porsche projector. I'm showing a RX330 lens with FROST/ROUGH finish. That's why the cut off line isn't sharp on some factory lens. Only some comes factory clear such as TSX S2000 300ZX and some other cars.... *** IF YOU LOOK CLOSELY ON THIS LENS IT'S NOT CLEAR AT ALL. ***
ENJOY!
Thread Starter
|
Registered User
Joined: Feb 2010
Posts: 599
From: Bay Area CA
Rep Power: 40
For whom it may concern. It's a mod. I'm sharing it for the people that are interested. Yes the purpose of this DIY it to get the cut off line sharper, it looks a lot more clean. No advantage on increasing the light. Just like decals on the car or aftermarket wheels...
Registered User
Joined: Mar 2007
Posts: 222
From: California
Rep Power: 28
What type of clearcoat are you using and how many layers are you applying?
Does this lend to any issues after awhile of having exposed the clearcoat to all of the heat from the lights being on? Perhaps any yellowing of the clear?
Does this lend to any issues after awhile of having exposed the clearcoat to all of the heat from the lights being on? Perhaps any yellowing of the clear?
Registered User
Joined: Mar 2010
Posts: 2,004
From: Chicago
Rep Power: 122

For whom it may concern. It's a mod. I'm sharing it for the people that are interested. Yes the purpose of this DIY it to get the cut off line sharper, it looks a lot more clean. No advantage on increasing the light. Just like decals on the car or aftermarket wheels...

Registered User
Joined: Mar 2007
Posts: 222
From: California
Rep Power: 28
+1 indeed, and a rep for the OP... I've always been a fan of the sharp cutoff HID, but also noticed that the cutoff on my litronics was not that sharp. Some of my HIDs from past cars have had much sharper cutoffs, and never really understood why until your thread posting. Thanks!
Thread Starter
|
Registered User
Joined: Feb 2010
Posts: 599
From: Bay Area CA
Rep Power: 40
 You have no idea......
 +1 indeed, and a rep for the OP... I've always been a fan of the sharp cutoff HID, but also noticed that the cutoff on my litronics was not that sharp. Some of my HIDs from past cars have had much sharper cutoffs, and never really understood why until your thread posting. Thanks!
Trending Topics

Thread Starter
|
Registered User
Joined: Feb 2010
Posts: 599
From: Bay Area CA
Rep Power: 40
It's glass. It'll take more time to shave off pieces of glass than layers of clear coat. Also tendency to create cracks, chip, hairline
Thread Starter
|
Registered User
Joined: Feb 2010
Posts: 599
From: Bay Area CA
Rep Power: 40
Dupli color spray paint. You can use the clear coat of your choice.
It is possible if you pry the headlights open. Or you can access it in the back where the HID Ballast are, you can use a stick with cloth to clean the water spots... Yeah pretty hard with out prying it open.
It is possible if you pry the headlights open. Or you can access it in the back where the HID Ballast are, you can use a stick with cloth to clean the water spots... Yeah pretty hard with out prying it open.

Registered User
Joined: May 2012
Posts: 1
Rep Power: 0
Hello guys
i`m new here
i read this old thread
i have hella projectors with smooth /not frosted/ lens
Can i ask you when use clear coar how long lens stay clear.
i mean how years - i see thread is on 2010 year, anybody have experience /lens sprayed with clear coat/
Thanks to all.
i`m new here
i read this old thread
i have hella projectors with smooth /not frosted/ lens
Can i ask you when use clear coar how long lens stay clear.
i mean how years - i see thread is on 2010 year, anybody have experience /lens sprayed with clear coat/
Thanks to all.
Registered User
Joined: May 2006
Posts: 1,807
From: Boston
Rep Power: 144
i would be concerned about the cc yellowing/burning

Thread
Thread Starter
Forum
Replies
Last Post
eclip5e
Automobiles For Sale
6
Jul 29, 2019 11:13 AM
Armytrix_F1_Exhaust
Mercedes / AMG
12
Jul 7, 2019 11:31 PM
undefnd
Automotive Parts & Accessories For Sale/Wanted
16
Aug 26, 2015 07:59 PM
WheelB
Lamborghini
0
Aug 20, 2015 12:25 PM