

Personalise with Plasti-dip

Thread Starter
|
Registered User
Joined: Jul 2013
Posts: 362
Rep Power: 29

Personalise with Plasti-dip
Hi all,
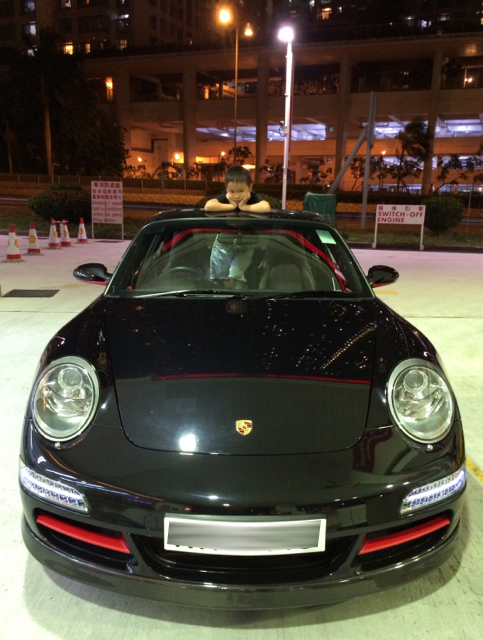
I've always wanted to give my C2S a little personal touch and been looking at various body kit options. But they are either too exaggerating or too expensive, so I gave plasti-dip a try and am very happy with how it turned out.
The exterior is just about right. It still looks very original but it's definitely "mine". The interior is a little too "loud" / ricey, but the great thing about plasti-dip is that it can be un-done and redo any time so I'm I'll keep fine-tuning it.
Let me know what you think ;-)
Last edited by simoncpw; Oct 12, 2013 at 12:45 AM.
Thread Starter
|
Registered User
Joined: Jul 2013
Posts: 362
Rep Power: 29
It's the Tech Art front spoiler and yes it's carbon fiber. The previous owner had it installed along with the side mirror trim. I removed the side mirror trim since I'm not a great fan of carbon fibre, but left the front spoiler on since I do want the slightly heavier look on the front. I might get it painted same as the body color.
Last edited by simoncpw; Oct 10, 2013 at 09:22 AM.
Registered User

Joined: Jul 2009
Posts: 812
From: South Florida
Rep Power: 71

Wow I think you did a great job. I do a lot of work with plasti dip myself and by looking at your pictures and your work I can tell that you are very good with it! To do the gauge clusters like that or even the door handles would be tough!!!
Now, you should take some black electrical tape and put it on the INSIDE of the interior door handles so that when you pull to open the door, you're not pulling on the dip! Little trick I've learned (usually applied to exterior but I'm sure it'll work the same)
John
PS- what year is your car? Only 41kms, seems like it's your weekend car for sure!
Last edited by Perk10; Oct 10, 2013 at 10:48 AM.
Trending Topics

Thread Starter
|
Registered User
Joined: Jul 2013
Posts: 362
Rep Power: 29
Thanks Perk10 for the tip. I was actually going to put electrical tape at the narrower end of the door handle, currently it rubs against the leather panel and rips the dip. But I'll do the other end as suggested ;-)
ksdsrasad,
- for the interior - the most important thing is removing the trims in the right way without breaking things. MaCarbon's site has excellent instructions and pictures showing how to do it properly. And this post shows how to remove the air vent. The only bump I got into was that there are actually 2 clips on the side air vents (instead of just 1 on the diagrams). And it's best to use a "hook" shape tool (instead of a screw drive) to pull-down and unlock the clip.
This post shows how to remove the gauge, and here's the result.
- for the rims - the most challenging part was doing the red ring/outline. I didn't want to use the normal masking tape & spray paint as the circle won't be perfect. So I went to a professional print shop to laser-cut the red-ring stickers, which fell off the rims after 2 days. Then I asked the print shop to laser cut a big circle instead and used it as masking, spray a normal red-paint on top of the black dip, then added 2-3 layers of plasti-dip glossifier to prevent the red-paint from falling off. It looks good now but time will tell if it last after a few car wash. But I only intent to prove if it really look good, I'll probably get the rims professionally painted if I still like this look after a few months.
Thread Starter
|
Registered User
Joined: Jul 2013
Posts: 362
Rep Power: 29
Cool! Looks very clean! Which front bumper is that?

Registered User
Joined: Dec 2009
Posts: 839
From: Central North Carolina
Rep Power: 91
I am not normally a fan of black wheels on black cars, but the slight contrast in color depth and shade makes yours an exception to the rule, Very, very nice.
Registered User
Joined: Mar 2012
Posts: 178
From: Austin, TX
Rep Power: 33
Thanks. I used black plasti-dip followed by 3 coats of silver metallizer to give the wheels a gunmetal finish.
I purchased the front bumper from another board member about 2 years ago and he couldn't remember who made it, so I am not sure what brand it is.
I purchased the front bumper from another board member about 2 years ago and he couldn't remember who made it, so I am not sure what brand it is.

