
DIY Backupm Camera and Euro Boot

Thread Starter
|
Registered User
Joined: Dec 2013
Posts: 48
From: Alabama
Rep Power: 16

DIY Backup Camera and Euro Boot
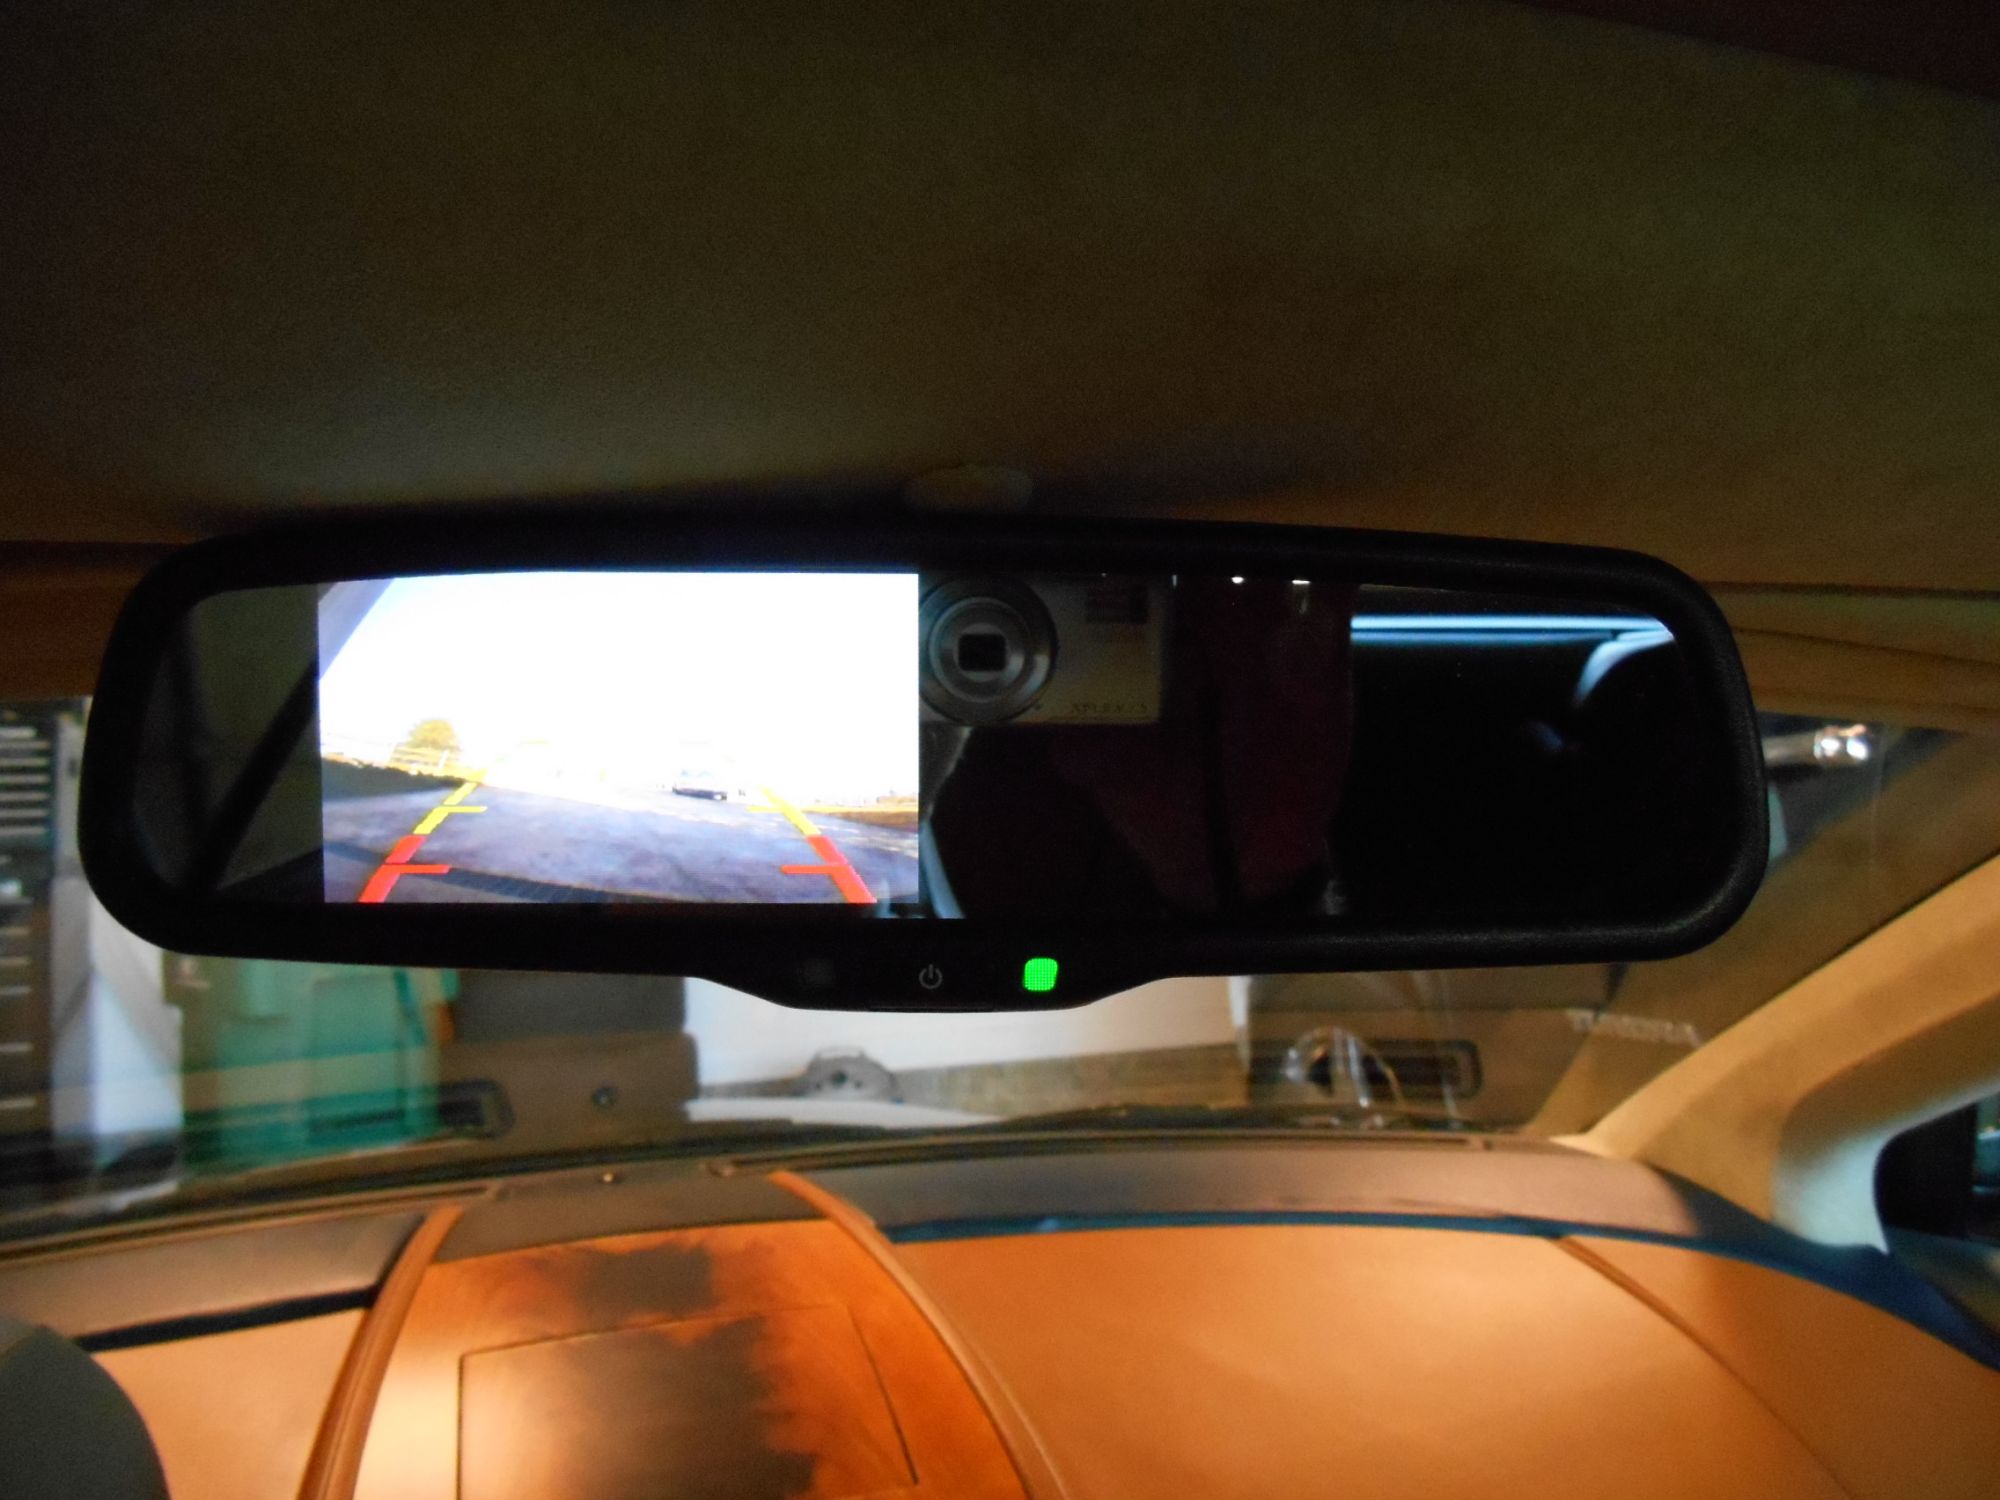
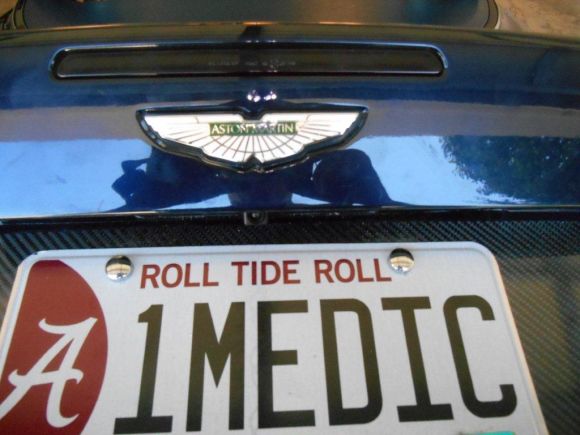
I installed a custom back up camera and also converted my boot to the euro look. I purchased a sheet of carbon fiber and removed the tag lights/holder. I used a 12" led strip for the new tag lights and re-routed the wires. I mounted a trunk release button underneath the rim. There are already openings for the camera and the button in the deck. The rear view mirror can be purchased at most auto suppliers.
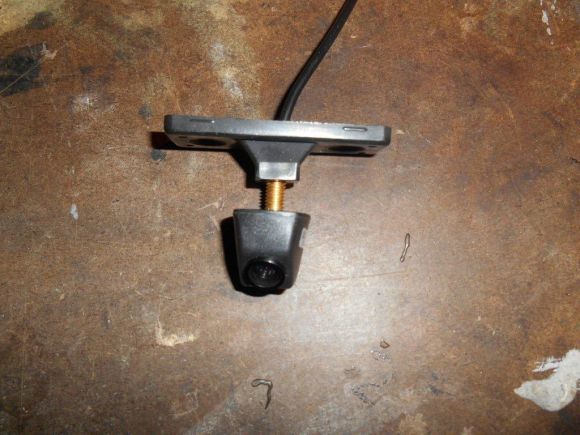
Purchase a pontoon mounting bracket from any online supplier (West Marine, Overtons) Here is a link:
http://www.overtons.com/modperl/prod...t-pair&i=75824
You can purchase a backup cam through Ebay or any major website. The model I used was a Rydeem 510.
Here is a similar cam : http://www.ebay.com/itm/400606163914...84.m1497.l2649
Mark the holes and use a drill punch to make indentions. Use tape or some covering to protect the boot. There is alerady a hole to route the wires.
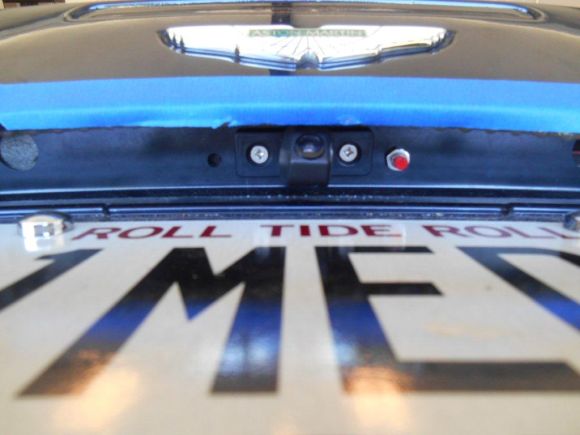
In the Volante, simply route through the openings in the rear of the bonnet. Tape down the wire to avoid crimping from the top.
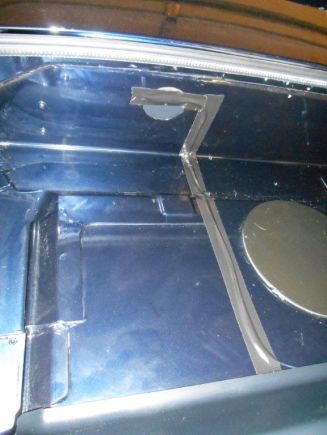
Tap into the reverse light already in the rear compartment.
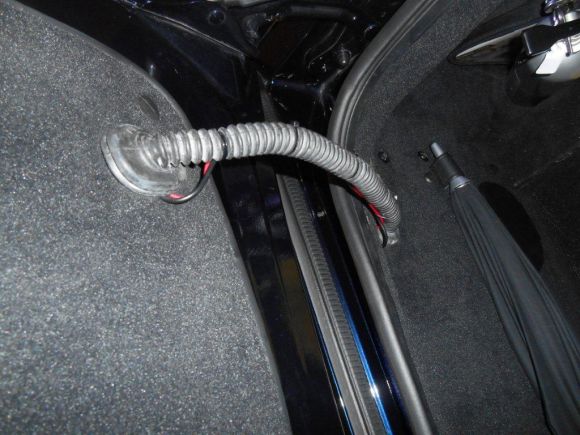
Route wires up to the drivers side dash.
The mirror wires are run though the headliner down the A-Post to meet the cam wires under the dash.
Purchase a pontoon mounting bracket from any online supplier (West Marine, Overtons) Here is a link:
http://www.overtons.com/modperl/prod...t-pair&i=75824
You can purchase a backup cam through Ebay or any major website. The model I used was a Rydeem 510.
Here is a similar cam : http://www.ebay.com/itm/400606163914...84.m1497.l2649
Mark the holes and use a drill punch to make indentions. Use tape or some covering to protect the boot. There is alerady a hole to route the wires.
In the Volante, simply route through the openings in the rear of the bonnet. Tape down the wire to avoid crimping from the top.
Tap into the reverse light already in the rear compartment.
Route wires up to the drivers side dash.
The mirror wires are run though the headliner down the A-Post to meet the cam wires under the dash.
Last edited by dallasbaker; May 13, 2014 at 12:37 AM.


Registered User
Joined: Apr 2012
Posts: 457
From: Michigan
Rep Power: 34
Nice job. I hate the Monkey's butt look of my US Trunklid............if only Aston had figured out that the US License plate mounting rules were different from the EU ones when they were designing the car , then we could have all had the EU look from new on our 9s.
FF
FF
Registered User

Joined: Apr 2011
Posts: 166
From: Southern California
Rep Power: 22
Well Done
That looks amazing. You may have inspired me.
I love washing my car, but am reminded every time how ugly & discolored the plastic tag lights are.
I have some dummy questions for you, and appreciate anything you're willing to share:
1- The carbon fiber you used to cover up the holes/area used to attach the tag lights?
2- Can you elaborate on how you cut and attached this?
3- Did you need a new rear view mirror to accommodate the camera image?
4- Do you have link(s) for any of the materials you used? I don't want to have to guess if what you used worked.
Thanks!

Registered User

Joined: Jun 2009
Posts: 2,161
From: Northern CT
Rep Power: 144

Good job, though.
Thread Starter
|
Registered User
Joined: Dec 2013
Posts: 48
From: Alabama
Rep Power: 16
The holes are in the boot lip for the camera and up under the edge of lip for mounting the release button.
The carbon fiber comes with 3m film on the back. I molded it around the shape of the original mount and lights.
The mirror is a Rydeen. They have several models. You will have to fabricate a mount. I used a small piece of aluminum @1/4" thick. Cut it in the shape of the original mirror mount and drill holes.
Trending Topics
Registered User
Joined: Jan 2012
Posts: 867
From: The Heart of England
Rep Power: 54
Now that I like fantastic idea!
Last edited by mikey k; Apr 10, 2014 at 05:45 AM.
Registered User
Joined: Jun 2013
Posts: 284
From: Atlanta, GA
Rep Power: 24
How did you run the wiring for the camera input to the rear view mirror?
Do you have to select the camera view on the mirror when reversing, or does the mirror display the image automatically?
Do you have to select the camera view on the mirror when reversing, or does the mirror display the image automatically?

Registered User
Joined: Aug 2013
Posts: 507
From: Ocala, fl
Rep Power: 37
Hi Dallasbaker
can you please write up DIY guide for this, looks so awesome I want to do it but not sure about wiring routing etc. once you remove that ugly black mountains which holds the tags, do we need to paint the area?
Excellent job.
can you please write up DIY guide for this, looks so awesome I want to do it but not sure about wiring routing etc. once you remove that ugly black mountains which holds the tags, do we need to paint the area?
Excellent job.

Registered User
Joined: Jun 2014
Posts: 12
From: NJ
Rep Power: 0
see cross post on other forum
@dallasbaker - thought you might be interested in how I tidied up my db9 trunk license plate.
http://www.astonmartinlife.com/forum...ent-t3130.html
http://www.astonmartinlife.com/forum...ent-t3130.html

Thread
Thread Starter
Forum
Replies
Last Post
997zen
Automotive Parts & Accessories For Sale/Wanted
4
Sep 7, 2015 07:13 AM