When you click on links to various merchants on this site and make a purchase, this can result in this site earning a commission. Affiliate programs and affiliations include, but are not limited to, the eBay Partner Network.
Thought I would add this for the folks who are not very confident when it comes to turning wrenches. This is only a guide. Please read the instructions that come with your kit.
Lowering links trick your cars computer into thinking the vehicle is at a different height by moving the sensor arm.
Installing lowering links on the Cayenne air suspension is extremely easy and is a good alternative to buying a lowering module (10 times the price). There's just a few things to be aware of.
I bought a set of Airmatic Lowering Links http://www.airmatic-lowering-links.co.uk
A special thanks to MikeL for pointing out the company! I ordered the links on a Monday and had them by Wednesday. Airmatic was quick to send a confirmation and tracking as soon as the links shipped. The links came with good instructions. They recommend that you start by extending the links 5 mm over stock to get a decent drop and still maintain good ride quality. That is what I did figuring it was easy enough to mess with it later.
People say you don't need to pull your tires but I have to say it's well worth it. It gives you much more space to work and gives you a good opportunity to clean the wheel wells. Make sure your keys are out of the ignition so your suspension doesn't try to adjust itself while you are working on it. Make sure the truck is in a spot where you can work on all 4 corners without having to move it. You don't want to start the truck until your completely done.
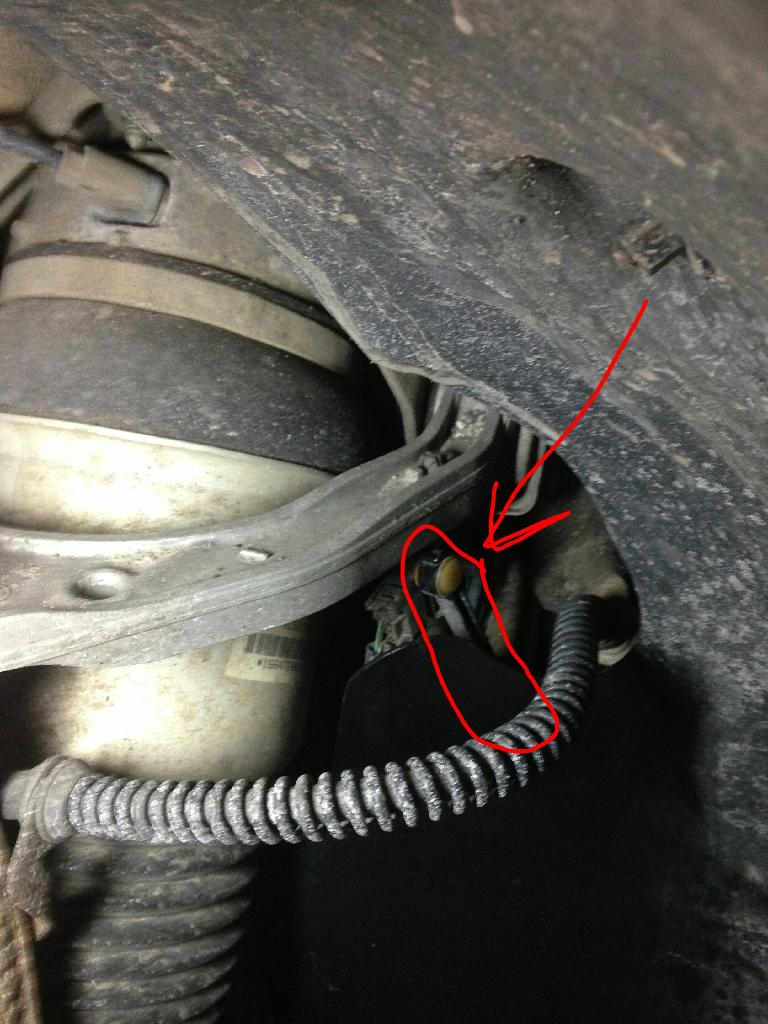
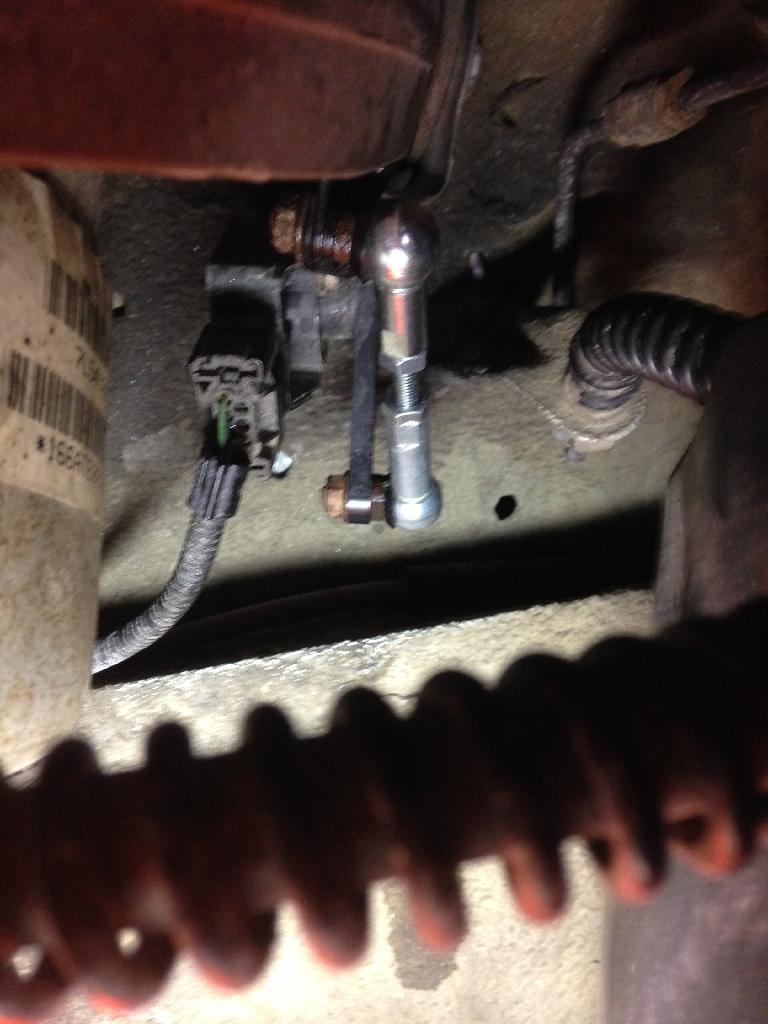
The front link is partially showing:
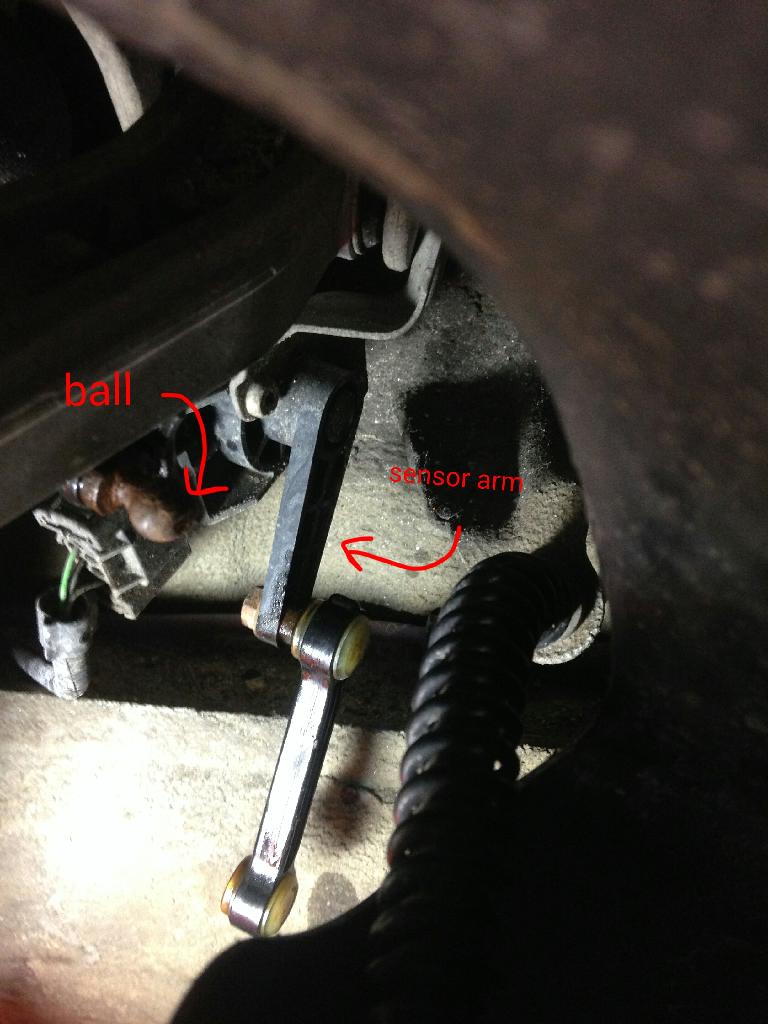
The link is a simple ball socket pressure attachment. You need to be careful pulling the link off the ball since everything is plastic and you could break the sensor if you're not gentle. I used some lubricant to loosen everything up. START WITH THE TOP JOINT FIRST. It makes it much easier to get the lower joint off without fear of damaging the sensor or the sensor arm.
I used a flathead screwdriver and my fingers to pull the ball out of the socket. It is a tight fit and in most cases it has been on there for almost a decade. The ***** are strong so don't be concerned about breaking them. Here is the link with the top joint disconnected.
With the top joint off, the sensor arm will move freely.
Now you can gently twist the link toward the sensor arm to separate the lower joint. I used an adjustable wrench to keep the arm in place and make sure there was no stress on the sensor itself.
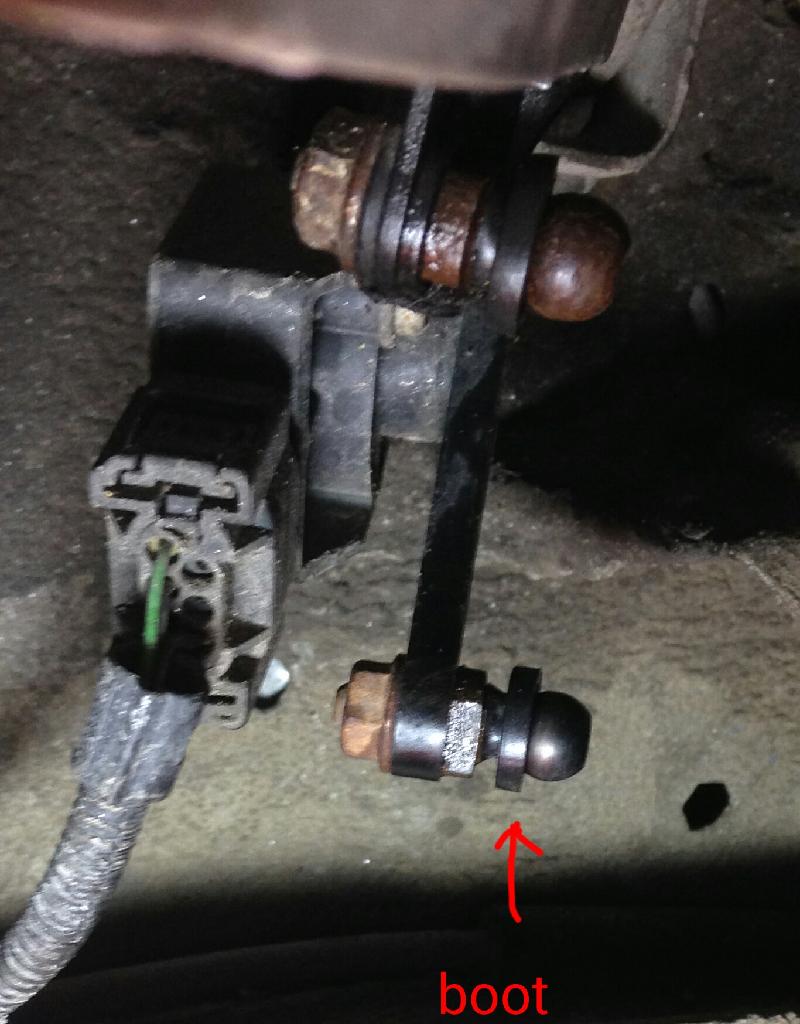
Now you need to push on the rubber boots that come with the kit. Like many other things, lube makes the job easier.
I chose to fill my links with grease to keep them protected. Using your fingers to press on the new links is difficult. I used a pair of pliers for the extra bit of leverage. You can hear and feel the pop when the link snaps to the ball. Try to pull the link off just to make sure it is fully set.
Here is a pic of the link in place.
The rears are the same as the fronts just in a different spot.
It's as easy as that! Once your are done you want to lower the truck to the lowest setting and then you are good to go. The recommended 5mm yielded me about an inch and as half drop. I can go more or less simply by adjusting the links.
best $120 ever spent on a car mod period. easy to install and remove if needed. initially i slammed it just to played with it and had no gap, but the car rode kind of choppy like that, so i set it at 2 finger gap all around. rides much better like that than no gap imo. hope u enjoy ur lowered ctt! nice write up btw, im too lazy to take pics and document everything lol
Just a tip to get the old plastic ones off, if you take a 9mm open wrench, it fits perfectly over the middle length of the plastic, and you can pry it away from the fitting it's attached to and it comes off fairly easy.
The feel of the suspension is great. You can feel that the center of gravity is now lower.
I live in NH and our roads were trashed this year. I think that the drop I used is perfect for these roads. I am running 19" rims right now and I'm sure that helps with the ride quality but the difference from before and after the links is minimal.
Hello, just wondering if you can help me with this. I also installed the lowering links and adjusted them to be longer so it should be lower. Now my truck is so high I don't know if either I put the position wrong or I have to adjust the rods to be shorter?
[Hi,
I have a set of lowering links but would like to pre set them before I put the car up on ramps, as I don't have much time to measure the original links when they are taken off the car. could you let me know what length front and back need to be in order to achieve at 20 mm drop.
Do you know the stock length front and rear??
Kind regards
Bruce
QUOTE=MikeL;4064722]best $120 ever spent on a car mod period. easy to install and remove if needed. initially i slammed it just to played with it and had no gap, but the car rode kind of choppy like that, so i set it at 2 finger gap all around. rides much better like that than no gap imo. hope u enjoy ur lowered ctt! nice write up btw, im too lazy to take pics and document everything lol[/QUOTE]
Last edited by Bruce Mould; May 17, 2021 at 08:11 AM.


 I ordered the links on a Monday and had them by Wednesday. Airmatic was quick to send a confirmation and tracking as soon as the links shipped. The links came with good instructions. They recommend that you start by extending the links 5 mm over stock to get a decent drop and still maintain good ride quality. That is what I did figuring it was easy enough to mess with it later.
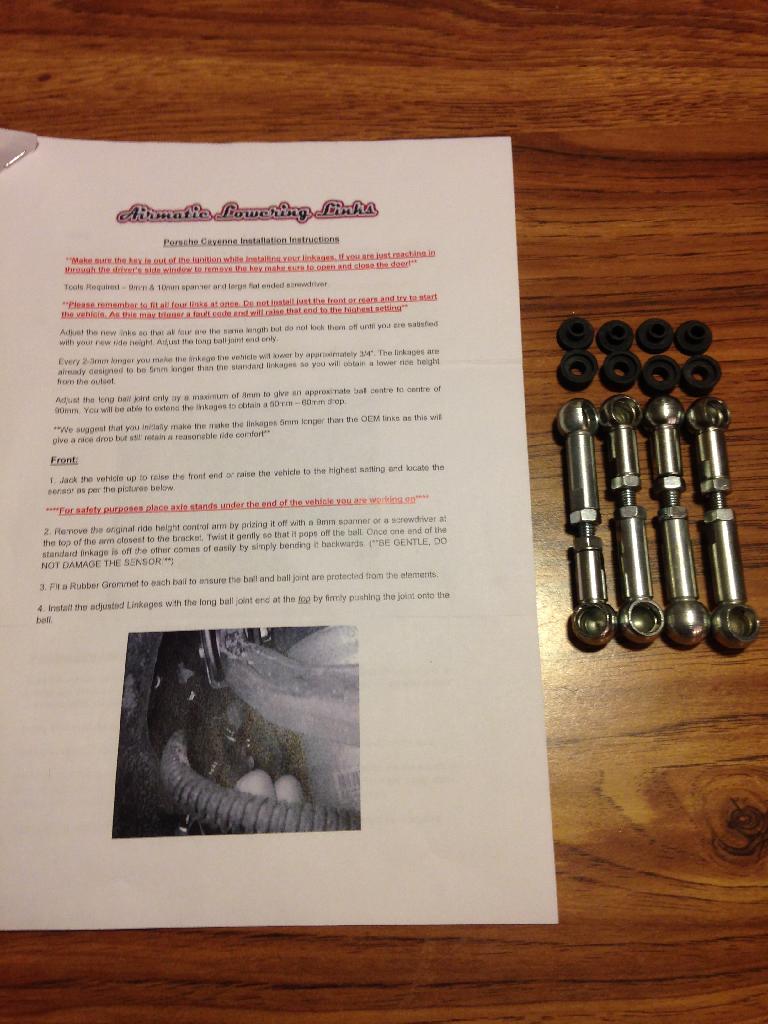


 Once your are done you want to lower the truck to the lowest setting and then you are good to go. The recommended 5mm yielded me about an inch and as half drop. I can go more or less simply by adjusting the links.


