
DIY In Tank Fuel Pump Upgrade. (pic heavy)

Thread Starter
|
Registered User
Joined: Jul 2010
Posts: 3,319
From: Long island NY
Rep Power: 381


DIY In Tank Fuel Pump Upgrade. (pic heavy)
There is plenty of talk of the stock pump not up to the job of feeding tuned k24 cars, so here is a DIY..
1) Disconnect battery.

2) remove the cover in the boot area (4 10mm nuts) to expose the fuel hat. On a gt2 it is under the battery tray.
3) With the fuel hat exposed you will see a arrow formed into the hat (out lined in black) and 3 lines on the tank. The arrow points to the middle line ( in white for clarity)


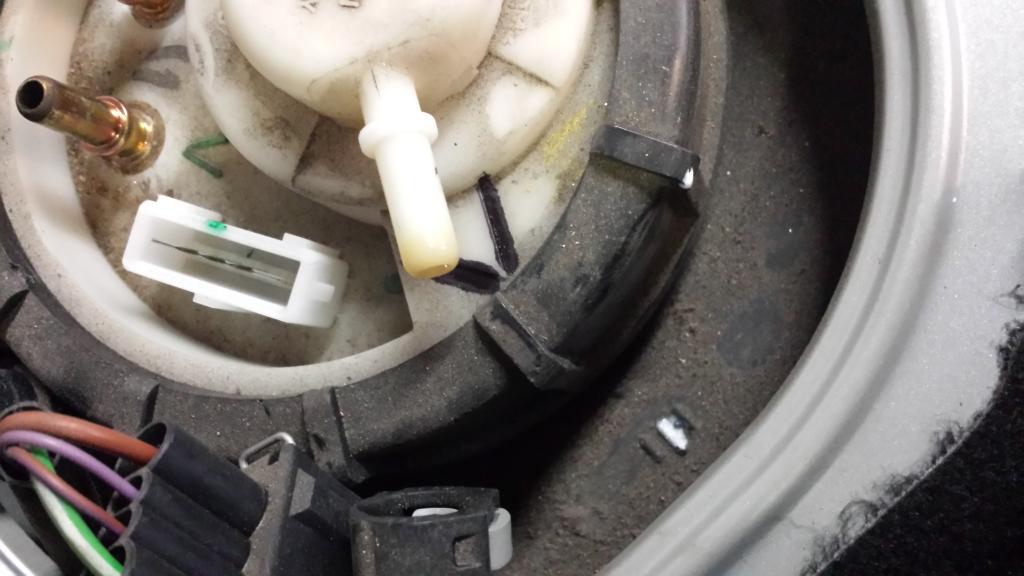
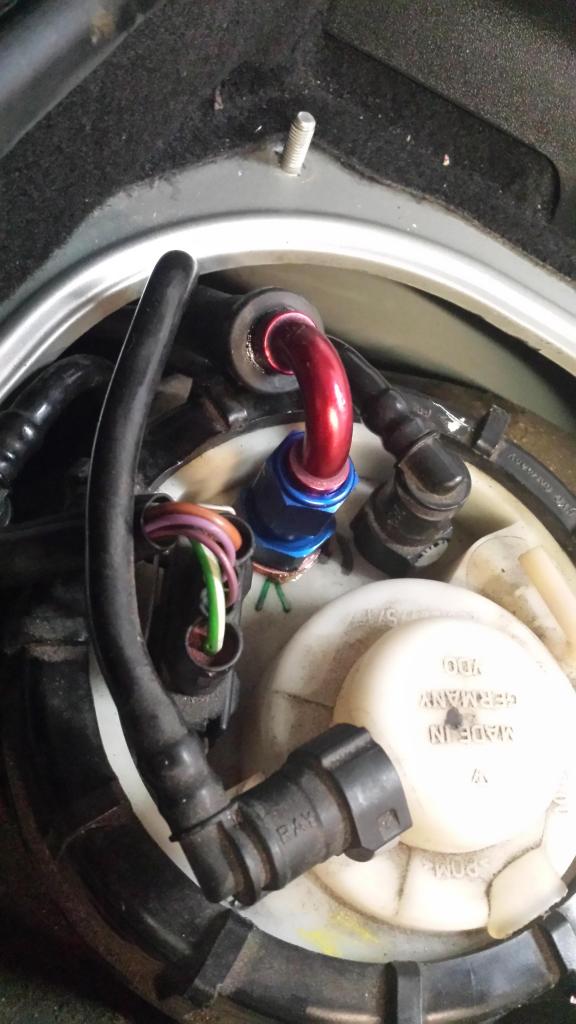
4) remove nut on tank, I use a large screwdriver and tap it gently to loosen the nut. Pull the hat out. unhook the lines and unplug the fuel pump harness. inspect the terminals for corrosion.


5) With the hat out of the way this is what you will see. Reach in and disconnect the two hoses that go to the jet pumps. Then on the back of the fuel basket there are two tabs that you will need to press (one for each pickup tube) to remove. Leave the tubes and jet lines in the tank. twist the basket to release it. make sure you have all the lines and pump harness out before the basket. It is a very tight fit and will not come out even if its just the two pump wires.

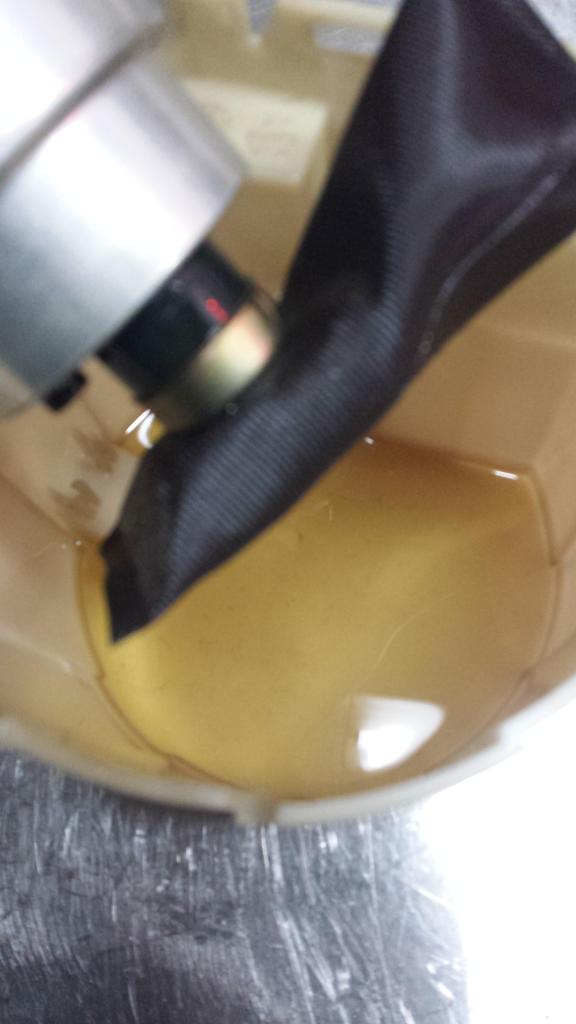
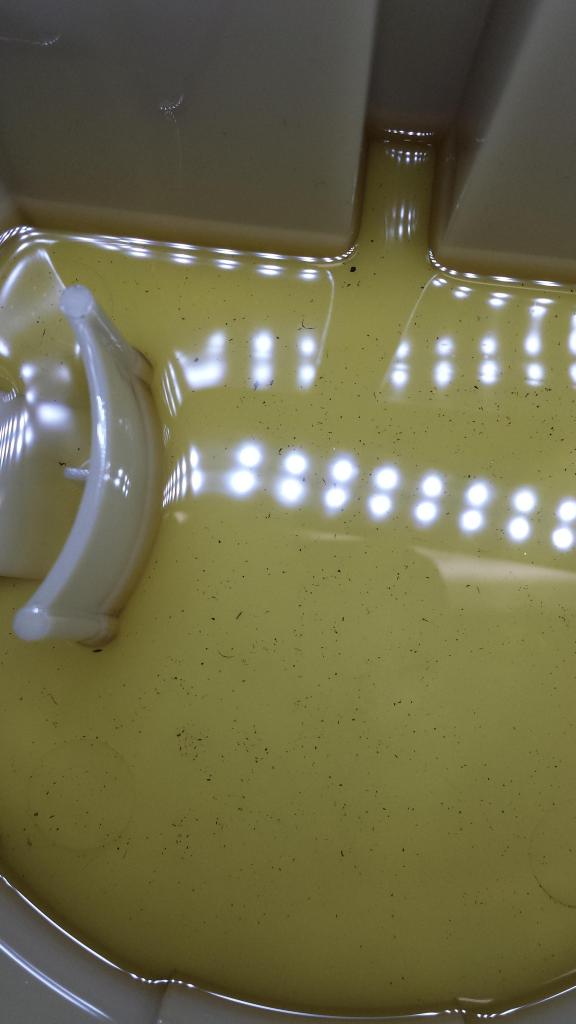
6) With the basket out gently pry on the tabs to open the basket up. Look at all the debris in the basket.... This is a factory car with factory filter.
7) Now with the basket open I push the return line in until I can place a zip tie on one of the ribs to ensure the return can not come free of the basket. If it does the system will not work once the fuel level is below the fill tubes openings in the basket.


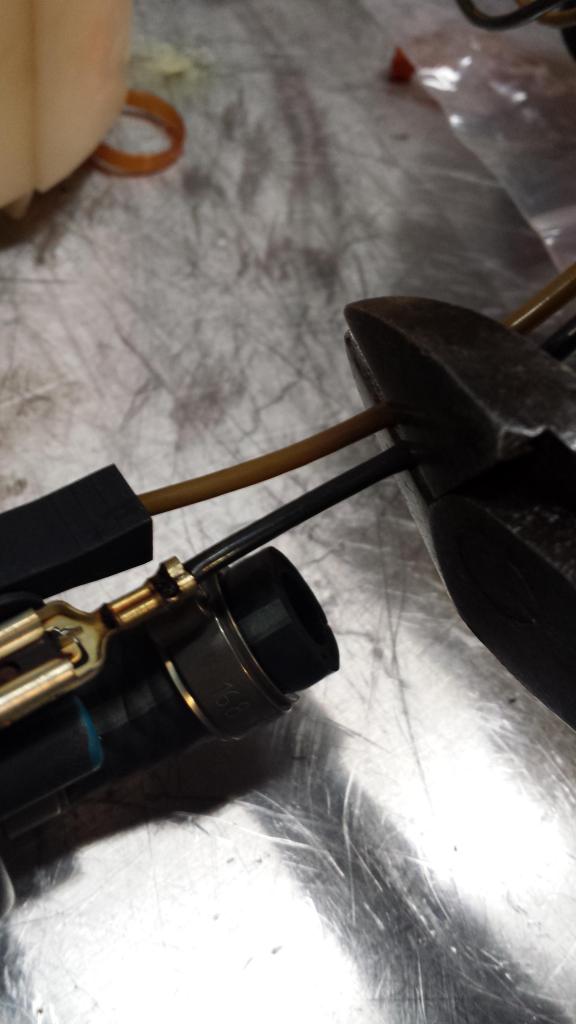
8) I cut the one use clamps with cutters then disconnect the line from pump. Gently pry on tab while pushing/rocking pump to remove from basket top. Then cut harness of pump.
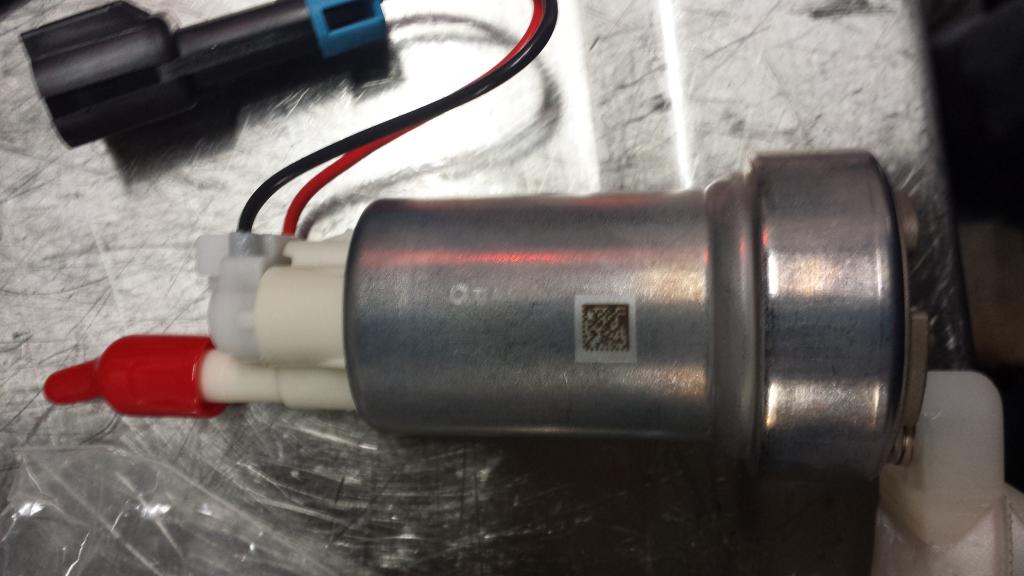

9) I use a Walbro 450 e85 safe pump, it pumps fuel just the same as the non e85 pump and is better suited for dealing with the E10 that comes out of the pumps today. Place pump in the basket, I use a stainless steel hose clamp. Cut a piece of high psi fuel line (-6) and secure with clamps.

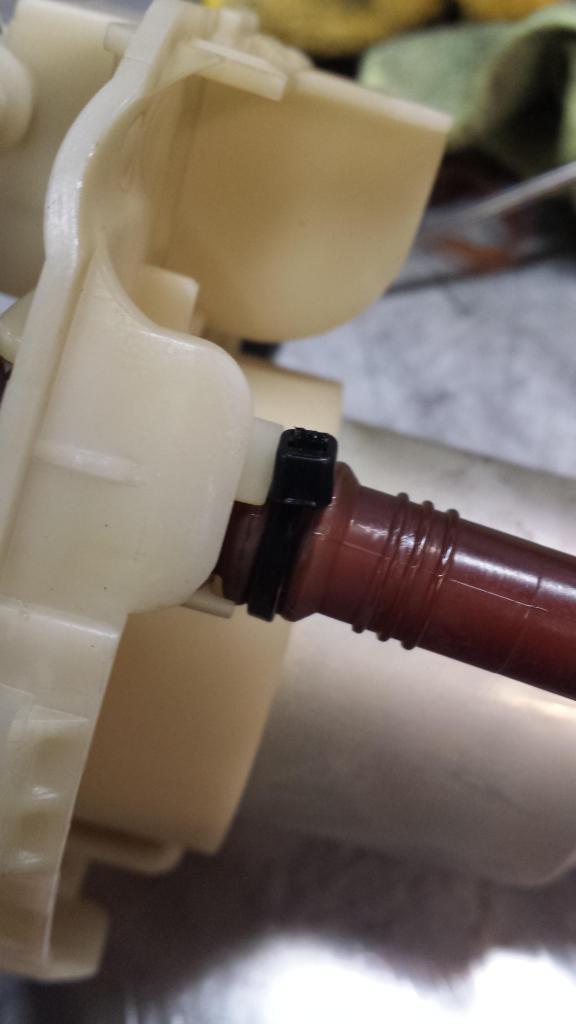
10) remove the rest of the supply line after the Y fitting. replace with -6 and clamps. the little rubber U is the hose that slpits and leaves so many cars stuck. I do not re install the factory check valve, you can install one down stream if you want.


11) Cut the supply fitting of as close as you can to the hat (the one next to green V). I then hold in vise and drill it out using a step drill.


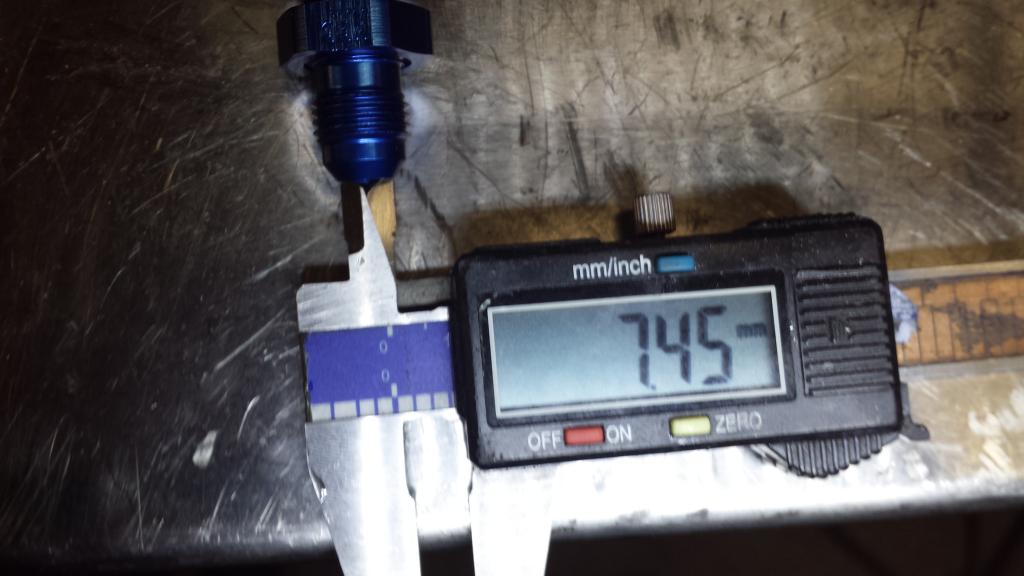
Just a note here. No matter what pump you install if you do not change the fuel feed fitting you will be limited to how much fuel can be pushed threw 4.67mm hole vs the 7.45mm hole of the -6 bulkhead.


12) I use a step drill to prep the hat for the -6 bulk head fitting. I use copper crush washers and O-rings on bulk head. Always grease O-rings.

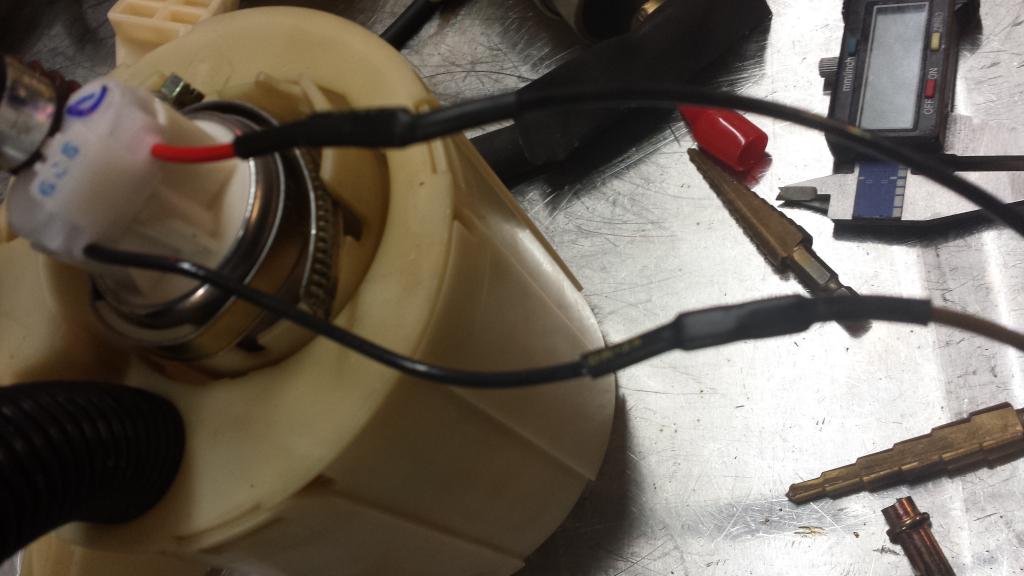
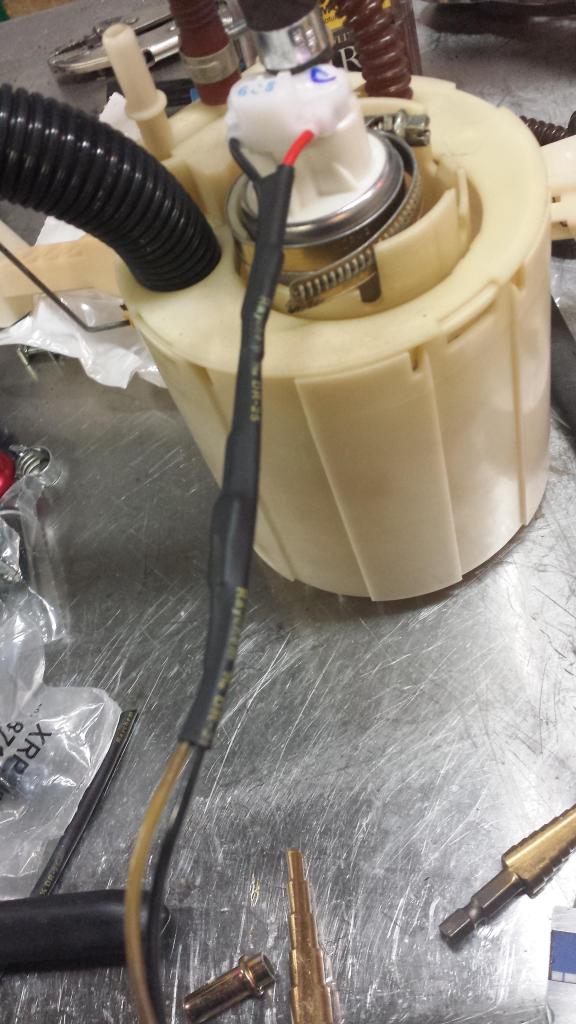
13) Cut the plug off the new pump yellow=ground black=12v. I stagger cut the wires and use crimps, glue line and heat shrink.
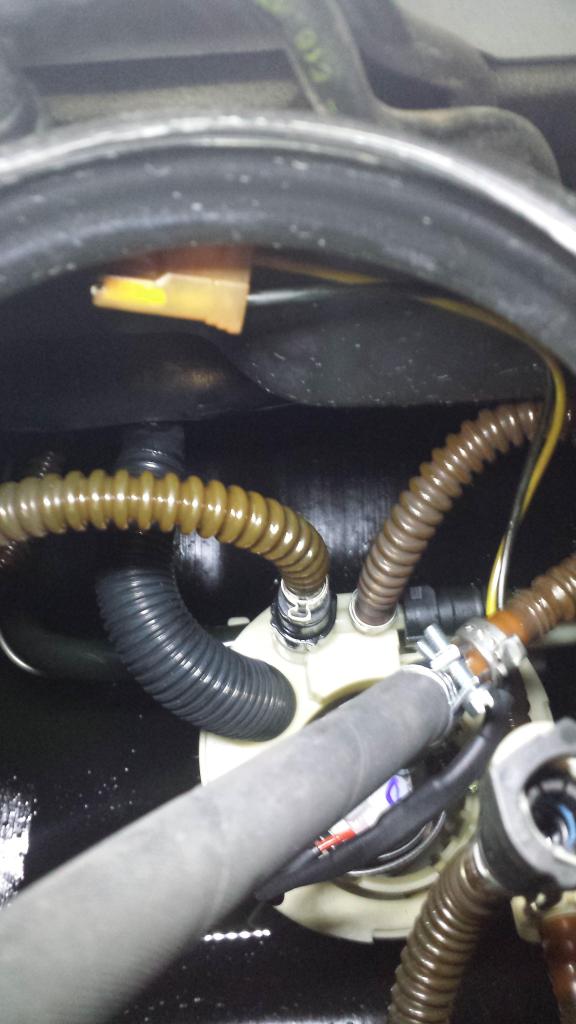
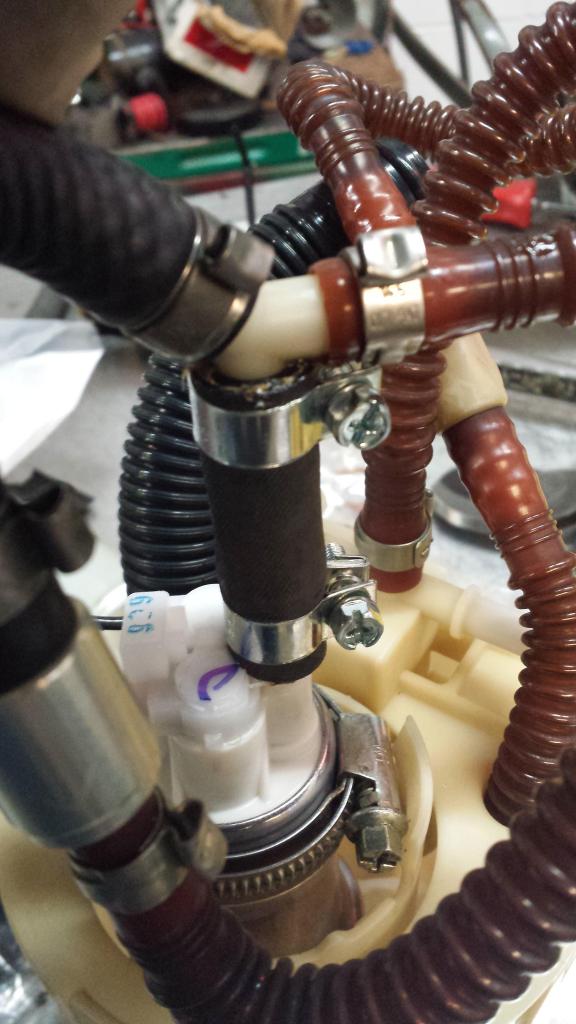
14) place basket back in tank. turn to lock. install the pick up tubes and re connect the jet pump lines. Make sure the black tube is on the fill pipe and into the top of the basket.

15) I grease the rubber seal. reconnect the return line and connect the feed line and plug the fuel pump harness in. press in the hat, line the arrow to the line in the tank. tighten the nut. You will never get the nut to line back up to the glue/ anti tamper mark. so use you head and just snug it up, no need to over tighten and break the nut.
1) Disconnect battery.

2) remove the cover in the boot area (4 10mm nuts) to expose the fuel hat. On a gt2 it is under the battery tray.

3) With the fuel hat exposed you will see a arrow formed into the hat (out lined in black) and 3 lines on the tank. The arrow points to the middle line ( in white for clarity)


4) remove nut on tank, I use a large screwdriver and tap it gently to loosen the nut. Pull the hat out. unhook the lines and unplug the fuel pump harness. inspect the terminals for corrosion.


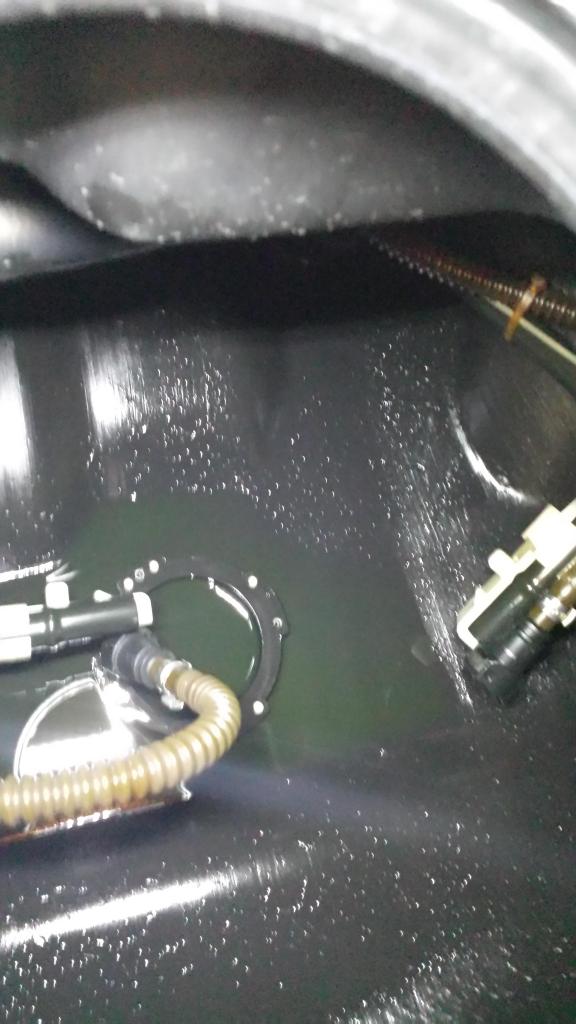
5) With the hat out of the way this is what you will see. Reach in and disconnect the two hoses that go to the jet pumps. Then on the back of the fuel basket there are two tabs that you will need to press (one for each pickup tube) to remove. Leave the tubes and jet lines in the tank. twist the basket to release it. make sure you have all the lines and pump harness out before the basket. It is a very tight fit and will not come out even if its just the two pump wires.


6) With the basket out gently pry on the tabs to open the basket up. Look at all the debris in the basket.... This is a factory car with factory filter.

7) Now with the basket open I push the return line in until I can place a zip tie on one of the ribs to ensure the return can not come free of the basket. If it does the system will not work once the fuel level is below the fill tubes openings in the basket.


8) I cut the one use clamps with cutters then disconnect the line from pump. Gently pry on tab while pushing/rocking pump to remove from basket top. Then cut harness of pump.


9) I use a Walbro 450 e85 safe pump, it pumps fuel just the same as the non e85 pump and is better suited for dealing with the E10 that comes out of the pumps today. Place pump in the basket, I use a stainless steel hose clamp. Cut a piece of high psi fuel line (-6) and secure with clamps.

10) remove the rest of the supply line after the Y fitting. replace with -6 and clamps. the little rubber U is the hose that slpits and leaves so many cars stuck. I do not re install the factory check valve, you can install one down stream if you want.


11) Cut the supply fitting of as close as you can to the hat (the one next to green V). I then hold in vise and drill it out using a step drill.


Just a note here. No matter what pump you install if you do not change the fuel feed fitting you will be limited to how much fuel can be pushed threw 4.67mm hole vs the 7.45mm hole of the -6 bulkhead.


12) I use a step drill to prep the hat for the -6 bulk head fitting. I use copper crush washers and O-rings on bulk head. Always grease O-rings.


13) Cut the plug off the new pump yellow=ground black=12v. I stagger cut the wires and use crimps, glue line and heat shrink.

14) place basket back in tank. turn to lock. install the pick up tubes and re connect the jet pump lines. Make sure the black tube is on the fill pipe and into the top of the basket.


15) I grease the rubber seal. reconnect the return line and connect the feed line and plug the fuel pump harness in. press in the hat, line the arrow to the line in the tank. tighten the nut. You will never get the nut to line back up to the glue/ anti tamper mark. so use you head and just snug it up, no need to over tighten and break the nut.

Thread Starter
|
Registered User
Joined: Jul 2010
Posts: 3,319
From: Long island NY
Rep Power: 381
Running the feed line
Here is how I run the feed line in -6.
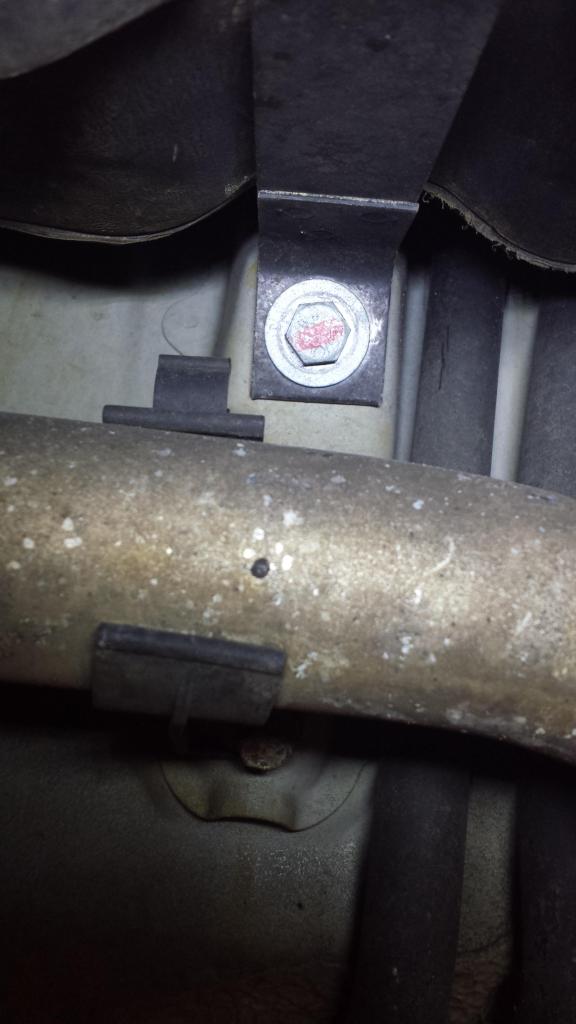

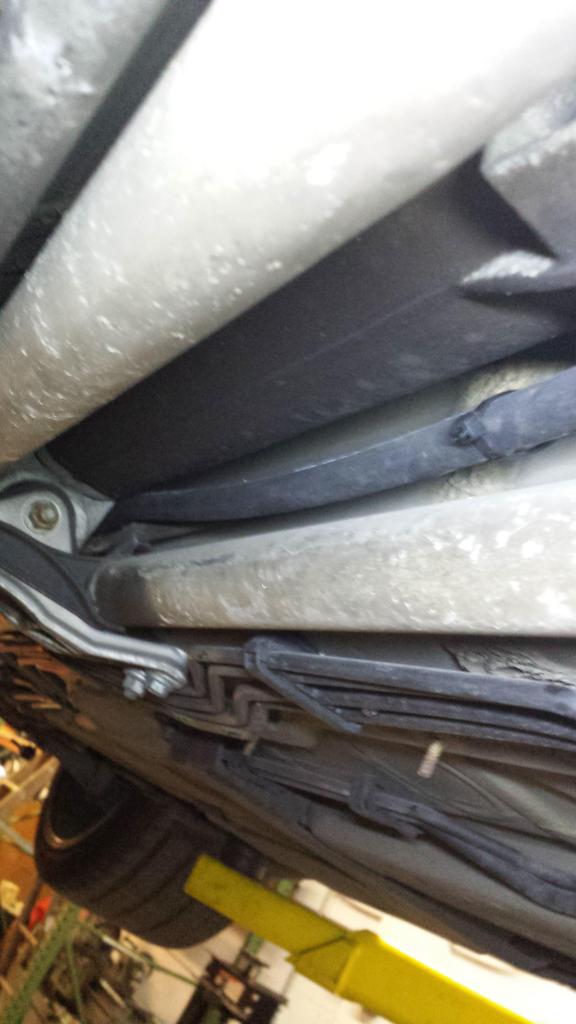
1) loosen these two bolts and remove them. They hold the fuel tank up. There is one more so no need to fear the tank from falling out.
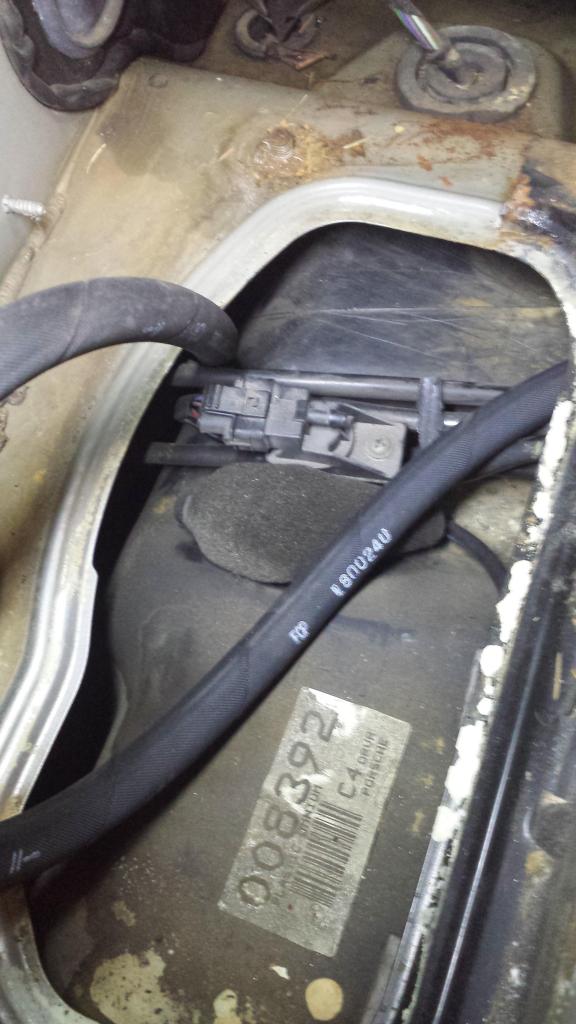
2) With the tank loose you can feed the line down behind the tank. It is not ease. I use a throttle cable from a old HD bike that always comes in handy. I put a hole in the end of the hose and push the cable out from the inside of the hose so that the eyelet is inside the hose, streamlined..
3) I come on down the drives side next to the coolant hard pipes. You can place a check valve her if you like.
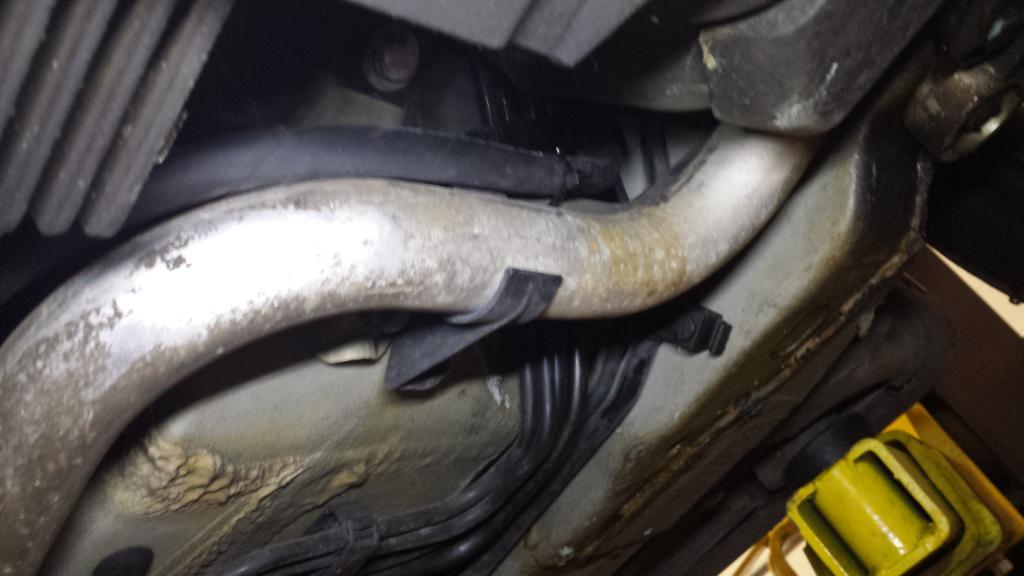
4) line ran along the front drive.
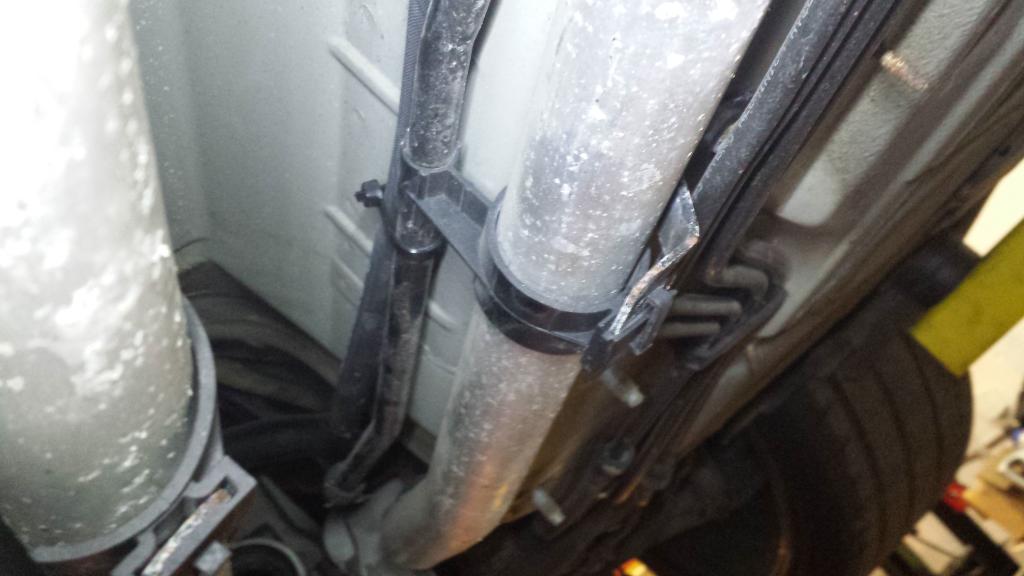
5) next to drive shaft.
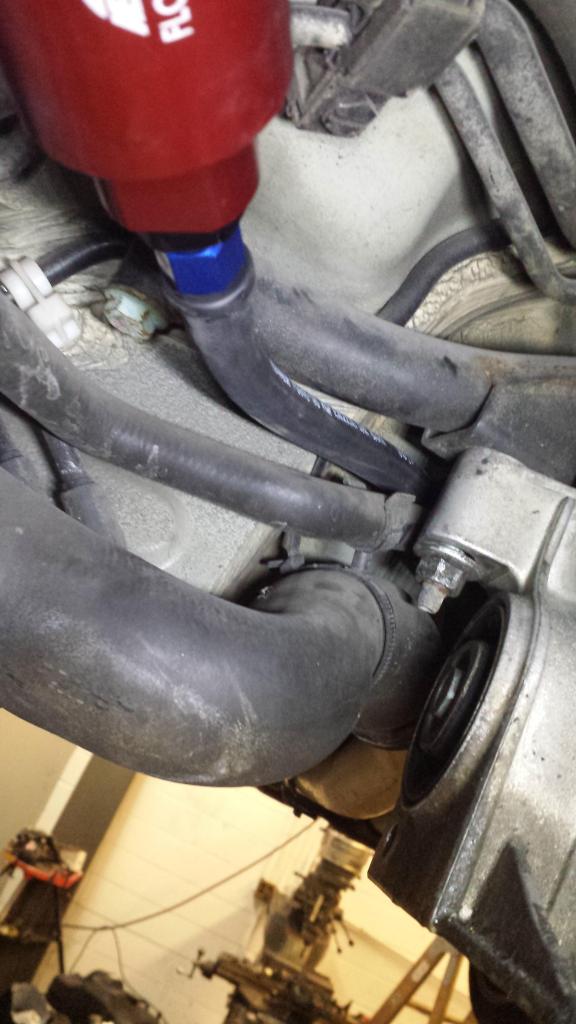
6) past trans mount.

7) filter installed next to trans. I am slipping a 2'' diameter silicone hose over the filter and will zip tie it up.
8) Running the line up to where the old filter was.
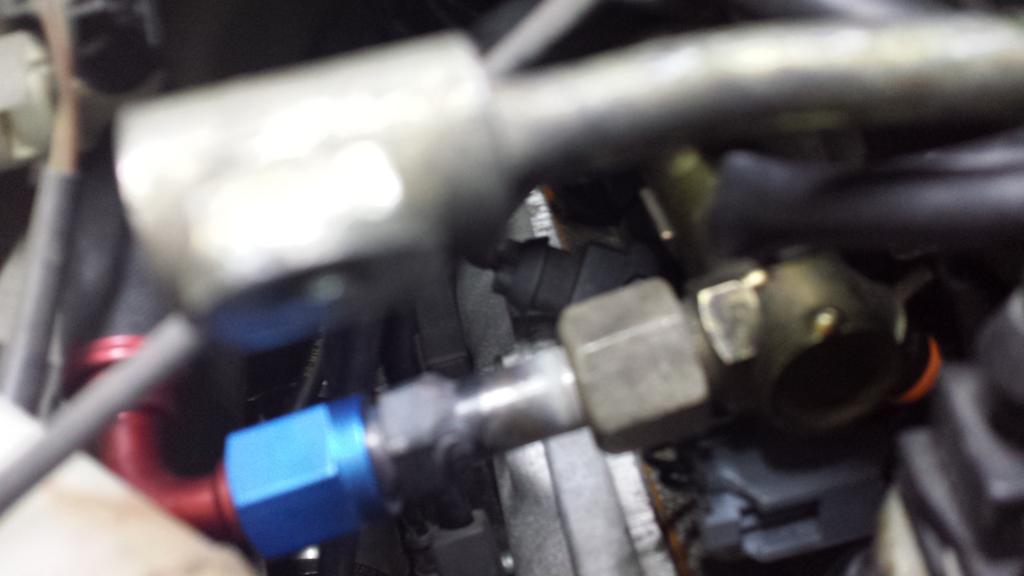
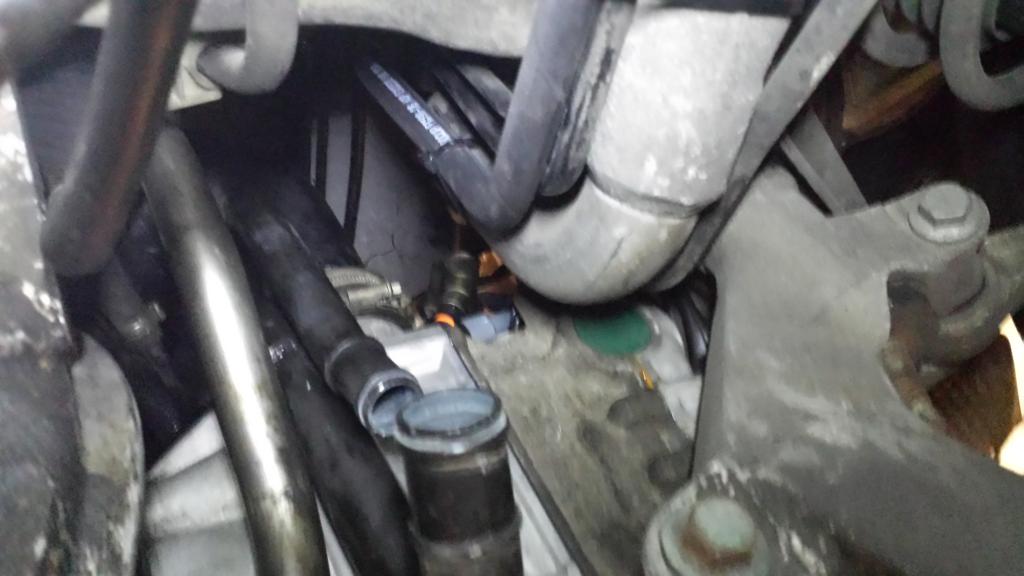
9) Connection to the fuel rail.
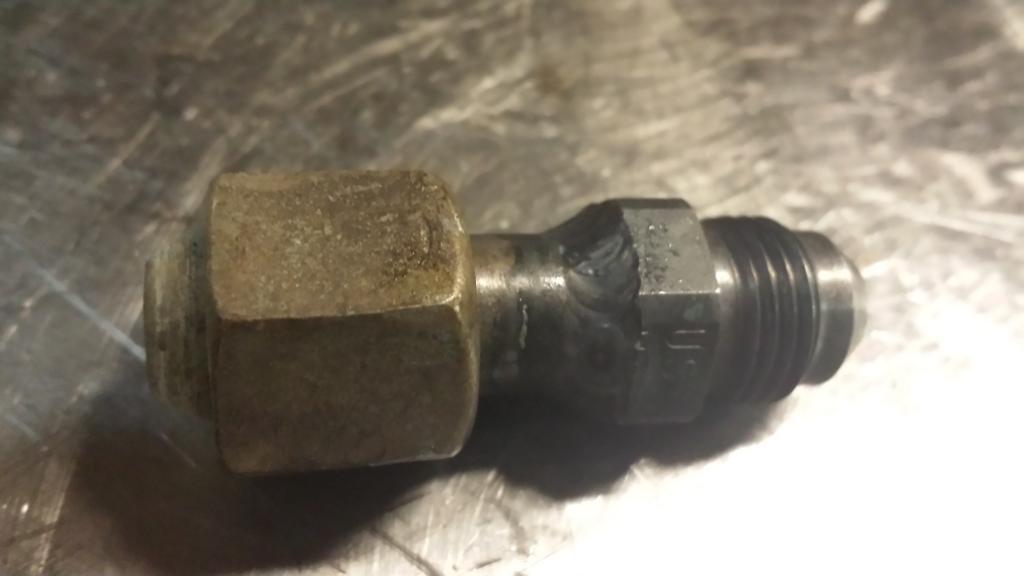
11) I cut the end off the factory fitting drilled it out to full size and welded the to a -6 weld on bung. now you have a full -6 supply line run from the pump to the rail.


1) loosen these two bolts and remove them. They hold the fuel tank up. There is one more so no need to fear the tank from falling out.

2) With the tank loose you can feed the line down behind the tank. It is not ease. I use a throttle cable from a old HD bike that always comes in handy. I put a hole in the end of the hose and push the cable out from the inside of the hose so that the eyelet is inside the hose, streamlined..

3) I come on down the drives side next to the coolant hard pipes. You can place a check valve her if you like.

4) line ran along the front drive.

5) next to drive shaft.

6) past trans mount.

7) filter installed next to trans. I am slipping a 2'' diameter silicone hose over the filter and will zip tie it up.

8) Running the line up to where the old filter was.

9) Connection to the fuel rail.

11) I cut the end off the factory fitting drilled it out to full size and welded the to a -6 weld on bung. now you have a full -6 supply line run from the pump to the rail.
Trending Topics

Rep points for that...
PS the only thing is.. at least for folks that daily d and rack up the miles, I'm not overly keen on that aeromotive filter... they need replacing/changing way too often compared to the stock style filters heh...
PS the only thing is.. at least for folks that daily d and rack up the miles, I'm not overly keen on that aeromotive filter... they need replacing/changing way too often compared to the stock style filters heh...
Registered User
Joined: Jan 2010
Posts: 874
From: Everywhere
Rep Power: 142
Wow I thought you posting the fuel pump was great and now the line, way awesome of you Tim.
So technically with this install, one is pretty close to being able to run E85 by adding some injectors and a fuel pressure regulator? Or is a surge tank a must for E85? And by running E85 I am not referring to big amounts of hp, I know E85 needs 30% more fuel, more like support for 600whp on E85.
So technically with this install, one is pretty close to being able to run E85 by adding some injectors and a fuel pressure regulator? Or is a surge tank a must for E85? And by running E85 I am not referring to big amounts of hp, I know E85 needs 30% more fuel, more like support for 600whp on E85.
Last edited by 02black330ci; Dec 9, 2013 at 05:38 PM.
Registered User

Joined: May 2010
Posts: 432
From: San Francisco
Rep Power: 64
Another solution for people using upgraded turbos with big power = 997.1 has dual pump setup (very similar to two 044's) compared to one in 996 sump. One can add an additional (third) 044 in-tank doing similar to above, would provide enough fuel for 800+whp on E85.
Great info, will look more into this route...
Registered User
Joined: Jan 2010
Posts: 874
From: Everywhere
Rep Power: 142
Never knew this info, good to know. Wondering if one can use this and use two walbros instead of 044s. Makes me think of the electrical draw at that point.
Thread Starter
|
Registered User
Joined: Jul 2010
Posts: 3,319
From: Long island NY
Rep Power: 381
Electrical draw is a major part of a fuel system. Your battery and alternator can only do a set amount. As voltage drops amp draw goes up. As voltage drops things like injector dead times change, ignition dwell.... These are not good for performance or reliability.

Nice write up Tim. Bout time there is a good techy thread up here. IMO This is way better then doing an inline 044 for a 1000$.
In my car Tim and I are actually using this same setup to run and drive the car with a Walbro 450 in stock location. When it comes on power the ProEFI turns on the big boy pumps that are sumped into the bottom of the tank.
This pump flows way more then a 044, its quiet and fits in stock location since its smaller then the factory pump where 044 is bigger and wider (needs basket trimming to fit 044)
__________________
#TeamAIM
997TT SilverSpool - 210.8 mph 1/2 Mile WR Apr 2019, 9.2 @ 168 mph 1/4 Mile Manual World Record , 3.15 60-130 mph , 2.72 100-150 mph , 1400whp E85
996TT SpoolBus - 204.6 mph 1/2 Mile 996TT WR Aug 2018, 9.5 @ 154 mph, 3.23 60-130 mph, 2.5 100-150 mph Manual Porsche World Record, 1400whp E85
997TT SlowBerry - 205.0 mph 1/2 Mile WR Nov 2018, 9.7 @ 170 mph 1/4 Mile , 3.2 60-130 mph , 2.4 100-150 mph , 1420whp E85
ESMOTOR | DO88 | TPC DSC | SYVECS | COBB | IPD | KLINE | XONA | AMS | ID | ERP | SACHS | TURBOSMART | CSF | DODSON |
Registered User
Joined: May 2010
Posts: 432
From: San Francisco
Rep Power: 64
044's (in my opinion) are more reliable, as they are used in day to day driving and I had more luck with them. Walboro 400 E85's do have higher flow numbers.
Another advantage of 997 setup - it eliminates the in tank rubber hose that, at times, cracks (especially with e85 use) and leaves most mechanics puzzled as it produces no codes.
Last I heard, and am not 100%, Chris G. in his GT2 used 2 Walboro 400/E85's that ran 9s. Maybe someone car use 997 sump with two Walboro e85's as it may be sufficient?