

DIY: V1 Hardwire 997 with auto dimming mirror (NO SOLDERING!)

Thread Starter
|
Registered User
Joined: Jul 2008
Posts: 3,191
From: Texas
Rep Power: 342


Thanks to member skeeter for walking me through this. This is his mod, I just took the pics while I did it
There was a very elegant hardwire thread on Renntech that involved a lot of cutting and soldering....
http://www.renntech.org/forums/index...-installation/
Yeah....wasn't too comfortable with that. Couldn't believe that no one posted a V1 hardwire using the V1 kit. To my knowledge, one doesn't exist. Well, here it is:
Tools needed:
Small flathead screwdriver
Phillips screwdriver
Pliers
V1 Hardwire kit
1) Remove the dome light cluster
I used a small flathead screwdriver up by the windshield to gently release the clips and remove the lights.
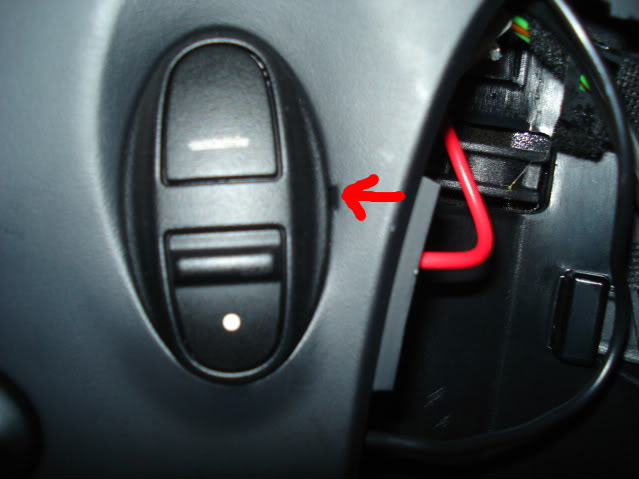
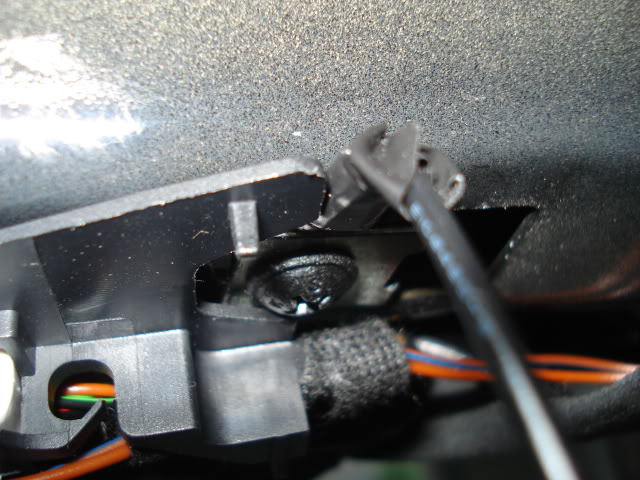
2) Remove the homelink buttons
There is a small tab along side each button cluster (indicated by red arrow). Use a small flathead to pop these out. They come out with very little effort.
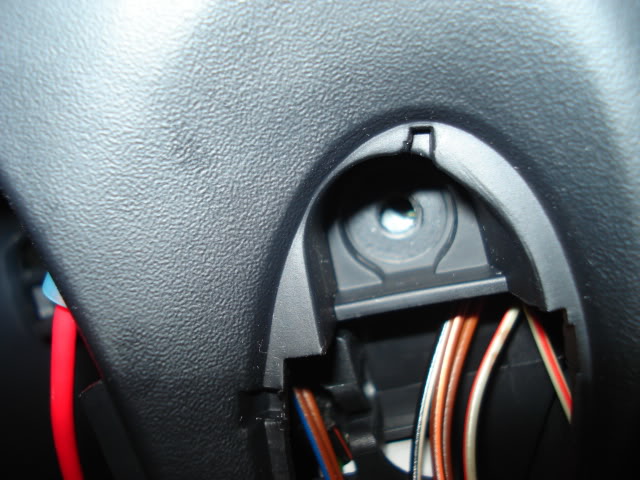
3) Remove the Phillips head screws
After removing the buttons, you will see a Phillips head screw under each button cluster. Remove these.
Screw hole with screw already removed
4) Remove plastic dome cover
Sorry, no pic of this. Get a flathead screwdriver or your fingers under the dome cover back by the sunroof and gently (but firmly") ) pull down. It is held by two clips a few inches from the back and hooks in the front by the windshield. I was afraid of breaking the thing, but it eventually came loose
) pull down. It is held by two clips a few inches from the back and hooks in the front by the windshield. I was afraid of breaking the thing, but it eventually came loose
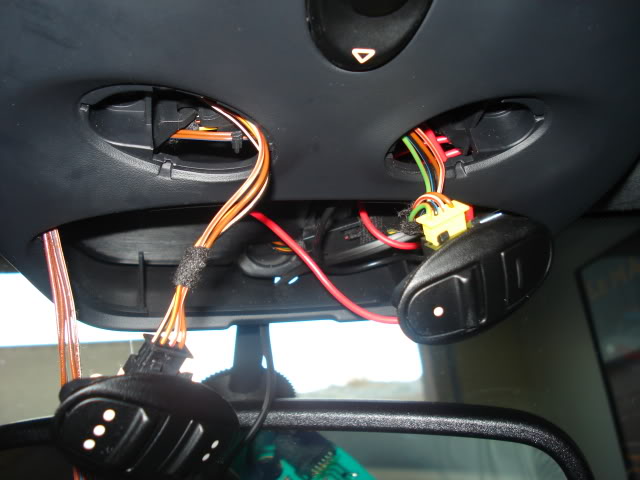
5) Find the ORANGE/BLACK hot wire
This wire is located in the cluster of wires coming out of the headliner on the driver's side. Cut or push the black tape aside to find it and get enough slack to attach the T-tap connector.
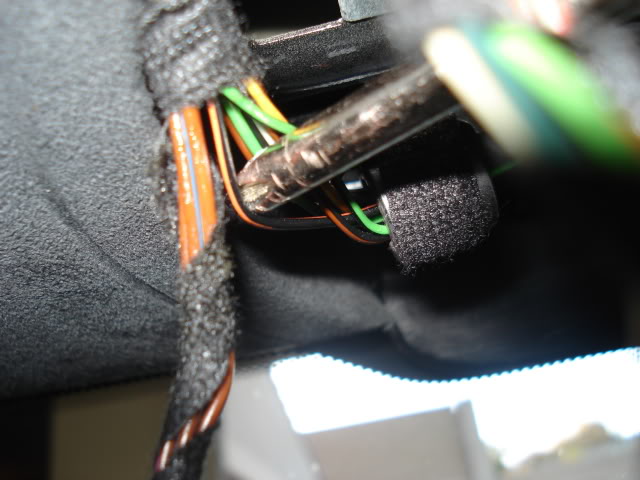
Hot wire with T-tap connected
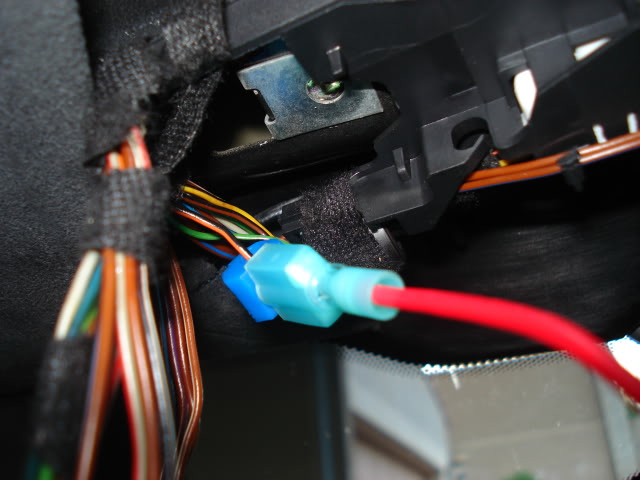
6) Attach the ground
This is PITA Using the metal clip on the passenger side where you removed the Phillips head screw, slowly slide the clip part way towards the passenger side. To prevent it from flying under the headliner if you accidentally remove it completely, stuff a small microfiber or paper towel in the space just to the right of the clip.
Now, using the flathead, pry open a space between the clip and the chassis. Then slide the spade connector from the hardwire kit into this space. Push the clip back to the left to line up the screw hole with the hole in the clip.
7) Test it
Without putting all the lights and panels back just yet, put the Phillips head screw back into the passenger side hole to hold and compress the ground to get a good connection.
Fire up the car and VOILA! Just remember to remove the screw again before you replace the dome cover.
Mine didn't work at first. Had to pinch the T-tap with pliers to adequately cut through the insulation of the hot wire. Other than that, just make sure the ground screw is in tight and it should work.
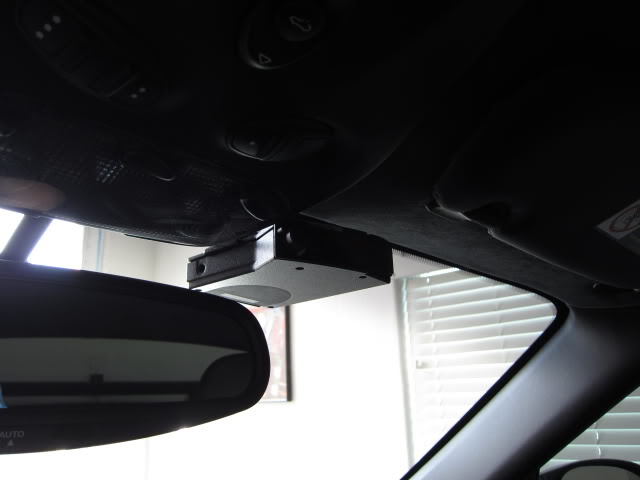
8) Route phone power cord out the front and STUFF the wires under the headliner
Route a short length of the straight cord out through the front hole by the mirror stalk.
Now to get the wires tucked...Ok, this is PITA too . If you haven't already noticed, there isn't a lot of room up there. But if you look under the headliner under the passenger side vanity mirror, there is some room to stuff all the wires. This took some doing with a VERY tight fit, but it works.
9) Reverse the removal steps.
Clip the plastic dome piece into place, replace Phillips head screws, replace buttons and dome light.
Now you can enjoy V1 hardwired goodness
There was a very elegant hardwire thread on Renntech that involved a lot of cutting and soldering....
http://www.renntech.org/forums/index...-installation/
Yeah....wasn't too comfortable with that. Couldn't believe that no one posted a V1 hardwire using the V1 kit. To my knowledge, one doesn't exist. Well, here it is:
Tools needed:
Small flathead screwdriver
Phillips screwdriver
Pliers
V1 Hardwire kit
1) Remove the dome light cluster
I used a small flathead screwdriver up by the windshield to gently release the clips and remove the lights.
2) Remove the homelink buttons
There is a small tab along side each button cluster (indicated by red arrow). Use a small flathead to pop these out. They come out with very little effort.
3) Remove the Phillips head screws
After removing the buttons, you will see a Phillips head screw under each button cluster. Remove these.
Screw hole with screw already removed
4) Remove plastic dome cover
Sorry, no pic of this. Get a flathead screwdriver or your fingers under the dome cover back by the sunroof and gently (but firmly
) pull down. It is held by two clips a few inches from the back and hooks in the front by the windshield. I was afraid of breaking the thing, but it eventually came loose5) Find the ORANGE/BLACK hot wire
This wire is located in the cluster of wires coming out of the headliner on the driver's side. Cut or push the black tape aside to find it and get enough slack to attach the T-tap connector.
Hot wire with T-tap connected
6) Attach the ground
This is PITA
Using the metal clip on the passenger side where you removed the Phillips head screw, slowly slide the clip part way towards the passenger side. To prevent it from flying under the headliner if you accidentally remove it completely, stuff a small microfiber or paper towel in the space just to the right of the clip.Now, using the flathead, pry open a space between the clip and the chassis. Then slide the spade connector from the hardwire kit into this space. Push the clip back to the left to line up the screw hole with the hole in the clip.
7) Test it
Without putting all the lights and panels back just yet, put the Phillips head screw back into the passenger side hole to hold and compress the ground to get a good connection.
Fire up the car and VOILA! Just remember to remove the screw again before you replace the dome cover.
Mine didn't work at first. Had to pinch the T-tap with pliers to adequately cut through the insulation of the hot wire. Other than that, just make sure the ground screw is in tight and it should work.
8) Route phone power cord out the front and STUFF the wires under the headliner
Route a short length of the straight cord out through the front hole by the mirror stalk.
Now to get the wires tucked...Ok, this is PITA too
. If you haven't already noticed, there isn't a lot of room up there. But if you look under the headliner under the passenger side vanity mirror, there is some room to stuff all the wires. This took some doing with a VERY tight fit, but it works.9) Reverse the removal steps.
Clip the plastic dome piece into place, replace Phillips head screws, replace buttons and dome light.
Now you can enjoy V1 hardwired goodness
Registered User
Joined: Feb 2010
Posts: 1,055
From: Temecula, Ca
Rep Power: 80
Wow! Thats perfect Ed! Great job...I was to lazy to do a diy once I was done...Plus I didn't want to take it back apart for pics haha! If you guys can find the red T-tap, then you won't have to pinch the fitting...

Registered User
Joined: Jul 2010
Posts: 66
From: San Francisco
Rep Power: 18
The clip that is provided with the hardwire kit from V1 is kinda large and big for the little wire. I would reinforce it with electrical tape from being dislodged and losing power for those occasional bumps.
Registered User
Joined: Feb 2010
Posts: 1,055
From: Temecula, Ca
Rep Power: 80
Don't use the blue tap...Just go down to the parts store and purchase a red tap...This way you will have no troubles! If you follow this, it will turn off with the key...Took me a few trys to figure out which wire would work, but this one is perfect!
Thread Starter
|
Registered User
Joined: Jul 2008
Posts: 3,191
From: Texas
Rep Power: 342
Yup, what Skeet said. I'm gonna have to go back into the panel to hook up a newly acquired concealed display. Anyone have any suggestions on how I should route the cable and where to put it?
Trending Topics
Registered User
Joined: Feb 2010
Posts: 1,055
From: Temecula, Ca
Rep Power: 80
LOL! Did you buy the mini box? I thought about that too, but haven't put much thought on how to run it...
Thread Starter
|
Registered User
Joined: Jul 2008
Posts: 3,191
From: Texas
Rep Power: 342
Didn't plan on buying it, but I traded it for my Gilmour Foam Gun with a local friend. Would like to put it on top of the steering column, but not really sure how I would route the wire.
Registered User
Joined: Feb 2010
Posts: 1,055
From: Temecula, Ca
Rep Power: 80
You'll have to fish it through the head liner and down the pillar....It's going to be a pain! Thats the reason I tried to find power in the roof, so I didn't have to run wires down the pillar...
Registered User

Joined: Aug 2009
Posts: 1,623
From: New England
Rep Power: 81
ed,
nice work
i will tell you that using the grides bracket and hardwire kit was a snap and it is a direct plug in into the fuse box...gary's directions and pics were a snap, and the use of the bracket avoids having to deal with suction cups
nice work
i will tell you that using the grides bracket and hardwire kit was a snap and it is a direct plug in into the fuse box...gary's directions and pics were a snap, and the use of the bracket avoids having to deal with suction cups
Thread Starter
|
Registered User
Joined: Jul 2008
Posts: 3,191
From: Texas
Rep Power: 342
Decided to tackle the V1 concealed display since it wasn't 120 degrees outside today
Mounted it on top of the steering column.
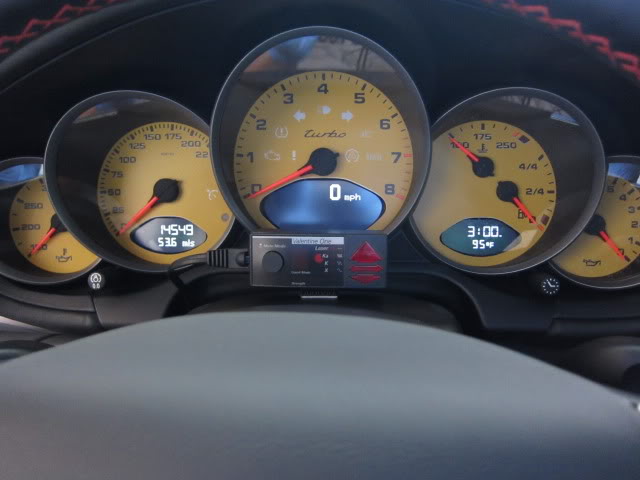
Then fed it between the trim above the ignition/light controls, under the A-pillar, across the headliner and back into the power supply in the dome cluster. Will try to tidy up the wire as it wraps around the driver's side air vent, but as it is, you can only see it if the door is open.
http://www.youtube.com/watch?v=bskdHrqhO-A
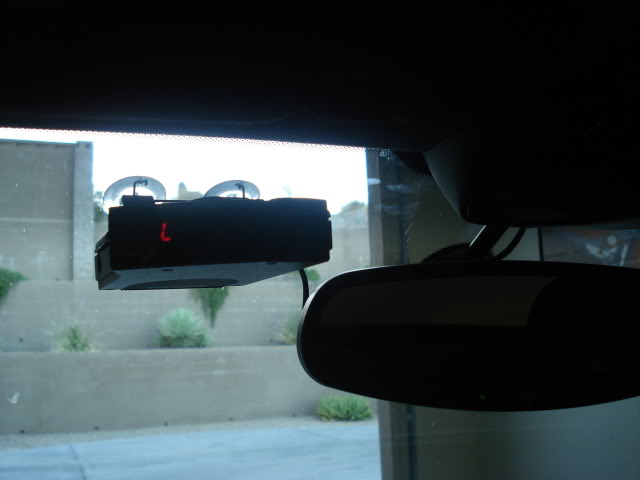
Remounted the main unit to the right of the rear view mirror.
Fired it up and works perfectly!
http://www.youtube.com/watch?v=L_lPUYwBgCo
Actually would have preferred to more 'stealthily' mount it in the little storage compartment below the climate controls, but I couldn't figure out a way to adequately route and tuck away the wire.
Mounted it on top of the steering column.
Then fed it between the trim above the ignition/light controls, under the A-pillar, across the headliner and back into the power supply in the dome cluster. Will try to tidy up the wire as it wraps around the driver's side air vent, but as it is, you can only see it if the door is open.
http://www.youtube.com/watch?v=bskdHrqhO-A
Remounted the main unit to the right of the rear view mirror.
Fired it up and works perfectly!
http://www.youtube.com/watch?v=L_lPUYwBgCo
Actually would have preferred to more 'stealthily' mount it in the little storage compartment below the climate controls, but I couldn't figure out a way to adequately route and tuck away the wire.

Registered User
Joined: Sep 2010
Posts: 286
From: Mia, FL
Rep Power: 45
I just did the V1 install, if you don't mind me I would like to add that you could get the ground connection from any of the screws holding the sunroof motor, easier that way, remember the motor is attached to the cars body...
Hope this helps
Jay
Hope this helps
Jay