Aston Martin DB7, DB9, DBS, Vantage V8, Vanquish, and Classic models

Has anyone tried these new black markers?

Thread Tools
 
Search this Thread
 
Rate Thread
 
  #16  
Old 02-17-2015, 09:27 AM
EspritNOOB's Avatar
Registered User
Join Date: Feb 2015
Location: Downey Ca.
Posts: 72
Rep Power: 14
EspritNOOB has a spectacular aura aboutEspritNOOB has a spectacular aura aboutEspritNOOB has a spectacular aura about
I'm also interested, how difficult is the installation?
 
  #17  
Old 02-17-2015, 10:06 AM
EZ Cookin's Avatar
Registered User
Join Date: Jan 2008
Location: New Braunfels, TX
Posts: 1,257
Rep Power: 81
EZ Cookin has much to be proud ofEZ Cookin has much to be proud ofEZ Cookin has much to be proud ofEZ Cookin has much to be proud ofEZ Cookin has much to be proud ofEZ Cookin has much to be proud ofEZ Cookin has much to be proud ofEZ Cookin has much to be proud ofEZ Cookin has much to be proud ofEZ Cookin has much to be proud of
It took me about 30 minutes. Not very difficult.
 
  #18  
Old 02-17-2015, 12:33 PM
EspritNOOB's Avatar
Registered User
Join Date: Feb 2015
Location: Downey Ca.
Posts: 72
Rep Power: 14
EspritNOOB has a spectacular aura aboutEspritNOOB has a spectacular aura aboutEspritNOOB has a spectacular aura about
Originally Posted by EZ Cookin
It took me about 30 minutes. Not very difficult.
Thanks looks like these will be in my future.
 
  #19  
Old 02-17-2015, 06:37 PM
Bleen's Avatar
Registered User
Thread Starter
Join Date: May 2013
Location: Glendale, CA
Posts: 431
Rep Power: 33
Bleen is a glorious beacon of lightBleen is a glorious beacon of lightBleen is a glorious beacon of lightBleen is a glorious beacon of lightBleen is a glorious beacon of lightBleen is a glorious beacon of light
Originally Posted by EZ Cookin
It took me about 30 minutes. Not very difficult.
I got these in the mail last Friday but haven't had the chance to install them yet. Hopefully this coming weekend. When I do, I'll take lots of photos / do a write-up.
 
  #20  
Old 02-17-2015, 07:14 PM
EZ Cookin's Avatar
Registered User
Join Date: Jan 2008
Location: New Braunfels, TX
Posts: 1,257
Rep Power: 81
EZ Cookin has much to be proud ofEZ Cookin has much to be proud ofEZ Cookin has much to be proud ofEZ Cookin has much to be proud ofEZ Cookin has much to be proud ofEZ Cookin has much to be proud ofEZ Cookin has much to be proud ofEZ Cookin has much to be proud ofEZ Cookin has much to be proud ofEZ Cookin has much to be proud of
I just ordered some smoked lights for the small round clear ones on the side front corner panels. I will let you know how those turn out as well.
 
  #21  
Old 02-18-2015, 03:55 AM
flinder's Avatar
Registered User
Join Date: Apr 2010
Location: dearborn
Posts: 358
Rep Power: 37
flinder is a splendid one to beholdflinder is a splendid one to beholdflinder is a splendid one to beholdflinder is a splendid one to beholdflinder is a splendid one to beholdflinder is a splendid one to beholdflinder is a splendid one to behold
Picks up the brown/orange in Tungsten

EZ/Karl, Did you notice if the small, round side markers in the fenders (called repeaters in European car speak I believe) were available in the amber lens color?
 
  #22  
Old 02-18-2015, 04:37 AM
karlfranz's Avatar
Registered User
Join Date: Apr 2011
Location: Melbourne
Posts: 2,358
Rep Power: 212
karlfranz Is a GOD !karlfranz Is a GOD !karlfranz Is a GOD !karlfranz Is a GOD !karlfranz Is a GOD !karlfranz Is a GOD !karlfranz Is a GOD !karlfranz Is a GOD !karlfranz Is a GOD !karlfranz Is a GOD !karlfranz Is a GOD !
Search for a Ford Transit or Panda. Those vehicles have the same repeater lights.
 
  #23  
Old 02-18-2015, 08:00 AM
EspritNOOB's Avatar
Registered User
Join Date: Feb 2015
Location: Downey Ca.
Posts: 72
Rep Power: 14
EspritNOOB has a spectacular aura aboutEspritNOOB has a spectacular aura aboutEspritNOOB has a spectacular aura about
Looking forward to the write up. Thanks Fellas.
 
  #24  
Old 02-18-2015, 12:48 PM
Bleen's Avatar
Registered User
Thread Starter
Join Date: May 2013
Location: Glendale, CA
Posts: 431
Rep Power: 33
Bleen is a glorious beacon of lightBleen is a glorious beacon of lightBleen is a glorious beacon of lightBleen is a glorious beacon of lightBleen is a glorious beacon of lightBleen is a glorious beacon of light
Originally Posted by karlfranz
Search for a Ford Transit or Panda. Those vehicles have the same repeater lights.
http://pumabuild.com/pumacat/product...f2abab671b35c2


Like these?
 
  #25  
Old 02-18-2015, 01:29 PM
EZ Cookin's Avatar
Registered User
Join Date: Jan 2008
Location: New Braunfels, TX
Posts: 1,257
Rep Power: 81
EZ Cookin has much to be proud ofEZ Cookin has much to be proud ofEZ Cookin has much to be proud ofEZ Cookin has much to be proud ofEZ Cookin has much to be proud ofEZ Cookin has much to be proud ofEZ Cookin has much to be proud ofEZ Cookin has much to be proud ofEZ Cookin has much to be proud ofEZ Cookin has much to be proud of
  #26  
Old 02-18-2015, 03:28 PM
karlfranz's Avatar
Registered User
Join Date: Apr 2011
Location: Melbourne
Posts: 2,358
Rep Power: 212
karlfranz Is a GOD !karlfranz Is a GOD !karlfranz Is a GOD !karlfranz Is a GOD !karlfranz Is a GOD !karlfranz Is a GOD !karlfranz Is a GOD !karlfranz Is a GOD !karlfranz Is a GOD !karlfranz Is a GOD !karlfranz Is a GOD !
^^^ Price seems a bit outrageous on those.
 
  #27  
Old 02-21-2015, 10:21 PM
Bleen's Avatar
Registered User
Thread Starter
Join Date: May 2013
Location: Glendale, CA
Posts: 431
Rep Power: 33
Bleen is a glorious beacon of lightBleen is a glorious beacon of lightBleen is a glorious beacon of lightBleen is a glorious beacon of lightBleen is a glorious beacon of lightBleen is a glorious beacon of light
So today I gave the markers a go.

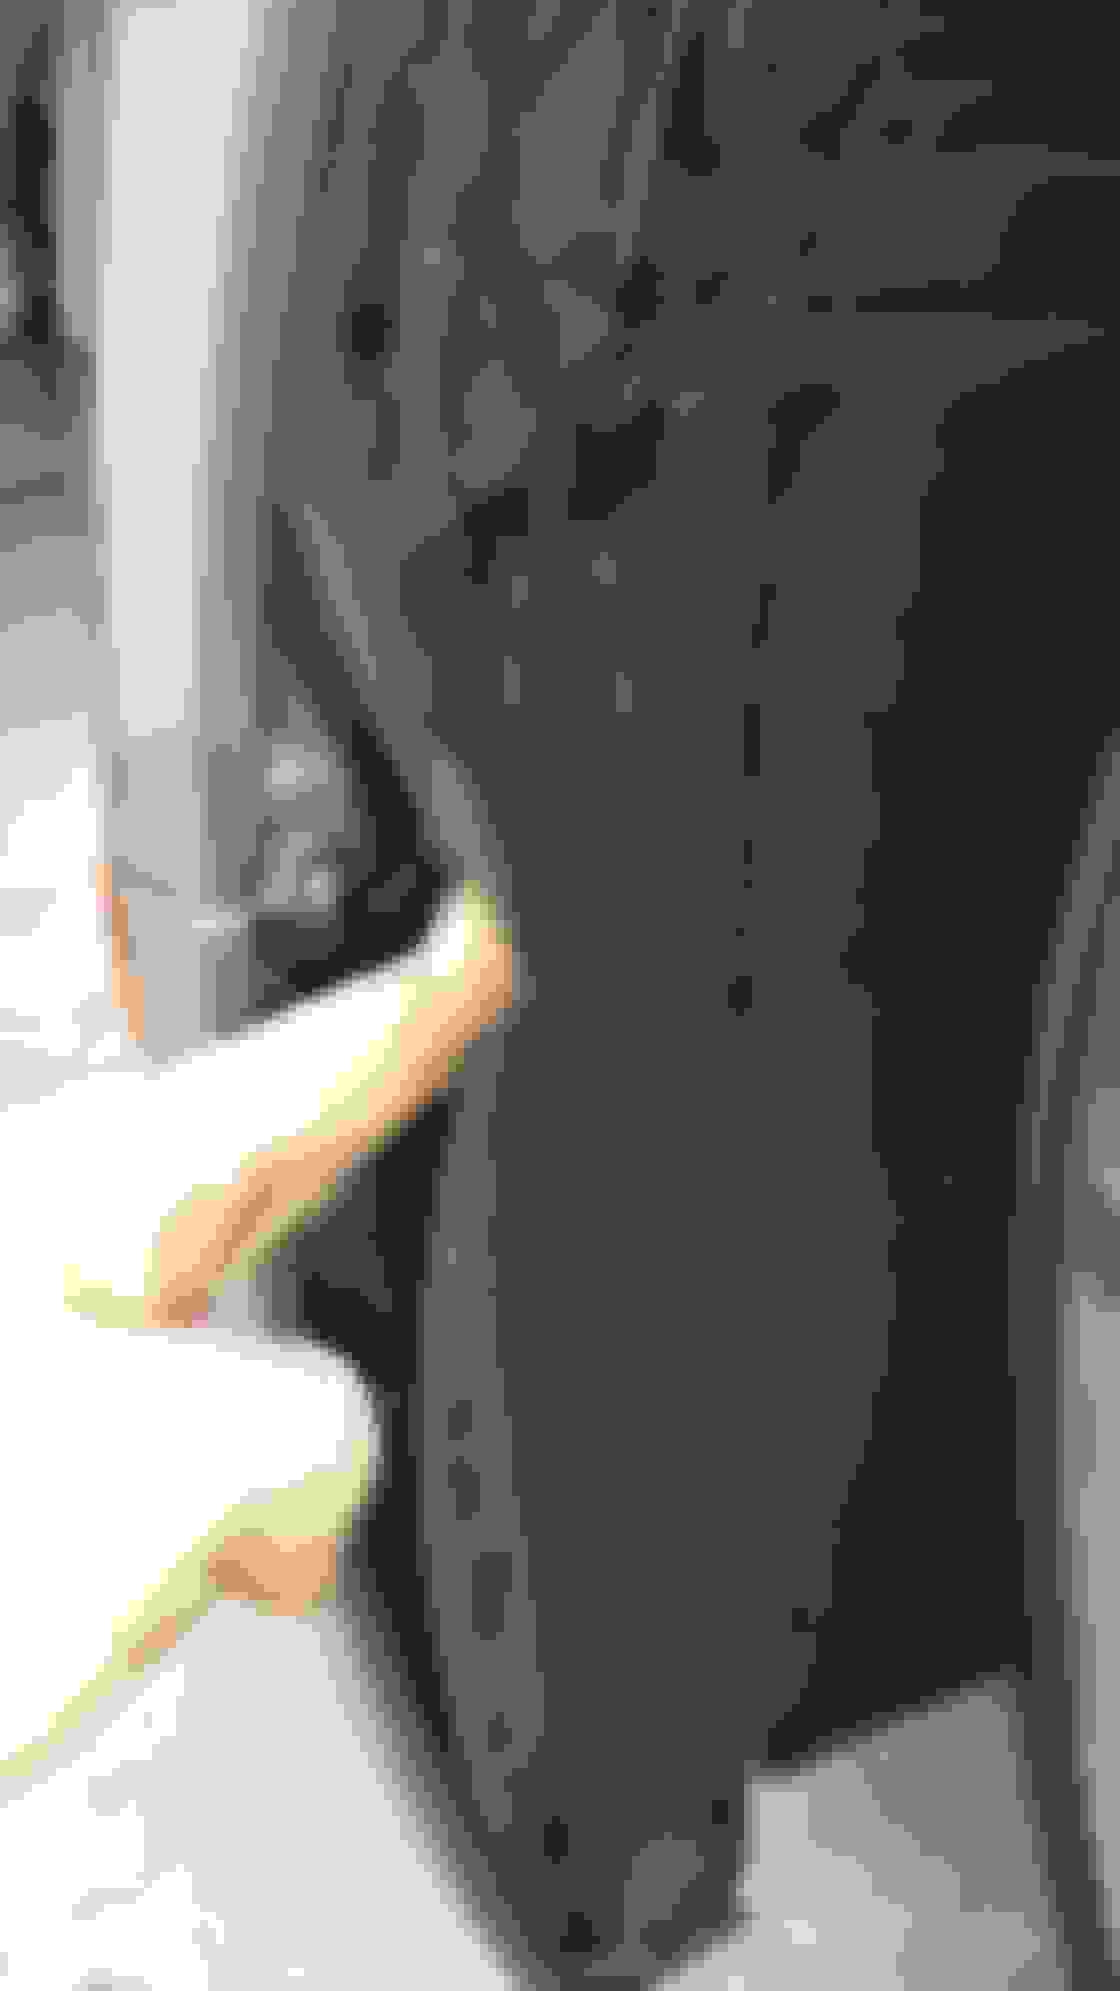
Unsure how to proceed, first I tried accessing the marker through the tiny door behind the headlight, in the wheel well:


You turn the screw 90 degrees, then just pry it open. There's a few plastic tabs but they're flexible. Got my hands super dirty. It didn't seem to be for anything other than to access the headlights so I put it back.

So I saw two screws lower in the wheel liner, and screwed them off. With a bit of force I managed to pry open the liner, like this:


Bingo! There's the marker. Unfortunately I couldn't go further as you need a 10mm ratcheted, flex-head wrench at the least. I just ordered a tiny one, should be arriving this coming week. Hopefully I'll be able to do this next weekend. Looks like just two screws, though I don't see any thread on the new markers.

Can anyone elaborate a bit more on the installation?
 
  #28  
Old 02-22-2015, 09:46 PM
Jeff1smith's Avatar
Registered User
Join Date: Nov 2014
Location: Port Angeles, WA
Posts: 34
Rep Power: 11
Jeff1smith is on a distinguished road
Yes , a 10mm ratcheted, flex-head wrench is exactly what you need. Rear nut is easy to remove, fwd not so much. Ended up using a hack saw blade to cut the fwd stud down to nut level because there is black plastic box that comes right up to the stud and prohibits you from getting your wrench on the nut. Once it is cut down, use your flex 10 mm wrench and remove fwd nut. New installation doesn't use the mounting plate , so no worries.

Anyone installed the round side markers yet?
 
  #29  
Old 02-22-2015, 10:24 PM
Bleen's Avatar
Registered User
Thread Starter
Join Date: May 2013
Location: Glendale, CA
Posts: 431
Rep Power: 33
Bleen is a glorious beacon of lightBleen is a glorious beacon of lightBleen is a glorious beacon of lightBleen is a glorious beacon of lightBleen is a glorious beacon of lightBleen is a glorious beacon of light
Originally Posted by Jeff1smith
Yes , a 10mm ratcheted, flex-head wrench is exactly what you need. Rear nut is easy to remove, fwd not so much. Ended up using a hack saw blade to cut the fwd stud down to nut level because there is black plastic box that comes right up to the stud and prohibits you from getting your wrench on the nut. Once it is cut down, use your flex 10 mm wrench and remove fwd nut. New installation doesn't use the mounting plate , so no worries.

Anyone installed the round side markers yet?
Just went back on this thread and saw yours about doing this. I don't think I fully understand what to cut, so I'll try not cutting anything.

This is what I bought:
GearWrench 9551 10mm Stubby Flex-Head Combination Ratcheting Wrench - Box End Wrenches - Amazon.com GearWrench 9551 10mm Stubby Flex-Head Combination Ratcheting Wrench - Box End Wrenches - Amazon.com

Also unsure what you mean by mounting plate, I guess I'll see when I do it
 
  #30  
Old 02-23-2015, 04:06 AM
Jeff1smith's Avatar
Registered User
Join Date: Nov 2014
Location: Port Angeles, WA
Posts: 34
Rep Power: 11
Jeff1smith is on a distinguished road
Originally Posted by Bleen
Just went back on this thread and saw yours about doing this. I don't think I fully understand what to cut, so I'll try not cutting anything.

This is what I bought:
GearWrench 9551 10mm Stubby Flex-Head Combination Ratcheting Wrench - Box End Wrenches - Amazon.com

Also unsure what you mean by mounting plate, I guess I'll see when I do it
The mounting plate I refers to is just the old backing of the amber light you are removing. Since it is coming out, don't worry about cutting the plastic stud, unless you think you may reinstall. As you read from my post, I didn't have a flex head ratchet and spent too many hours trying to get the wrench around the nut. The pro at the body shop also cut it down in order to get the wrench on the nut, due to a plastic housing right up against the stud. This was on a DB9, so yours may not have this issue. Good luck


You have already rated this thread Rating: Thread Rating: 0 votes,  average.

Quick Reply: Has anyone tried these new black markers?


All times are GMT -6. The time now is 10:35 PM.