When you click on links to various merchants on this site and make a purchase, this can result in this site earning a commission. Affiliate programs and affiliations include, but are not limited to, the eBay Partner Network.
The project is progressing nicely, although not without hiccups.
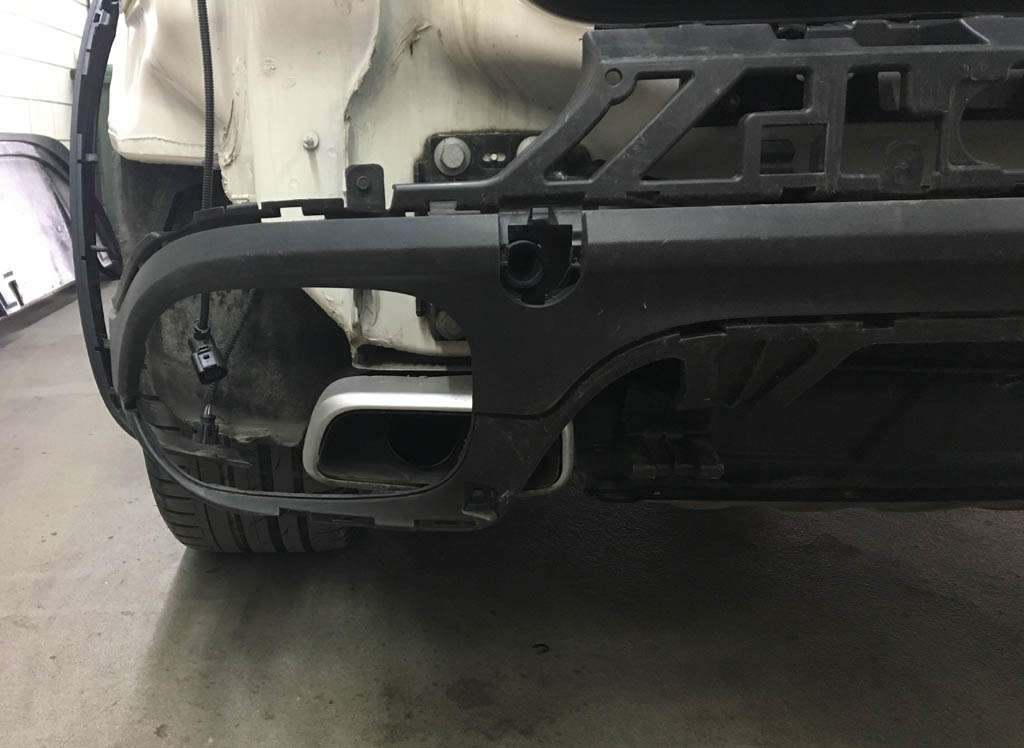
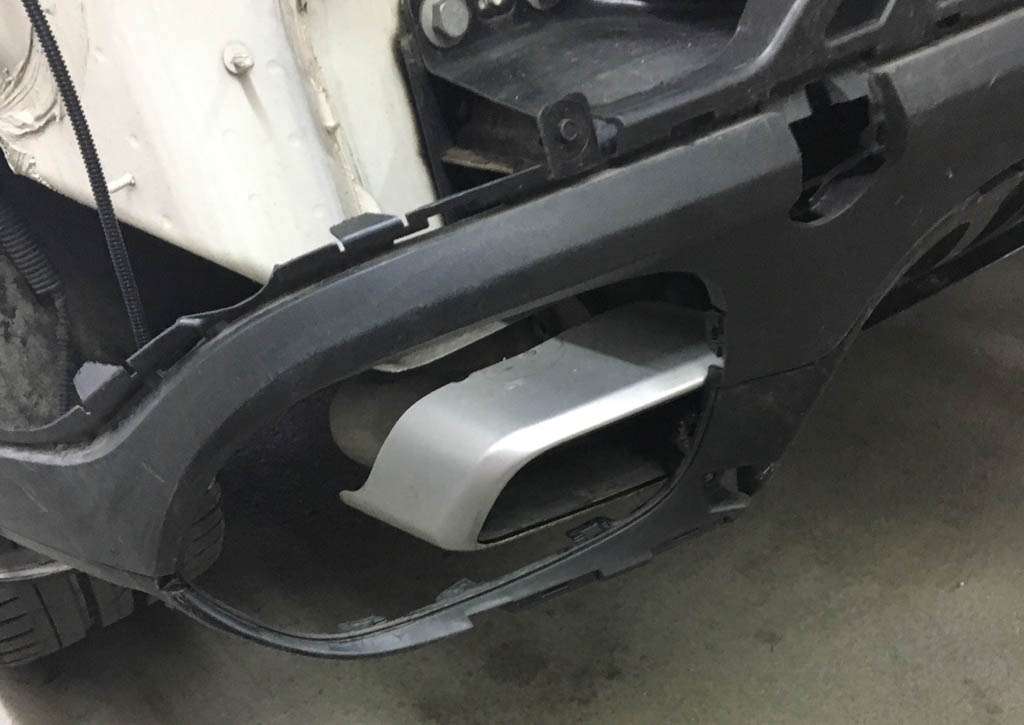
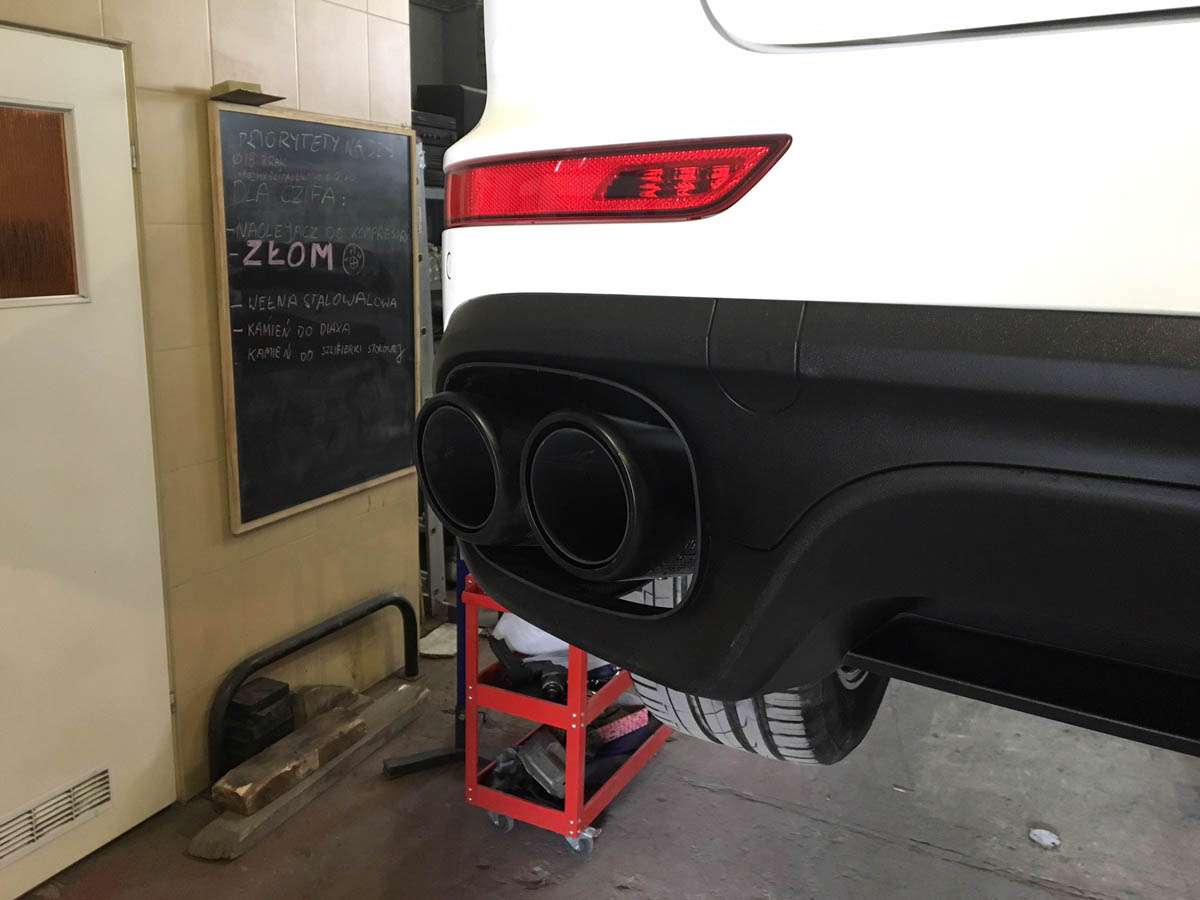
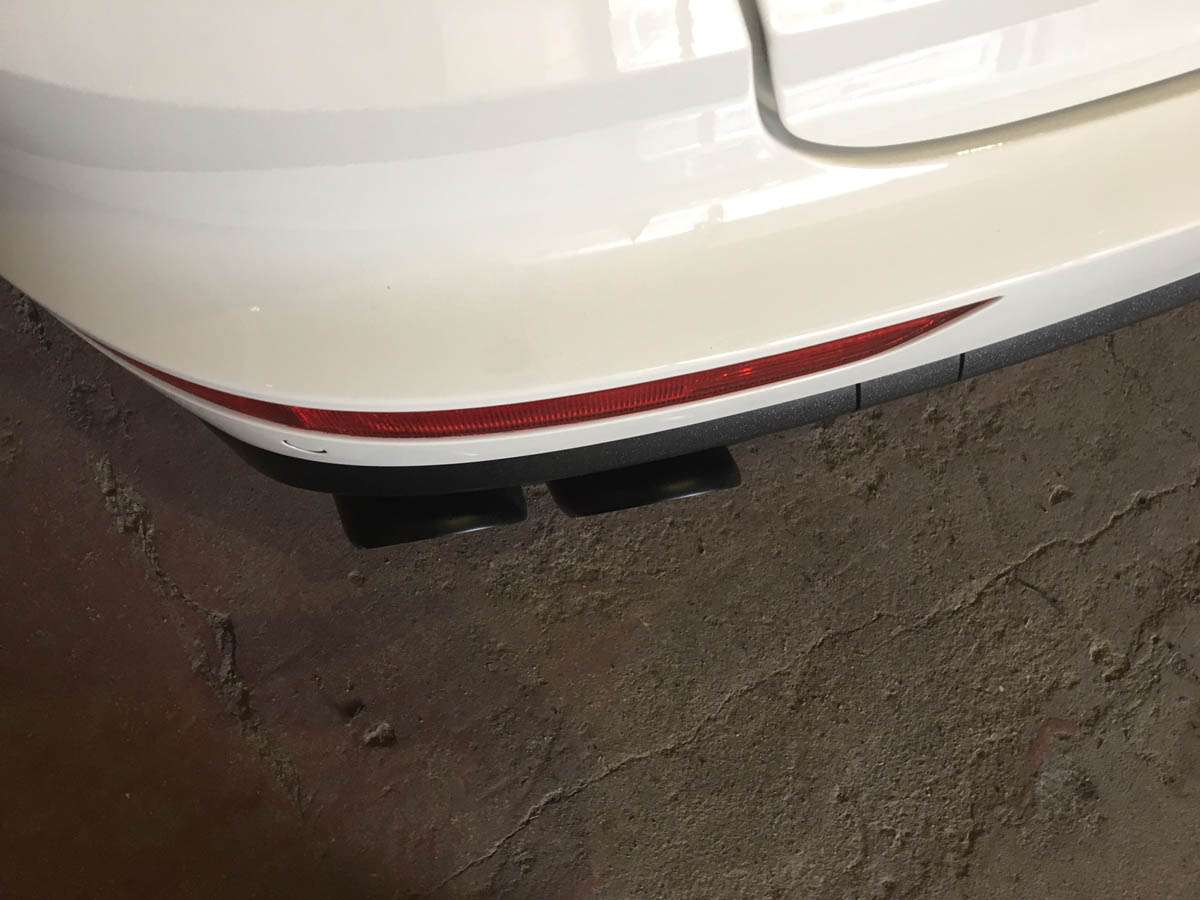
We just found out the old exhaust system is completely off and needs to be reworked. The chineese quad tips I've just bought also do not fit. The exhaust pipe has to be made longer by about 1-2" for the tips to stick out further to the sides from the mufler.
For the time beeing, we have tilted the exhaust tips down. The car looks kind of funny now, but at least I can drive it and will not have to revisit the bodyshop.
I know that you guys said the exhaust needs some work - it is just I was not able to understand what kind of work is needed.
I've booked a visit to the mufler shop on Friday to fix this exhaust situation. After that I will still have to visit the Porsche stealership to reprogram the power tailgate and put the new PORSCHE logo on (they have a special template for that, so I will not risk having the logo in a wrong place/angle).
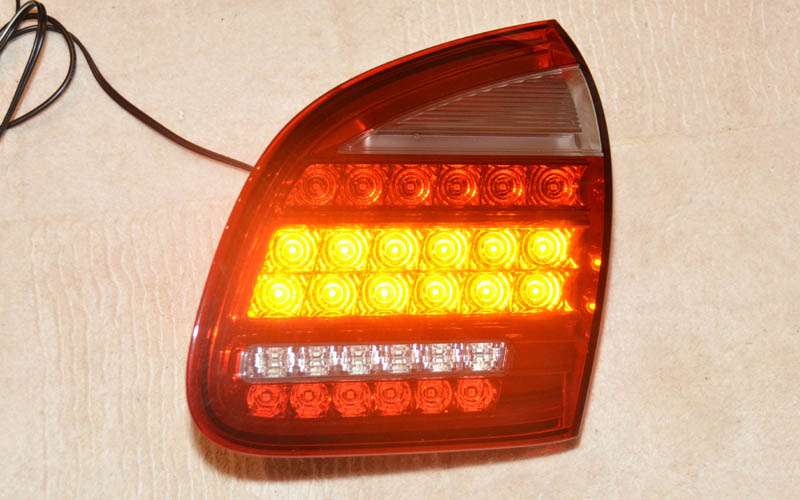
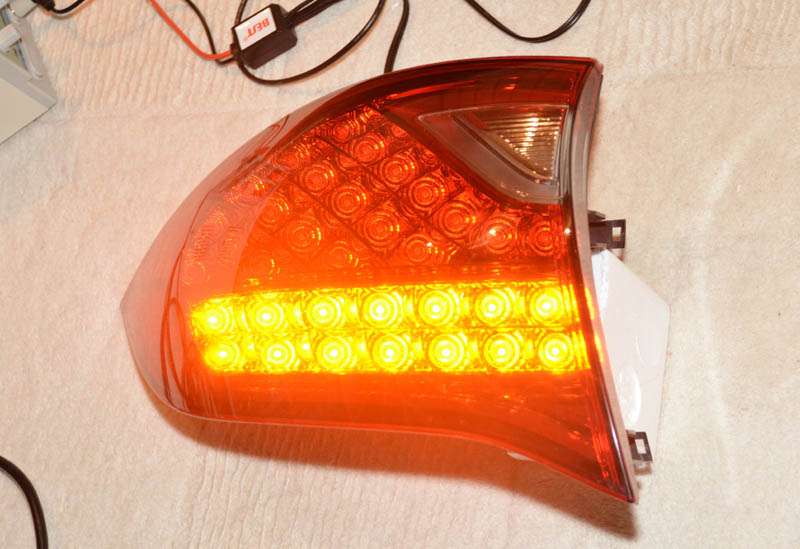
BTW - I'm selling off my original euro taillights for cheap (with orange turn signals) if someone is interested in making his car look more original (and true to Porsche original design).
Here is how the orange turn signal looks like for those who haven't seen one in action (connected to my desktop PSU). The turn signal lights on both parts of the tailight - tailgate and fender:
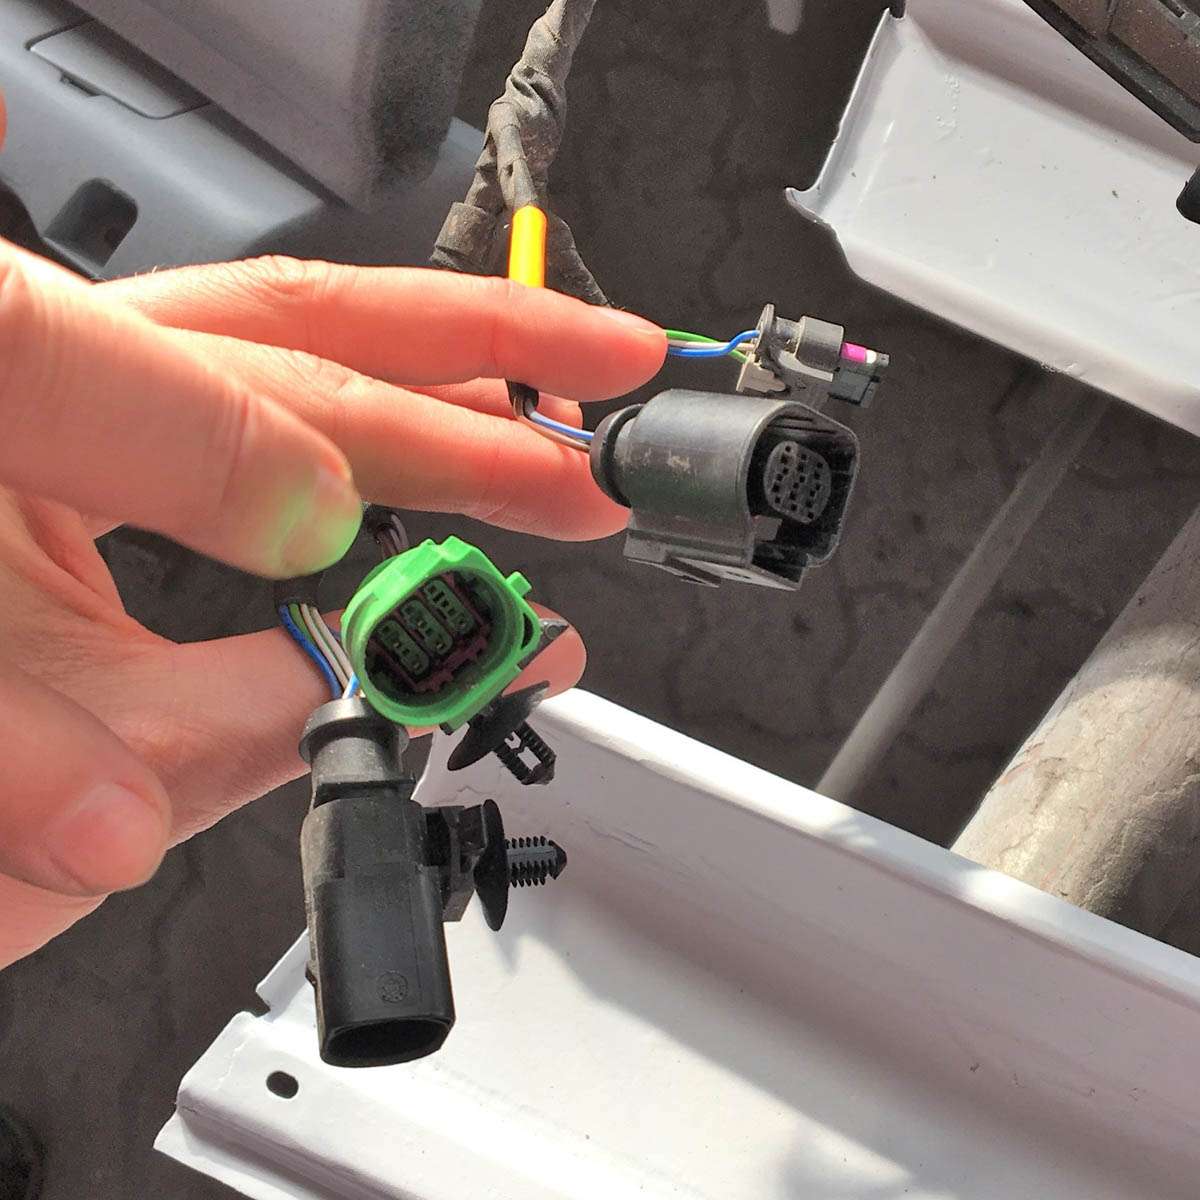
I have actually bought a complete 958.2 bumper - with parking sensors, lights and all wiring. There are 4 plugs on the driver's side and 2 on the passenger's side:
- The 2 on the passenger's side are fog light and parking sensor
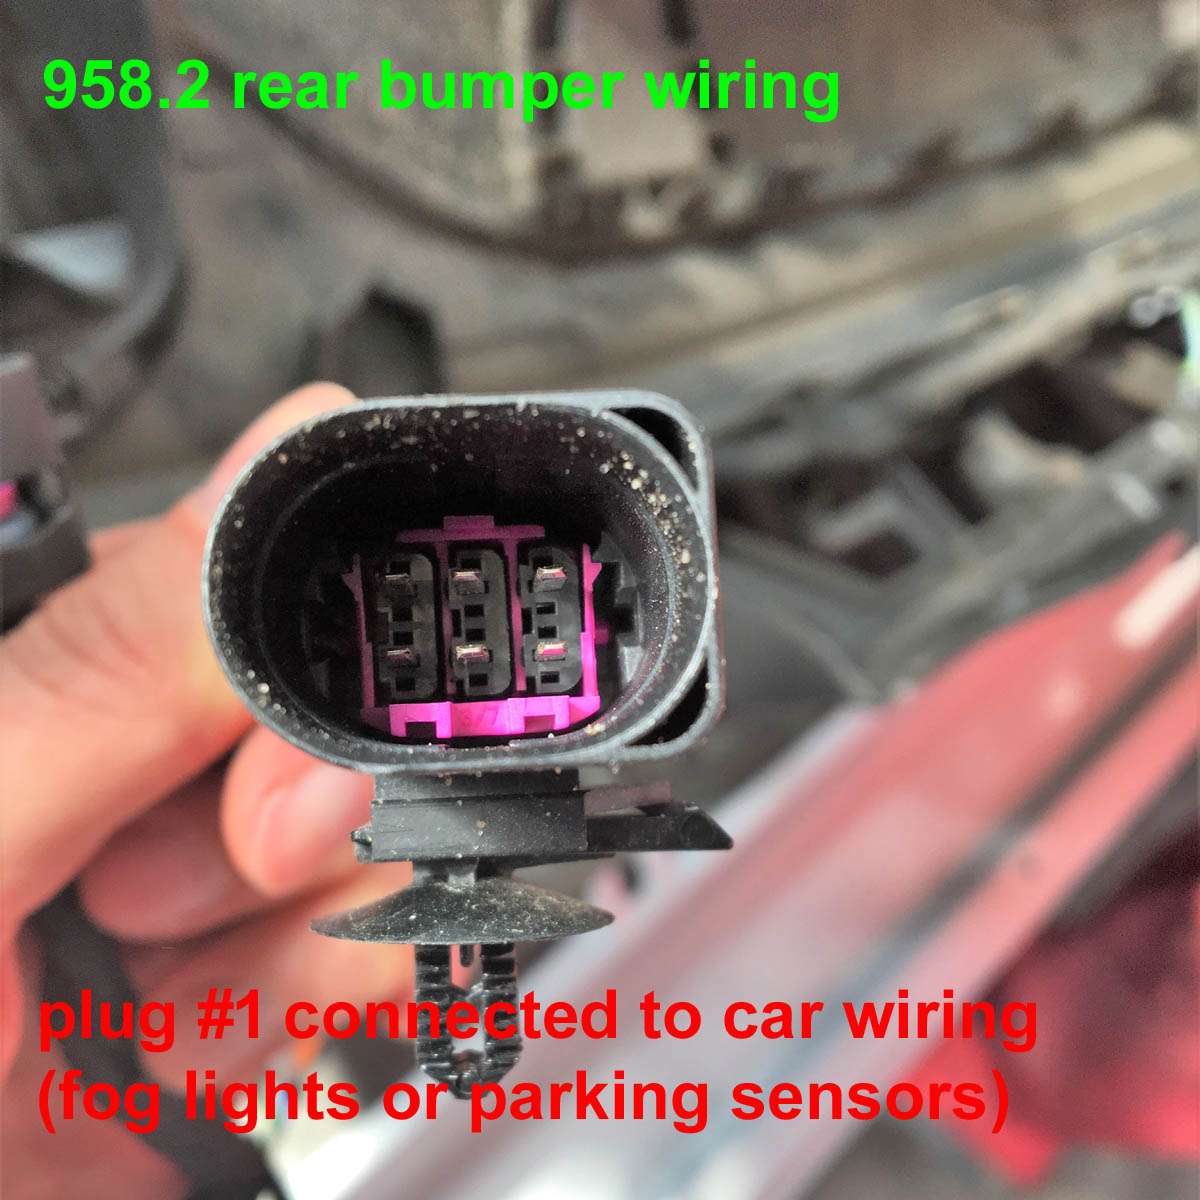
- The 4 on the driver's side are fog light, parking sensor and 2 which go back to the car wiring (pic below)
Would those two plugs fit the existing 958.1 wiring ?
We did not use the wiring that came with the 958.2 bumper. Instead, we have reused the old 958.1 parking sensors wiring, which was plug&play and have fabriceted new wiring for the fog lamps. We have sourced the signal for the fog lamps from the fender taillights and routed the cable down (on both sides, so you have to fabricate two cables).
Last edited by Elberoth; Apr 29, 2018 at 04:27 AM.
wow. Care to elaborate exactly which are the pins at fenders that needed to be extend down the bumper?
just 2 wires? u just lengthened it? any wiring bypasses?
1. Invert pins 2 with 4 to make the new taillights work. You can briefly connect the new ones now to check. The remaining old tailgate lights (if not removed) will stop working - this is normal.
2. Remove all remaining pins (5-10) from the connector.
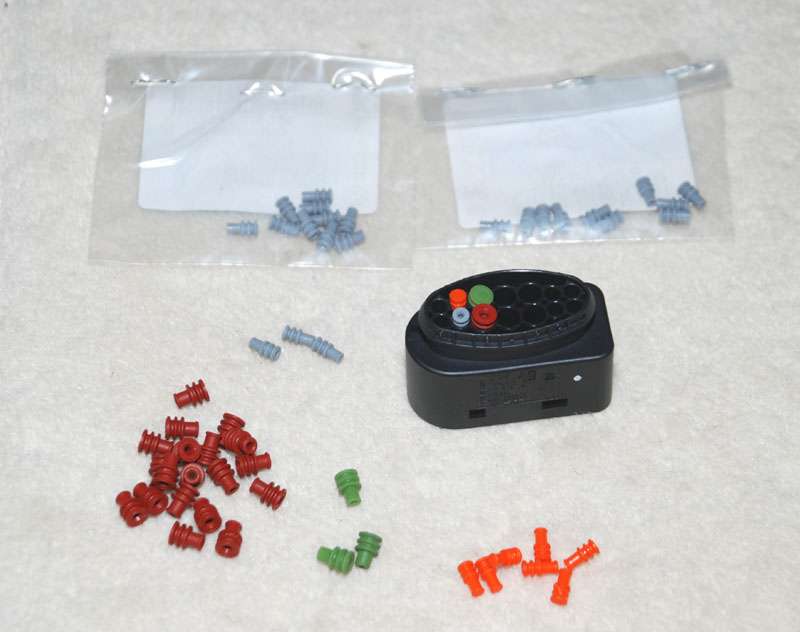
3. Cap the empty pin holes with 6 suitable rubber caps to prevent water from entering the connector. You can get them from Audi or VW dealership - you need 24 or 26 (not sure now - just get 30, as they cost next to nothing) - the part # is: 3C0 972 841
Here is a link to my Audi Q5 facelift project where I pictured those rubber caps (ornage on the pic below) and how to insert them:
4. Solder wires removed from pins 5, 7 and 10 to wires 2, 3 and 4. Those wires will carry over the power to the tailgate lights.
Tailgate lights:
1. Source new connectors (Audi/VW part # 1J0973715). Two needed.
2. Move old pin 6 to new pin 1 (ground) and old pin 4 to new pin 7 (reverse light).
3. Remove pins 2, 3 and 4 from the old connector and insert them into the new connector following the order on the fender taillight connector for pins 2, 3 and 4. So basicly the cable from pin 2 @ the fender taillight connector has to go to pin 2 @ tailgate light connector, cable from pin 3 to pin 3 and 4 to 4.
4. Cap the 5 empty pin holes with orange rubber caps.
Fog lights:
1. Stuff to source:
- 4m of a regular 0.5mm2 automotive electrical wire (AWG 20) - 2m brown (for ground) and 2m in other color for power;
- flexible, automotive electracal conduit - only big engough to house the two small cables, approx 6mm in diameter. 2m needed:
- 4 new pins like these:
- 4 rubber grommets (grey on the first pic; VW/Audi part # 357 972 740 D)
2. Cut the wire you bought. You need two pairs (brown and that other color you bought), approx 70cm long each.
3. Cut the electrical conduit - you need two runs, approx 60cm each.
4. Run the wire through the electrical conduit.
5. Insert grey grommets at one of the ends and then solder/cramp new pins (see my audizine link above for how to do info)
6. Use the old tailgate lights connectors you have just removed and insert brown cable into pin 1 and the other cable into pin 2.
7. Cap the 4 empty pin holes with orange rubber caps
8. Seal off the connection between the electrical conduit and connector body using the plastic 90 deg elbow (leftover after doing the tailgate lights)
9. Run the cable up, towards the fender taillight connector:
10. Now you have to solder the newly made cable to the existing wiring of the fender taillight connector: brown cable to the brown cable @ pin 1; the other cable to the cable removed from pin 9.
11. You can check now if the fog lights work. IMPORTANT: The fogs light up only when the tailgate is closed.
Licence plate lights:
1. Source 2 new connectors (VW/Audio part # 1J0973715) nad the new LED licence plate lights (the old ones do not fit)
2. Replace the existing connectors with the new ones.
3. Solder LED resistor across the two cables to get rid of the blown bulb warning on the dash
3rd (spoiler) stop light:
1. Reverse the polarity of the cables (+ and -) - otherwise the light will not work (LED lights are polarity sensitive)
Parking sensors:
1. Reuse the old wiring.
2. The parking sensors are different on the FL model. If you bought your rear bumper without them, you can either reuse the old parking sensors and attach them with some sort of silicone/glue (not very elegant) or get the new FL parking sensors (Audi/VW part # 5Q0.919.275.B). You can get them on ebay for like $10-15 per piece so playing with silicon does not make any sense IMO.
Done. Everything should work. No error message, no coding necessary. Enjoy!
Last edited by Elberoth; Apr 27, 2018 at 10:29 AM.
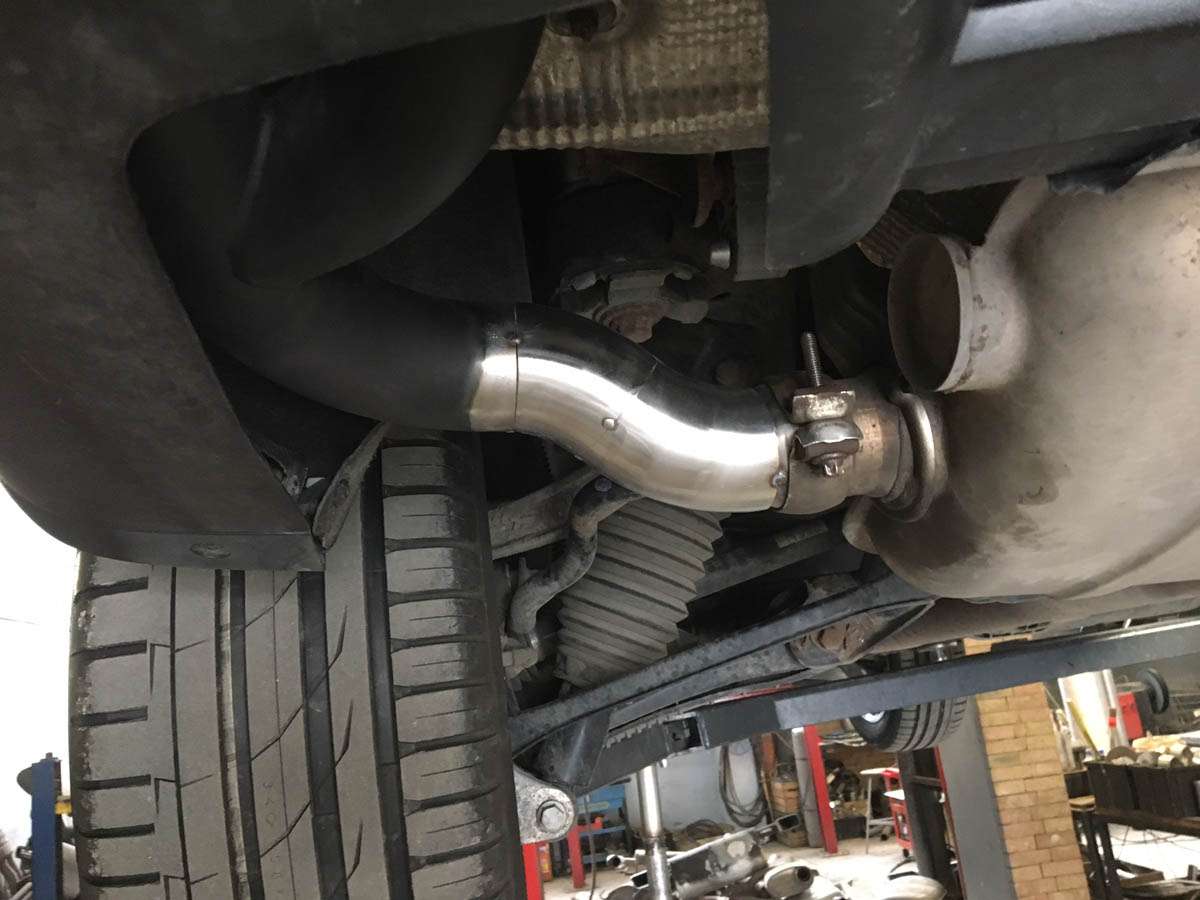
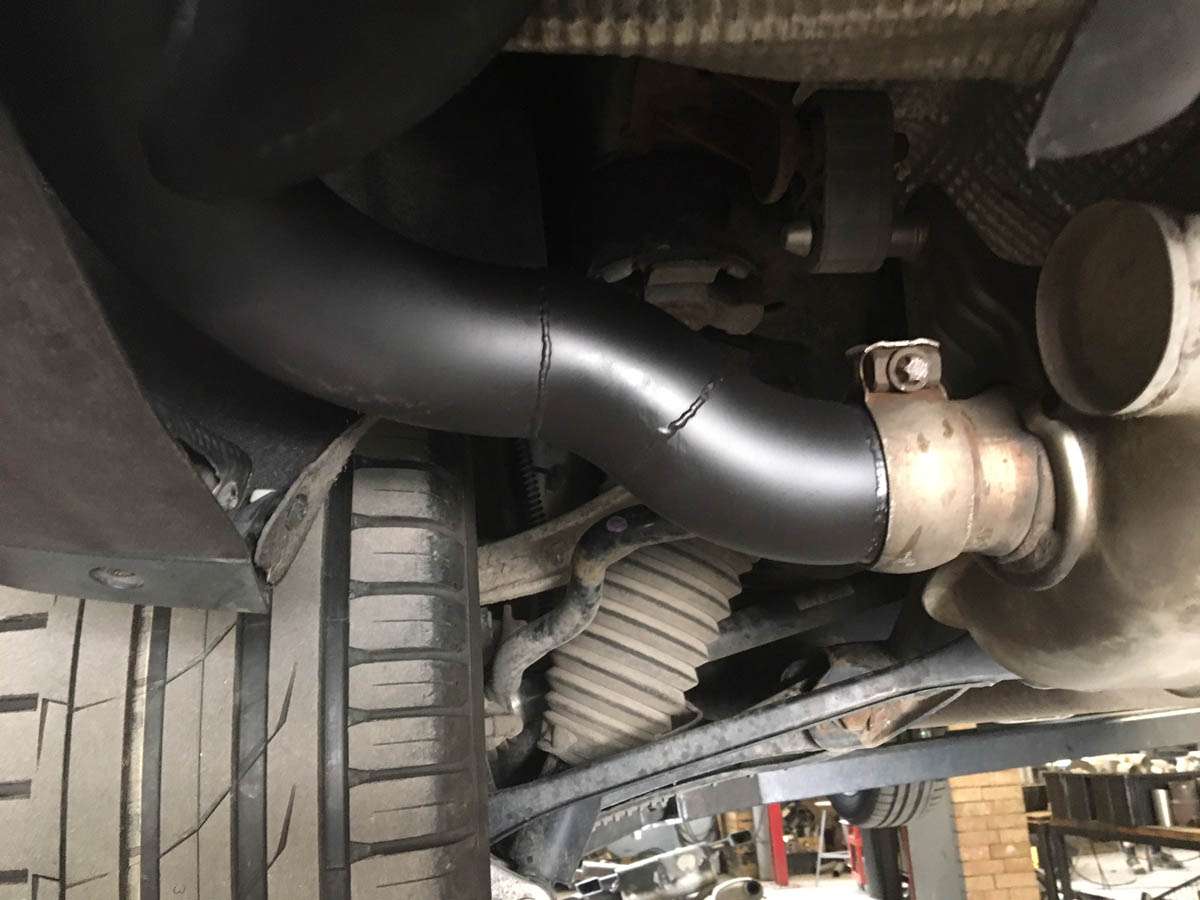
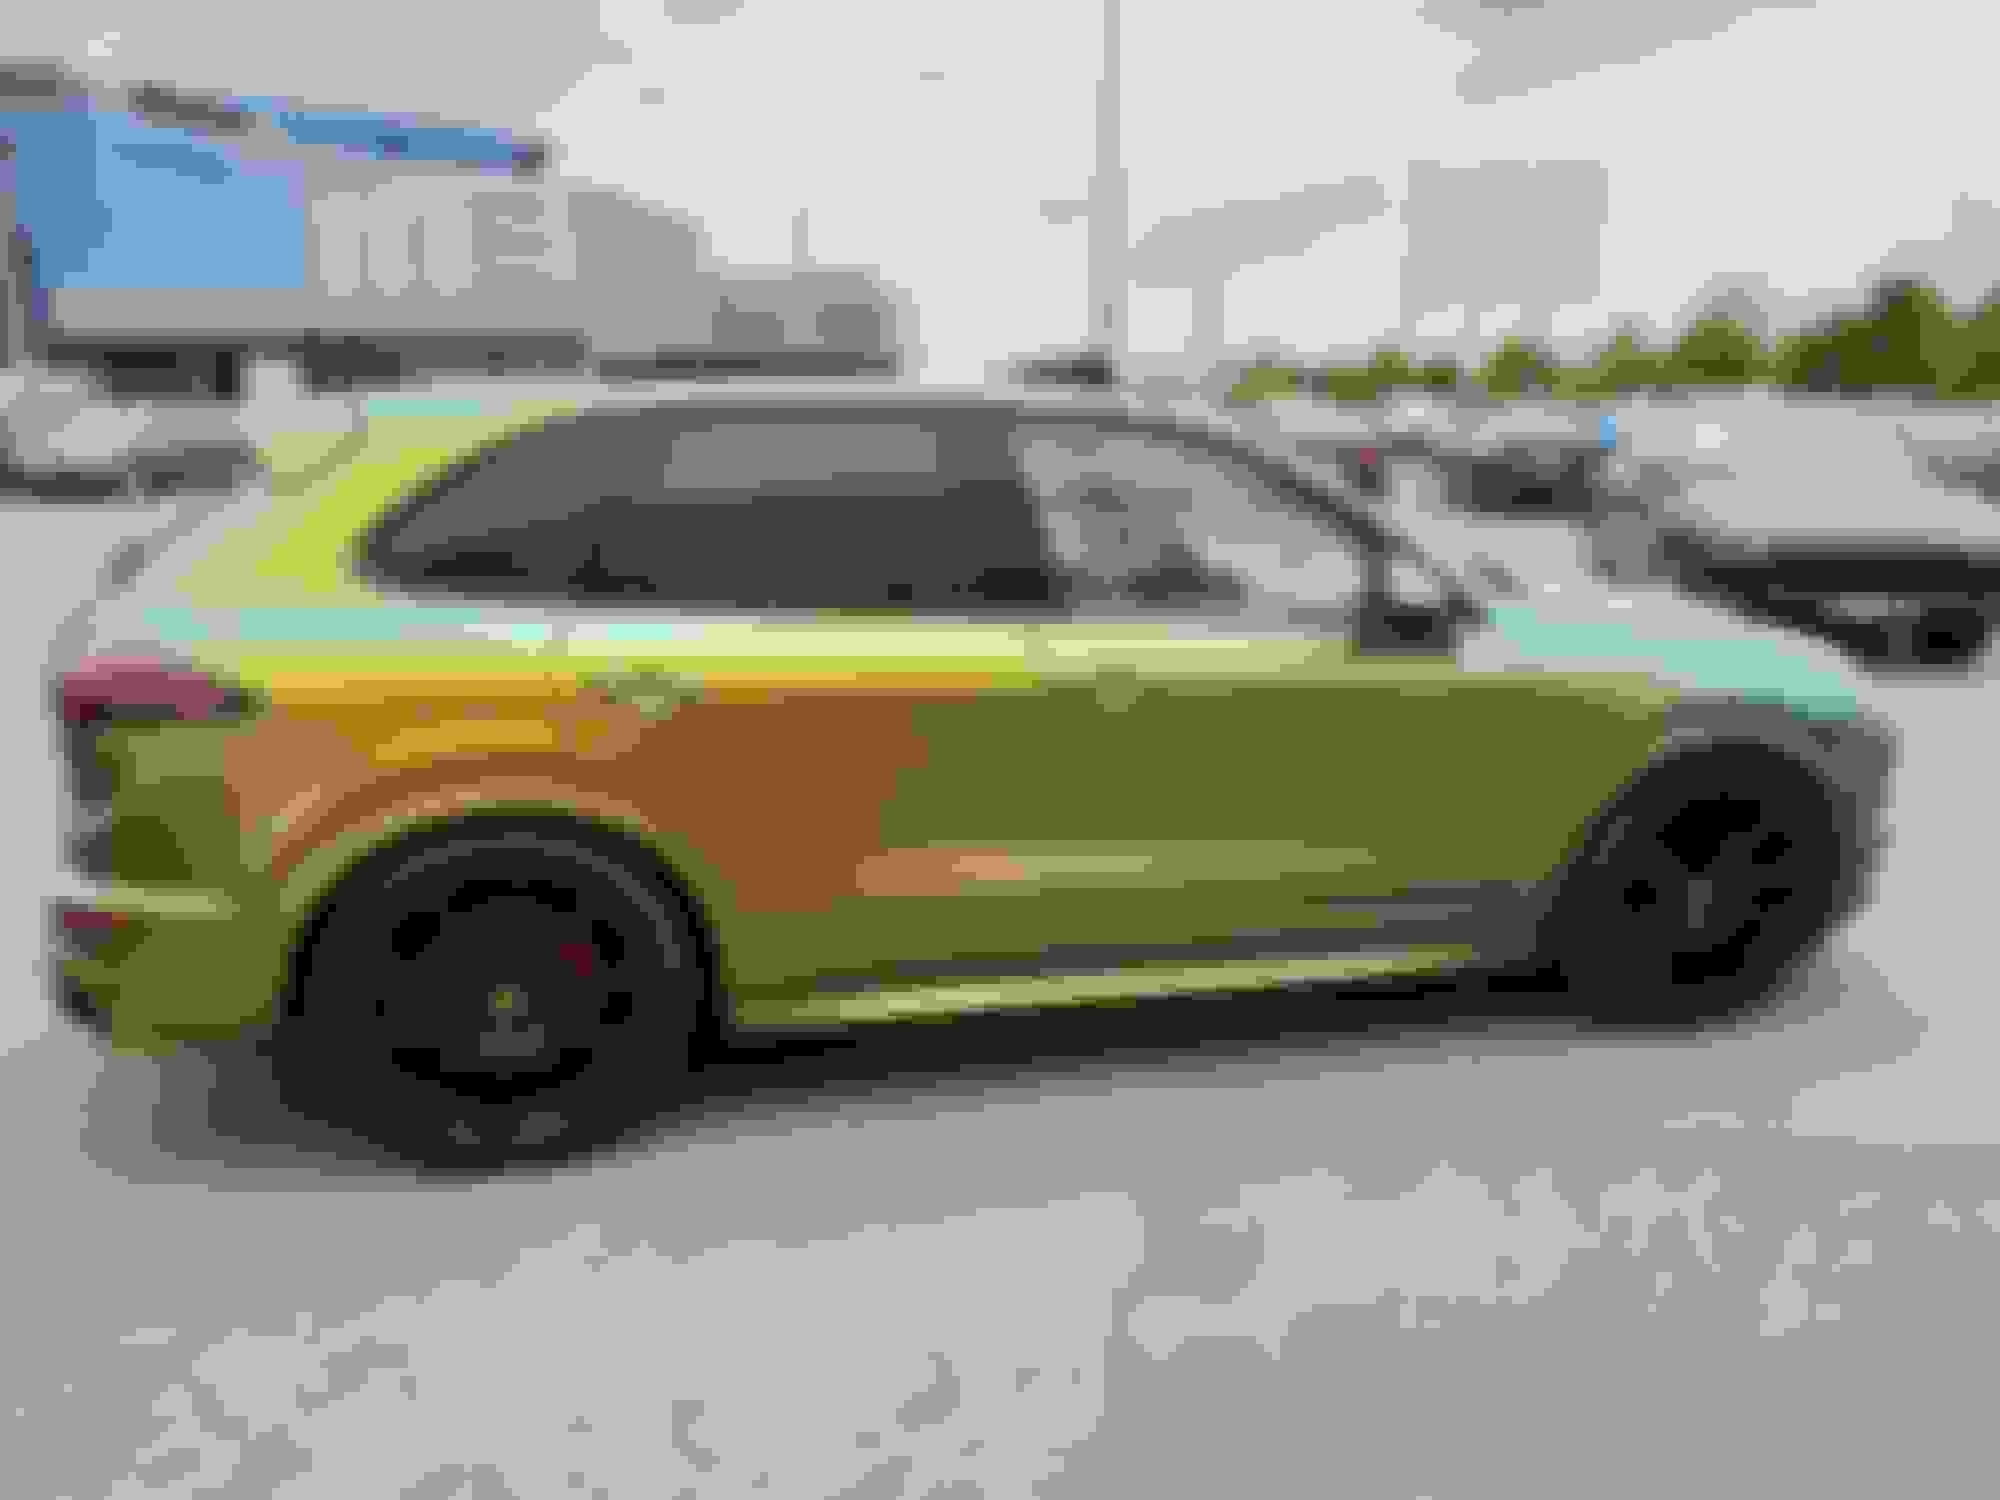
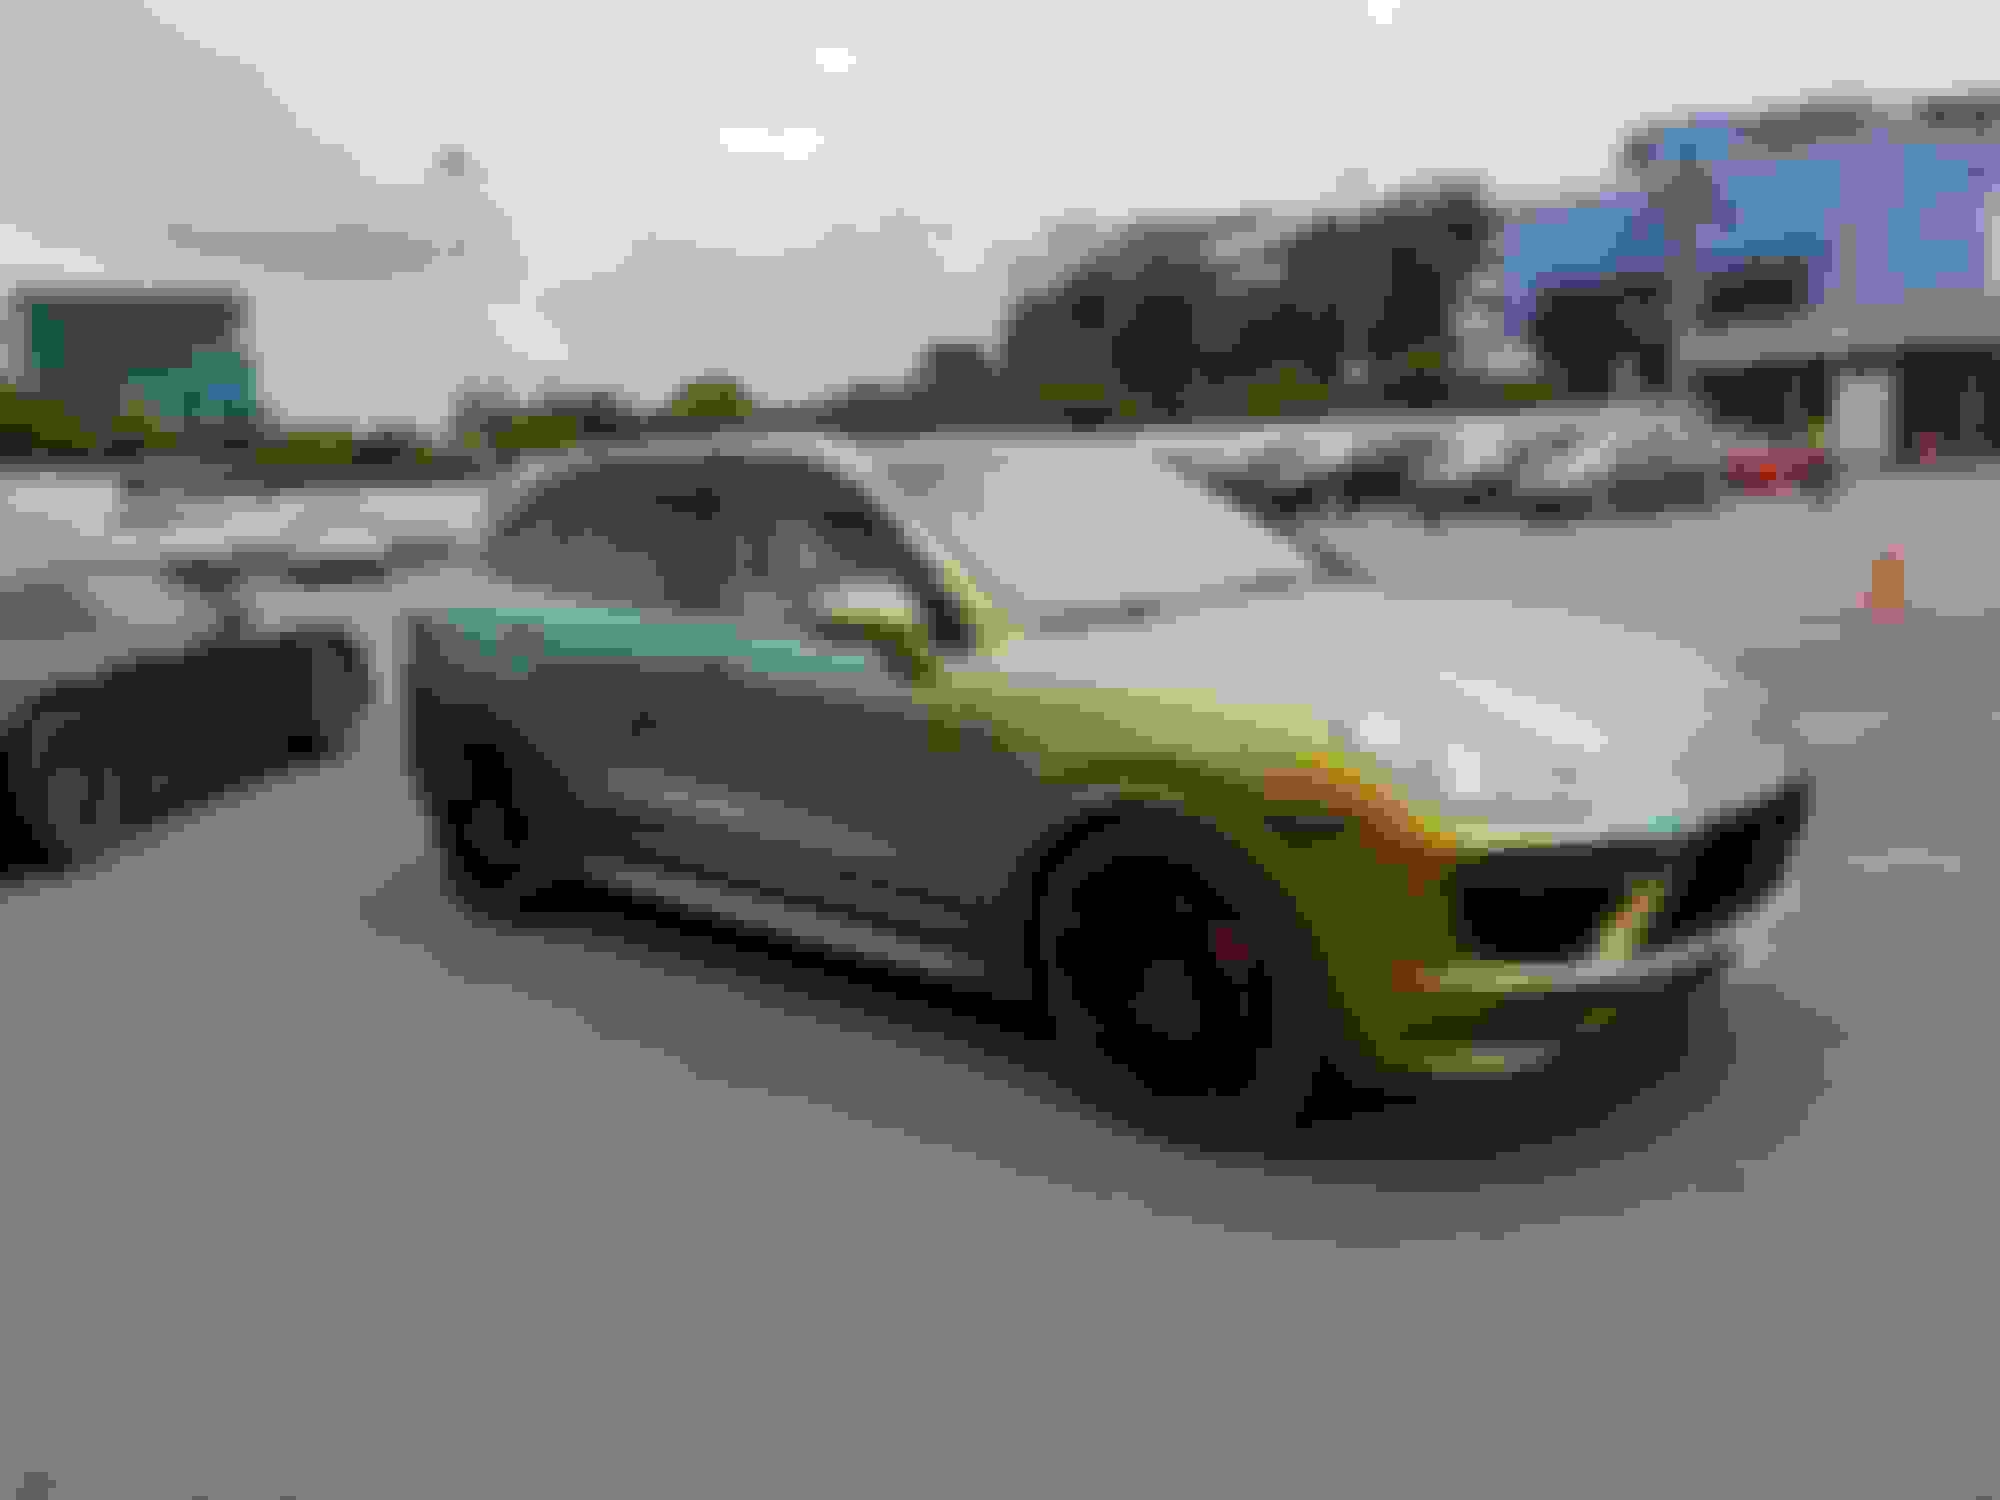
We did the exhaust today. Before I started the FL project, I have bought the quad tips from Aliexpress. Unfortunately, since the FL cars have exhaust cutouts moved to the sides, we had to modify the tips piping to make them fit.
We have moved them approx 4" away from the mufler and ~1.5" up (chence the use of two elbows vs straight piping - otherwise the tips would end up being tilted upwards, which looks a bit goofy).
The first tailgate (inner) lights I got with the tailgate turned out to be in US spec (red turn signals), so I had to return them (useful tip: US version has a SAE text printed on the label next to the part #, EU one has ECE).
The second left tailgate was OK, but the right turned out to have some broken mounts so I had to return it.
The third one turned out to be smoked version (GTS model). So I bougth the fourth one, which again - turned out to be smoked version.
Today I got FIFTH tailgate right light and it finally fits the rest of the car.
Now I need to collect the funds from those ebay sellers. Thankfuly, EU law mandates every item you buy can be returned withing 14 days period, no questions asked.
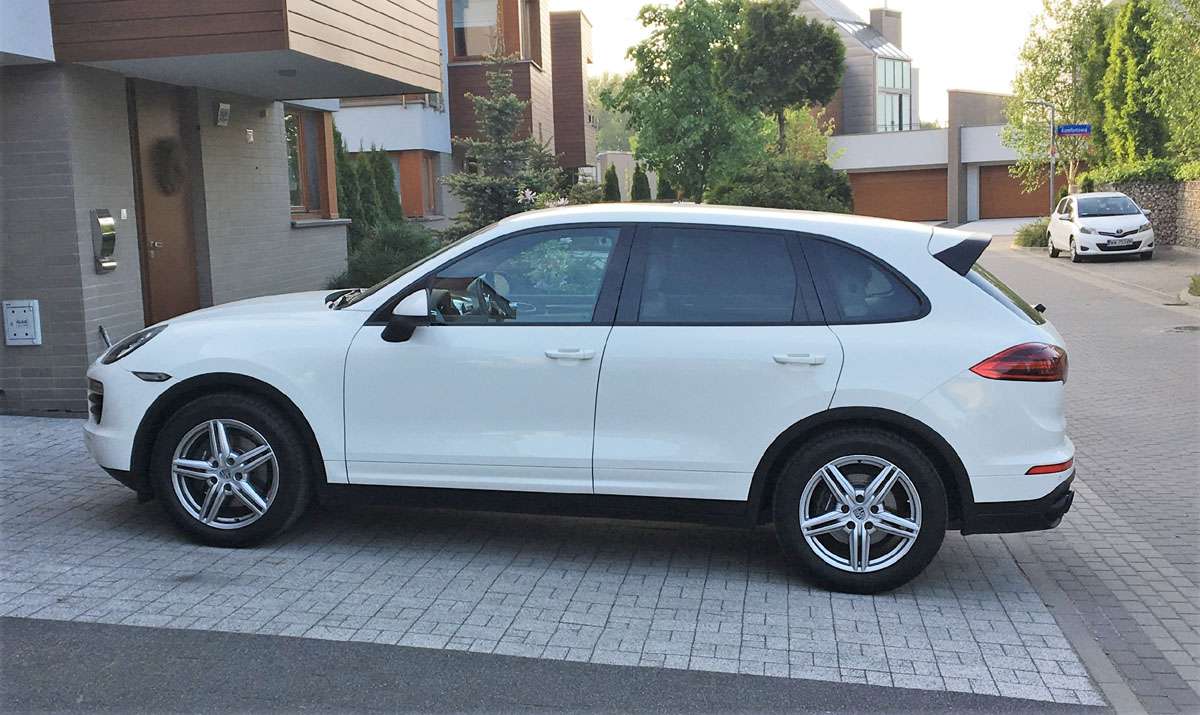
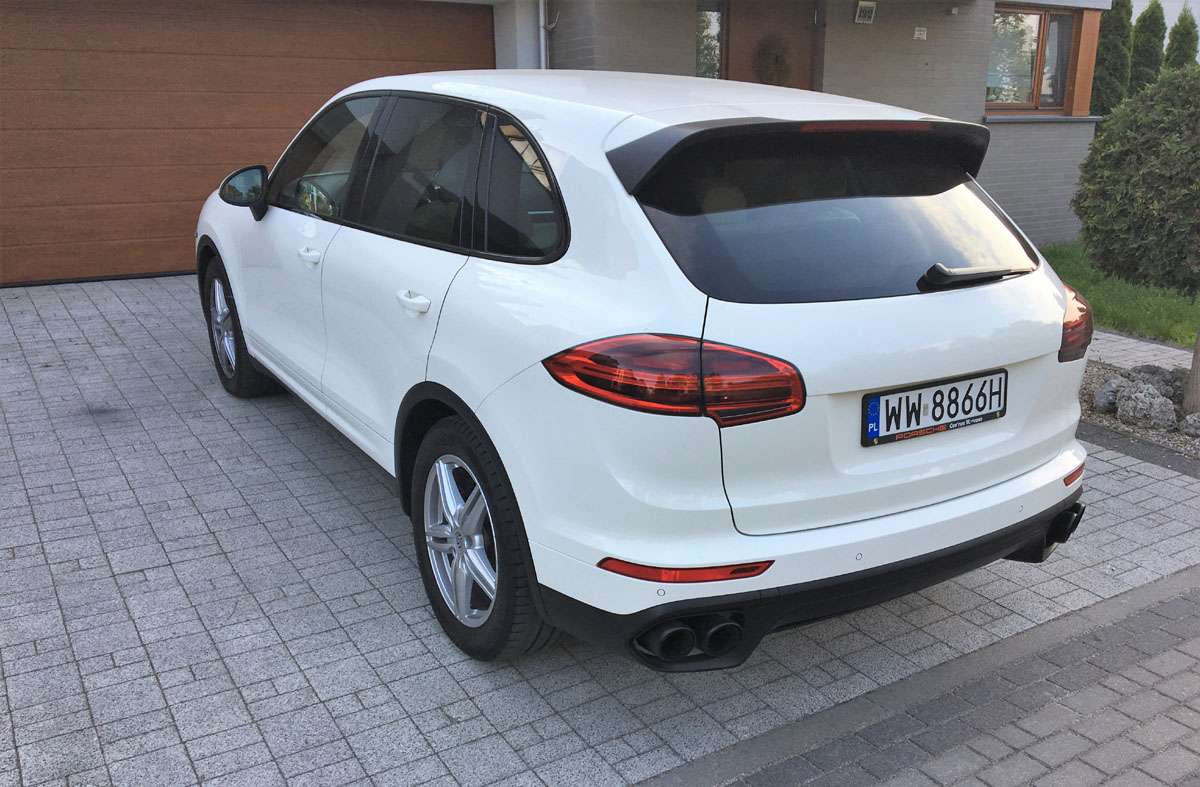
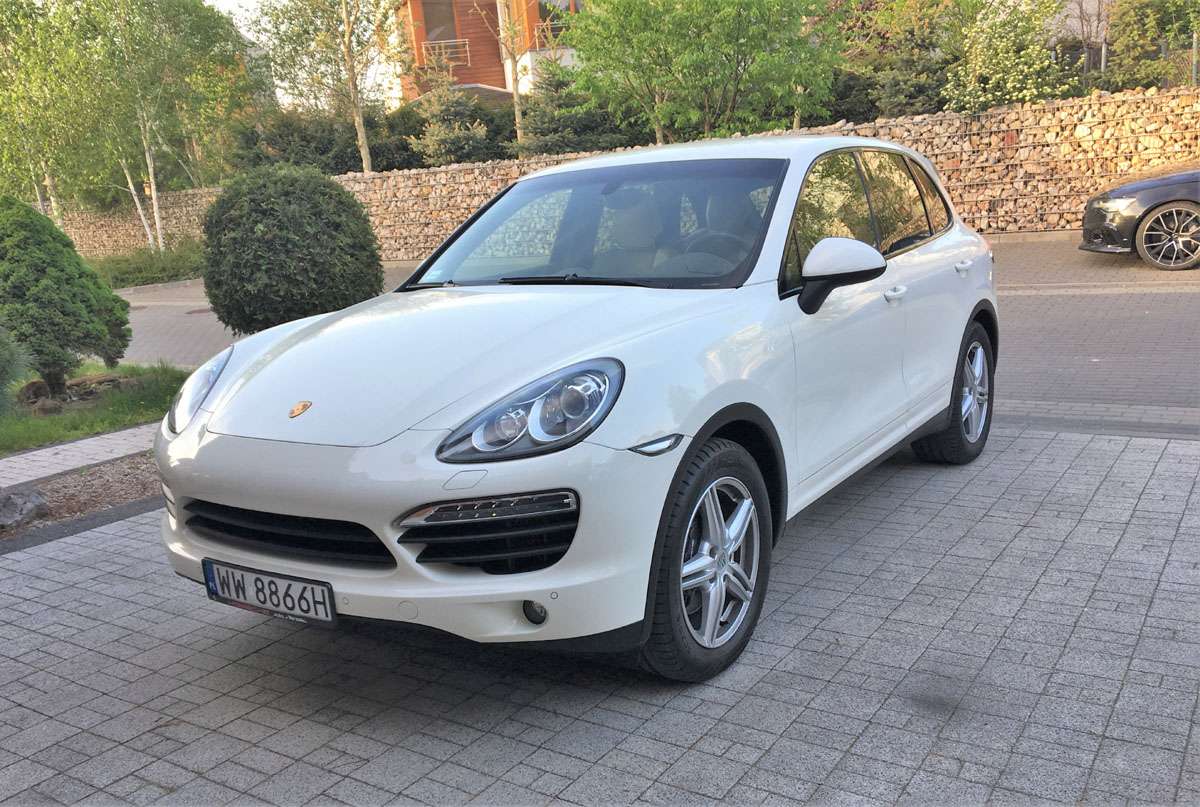
Looks ok. But honestly I don't like it. If you choose to put some money into it, why to do it ordinary? It's just an ordinary/cheapest cayenne 958.1 front and 958.2 rear.
You can do it better.
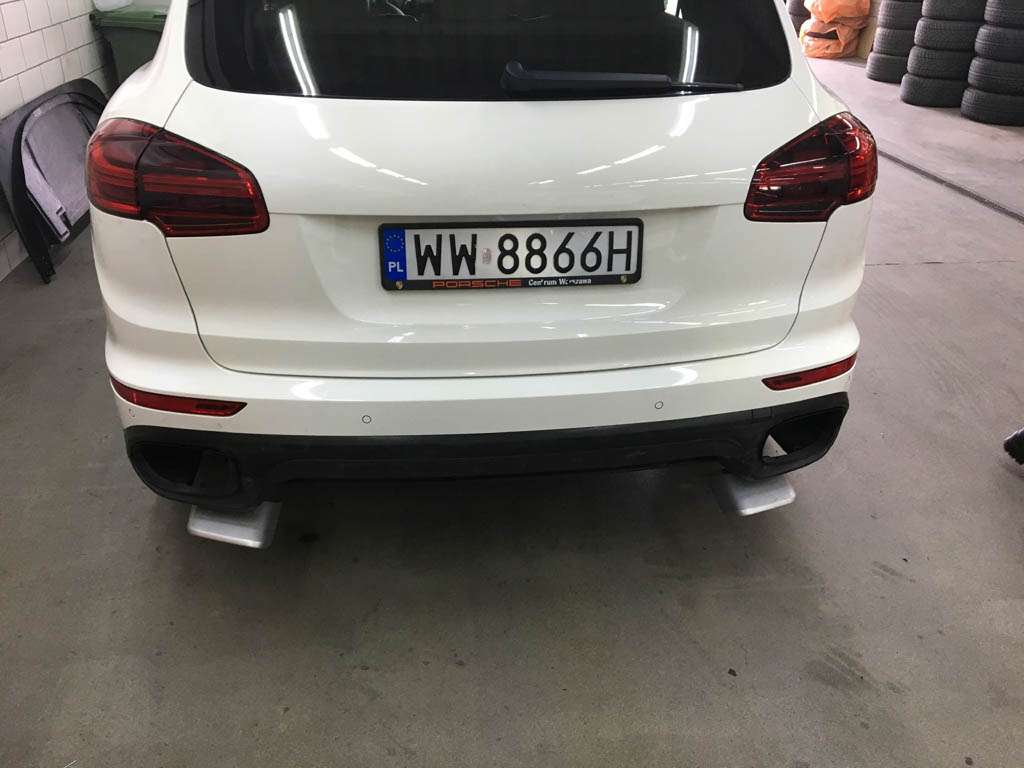
For the rear, blacked tail lights and GTS/Aero rear bumper's skirt. At least you bought double muffler pipes.
For the side of car, another 21" rims,
GTS/Aero skirts,
Wide version of wheels arch. Here not GTS ones, I personally don't like how that tinie part looks on rear gts doors. I prefer normal ones, like 958.2.
Front of car:
Turbo/GTS bumper
Aero/gts low bumper skirt.
Yes, it's your car, your money, but if you choose to modify it, at least make it extraordinary
If you like it like this, again it's your choice. Don't take me wrong.
De gustibus. I don't like the look of smoked (GTS) taillights or GTS rear bumper. IMO they look inferior to regular ones and the only reason ppl are putting them on is 'cos they come from the more expensive, GTS model. But to each his own.
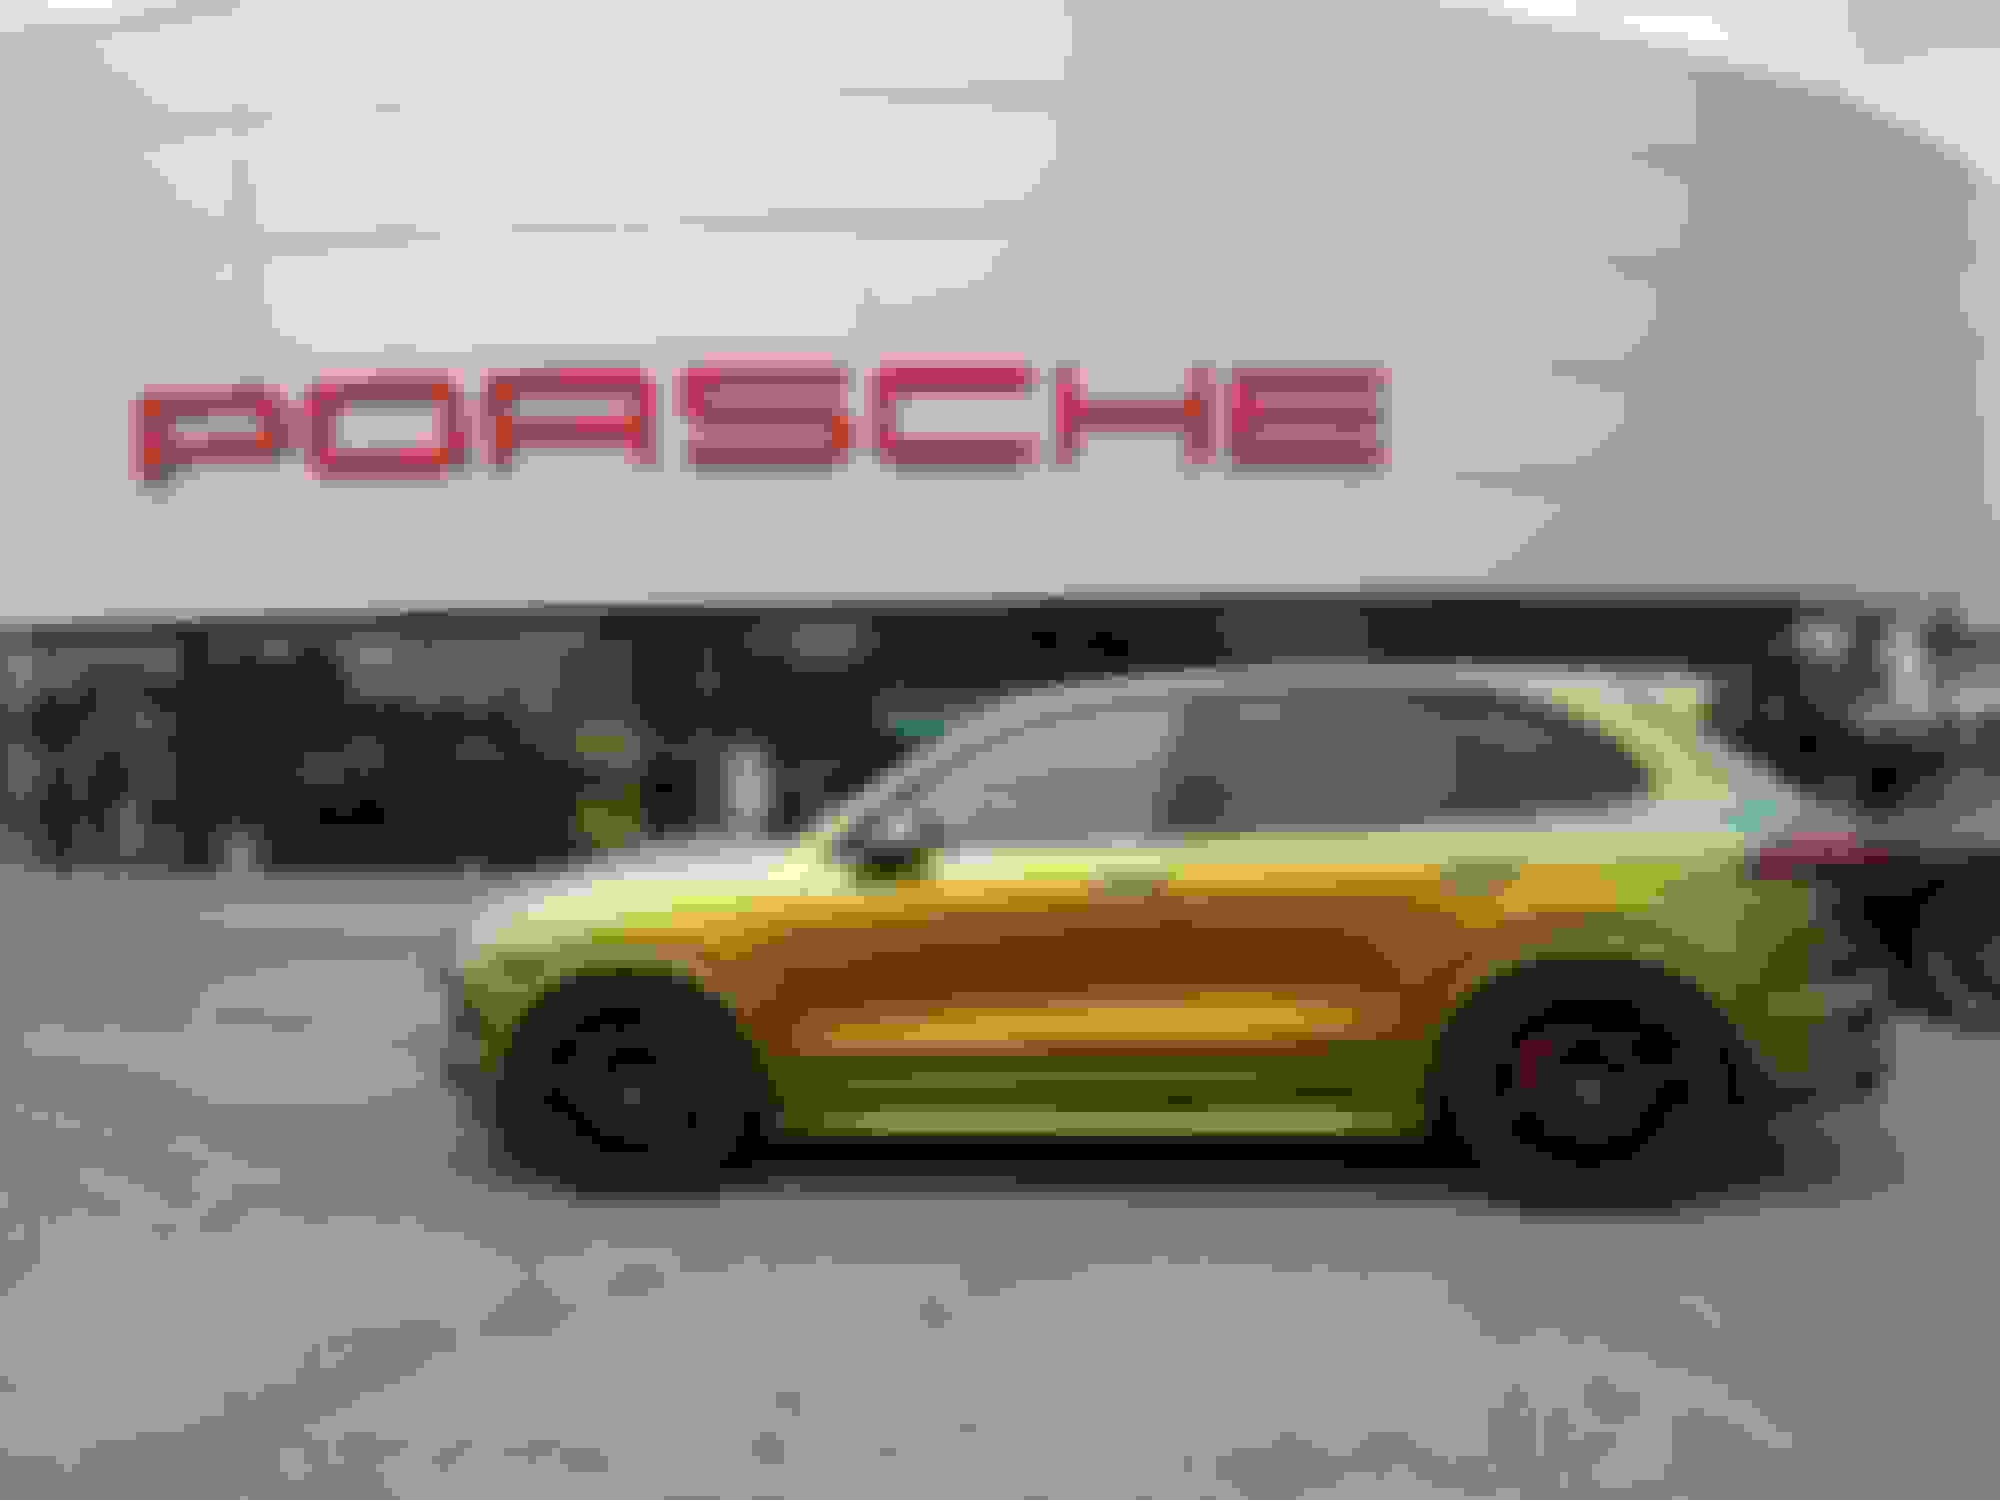
As for the wheels, they are in the plan. I'm gonna upgrade the wheels to bigger ones - 20" or 21". I have alredy put mine on ebay. They will be in black/dark grey, to keep the black theme of the car: black window trim, black rear spoiler, black exhaust tips, black front grills/ribs, black wheel arches etc.
I also want to have the calipers painted acid green, to make the car look like this:
IMO this is a great color combination for a white car.
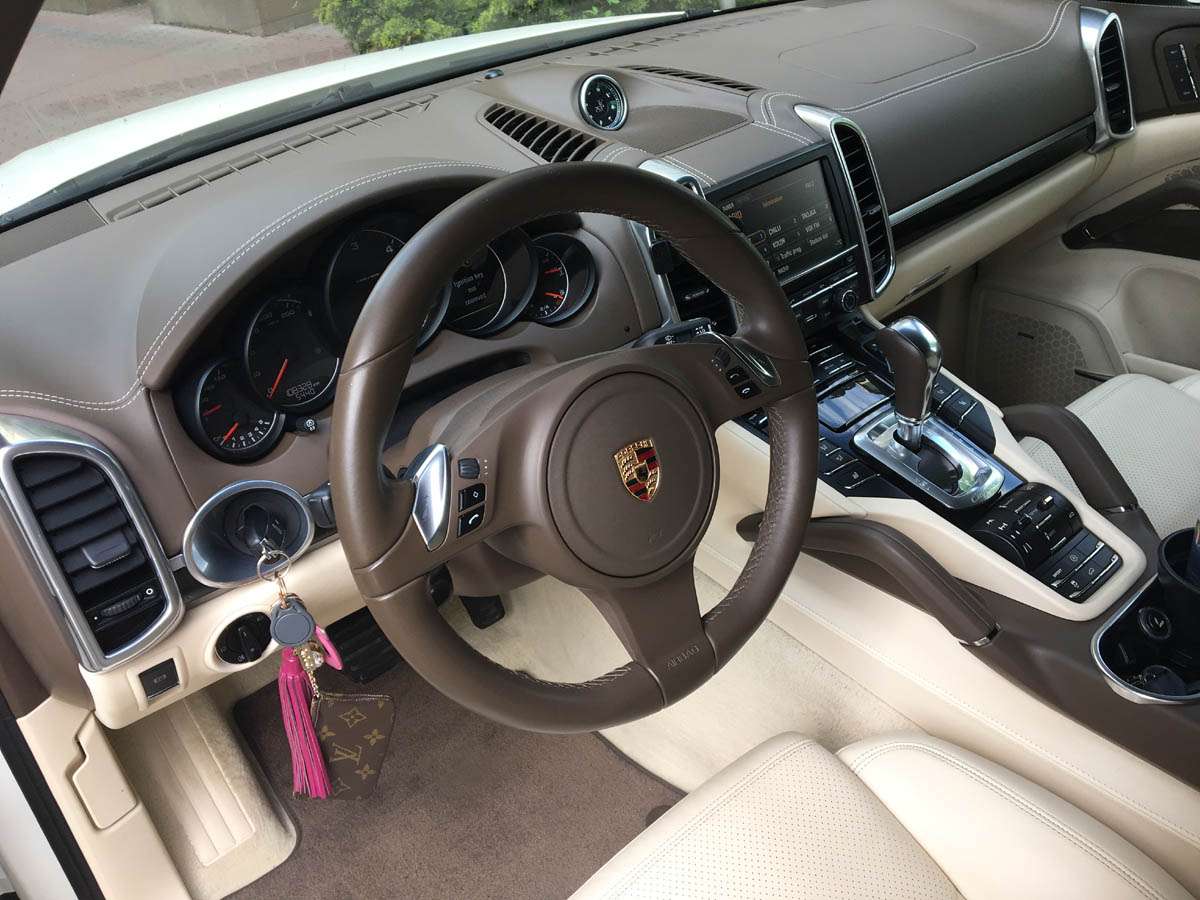
My next mod will be the installation of the Macan/958.2 steering wheel that I've just bought.
Current:
New:
Last edited by Elberoth; May 13, 2018 at 02:17 PM.