
Dash strip install.......

Thread Starter
|
Registered User
Joined: May 2007
Posts: 551
From: san francisco
Rep Power: 42

Dash strip install.......
I know this subjust was posted on renntech, but I wanted to post it here as well. I just install CF dash strips last night and it wasn't as hard as I thought it would've been. I got a lot of idea's from all the people that posted on renntech, but I thought I'd try something a little different.
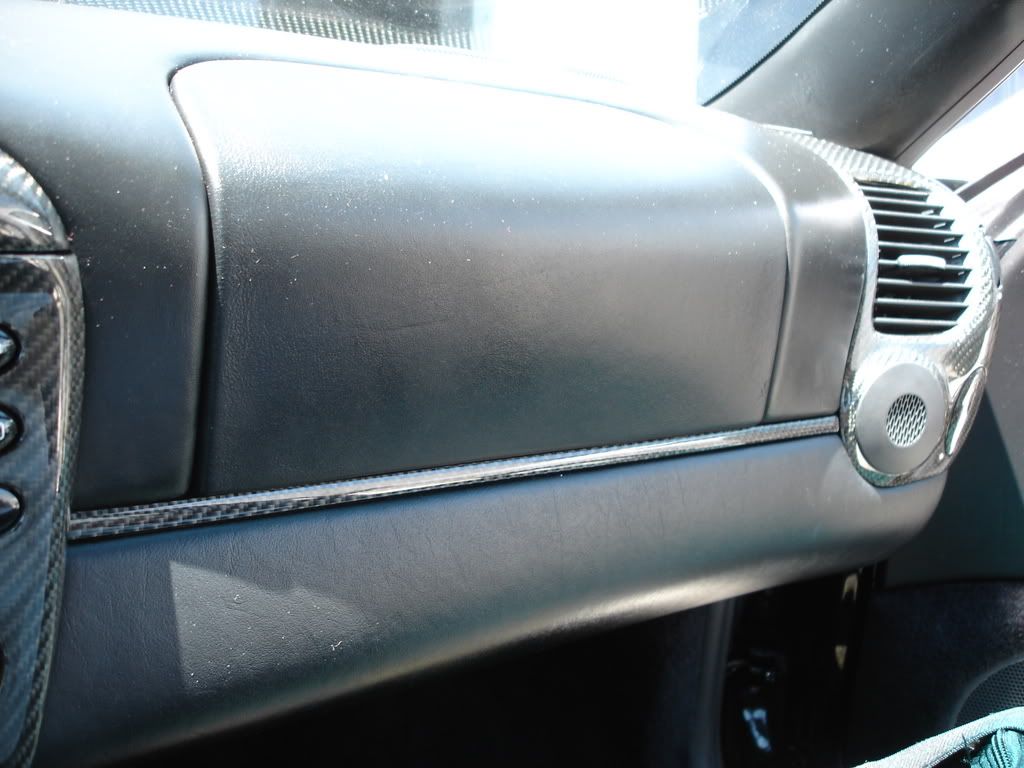
For the long piece (passenger side), I removed the side vent, foam panel under the dash, air duct and the airbag. By removing the airbag, most of the screws were pretty easy to get to. I only had problems with the 2 end screws. Those were a little bit harder to get to because it's pretty tight at the ends.
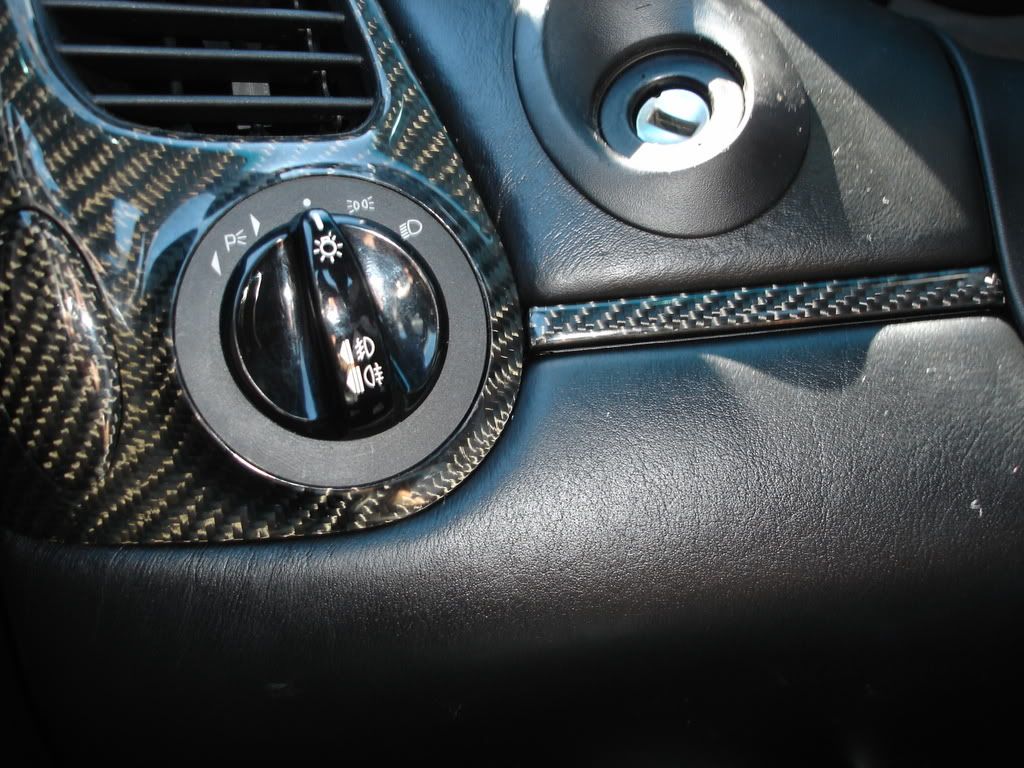
As for the 2 strips on the driver side, I removed the insterment pod, side vent and the lower steering console (it kinda looks like a horseshoe). It's a little tricky, there are 2 screws under the pod and I kinda twisted it off the steering column. Once I did that the strips were easy.
The whole job took my friend and I about 1.5 hours start to finish and I didn't have to brake anything. I wanted to take some pictures of the actual install, but I forgot my camera, sorry. Here is what I used as a reference: http://www.renntech.org/forums/index...hl=vents&st=20
For the long piece (passenger side), I removed the side vent, foam panel under the dash, air duct and the airbag. By removing the airbag, most of the screws were pretty easy to get to. I only had problems with the 2 end screws. Those were a little bit harder to get to because it's pretty tight at the ends.
As for the 2 strips on the driver side, I removed the insterment pod, side vent and the lower steering console (it kinda looks like a horseshoe). It's a little tricky, there are 2 screws under the pod and I kinda twisted it off the steering column. Once I did that the strips were easy.
The whole job took my friend and I about 1.5 hours start to finish and I didn't have to brake anything. I wanted to take some pictures of the actual install, but I forgot my camera, sorry. Here is what I used as a reference: http://www.renntech.org/forums/index...hl=vents&st=20
Thread Starter
|
Registered User
Joined: May 2007
Posts: 551
From: san francisco
Rep Power: 42
Originally Posted by nine9six
Looks very nice.
did you have to make the custom trim for the dvd nav unit?
did you have to make the custom trim for the dvd nav unit?
Registered User
Joined: Apr 2007
Posts: 561
From: OC, CA
Rep Power: 43
Originally Posted by lilstan
No, that is the factory horseshoe. I will be upgrading to a 02+ and adding a cup holder very soon.
I want to add a navigation too and I want to be able to make it look as clean as that.
Thread Starter
|
Registered User
Joined: May 2007
Posts: 551
From: san francisco
Rep Power: 42
Originally Posted by nine9six
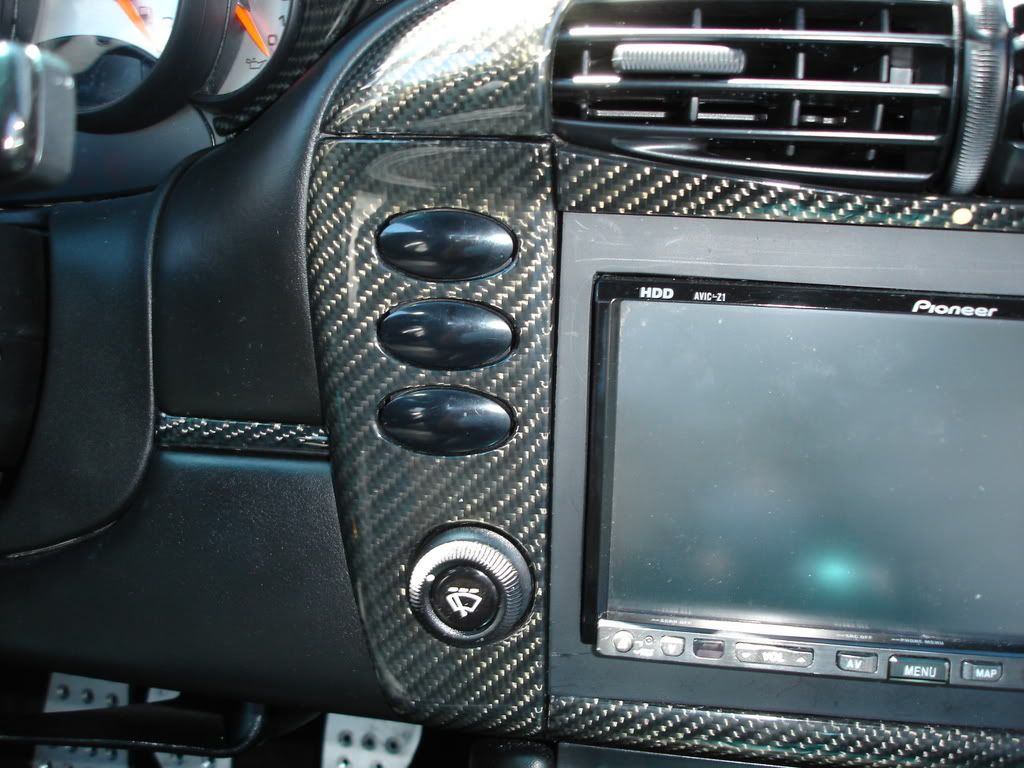
thanks but what I meant was the grey piece that is around your pioneer avic unit. Is that factory?
I want to add a navigation too and I want to be able to make it look as clean as that.
I want to add a navigation too and I want to be able to make it look as clean as that.
Registered User
Joined: Apr 2007
Posts: 561
From: OC, CA
Rep Power: 43
Originally Posted by lilstan
It's actually flat black, but yes it's a custom piece. My buddy is a auto installer and he has a lot of stero install kits laying around, so I just found one that fits. If you going to go with the clean look, I would upgrade to 02'+ horseshoe and still the cup holder (if you don't already have one). With the cupholder the gaps at the top and bottom the of the nav get a lot smaller. That's what I plan on doing in a couple of weeks.
Registered User
Joined: Jul 2006
Posts: 3,001
From: NJ
Rep Power: 150

Originally Posted by nine9six
Thanks for the info. I may as well do the cupholder upgrade since I have no cupholder at all.
Trending Topics

Registered User
Joined: Oct 2012
Posts: 8
From: sacramento
Rep Power: 0
This is the post I have been looking for because it appears you have no glove box! Thank you so much for the info. So you didn't you have to remove the middle horseshoe console trim to remove the long strip? It kind of looks like the long strip goes up underneath the horseshoe trim and I read some forums that mentioned doing this. The less I have to do the better!

Registered User
Joined: Oct 2012
Posts: 8
From: sacramento
Rep Power: 0

Thread
Thread Starter
Forum
Replies
Last Post
adnanm3
Aston Martin
25
Oct 25, 2016 08:38 AM
ECS Tuning - BMW
Mini Cooper Vendor Classifieds
0
Oct 1, 2015 01:35 PM
ECS Tuning - BMW
Mini Cooper Vendor Classifieds
0
Oct 1, 2015 01:29 PM