When you click on links to various merchants on this site and make a purchase, this can result in this site earning a commission. Affiliate programs and affiliations include, but are not limited to, the eBay Partner Network.
add-on :
ready to buy in UK but :
for front upper arms i found 2 numbers part for the same side DG43-3084-AB P and DG43-3084-BA P
(same AB P versus BA P for the other side DG43-3091-__ _)
What does it mean please ?
and what is P ?
thanks for answer
Best
Last edited by Phil57DBS; Jul 6, 2018 at 03:07 PM.
Do you remember which version of the V3 coilover suspension you ordered? From KWs product listing they are available for
(I) 4.3L Roadster, 10 and 12 mm piston rod thread diameter
(II) 4.7L Coupe, 10 and 12 mm piston rod thread diameter
I think i have to order the 10 mm Version for my 07 V8 Vantage, which was delivered with Dynamic Suspension. Do you know whether the versions vor (I) and (II) differ in length or diameter?
AMR - took me a bit I had to find the box. I purchased them from a vendor here and they selected the model. They are very nice on the street end very easy to work with. Jury is still out on track work.
I have several hundred miles on the new bushings and all I can say is WOW! The steering is completely changed. The steering response is now very linear to the throttle response. I am a little stunned how well it works. I find no harshness at all. Turn in and lateral weight transfer in transition just make me smile. It is a blast to drive.
I have no idea how many miles we'll get out of them so they will have to routinely be inspected. We will tear it apart again tomorrow and see how everything looks. If all is good, I will see about getting the drop weights.
The 5.3's were checked at the chassis to determine which bushing was causing the most friction and we will take .005 out of the shim, re-fit, and re-check.
The 11 lb is bound thru the rear bushing. We'll take .010 out of it and re-fit.
It's an iterative process until we get it where we want it. If we could get them all to 2lb I would be very happy. I have a feeling the squareness of the mounting tabs will dictate where we end up.
Thank you for your interest in installing a Nogaro in your 2006 Aston Vantage. Cobra has developed a complete package for installing the Nogaro in a Vantage. This includes the sliders, sidemounts and seat belt mounting points. The only modifications you need to do to the car is install a resistor to bypass the air bag sensor with a 2.3 ohm resistor. You would also need to rework the driver�s seat position sensor. This has to be disconnected on the old electric slide and plugged into the multi-plug in the floor. Initially this will create a fault that needs clearing but thereafter it�s fine. The cost for the hardware for the Nogaro install is $300 per side. The Nogaro seat in vinyl with Dinamica center section retails for $1320. If you want to save the most weight, you can get the Nogaro in a Carbon fiber shell which retails for $4600. It is possible to get the Nogaro in custom leather trim as well if you are interested. Please let me know if you have any questions or need more information. Thank you.
Looking at switching in manual seats. Do any of you have experience installing the resistor and do any of you know about clearing the fault? Is this something that can be done with the Foxwell or would I need OEM service?
Also I would like to remove the seat switches. Can I simply unplug them from the system?
Is there a cover to replace the switch cover in the console or we would need to fabricate?
Interessting...I was looking at the Nogaro as well.
I was playing with the idea to keep the "electric" seat base, mount the Nogaro onto tit and thus keep the adjustability (except the rear tilt).
We are going to run with Pro Drive at Portland on Tuesday so we have been working on re-setting for track work. The Mustang is on the rack so we cut up some block and leveled it to itself on the floor to act as ground plane. We painted the floor so we can get back pretty quickly.
We set pressures at the track by monitoring tire temperatures. We have some data from Sept so we pressurized the tires to the hot pressures used on the track.
We put the car up on the block and then loosened all four lower control arms.
We lowered the car to 3.00 inches from the ground plane to the bottom of the front subframe. We set the rear to 3.375. We used plastic bags between the block and the tires to minimize scrub.
Next we set the caster and were able to achieve 5.5 deg per side. We were unable to get this in Sept perhaps poor setup.
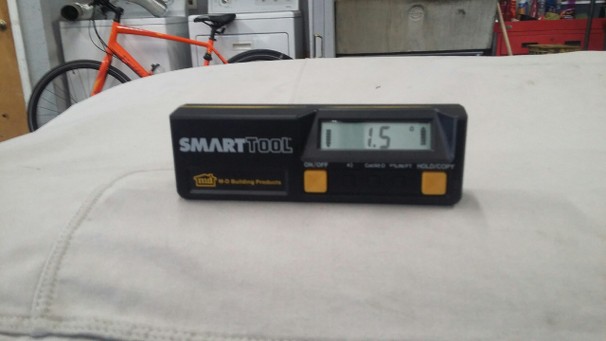
For camber we achieved -2.5 front and - 1.75 rear. These settings did match our September setup. We have switched from a Longacre caster/camber to a Smart camber gauge. We checked the two gauges against each other and they correlated very well. The Smart Camber gauge is easier to use because we don't have to take the tires on and off to make adjustments.
We are running 275 35 18 BFG R1 all around. It helps with expense because we can rotate them.
The Smart camber gauge is really nice because it utilizes a digital level that can be removed from the triangular camber frame to be used on it's own. We used just the level to help square the Smartstrings frame.
Next comes toe so today we assembled the smart strings frame and attached it to the car. A 911 has a much blunter nose so the frame is really designed for that. Because the Vantage nose is radius-ed in plan, we needed to move the center tubes in board. The car is sitting so low we had to add some shop towels to keep the frame off of the car.
The frame fits the rear pretty easily . The strings go around the grooves in the string bars.
The frame is setup such that the sting bars lie in the same plane as the center of the wheels. The strings are attached and we used some big nuts to keep tension om the strings.
the strings need to then be adjusted so they are equi-distance from the wheels. This dimension will not match from front to rear.
That is as far as we got. Tomorrow we will set front to 1/32 out and the rear at 1/16th in. We ran 1/16th out on the front in September. I ran it on the street and the car turned in really quickly. I want to try to run a little less and see if we can connect the transient weight transfer closer to the steering.
Notice we failed to add the requisite surrogate weight to the car. I am working on this. My main goal is to run it and re-check the uppers for binding.
So
Establish Ground Plane
Loosen Control Arms
(Add Surrogate Weight)
Set Ride Height
Torque Control Arms
Set Caster
Set Camber
Set Toe
Iterate Last Three
The Smartstrings greatly simplifies setup and checking of toe.
Our upper control arm drop weight has all four uppers dropping from 3.0 - 3.4 lbs. Very happy with that.
Really excited to run it again Going to see if we can get the Go-Pro working with it.
Now about seats. I was put in touch with a fellow Aston owner who had the Cobra seats installed in his car by Bamford Rose. If I understand correctly, the seat position sensor was cut off the original seat and wired back into the car.
Question - What all does this sensor control? I do not have memory seats . Is it also tied into safety systems?
I ask because is there a chance I don't have this system?
Question - What all does this sensor control? I do not have memory seats . Is it also tied into safety systems?
cliff
I think even without seat memory there are some end switches.
(there are threads/videos about seats not moving properly after battery disconnect, and needed to be re-set).
However, why you would need that with mechanical seat runners is beyond my imagination - well maybe related to airbags?
But if it would be end switches, it should simply be open or closed circuits...
Thomas
Last edited by TR-Spider; Jul 25, 2018 at 11:59 PM.
Have not gotten anything sorted and have not thoroughly researched for available information.
Hi Cliff
I am sure you will find it is easy enough to fit the seats and do the airbag delete, the only part which gave us a headache was the Seat position sensor so we cut it off the original Aston seat and wired it into the original seat feature plug.
The seats are a lot more comfortable than the standard sport seats which always gave me back ache, they are also better than the Aston lightweight fixed back seats because they are wider in the hip area.
If you give Cobra a ring directly I am sure they can advise you on dimensions, fitting and costs.
I hope this helps and you will find they transform the whole driving experience.
Kindest regards
Mark
Based on Marks responses I think the airbag delete will be straight forward. The seat sensor is another issue, but I am feeling more confident about figuring it out. If it all goes to hell I'll have Stuart fix it when he installs the 4 point --- hellooooo Stuart.
Rich - I know you have had the consoles apart. Do you see any reason I could not remove the seat switches and fabricate some blocking plates for the console? I would prefer not to leave the seat switches. If you have the right resistors, mighty as well send me a couple In one of Marks responses he stated the resistor is 2.3 ohms.
TR - thanks for the help - I am making headway . I need to do some more study. Pretty sure I am going to order a set. Deciding on trim level.
Leaning towards matching the Aston stitching in all black.


 In one of Marks responses he stated the resistor is 2.3 ohms.