
Greetings from Niagara, Ontario, Canada


Thread Starter
|
Registered User
Joined: Apr 2017
Posts: 399
From: Niagara Region
Rep Power: 29

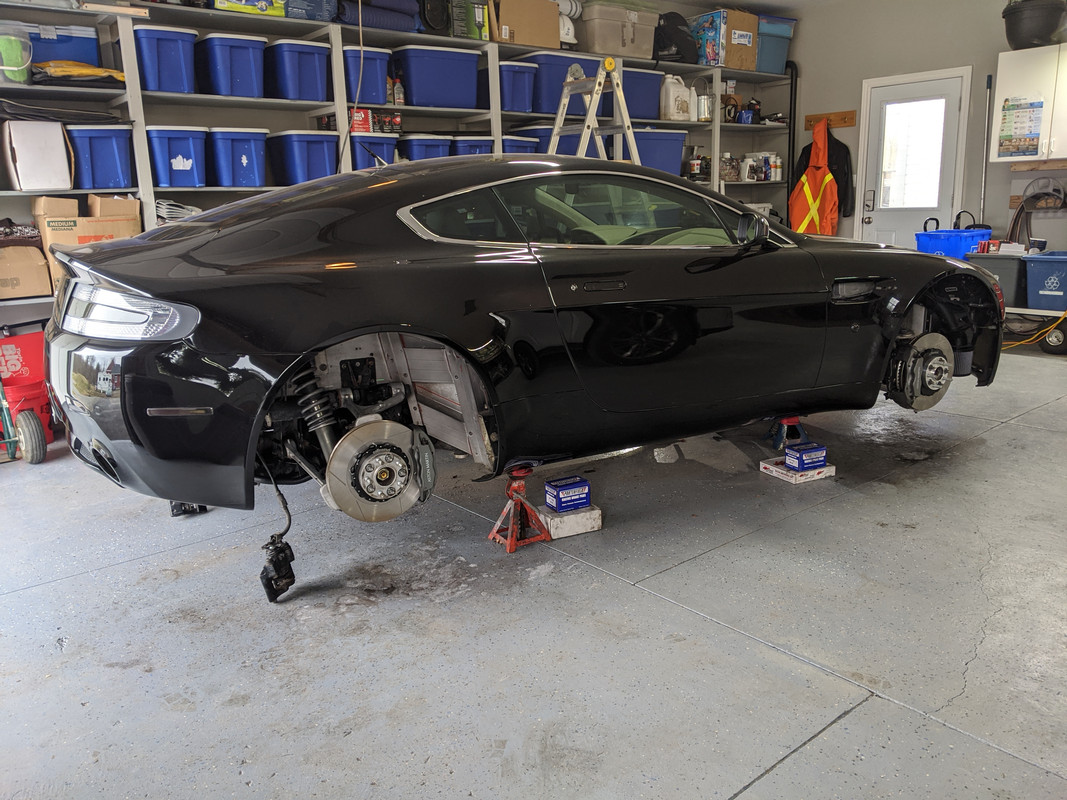
Cleanup in preparation for installation of rear rotors:
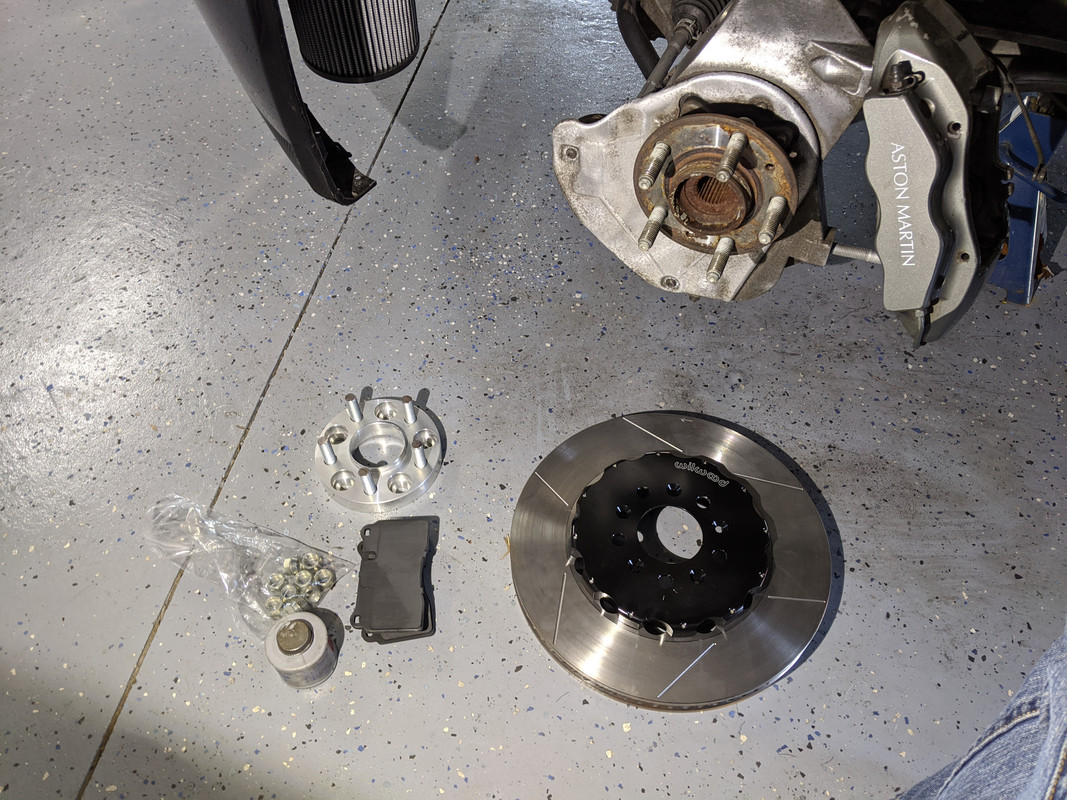
These are going to look good and hopefully improve performance as well:
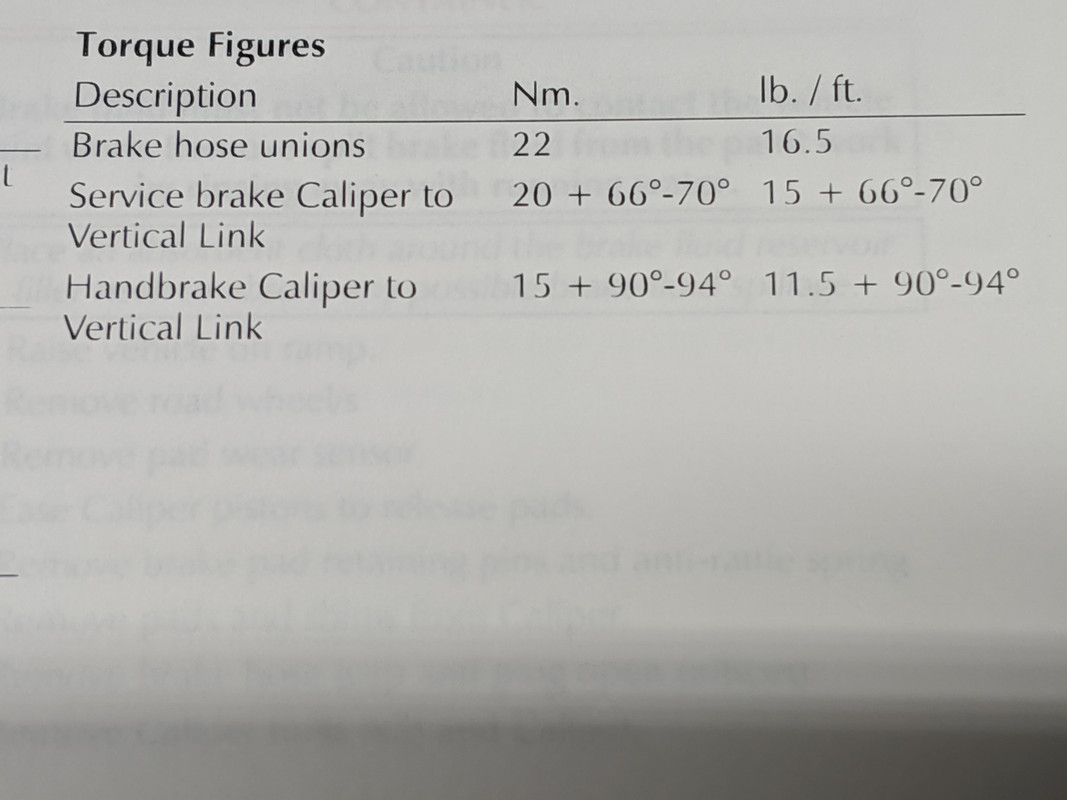
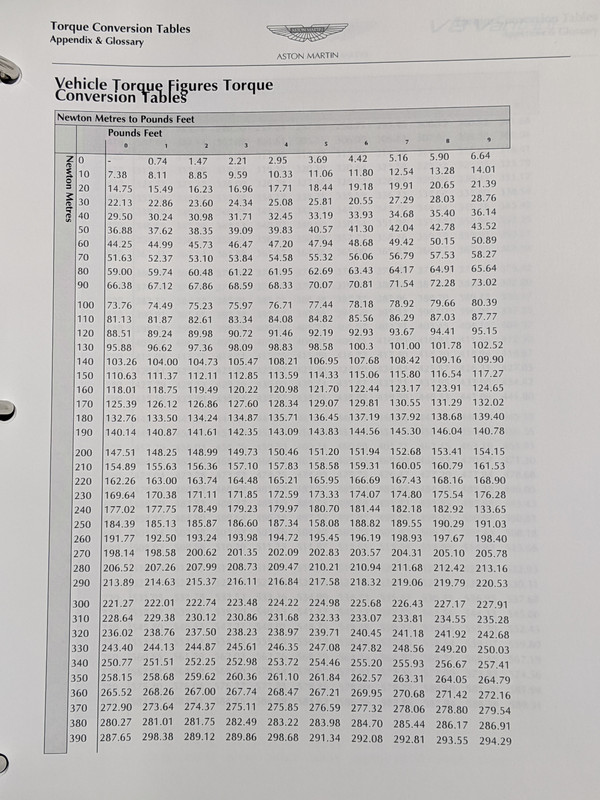
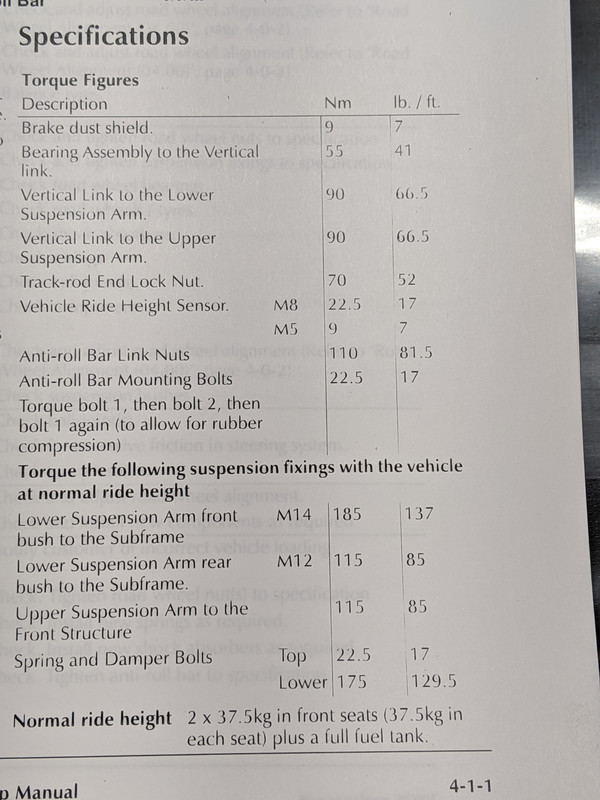
Here are the torque specs I used for reassembly:
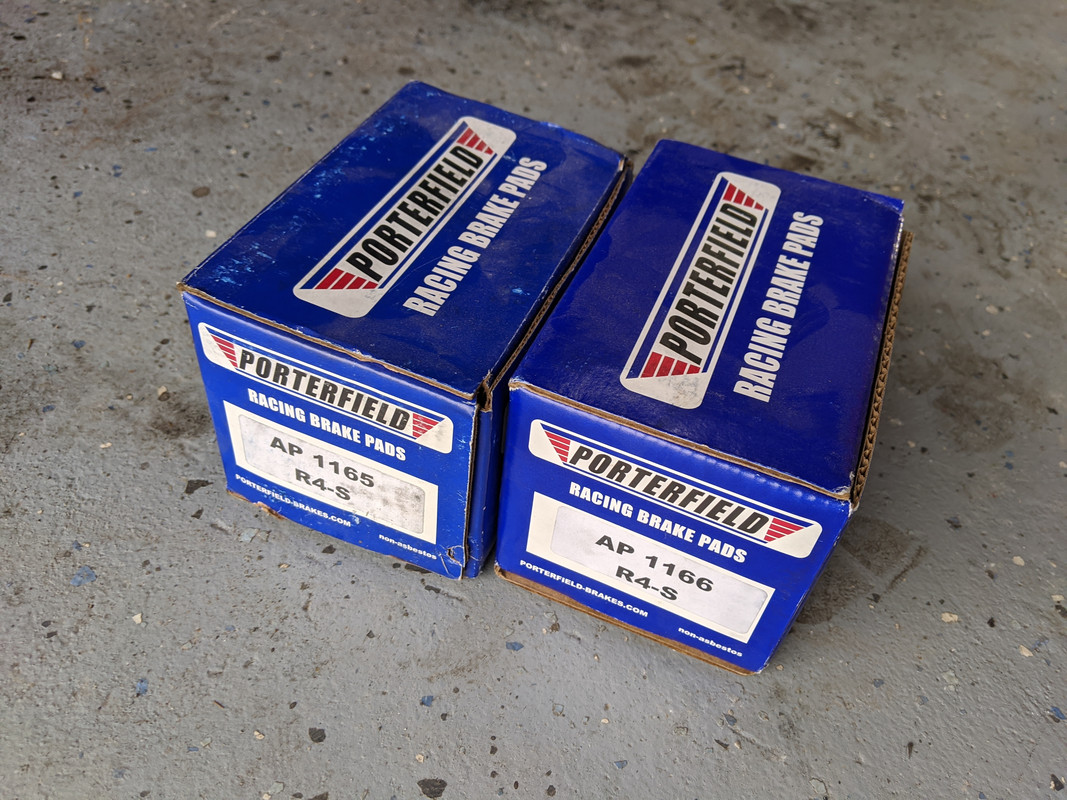
I liked how quiet my experience was with the Porterfield brake pads, so I went with another set of them:
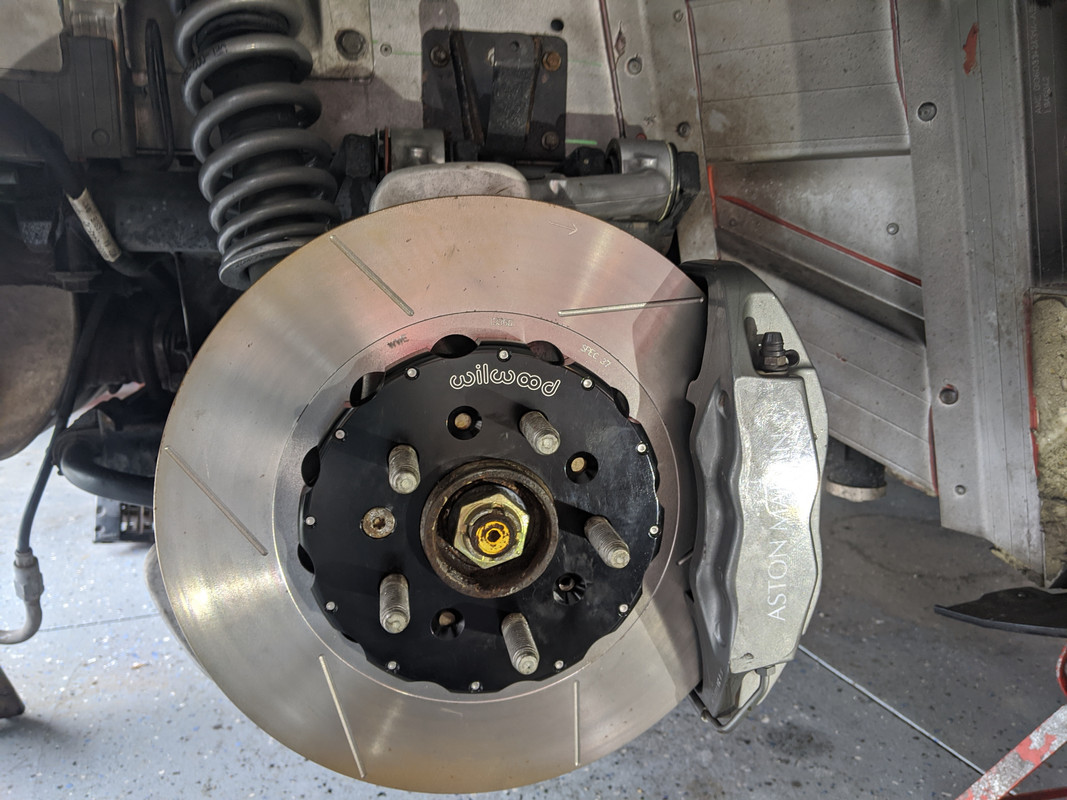
These are going to look good and hopefully improve performance as well:
Here are the torque specs I used for reassembly:
I liked how quiet my experience was with the Porterfield brake pads, so I went with another set of them:

Thread Starter
|
Registered User
Joined: Apr 2017
Posts: 399
From: Niagara Region
Rep Power: 29
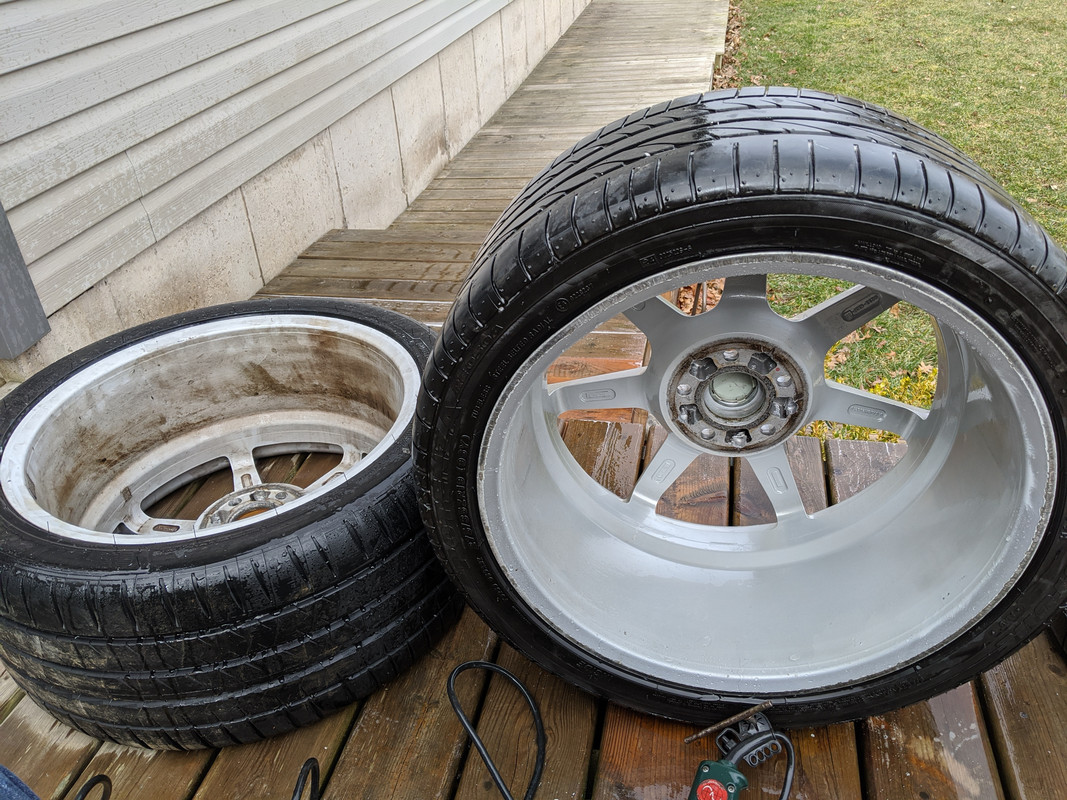
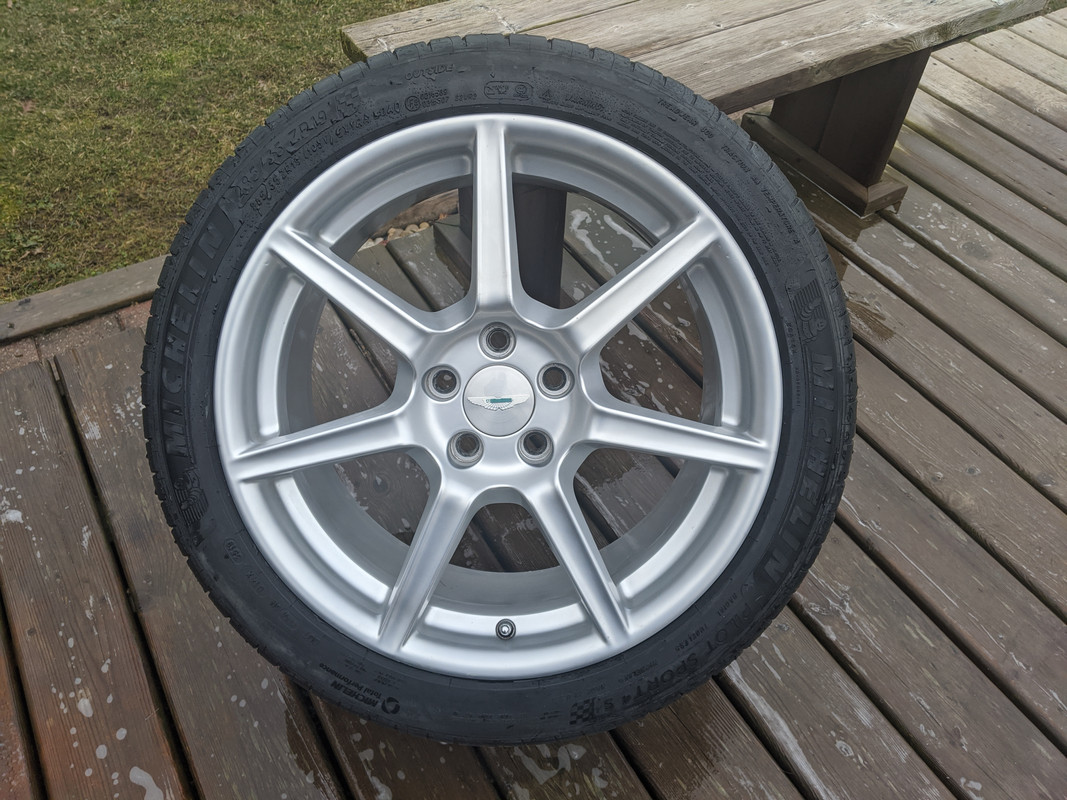
Took the opportunity to deep clean the rims:
I purchased online new Michelin Pilot Sport 4S 285/35/19 rear tires to replace the Bridgestone 275/35/19:
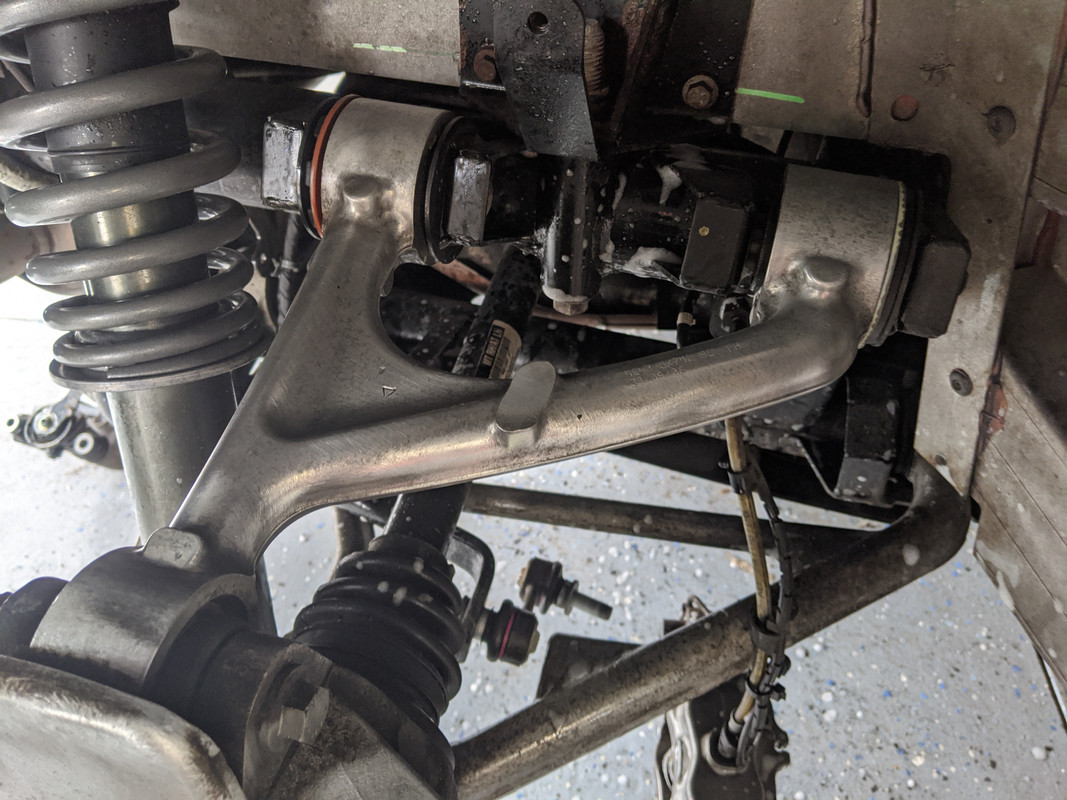
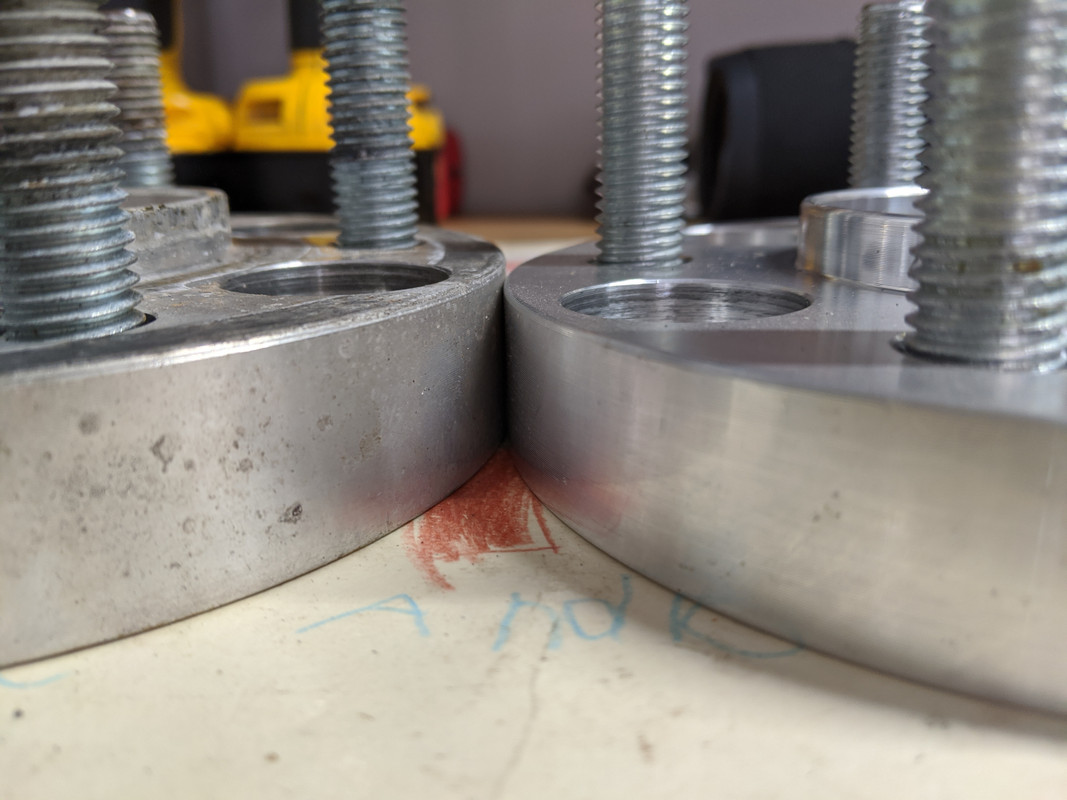
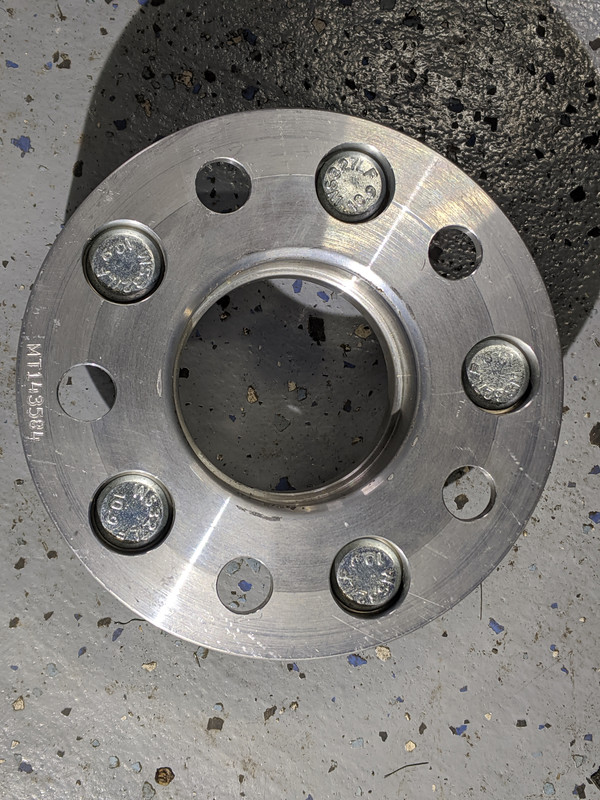
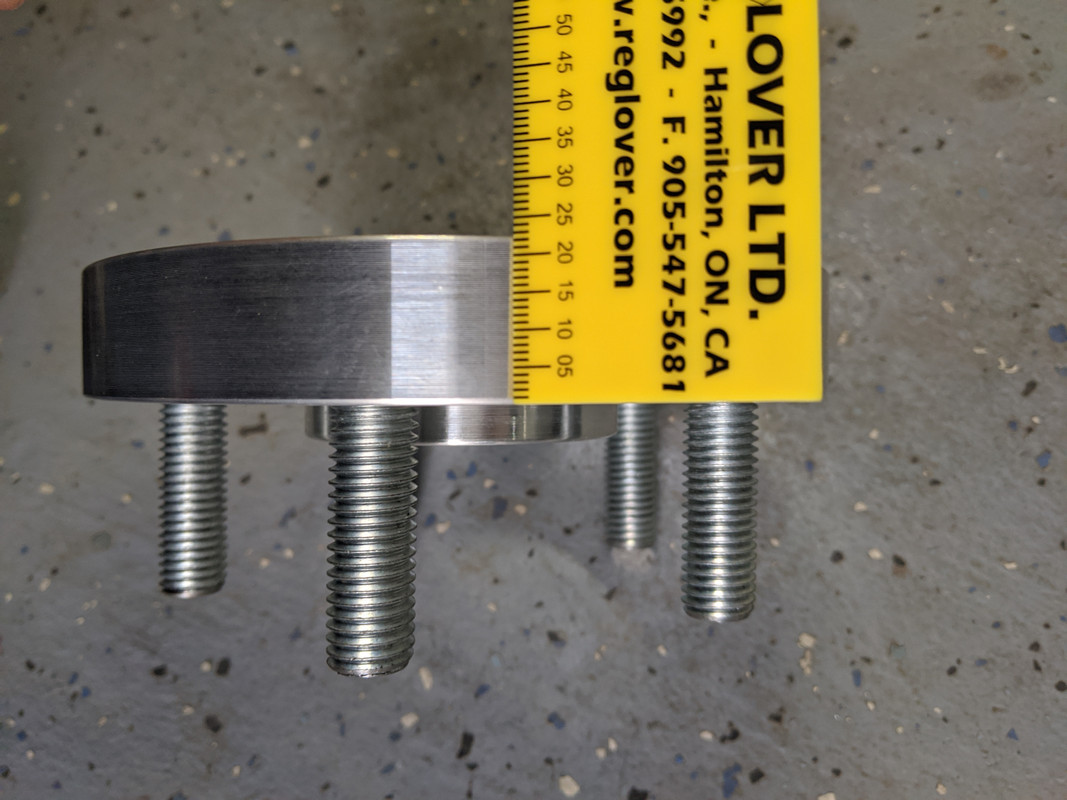
I decided to reduce the wheel spacers from 25 mm to 22 mm with the new lowering springs and wider tires:
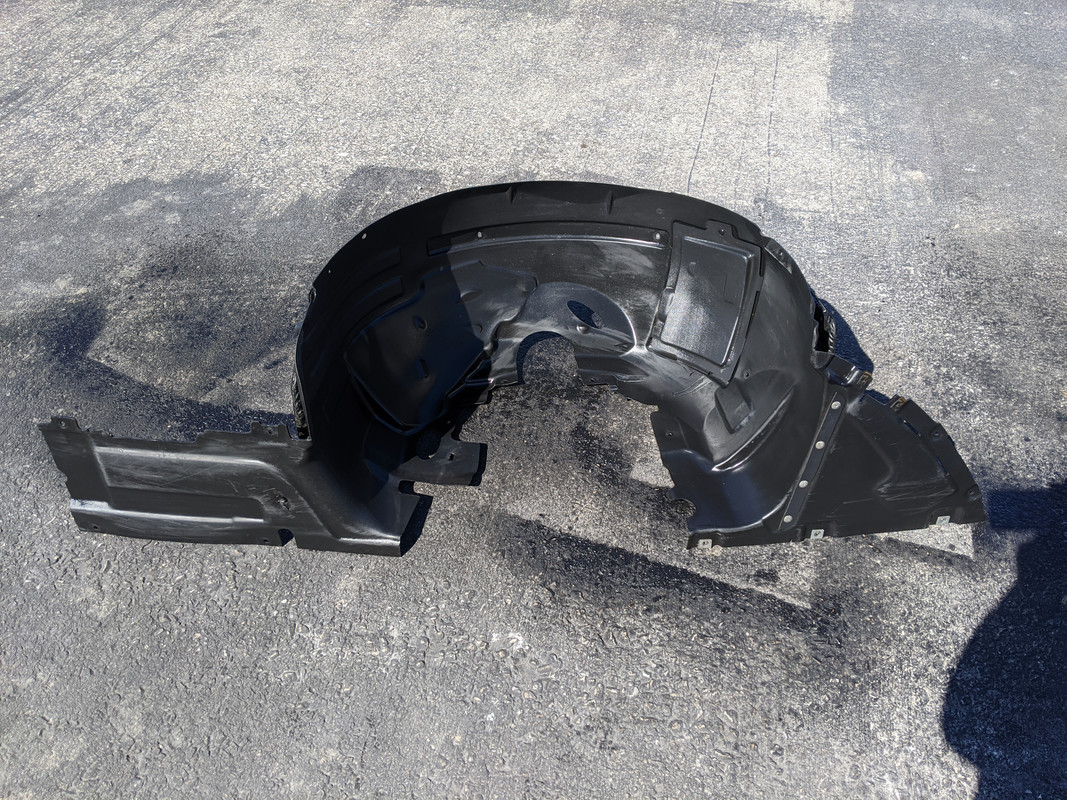
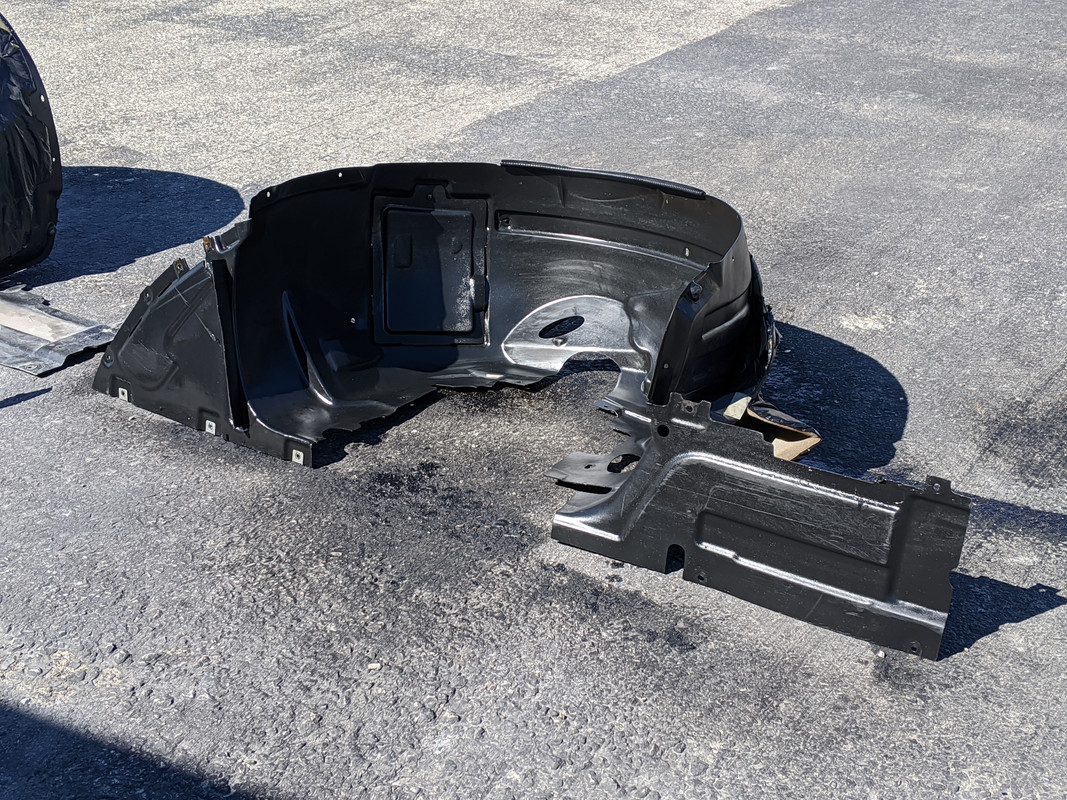
I ended up removing all the wheel well liners so they and the aluminum in behind could be cleaned:
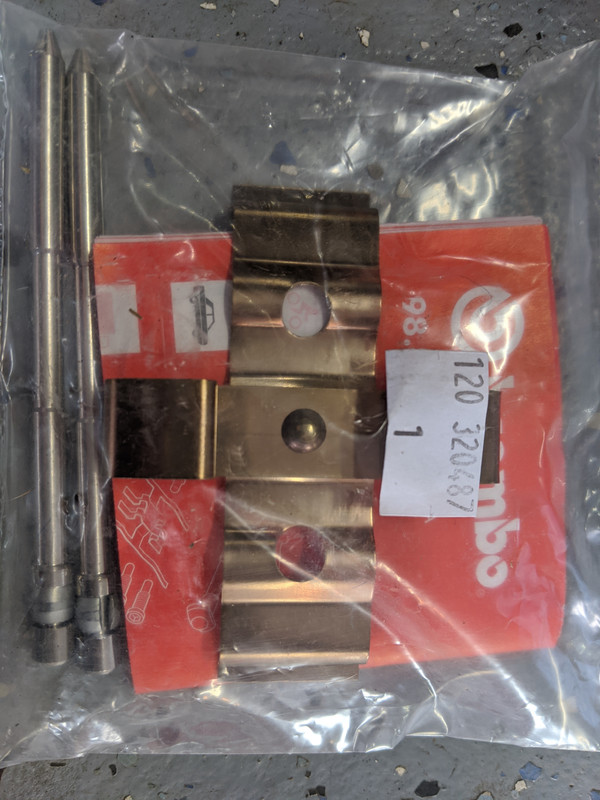
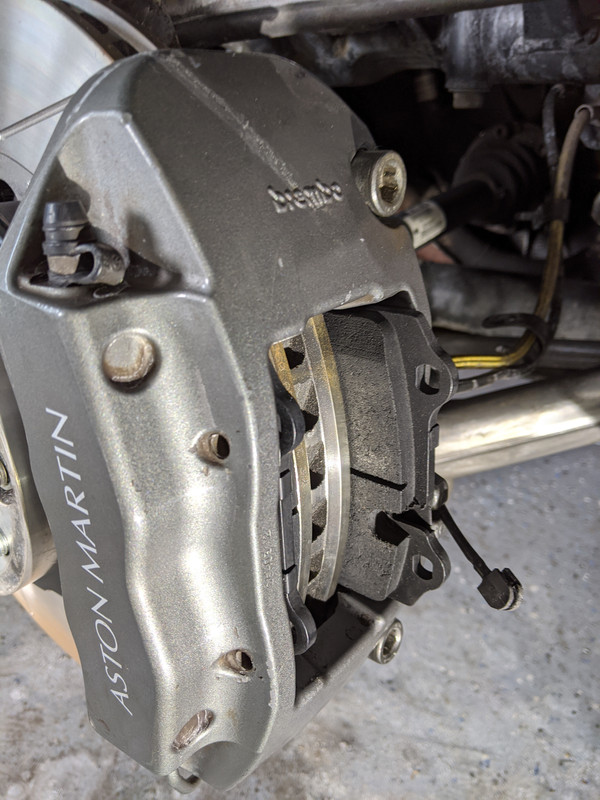
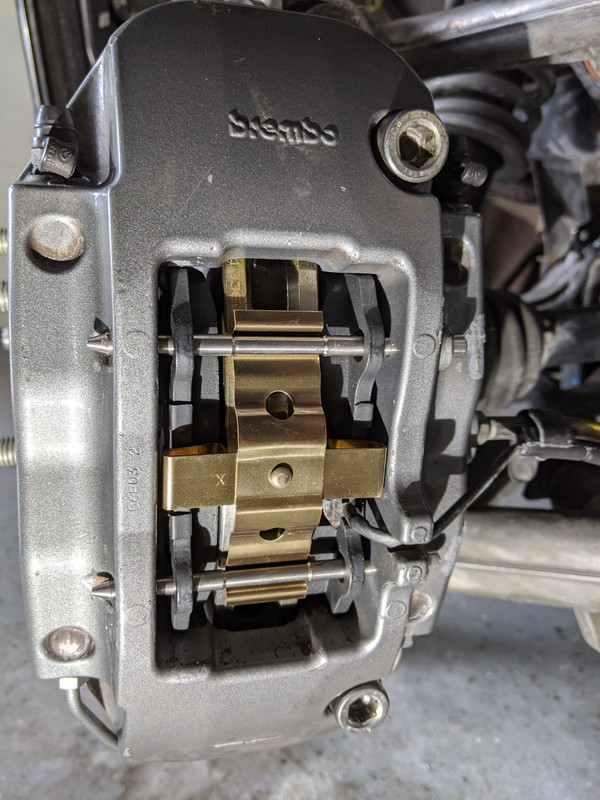
I installed new brembo caliper pins and springs on the rear as one side was a little bent and damaged from a past incident:

Next I'm moving on to the fronts...
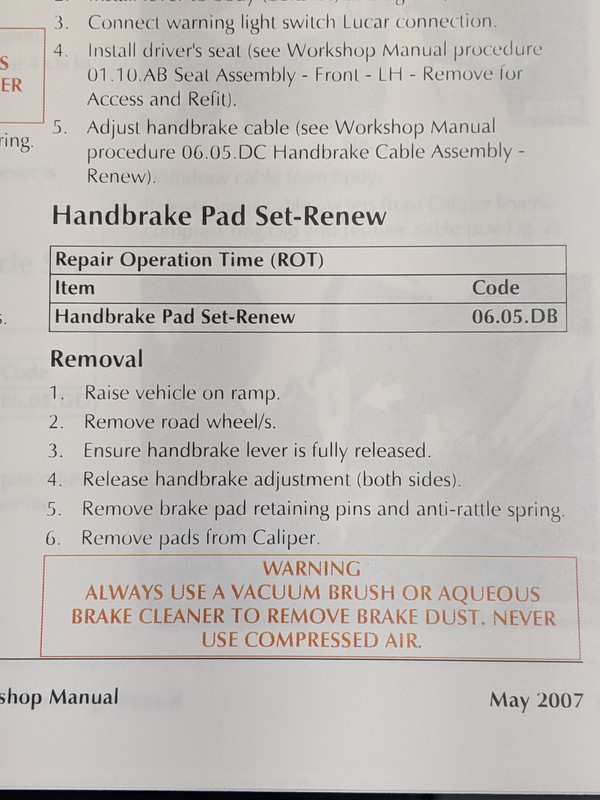
Rears are complete except handbrake as I ordered new pads for them:
I purchased online new Michelin Pilot Sport 4S 285/35/19 rear tires to replace the Bridgestone 275/35/19:
I decided to reduce the wheel spacers from 25 mm to 22 mm with the new lowering springs and wider tires:
I ended up removing all the wheel well liners so they and the aluminum in behind could be cleaned:
I installed new brembo caliper pins and springs on the rear as one side was a little bent and damaged from a past incident:
Next I'm moving on to the fronts...
Rears are complete except handbrake as I ordered new pads for them:
Thread Starter
|
Registered User
Joined: Apr 2017
Posts: 399
From: Niagara Region
Rep Power: 29

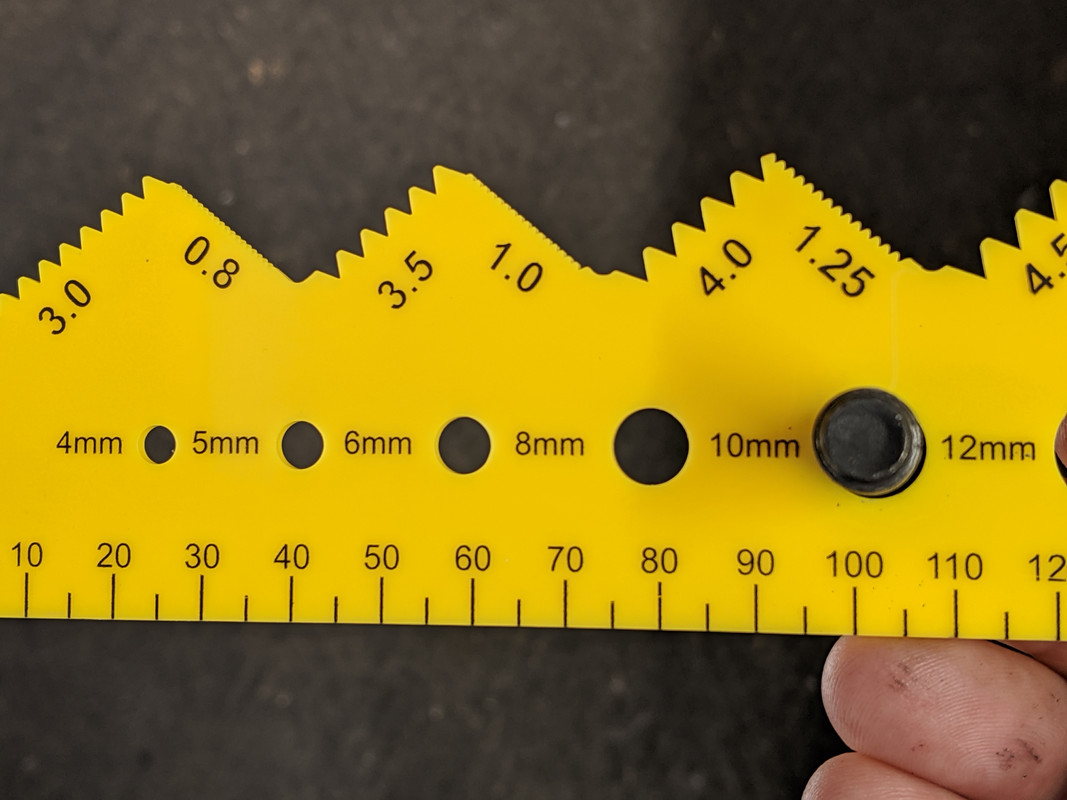
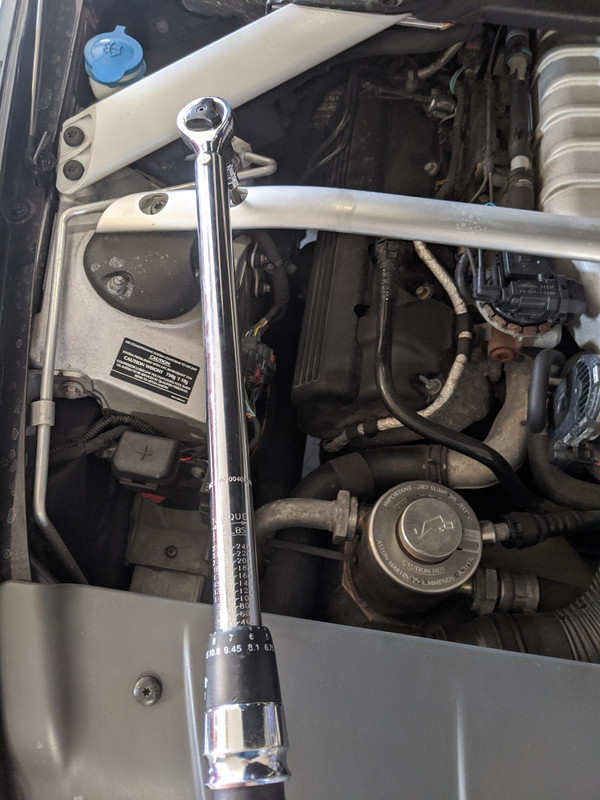
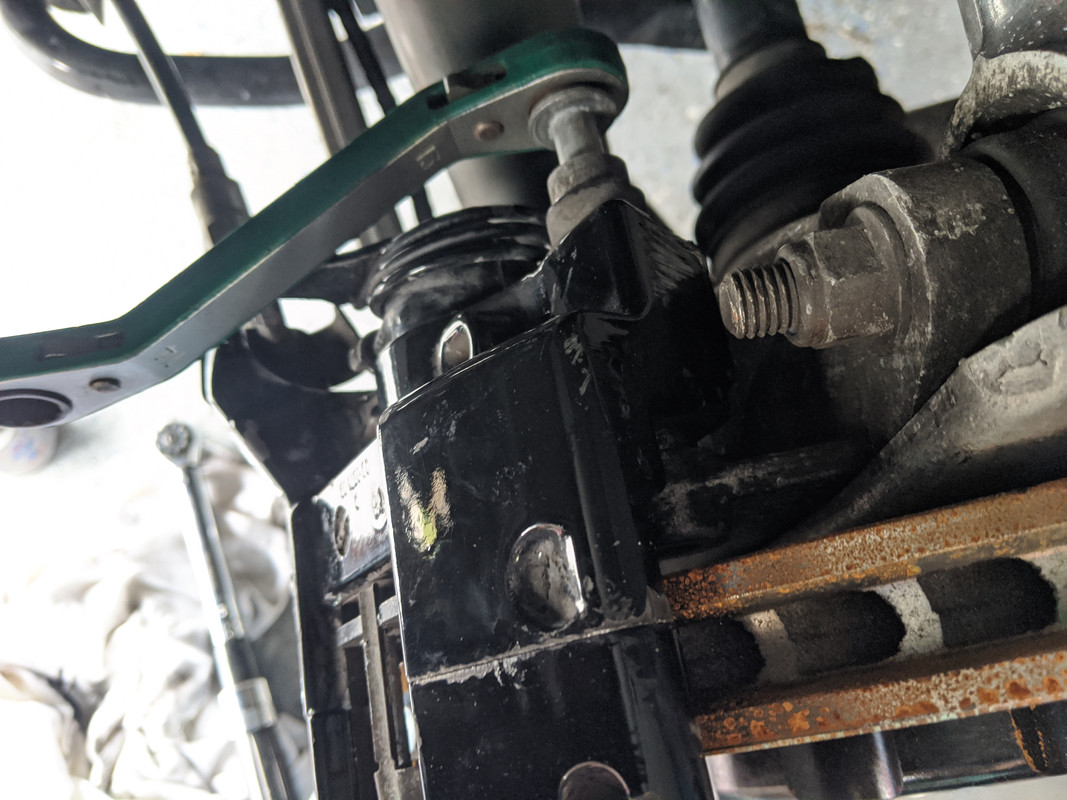
~50 NM or 37 ft/lbs based on the following:
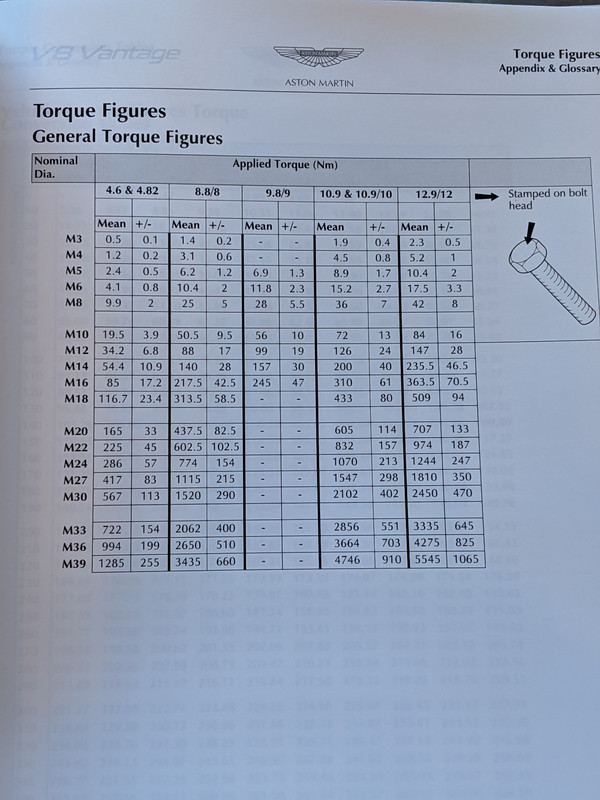
I put a dab of anti-seize on the threads and then alternate pattern to torque to spec:
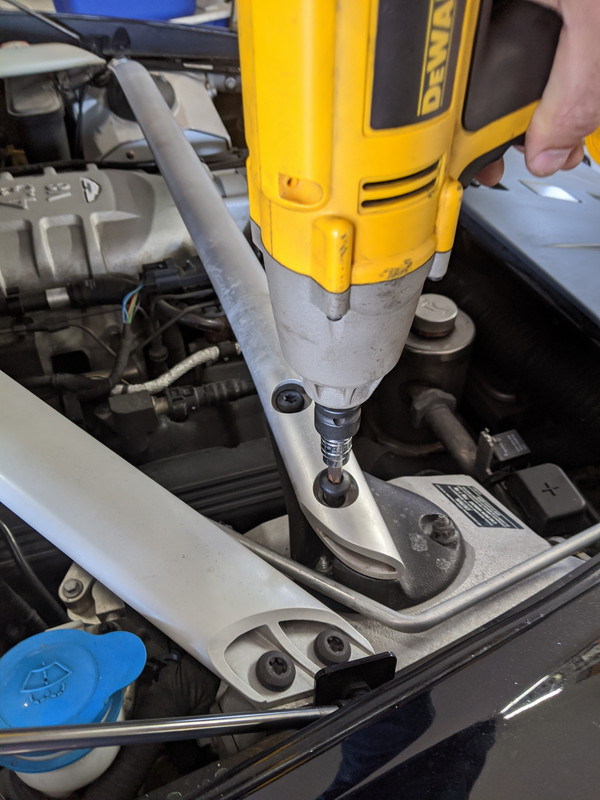
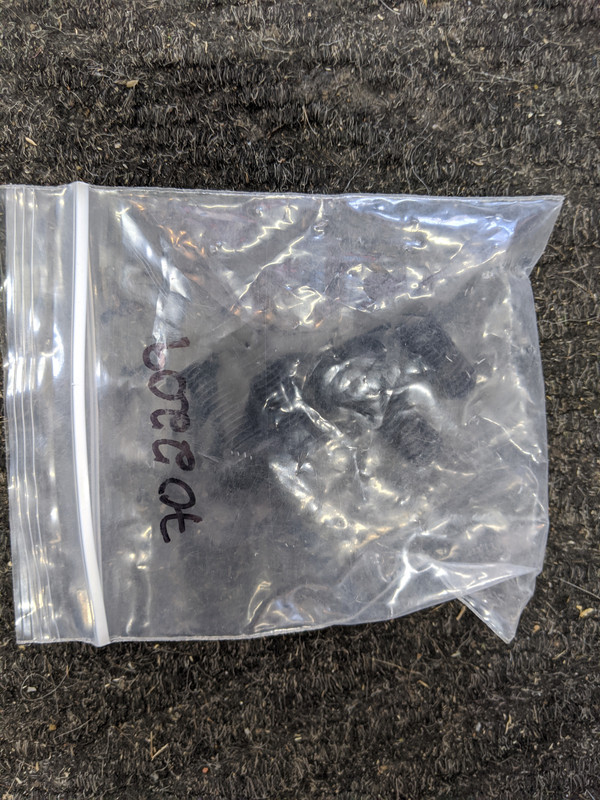
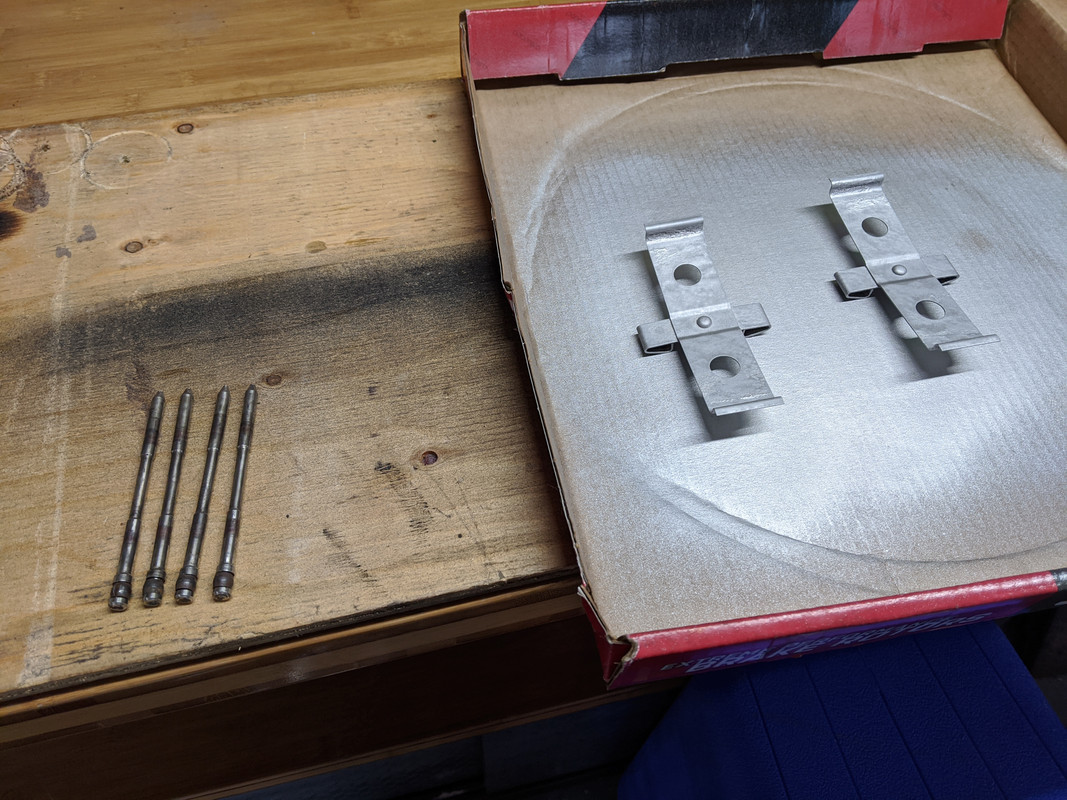
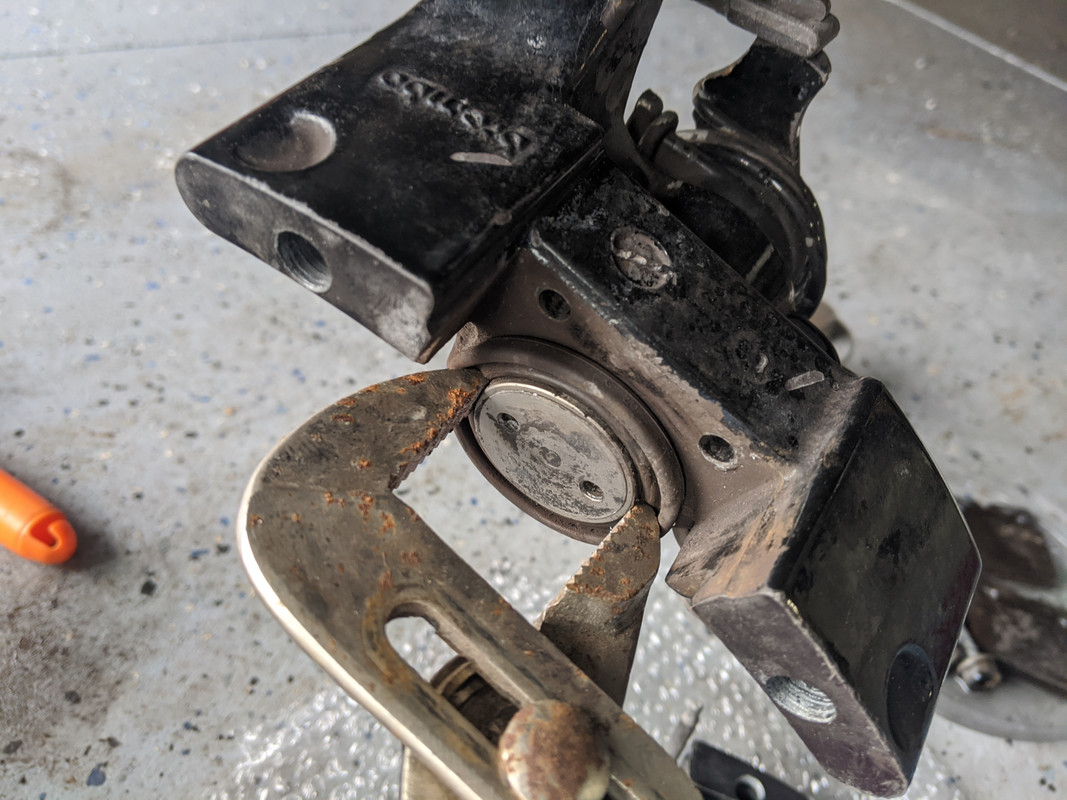
But sure to torque those 4 Torx M10 x 25 mm bolts (Aston part # 702209) once the car is back on the ground and the springs have settled.
Turns out I had a pack of new ones from Redpants in my personal fastener inventory, so I replaced all four for cosmetic reasons.
Thread Starter
|
Registered User
Joined: Apr 2017
Posts: 399
From: Niagara Region
Rep Power: 29
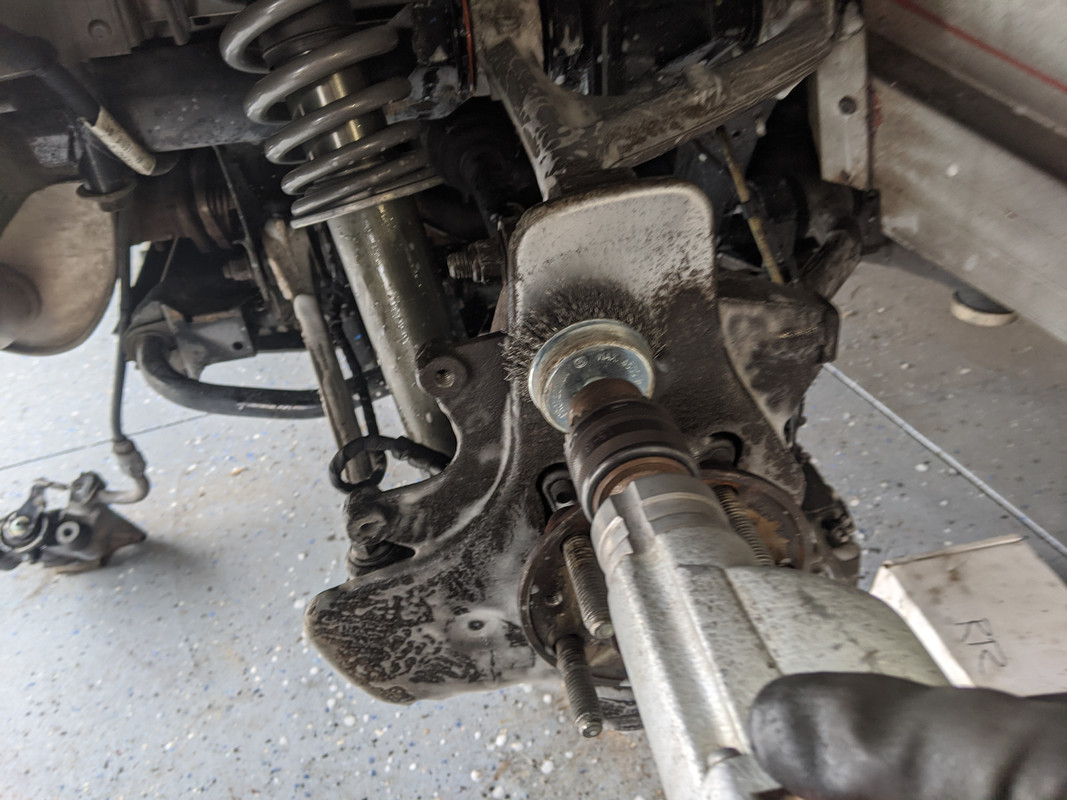
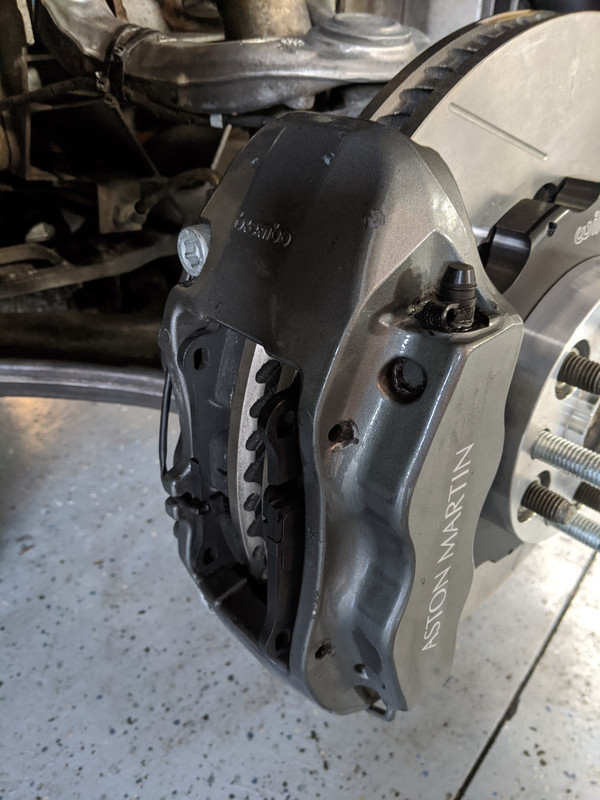
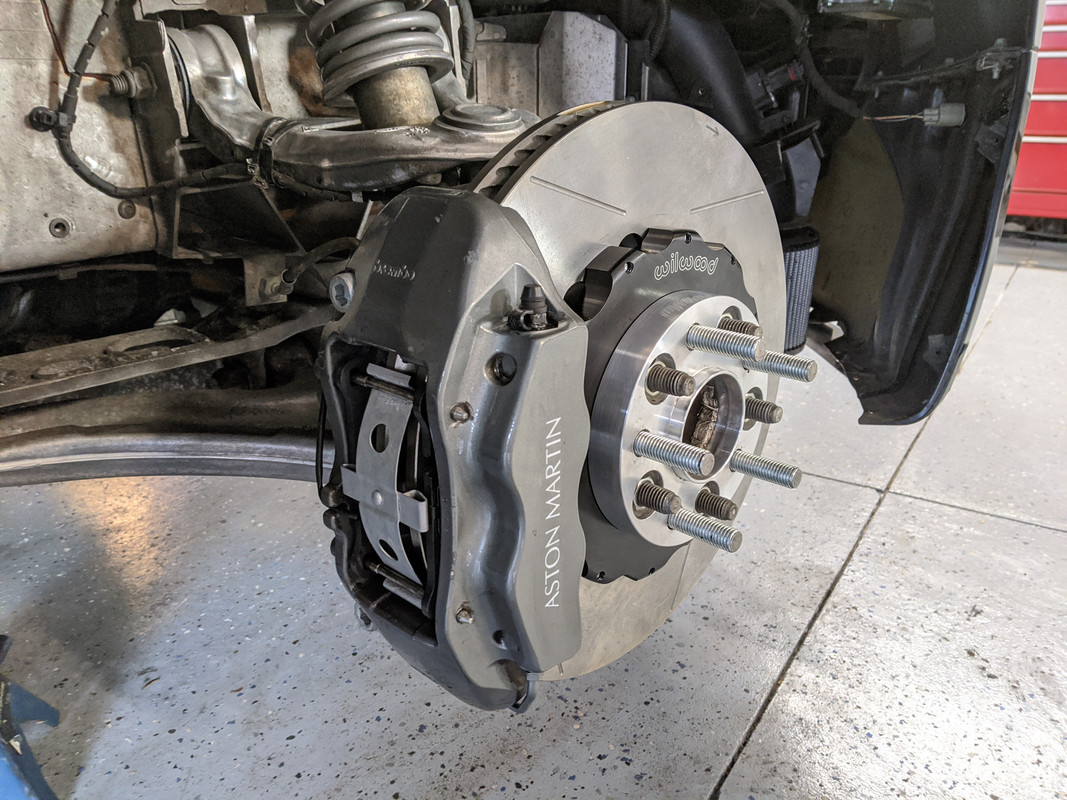
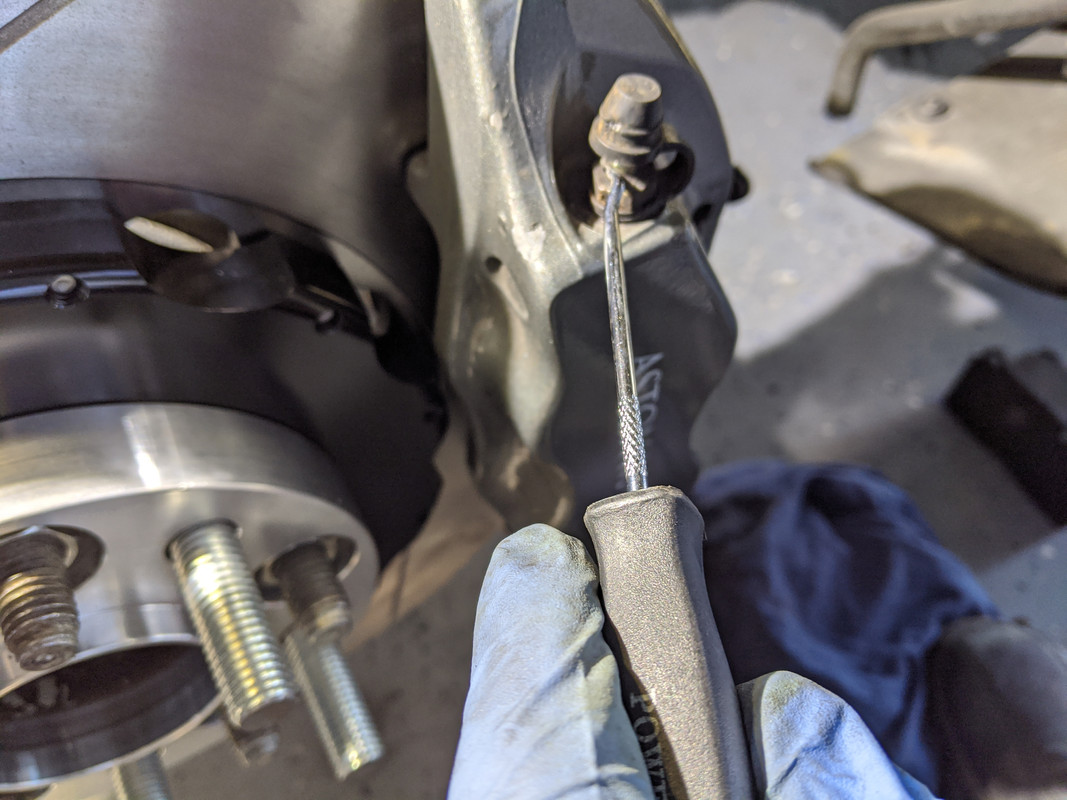
Fronts are similar procedures as the rear - I started on the left side:
Clean the calipers and retract the pistons:
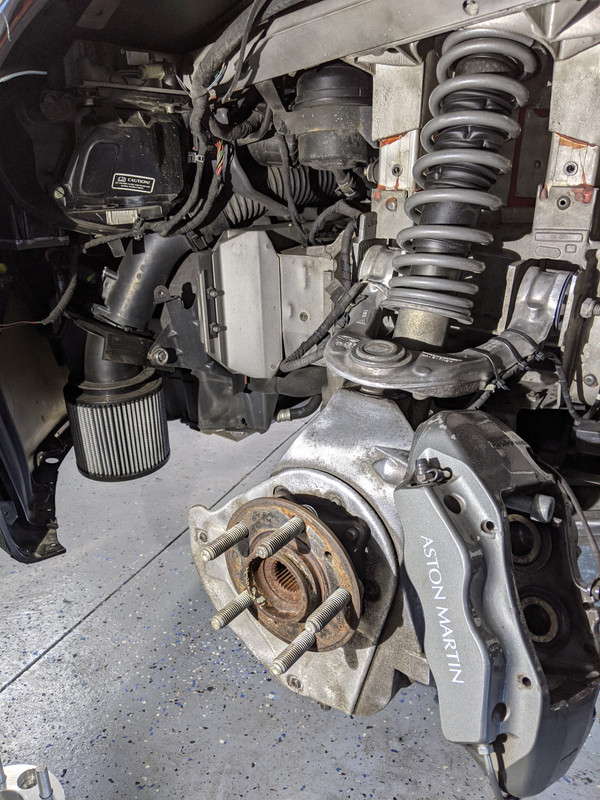
Cleanup the brake dust shield:
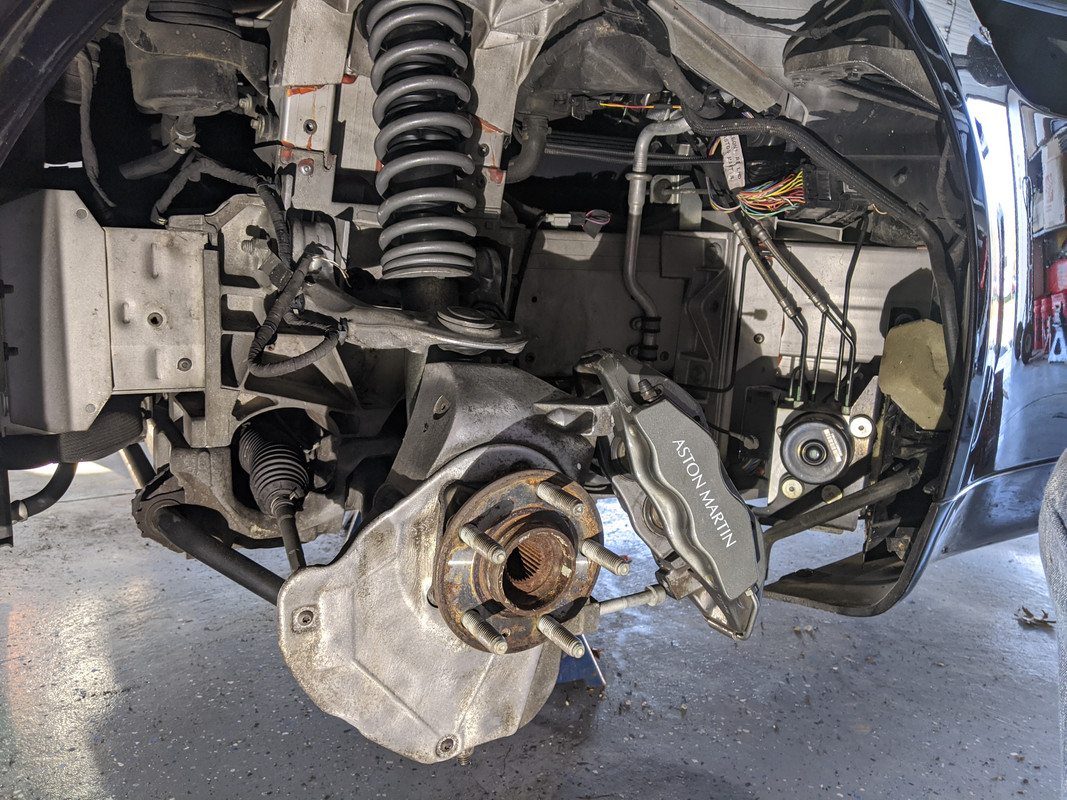
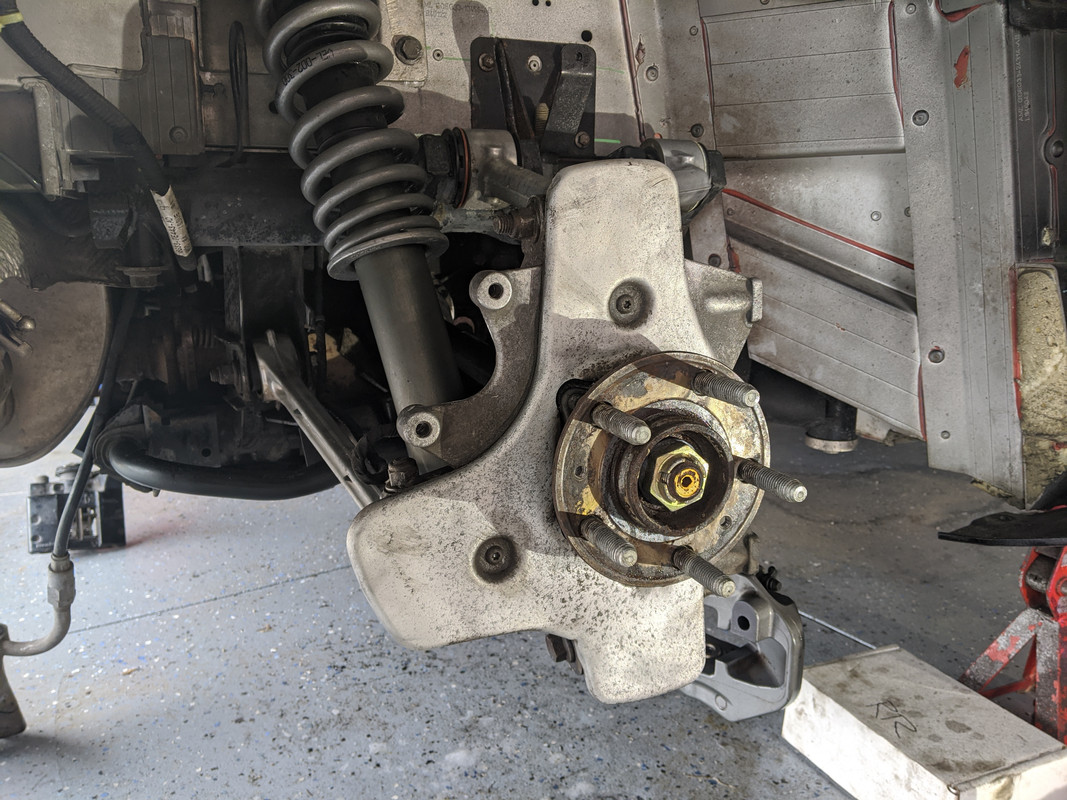
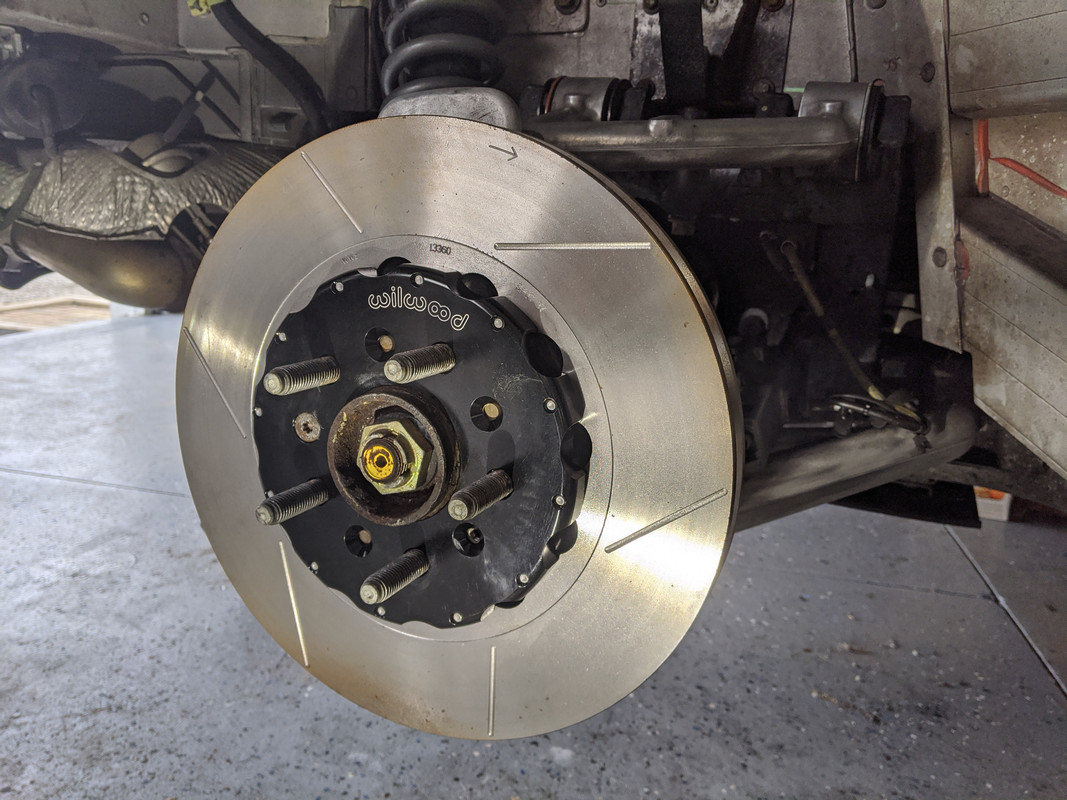
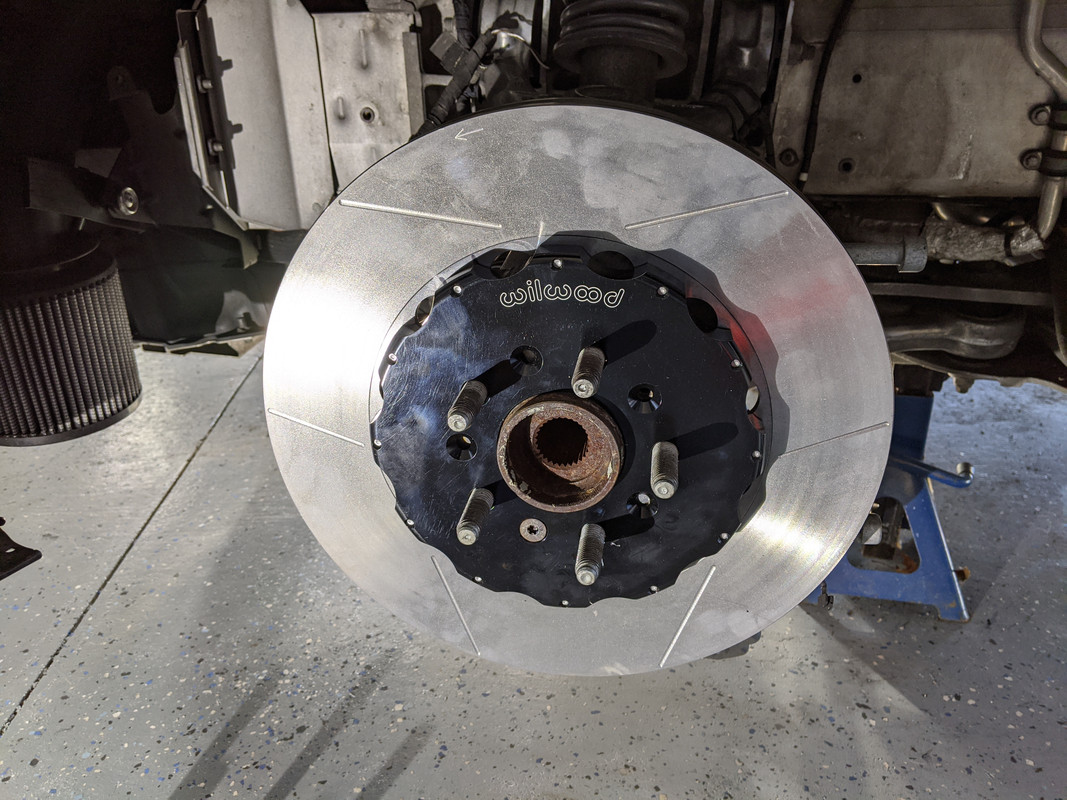
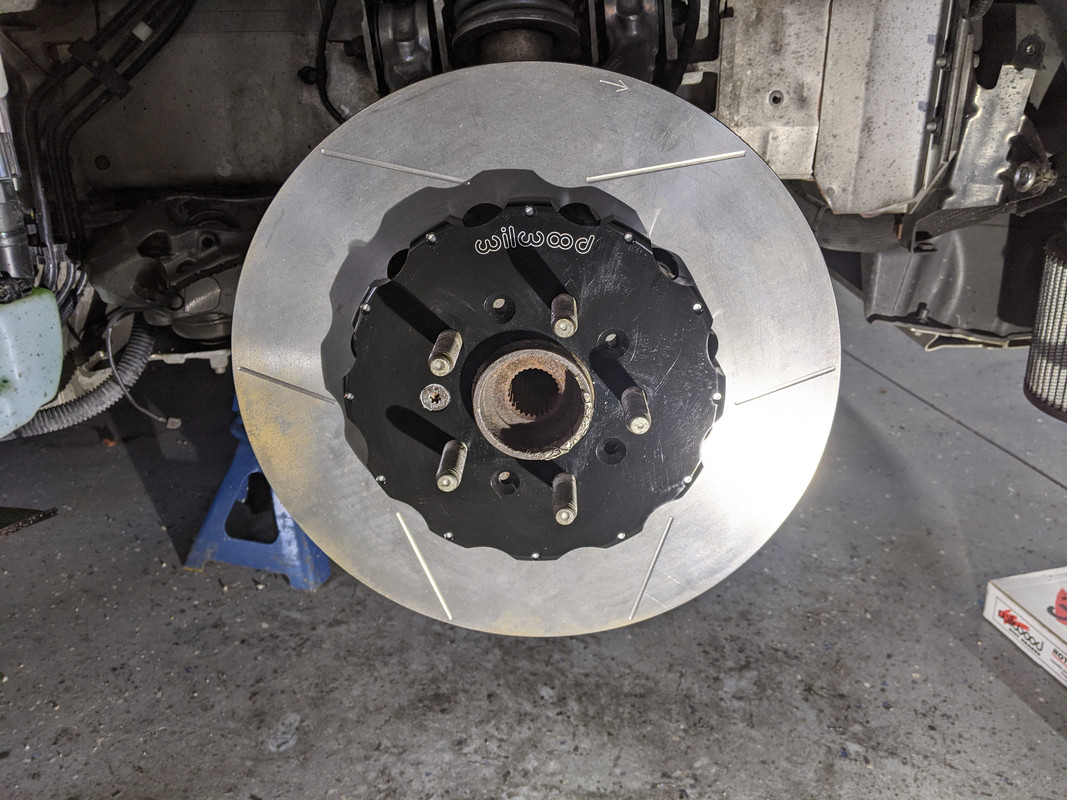
Mount the rotors with some anti-seize on the Torx retaining screws:
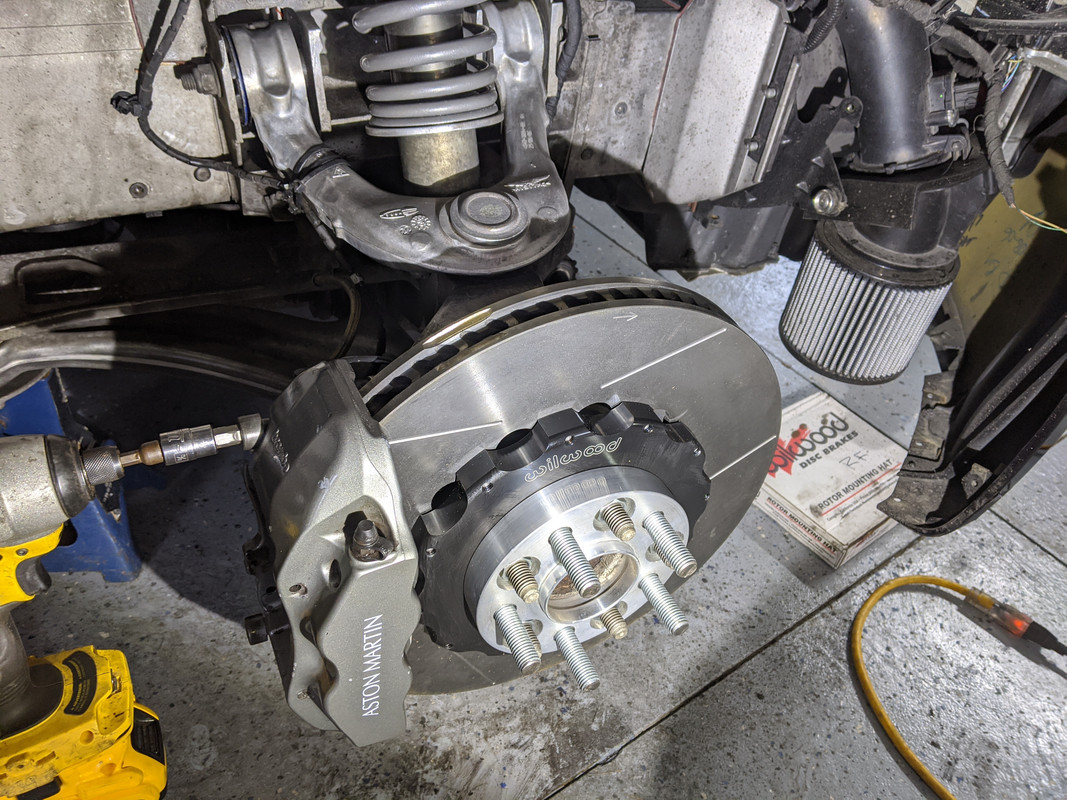
Then you can mount the calipers with the following torque specs:

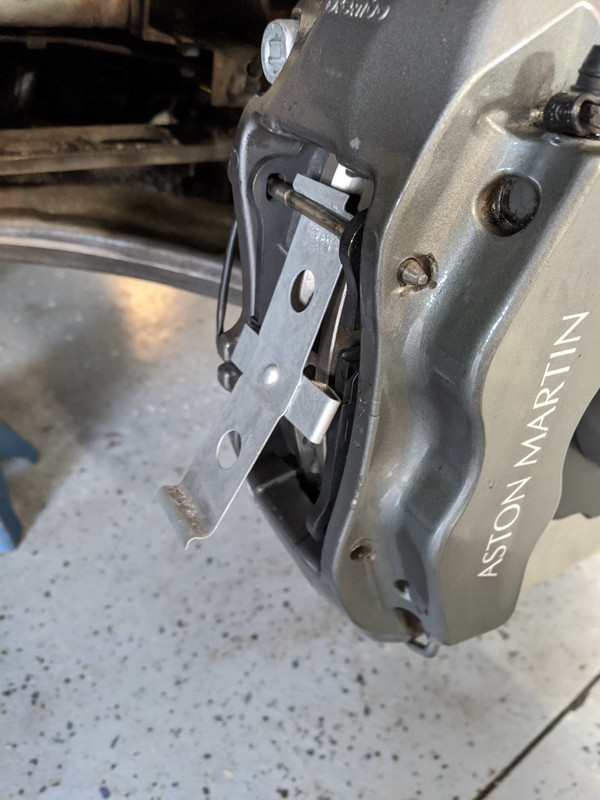
Then I was ready to install the new brake pads:

I decided to clean and paint the brake pad springs:
Install the pads and hook up the wear sensor to the inboard pad:
I like to put the top pin in first and then hook the spring behind it:
Then push the bottom of the spring in and tap the lower pin home:
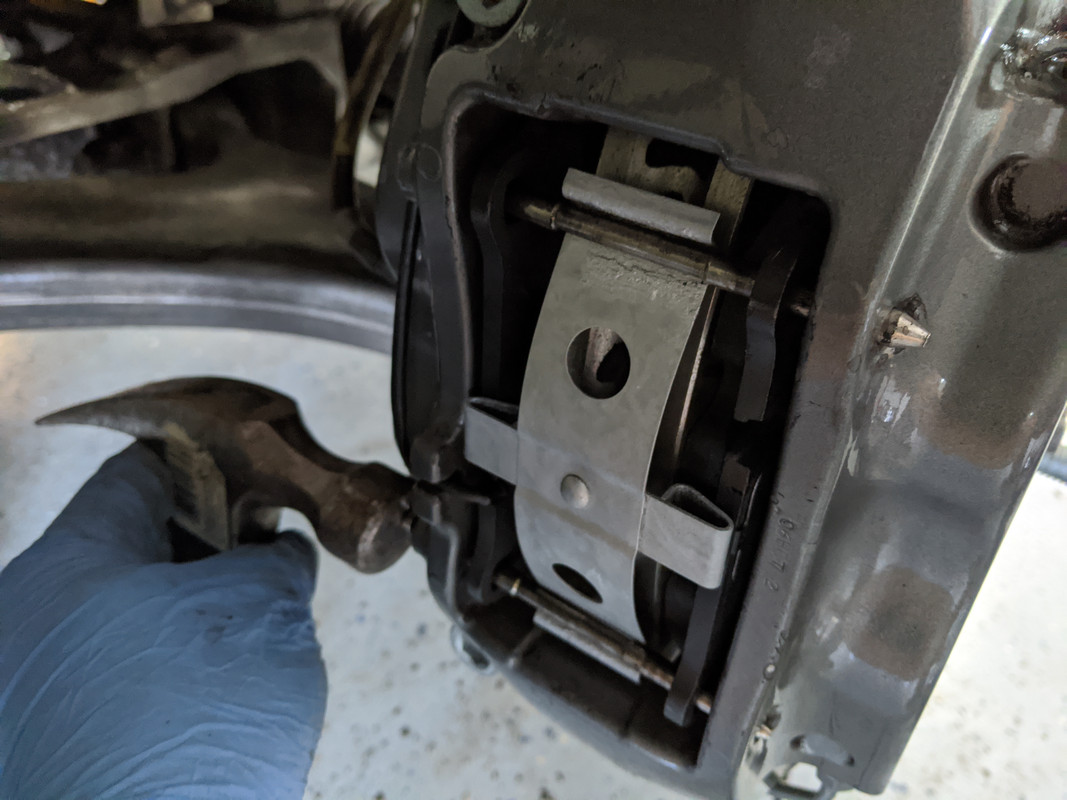
It should end up looking something like this:
Lather, Rinse and Repeat for the right side:

Pictures are supposed to be a thousand words and I took a lot more.
So if there is something I missed or you need a shot of, let me know.
Next up will be the brake fluid flush and bleeding...
Clean the calipers and retract the pistons:
Cleanup the brake dust shield:
Mount the rotors with some anti-seize on the Torx retaining screws:
Then you can mount the calipers with the following torque specs:
Then I was ready to install the new brake pads:
I decided to clean and paint the brake pad springs:
Install the pads and hook up the wear sensor to the inboard pad:
I like to put the top pin in first and then hook the spring behind it:
Then push the bottom of the spring in and tap the lower pin home:
It should end up looking something like this:
Lather, Rinse and Repeat for the right side:
Pictures are supposed to be a thousand words and I took a lot more.
So if there is something I missed or you need a shot of, let me know.
Next up will be the brake fluid flush and bleeding...
Last edited by 007V8Vantage; May 14, 2020 at 12:20 PM.


Thread Starter
|
Registered User
Joined: Apr 2017
Posts: 399
From: Niagara Region
Rep Power: 29
?
Cheers,
Ryan
Thread Starter
|
Registered User
Joined: Apr 2017
Posts: 399
From: Niagara Region
Rep Power: 29
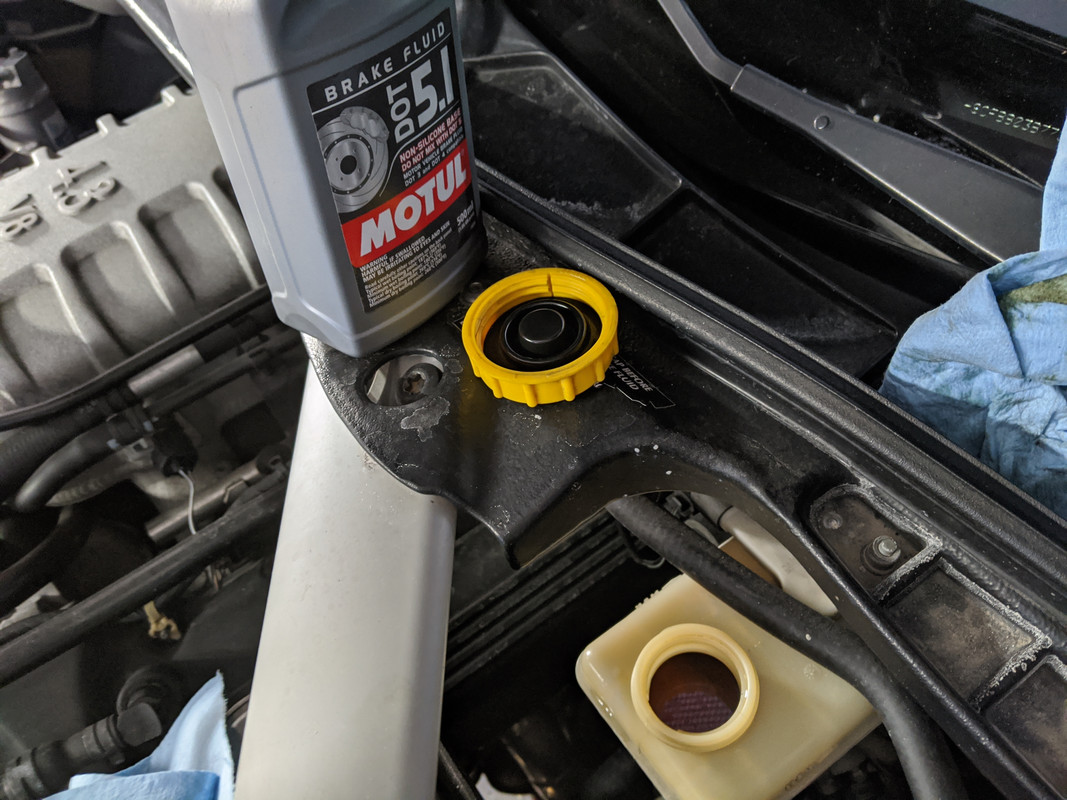
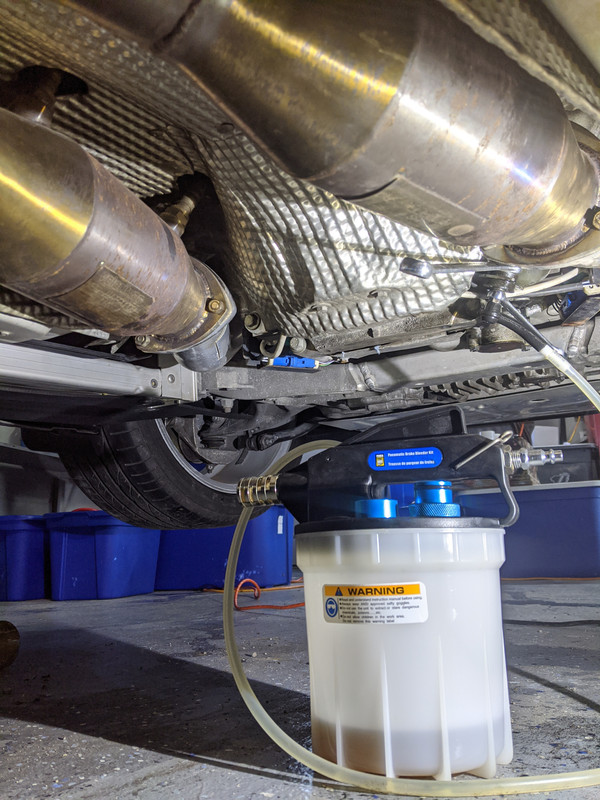
Finally got an opportunity to try out my new air compressor driven bleeder kit:
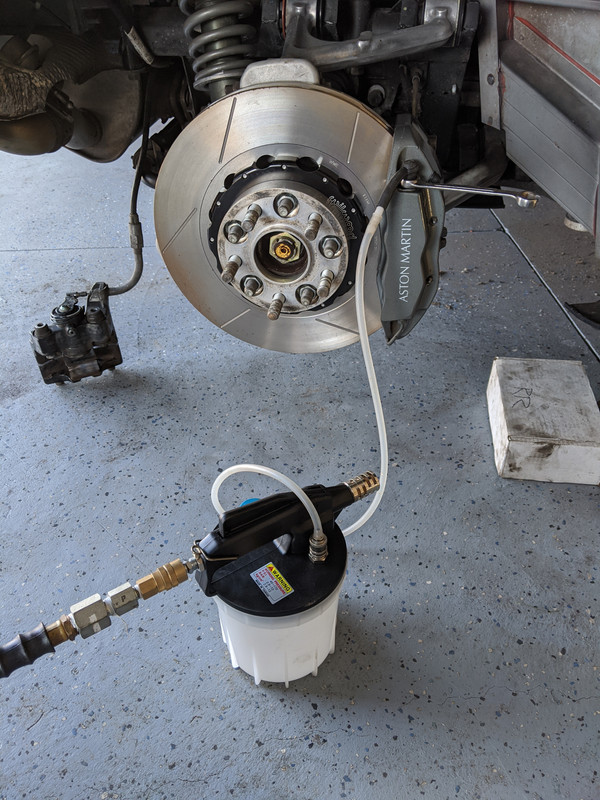
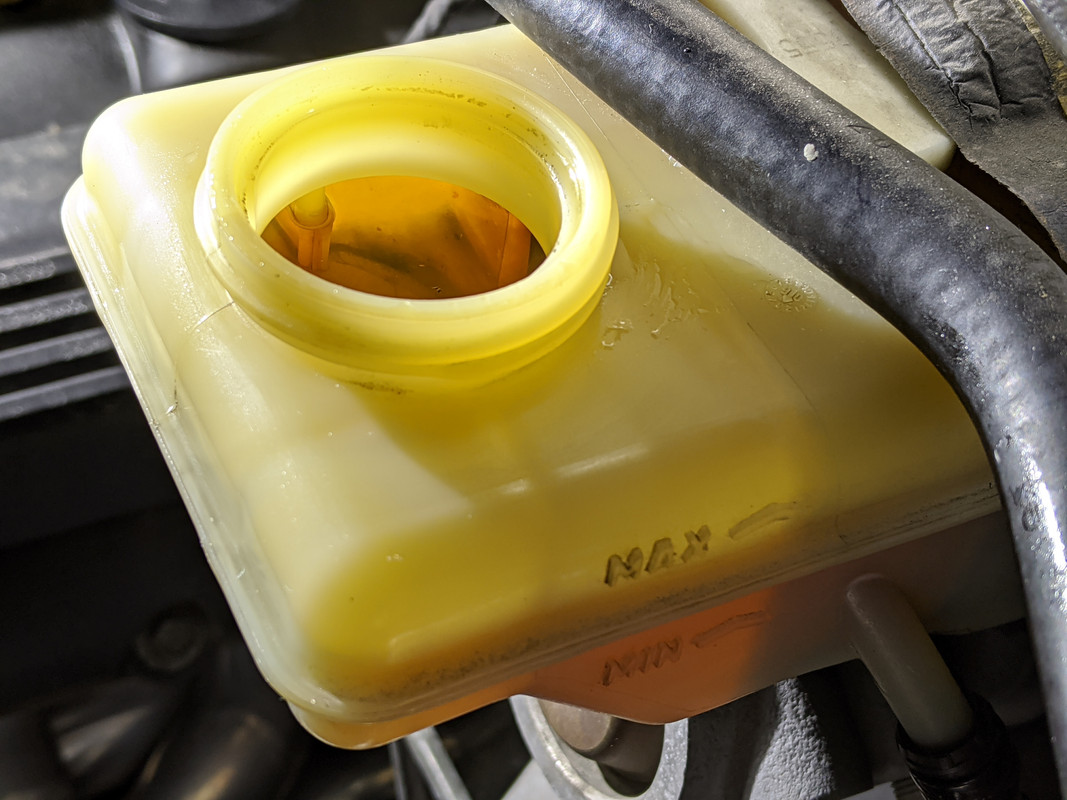
I used it to generate a vacuum to pull old fluid out and replace with fresh fluid from the master cylinder - you can see how dirty it was:
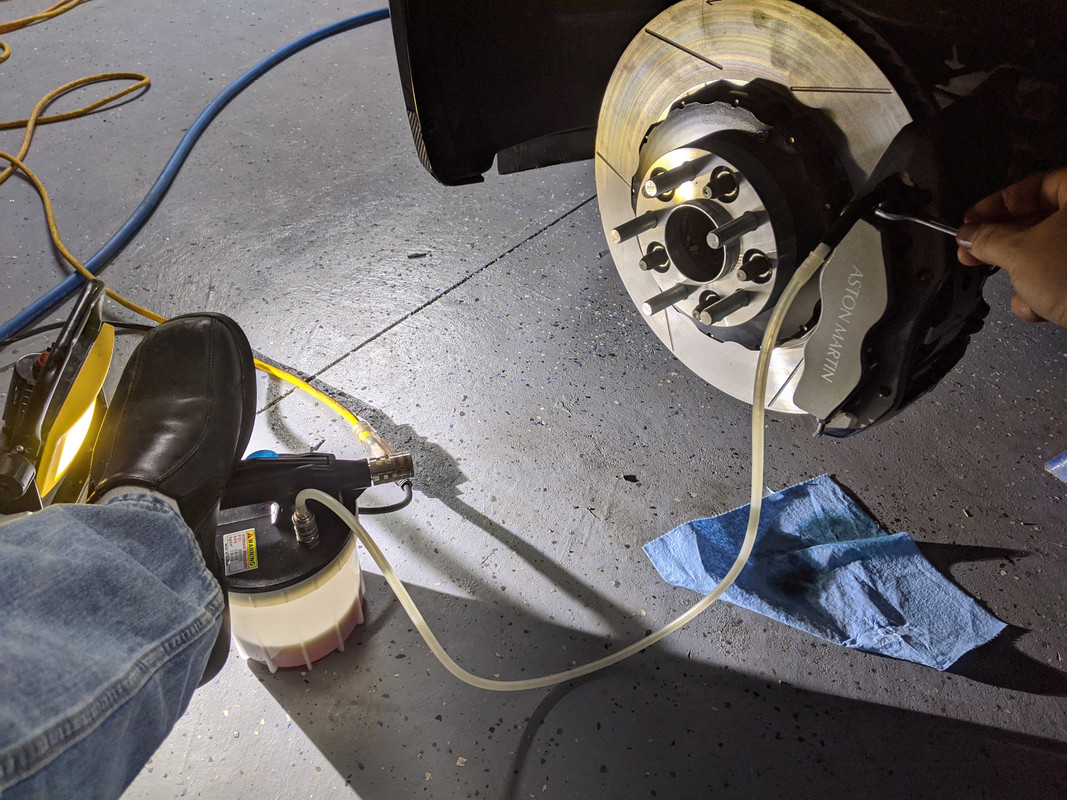
Using a pick gets the bleeder caps off without damage:
Motul 5.1 is the fluid I'm trying this time:
Clutch line was especially black:
It does a good job of getting old fluid out however I still preferred the old school two person method of getting all the air out of the system:
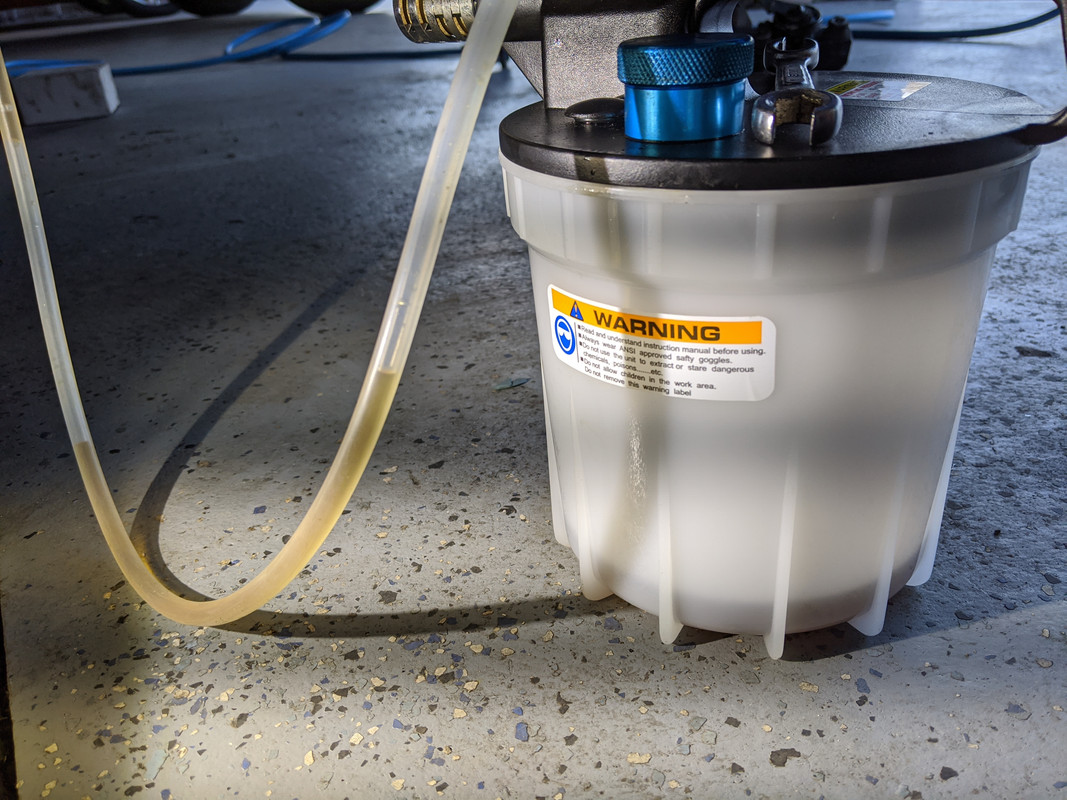
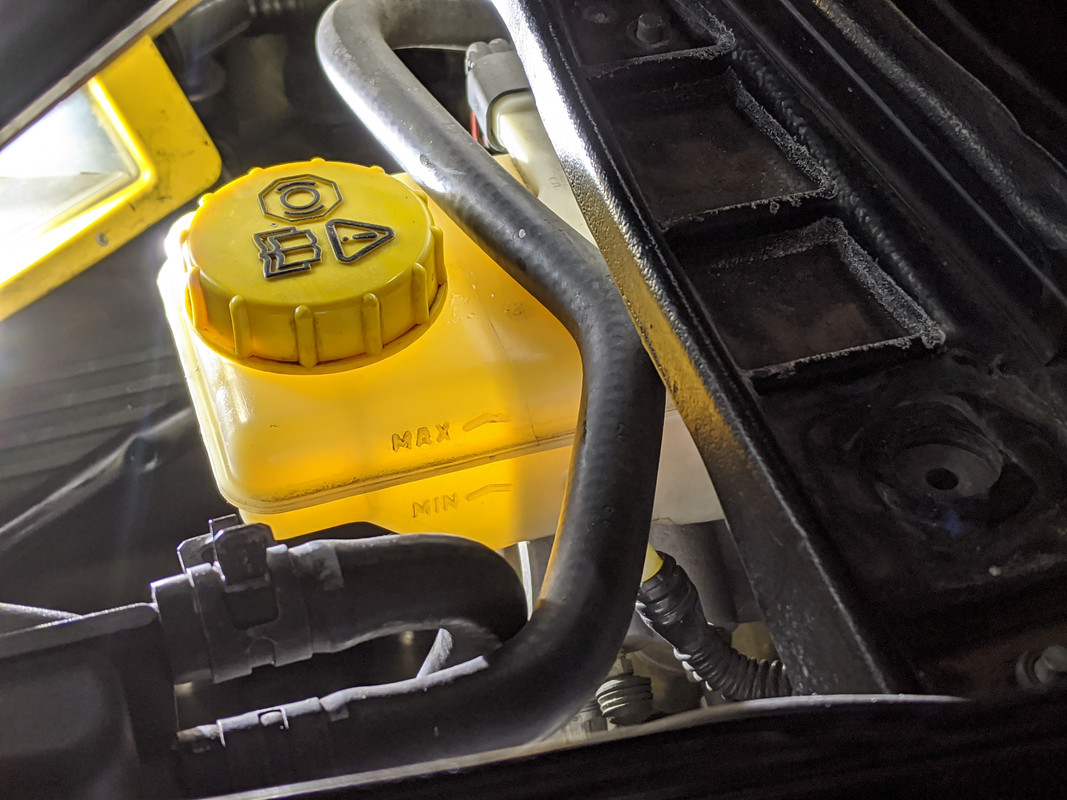
See the difference in the reservoir after bleeding all brake lines and clutch:
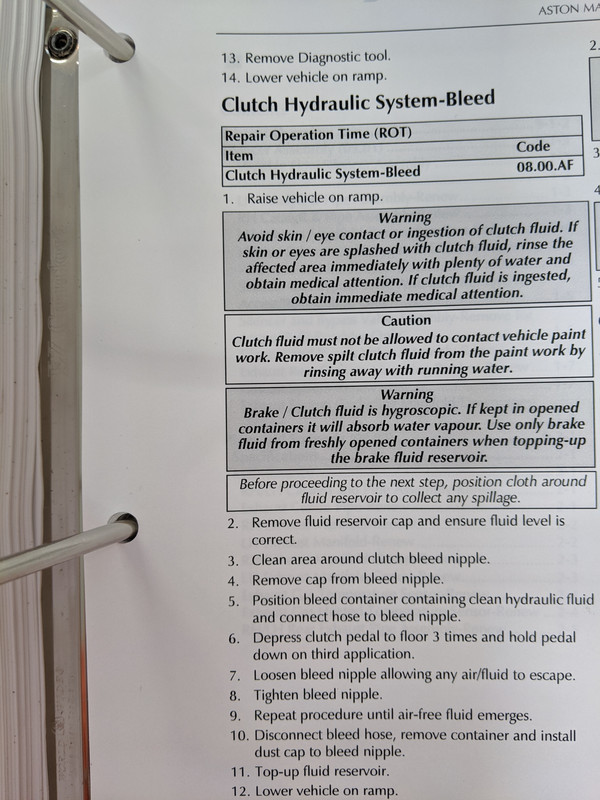
For my quick future reference on this thread - here are the steps I followed to bleed the clutch:
Getting closer, next a couple jobs while the wheel well liners are out...
I used it to generate a vacuum to pull old fluid out and replace with fresh fluid from the master cylinder - you can see how dirty it was:
Using a pick gets the bleeder caps off without damage:
Motul 5.1 is the fluid I'm trying this time:
Clutch line was especially black:
It does a good job of getting old fluid out however I still preferred the old school two person method of getting all the air out of the system:
See the difference in the reservoir after bleeding all brake lines and clutch:
For my quick future reference on this thread - here are the steps I followed to bleed the clutch:
Getting closer, next a couple jobs while the wheel well liners are out...
Thread Starter
|
Registered User
Joined: Apr 2017
Posts: 399
From: Niagara Region
Rep Power: 29
My online order had finally arrived after a CoVid-19 delay:

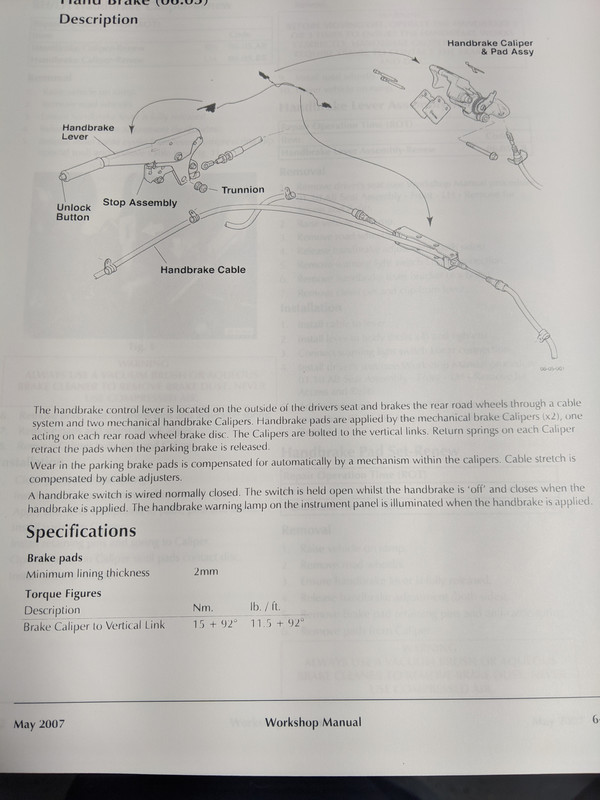
Loosen this nut to remove the cable:
Remove the Torx bolts to disassemble caliper:
Retract the piston:
Load up the pads and springs and bolt back together the assembly:

A ratcheting wrench is handy for bolting them back up:
Then you can adjust cable tension:

You will likely see markings or be able to tell by the threads where is was previously, unless it needs adjustment:

Next is driver's side...
Loosen this nut to remove the cable:
Remove the Torx bolts to disassemble caliper:
Retract the piston:
Load up the pads and springs and bolt back together the assembly:
A ratcheting wrench is handy for bolting them back up:
Then you can adjust cable tension:
You will likely see markings or be able to tell by the threads where is was previously, unless it needs adjustment:
Next is driver's side...
Thread Starter
|
Registered User
Joined: Apr 2017
Posts: 399
From: Niagara Region
Rep Power: 29
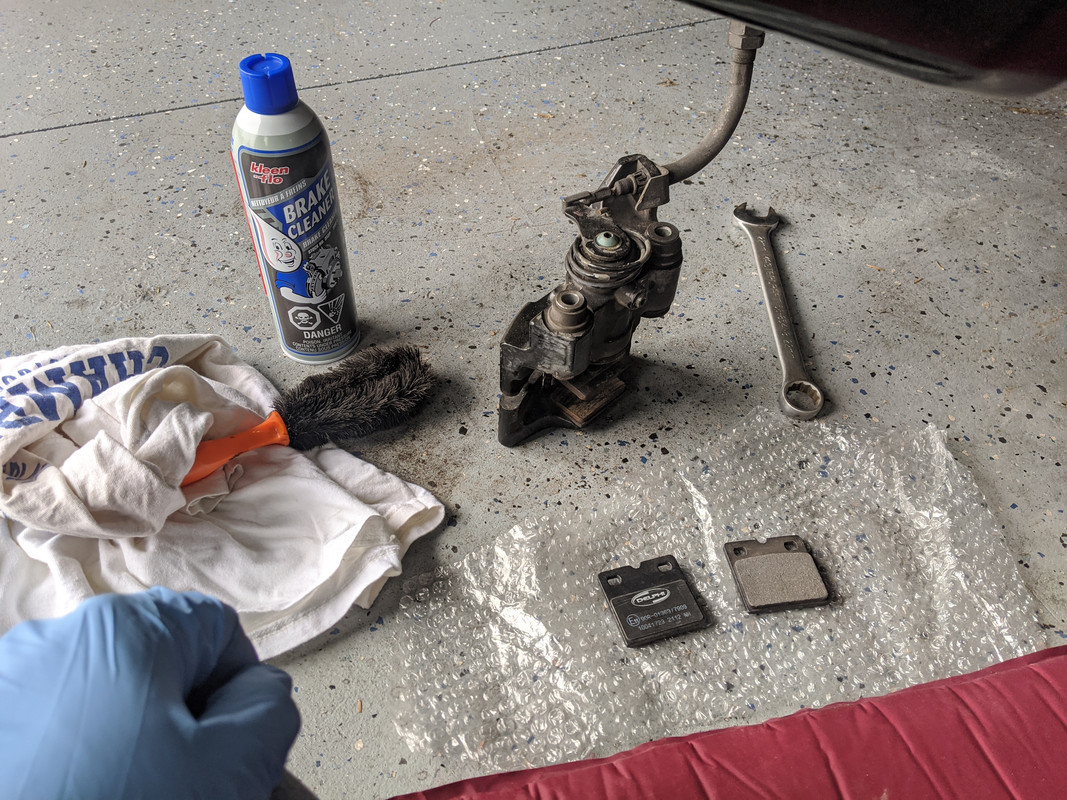
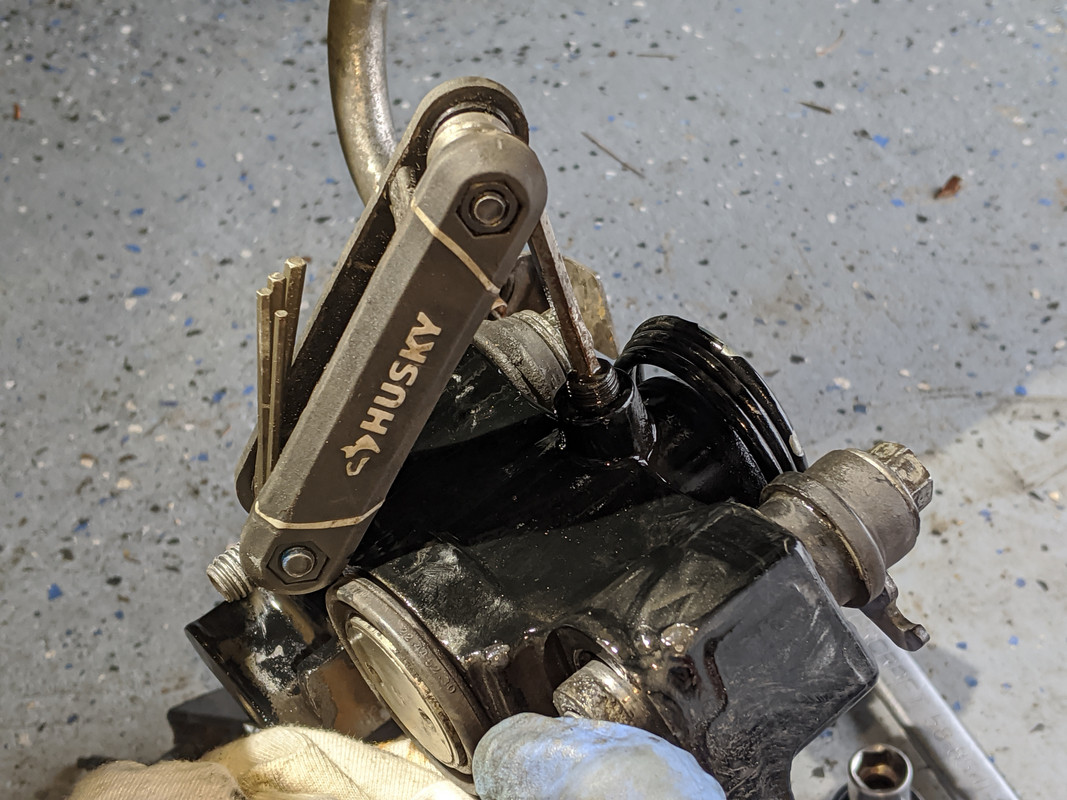
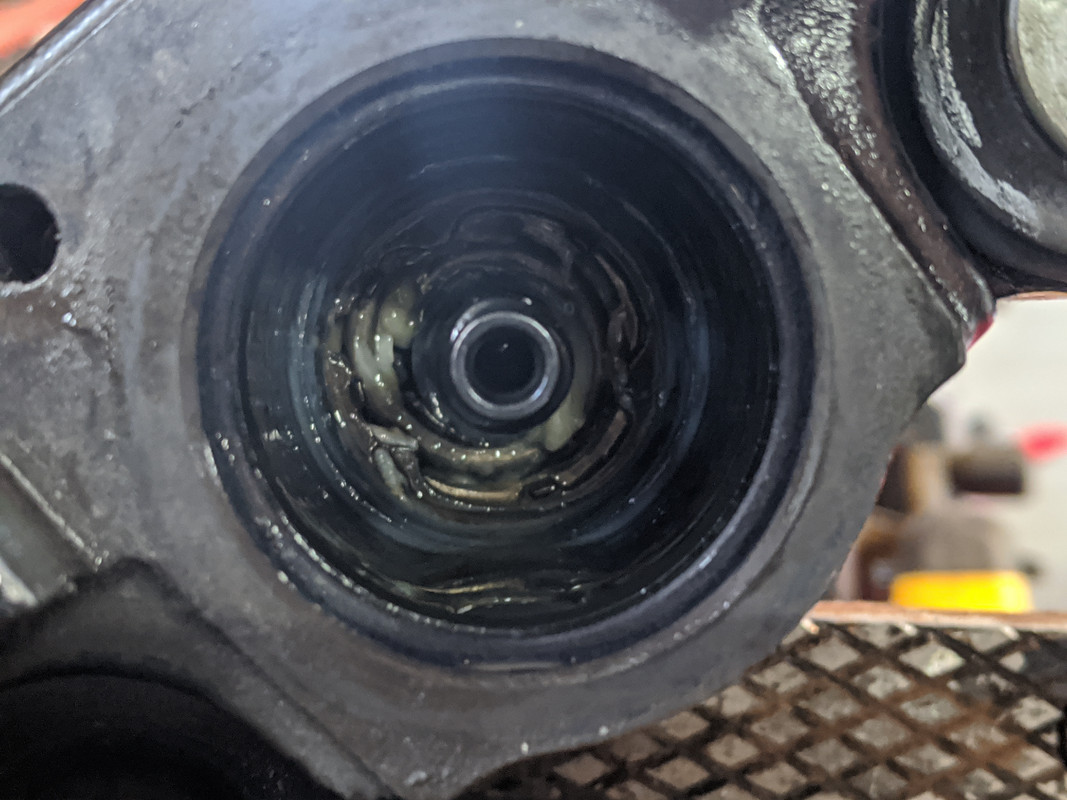
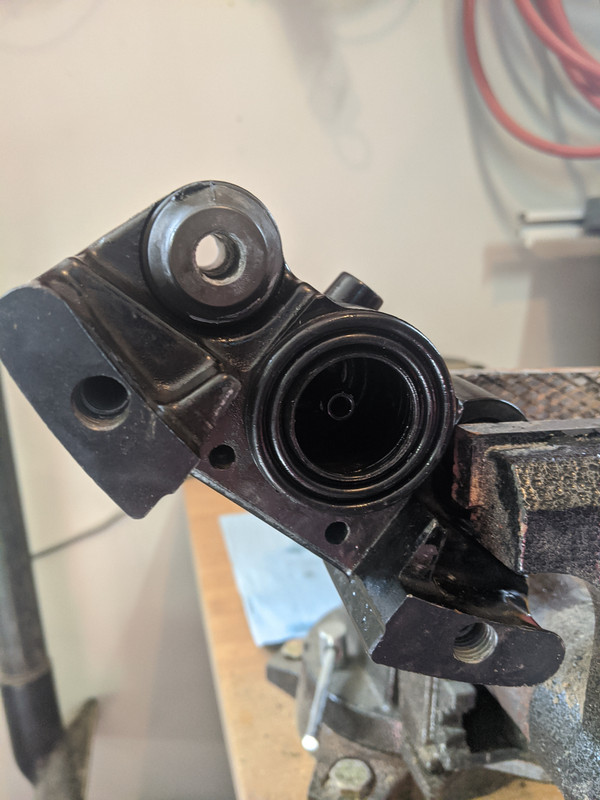
Turns out the piston was seized up and not working so I needed to completely disassemble the caliper:
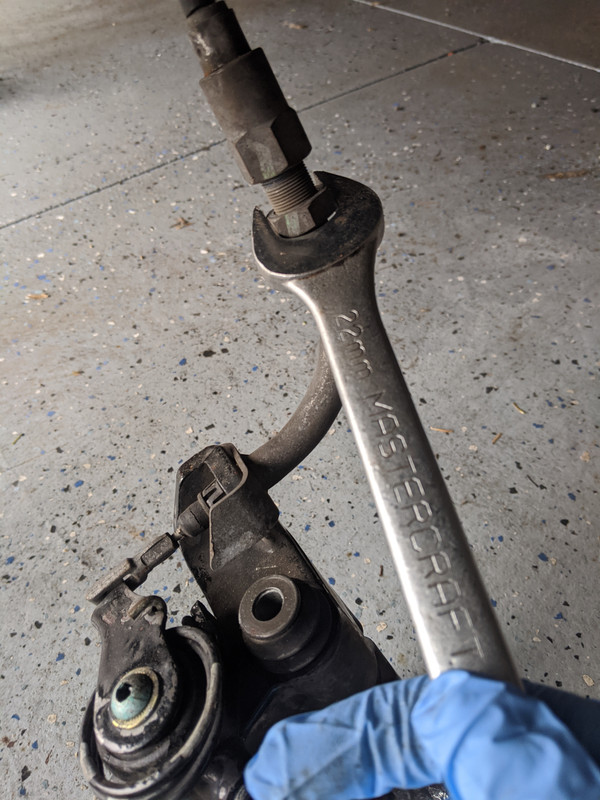
In order to remove from car I used a fuel injection clamp to remove the retaining clip:

The brake fluid will be flushed and refilled:
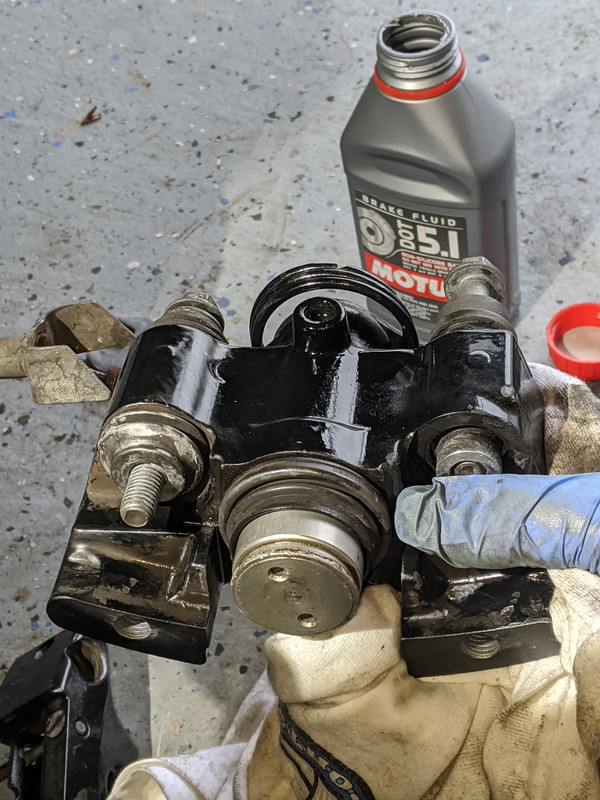
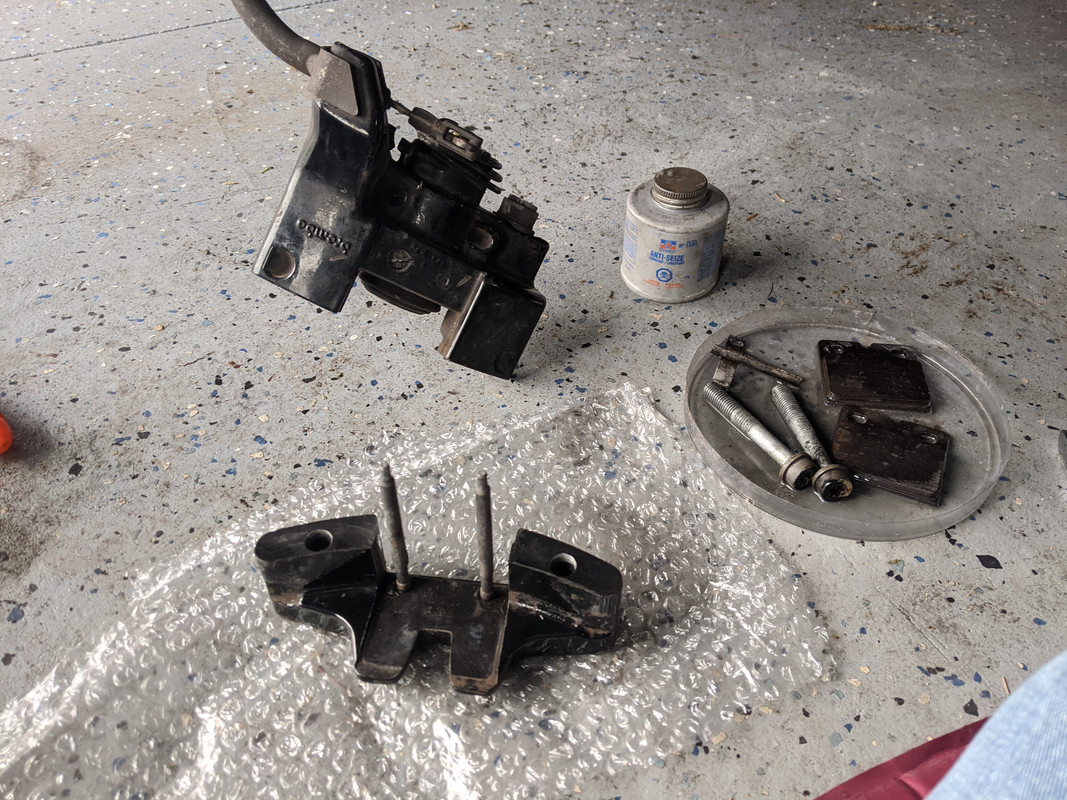
Then I mounted in my bench vise to complete disassembly, cleanup and hopefully rebuild without having to buy a new one:
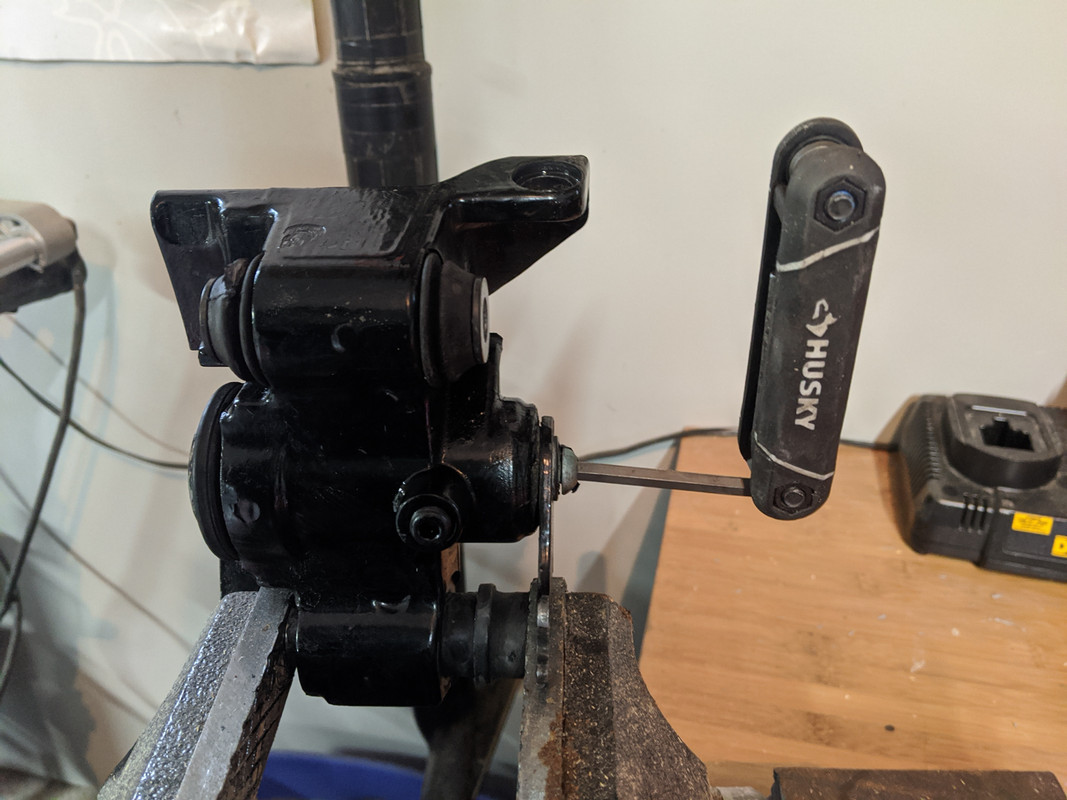
Be patient reinstalling the piston into the seal:
Well it was rewarding seeing exactly how a mechanical caliper works:
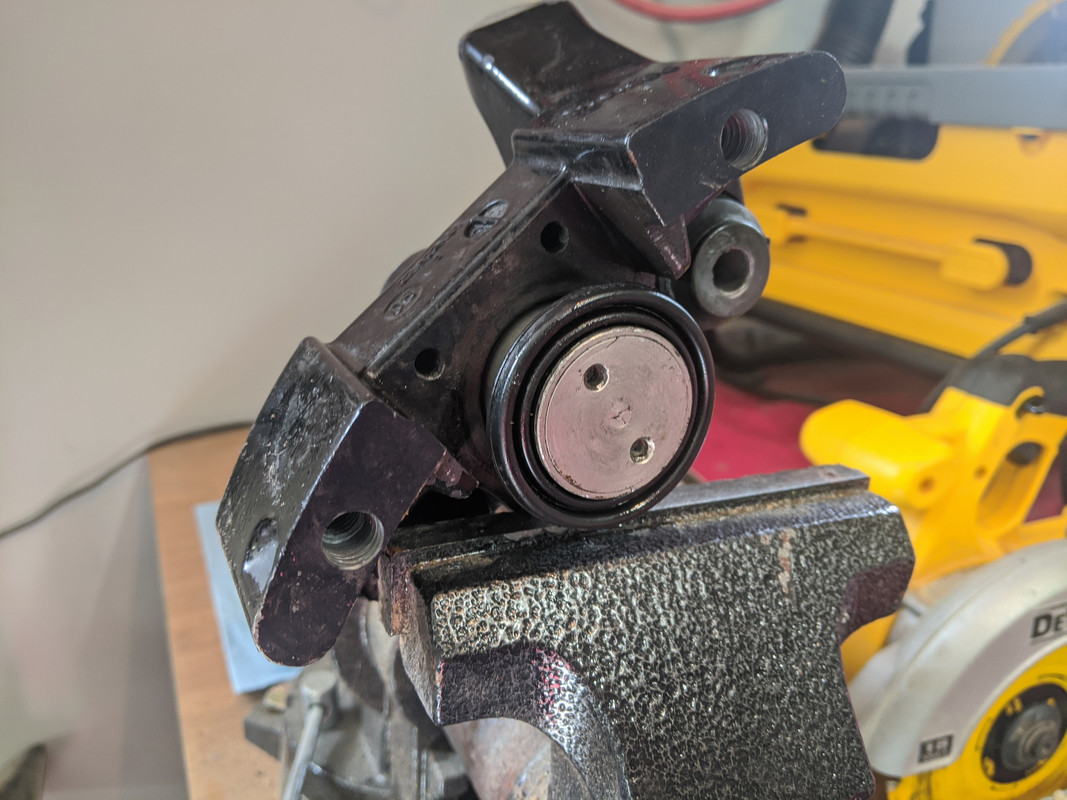
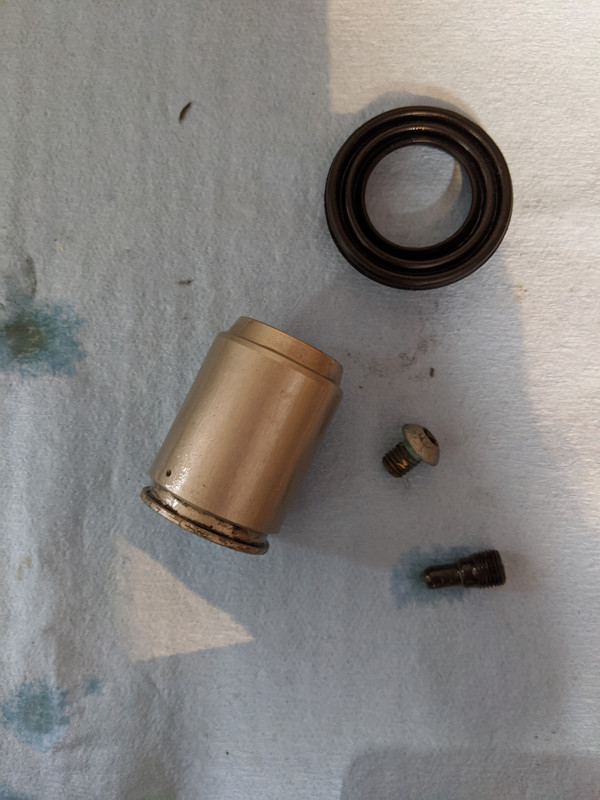
Success! I posted pictures of the parts in case it helps out another forum member.
The lever now moves the piston out as designed and will take up slack as the pads wear
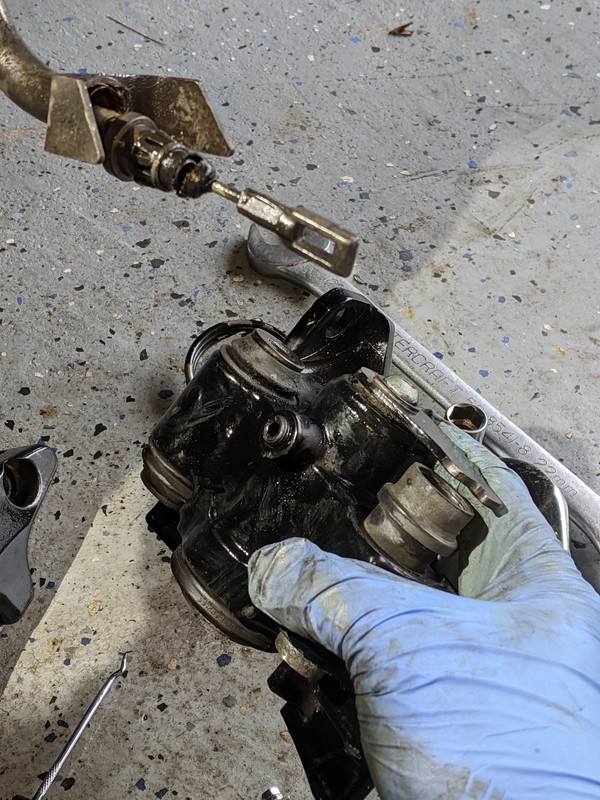
In order to remove from car I used a fuel injection clamp to remove the retaining clip:
The brake fluid will be flushed and refilled:
Then I mounted in my bench vise to complete disassembly, cleanup and hopefully rebuild without having to buy a new one:
Be patient reinstalling the piston into the seal:
Well it was rewarding seeing exactly how a mechanical caliper works:
Success! I posted pictures of the parts in case it helps out another forum member.
The lever now moves the piston out as designed and will take up slack as the pads wear
Thread Starter
|
Registered User
Joined: Apr 2017
Posts: 399
From: Niagara Region
Rep Power: 29
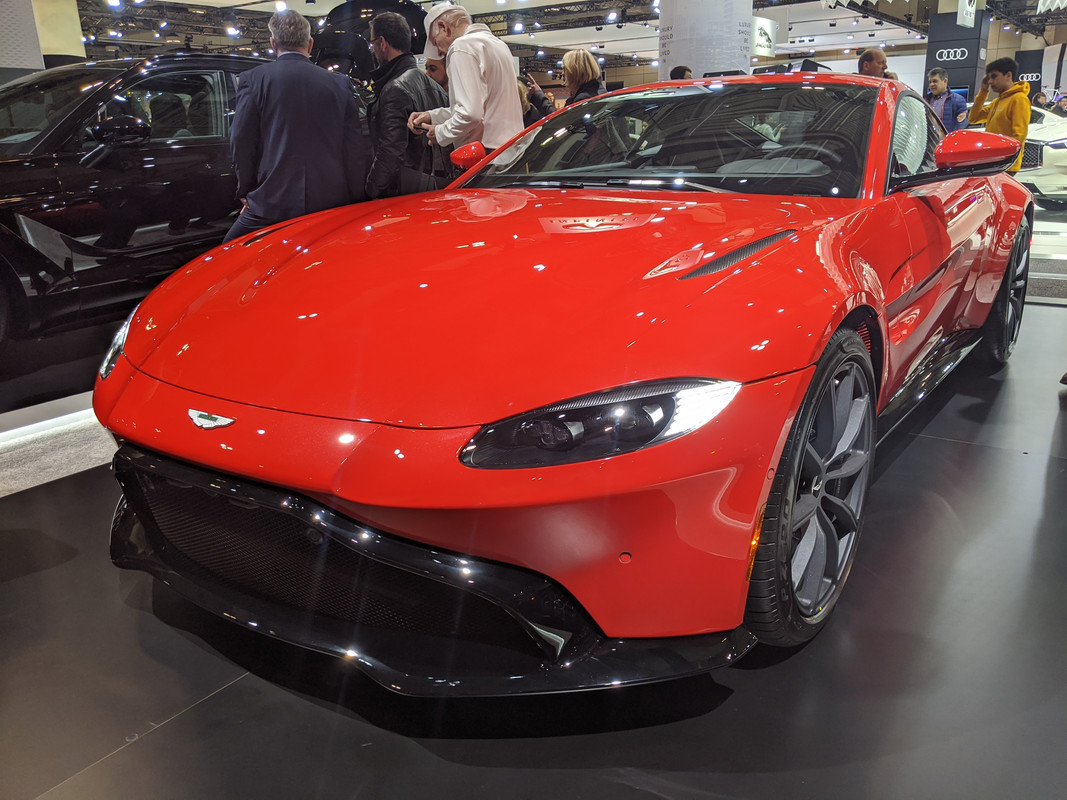
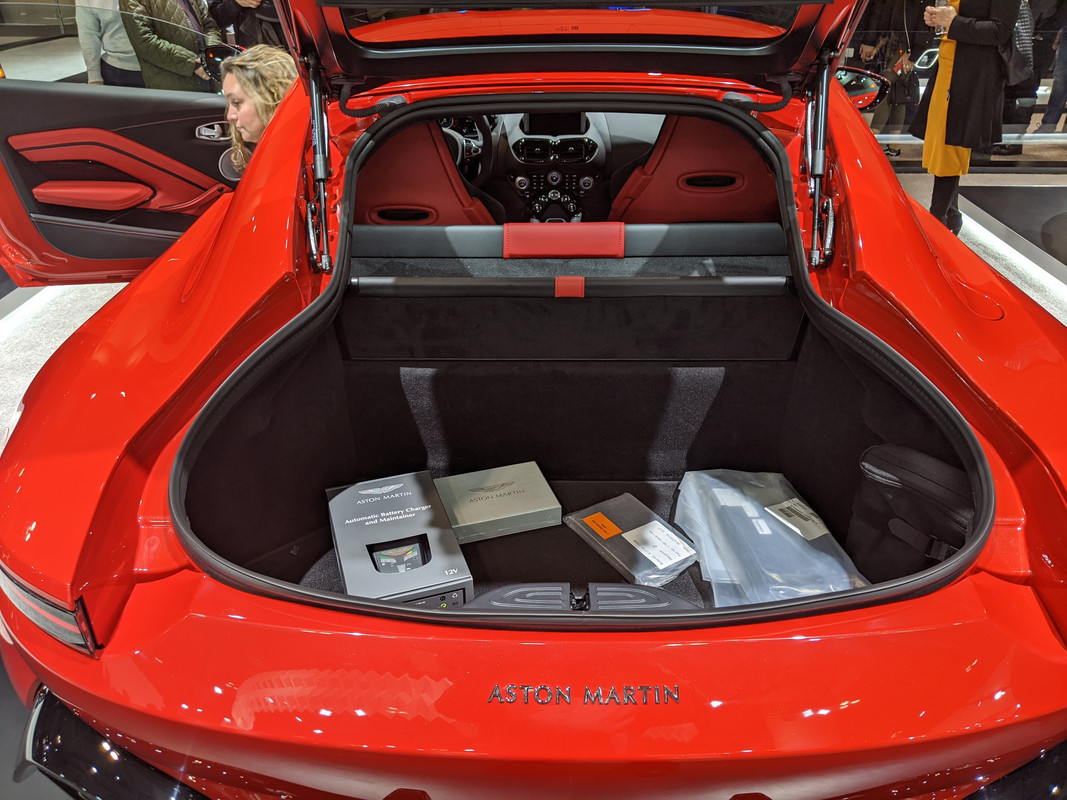
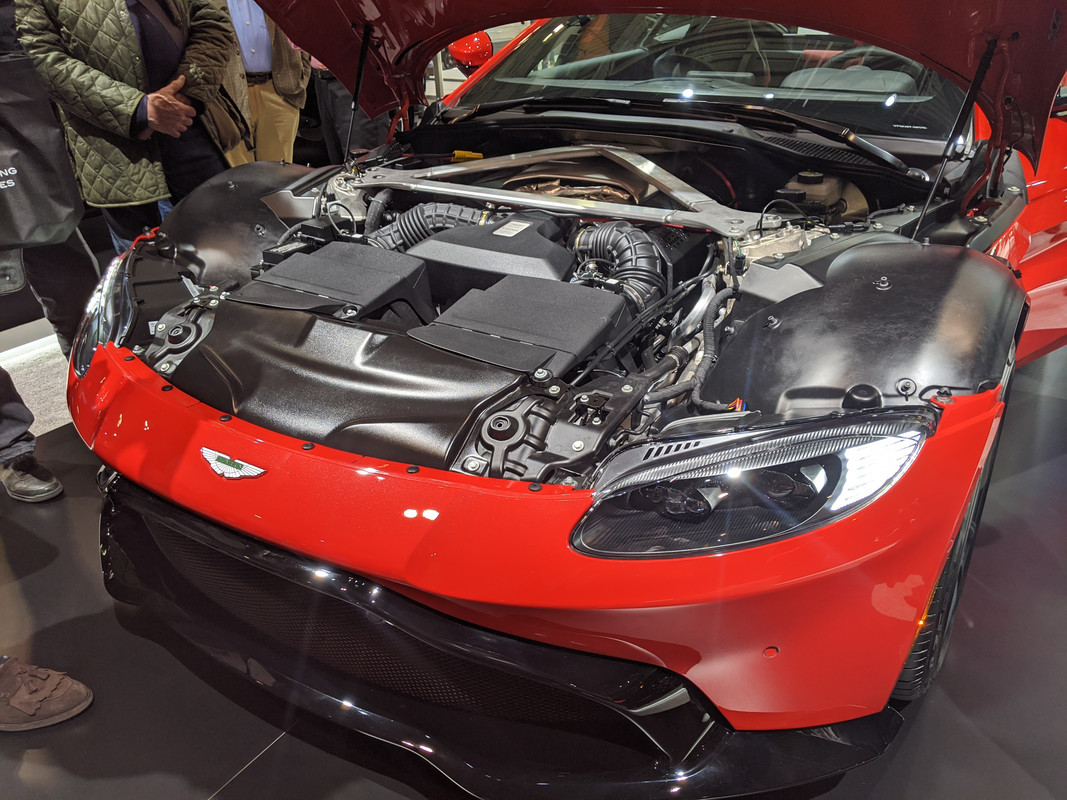
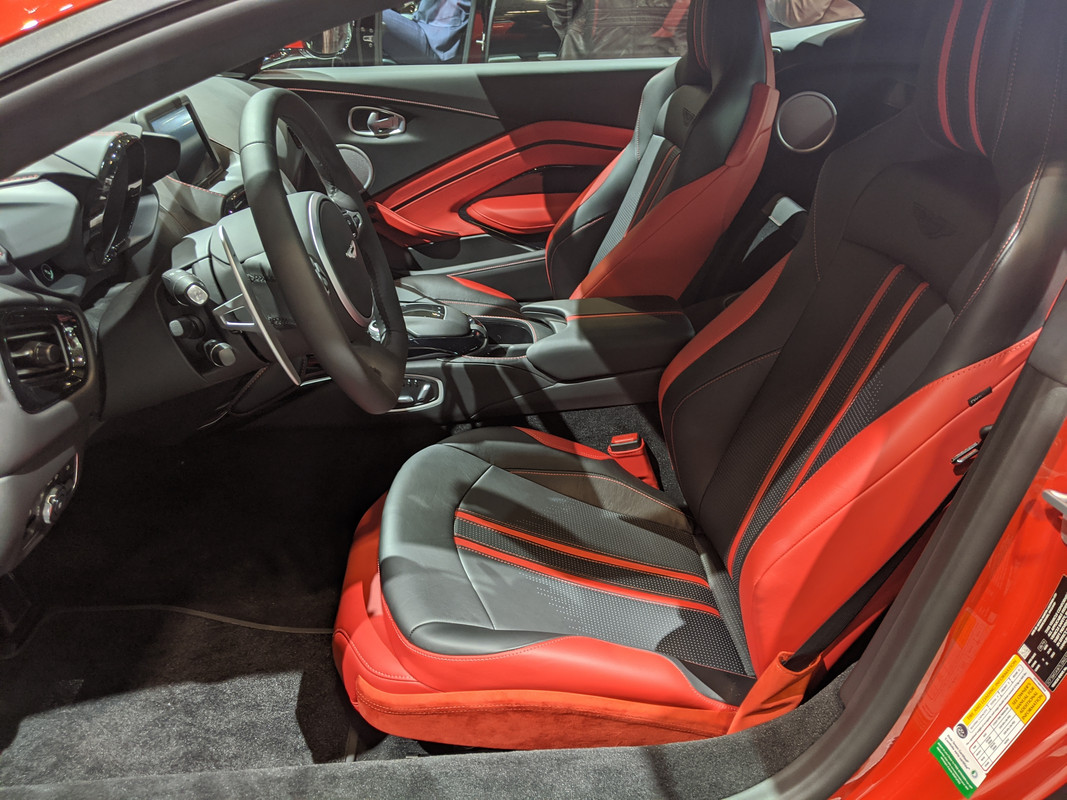
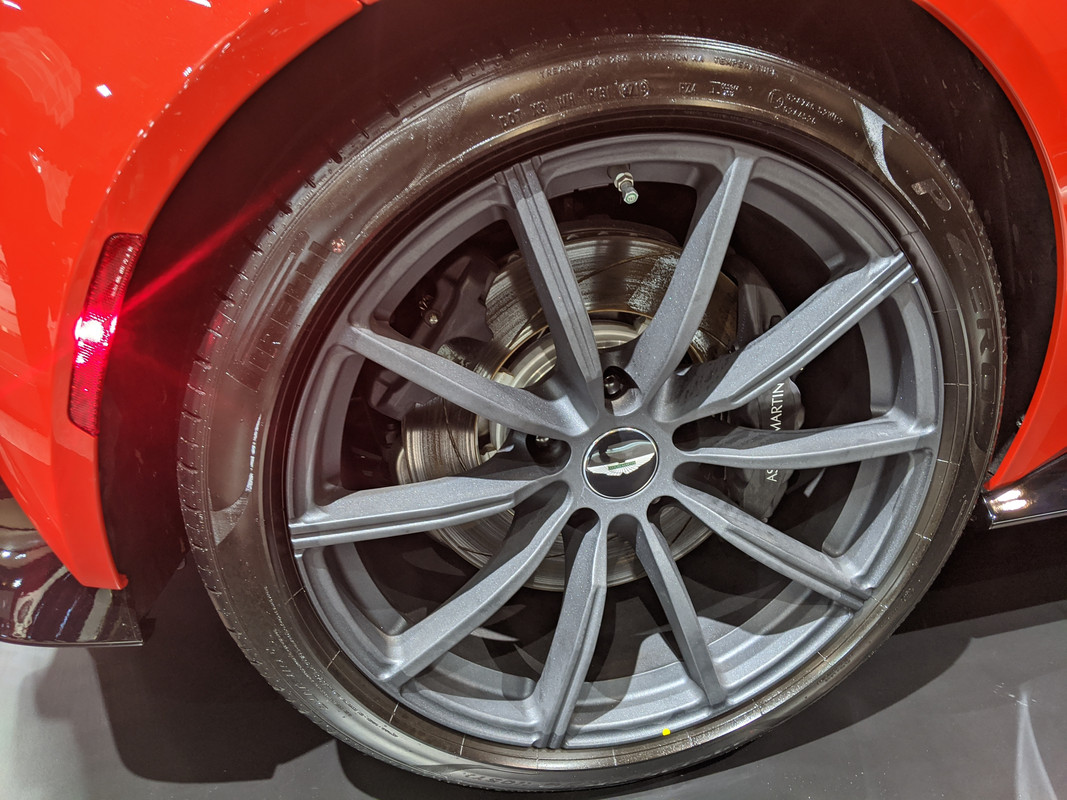
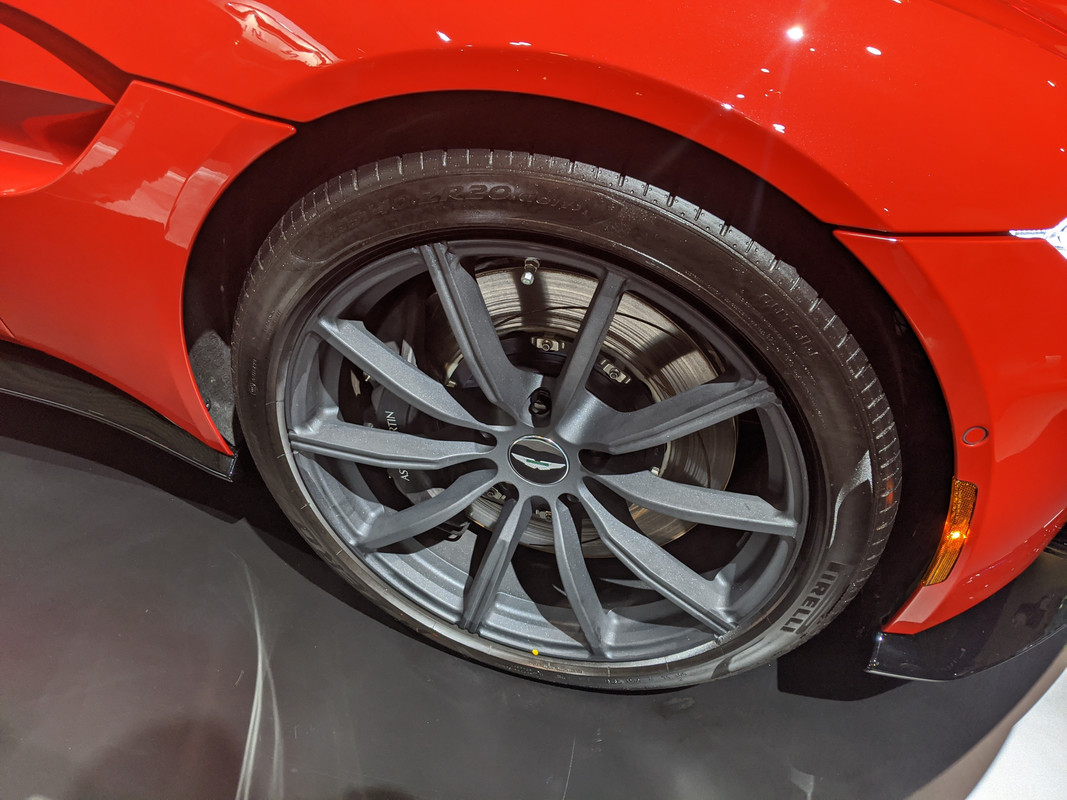
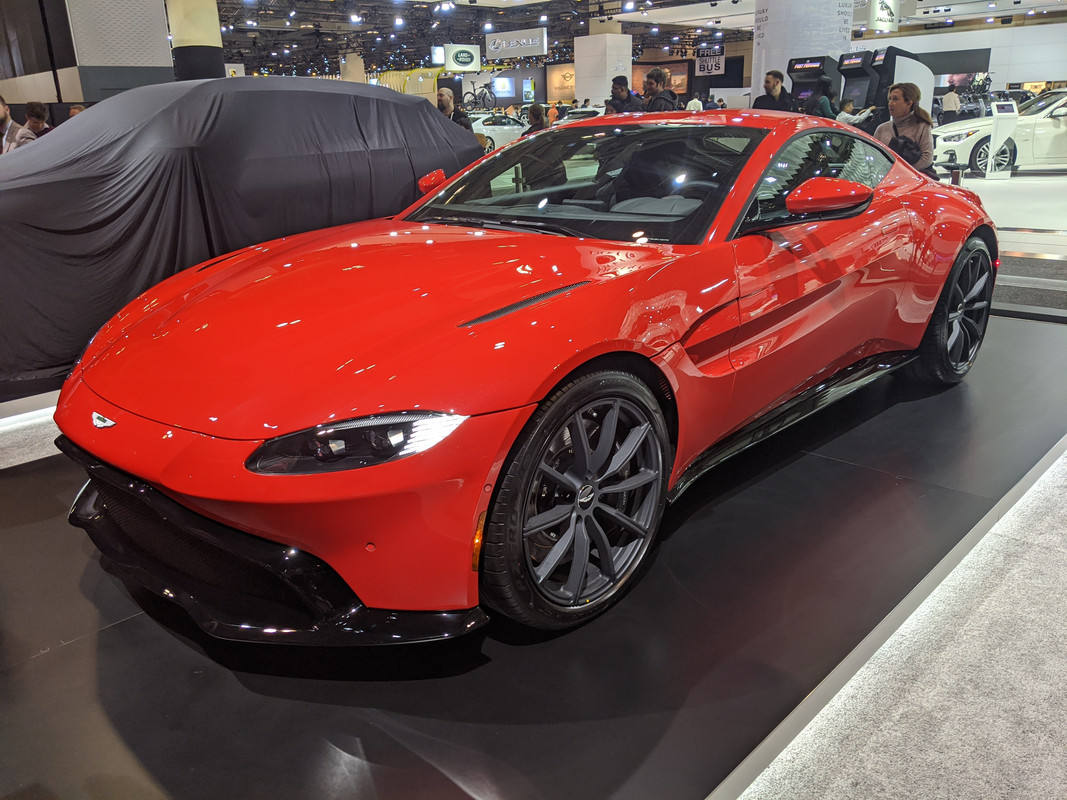
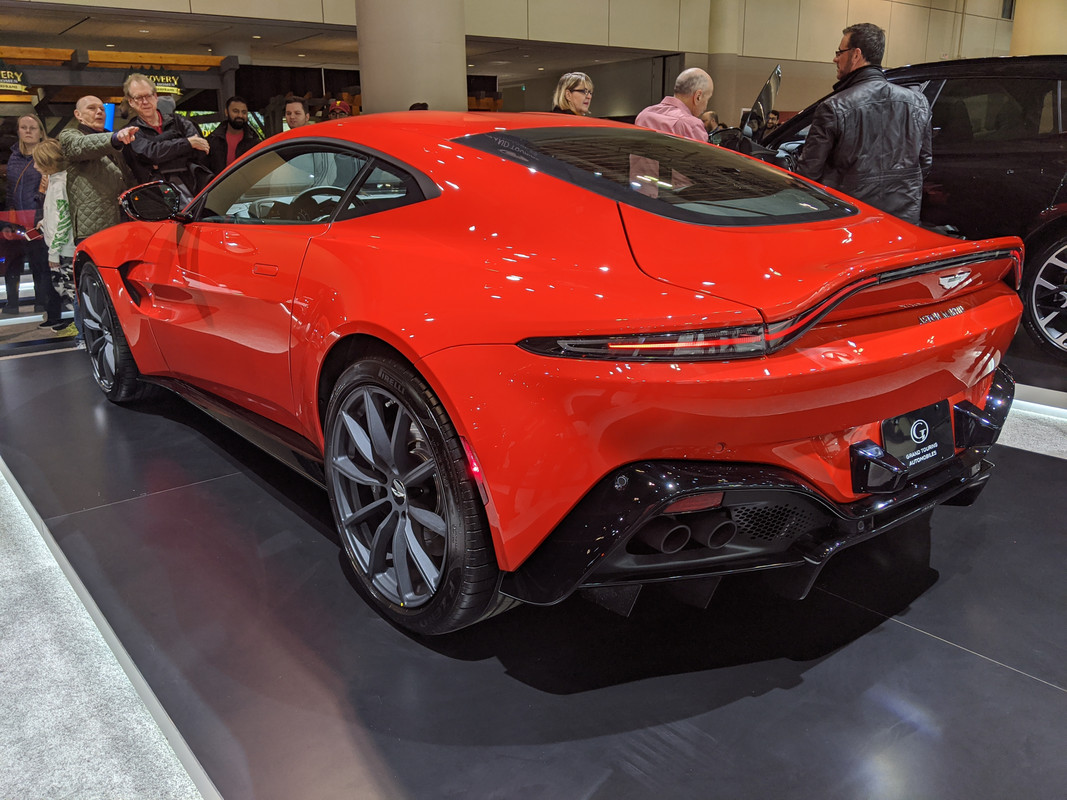
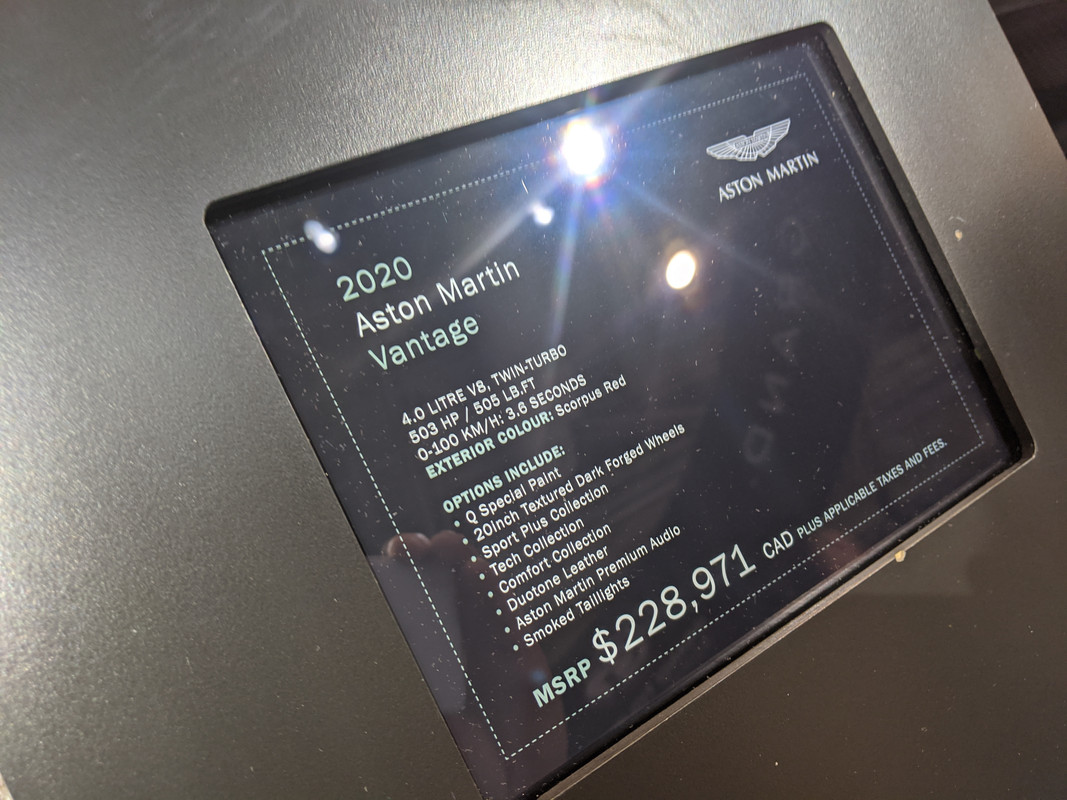
A few pics from the AMOC club private viewing of the Grand Touring display back in February 2020.
It was nice to sit in and check out the new Aston's with friends.
It was nice to sit in and check out the new Aston's with friends.
Last edited by 007V8Vantage; Nov 15, 2020 at 03:48 PM.
Thread Starter
|
Registered User
Joined: Apr 2017
Posts: 399
From: Niagara Region
Rep Power: 29
No problem, I like to keep a record of my experiences with cars I love and if other enthusiasts are entertained it's a bonus