
Greetings from Niagara, Ontario, Canada


Thread Starter
|
Registered User
Joined: Apr 2017
Posts: 399
From: Niagara Region
Rep Power: 29

Backstory:
When I purchased my Vantage, I had experienced both the standard and premium audio systems and of course preferred the premium.
However that is one of many options and many other things to consider.
The good news, was that this was an option that could be added by:
1) upgrading and adding OEM Premium speakers.
2) removing single amplifier and installing dual amplifiers.
3) replacing single amp harness with dual amp harness.
4) Dealer reflash of PCM to tell head unit that "you are now Premium Audio".
Most advice on this forum was to upgrade standard audio via aftermarket options (most commonly due to cost reasons).
While I have modified car audio using aftermarket when I was younger, for the Aston I liked the idea of staying OEM if possible.
It would be a clean factory install and I already know what the end result would be and that I will love it.
I was inspired by forum member Batman-76 who despite advice otherwise did this conversion (successfully).
His thread (link below complete with part numbers) and a few encouraging PM's later and I was all-in.
https://www.6speedonline.com/forums/...de-thread.html
I started collecting parts two years ago (see pages 23 and 24 of this thread) from a salvage yard in Michigan.
The speakers and amps all came from the same 2008 Vantage, while the harness I bought online.
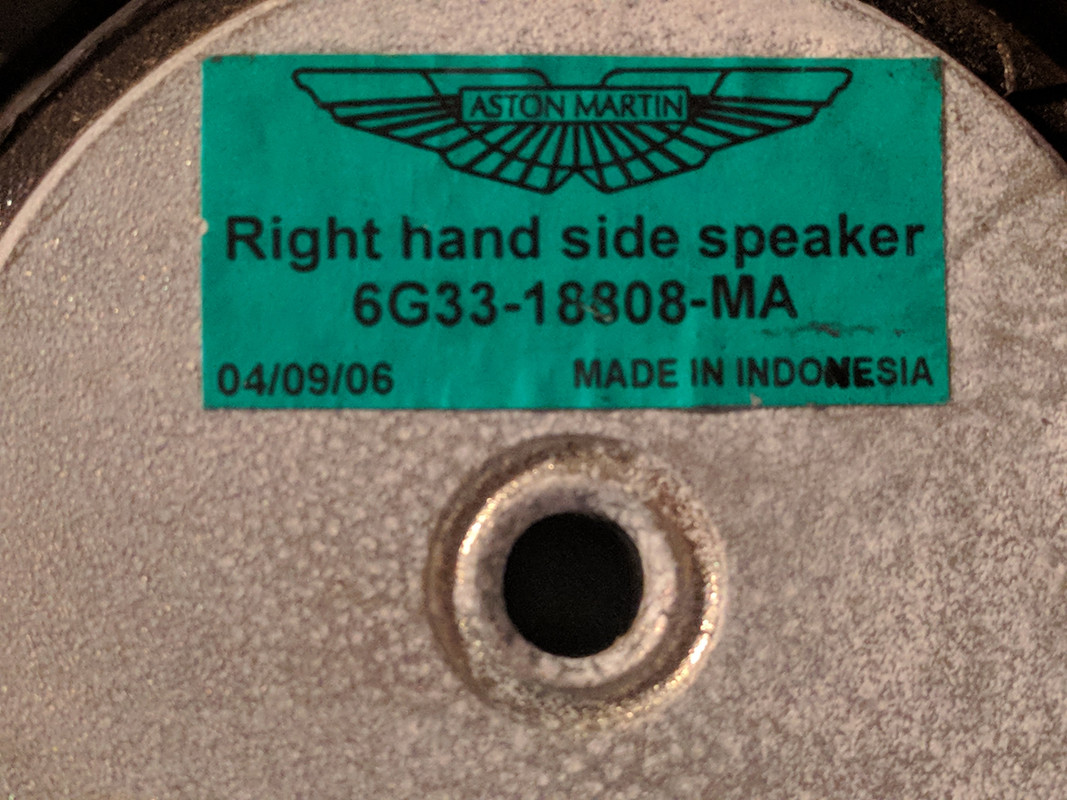
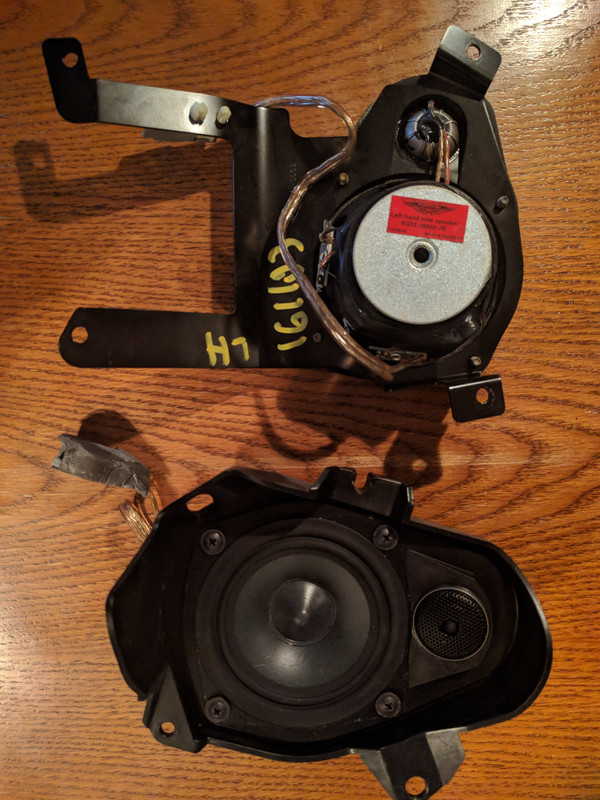
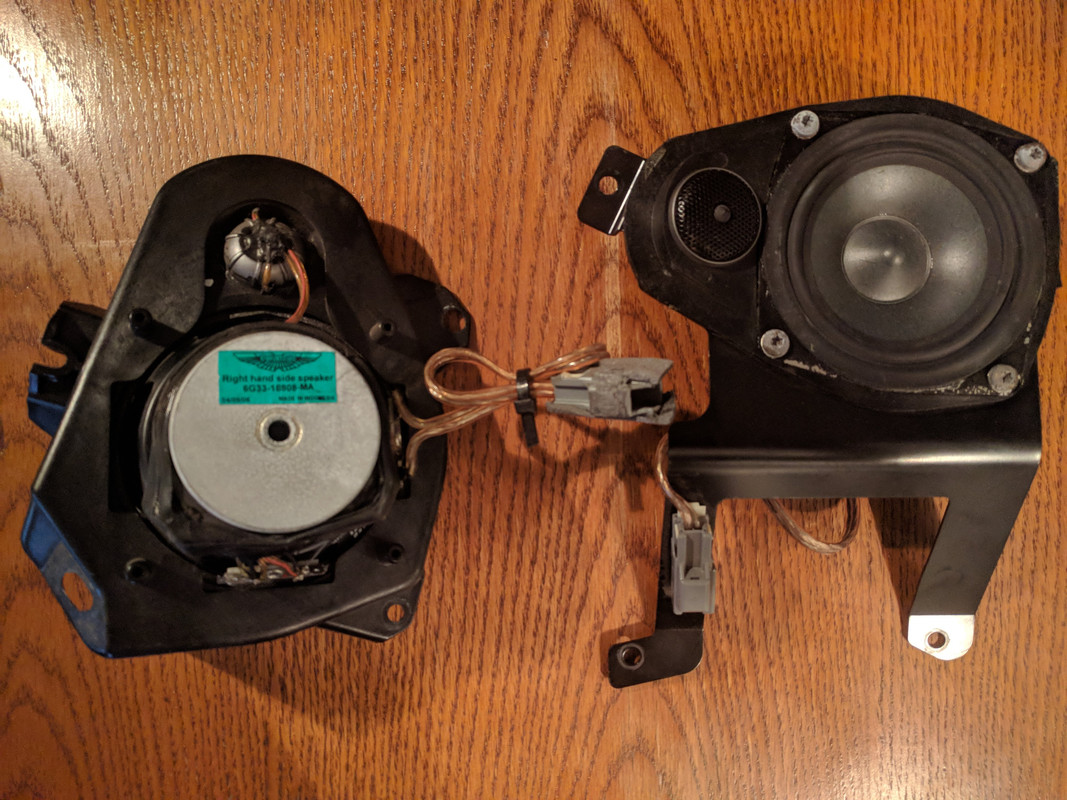
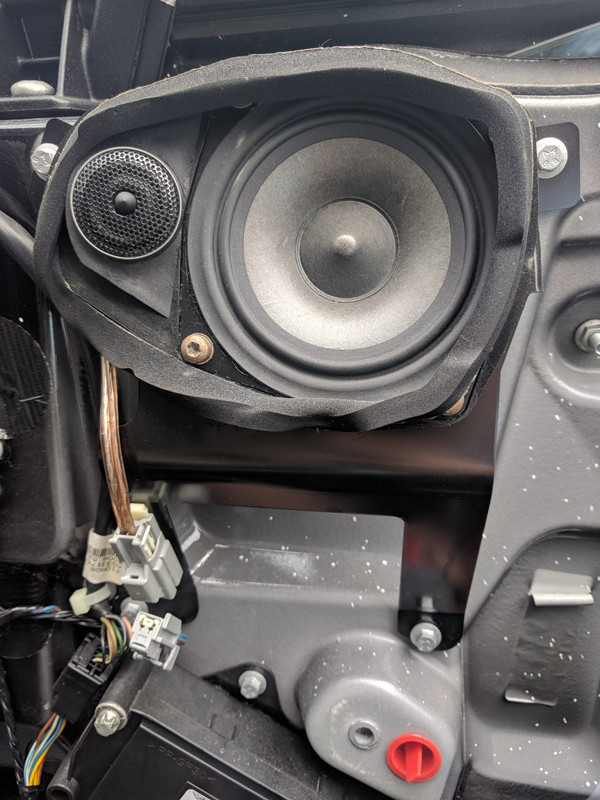
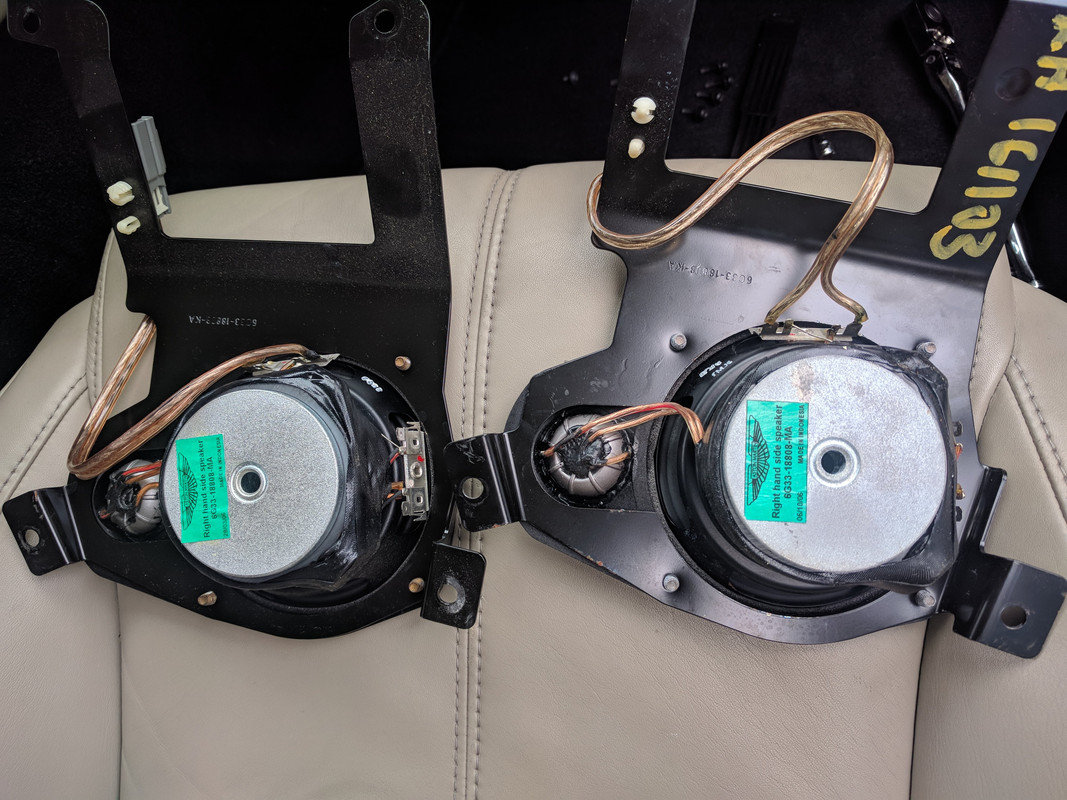
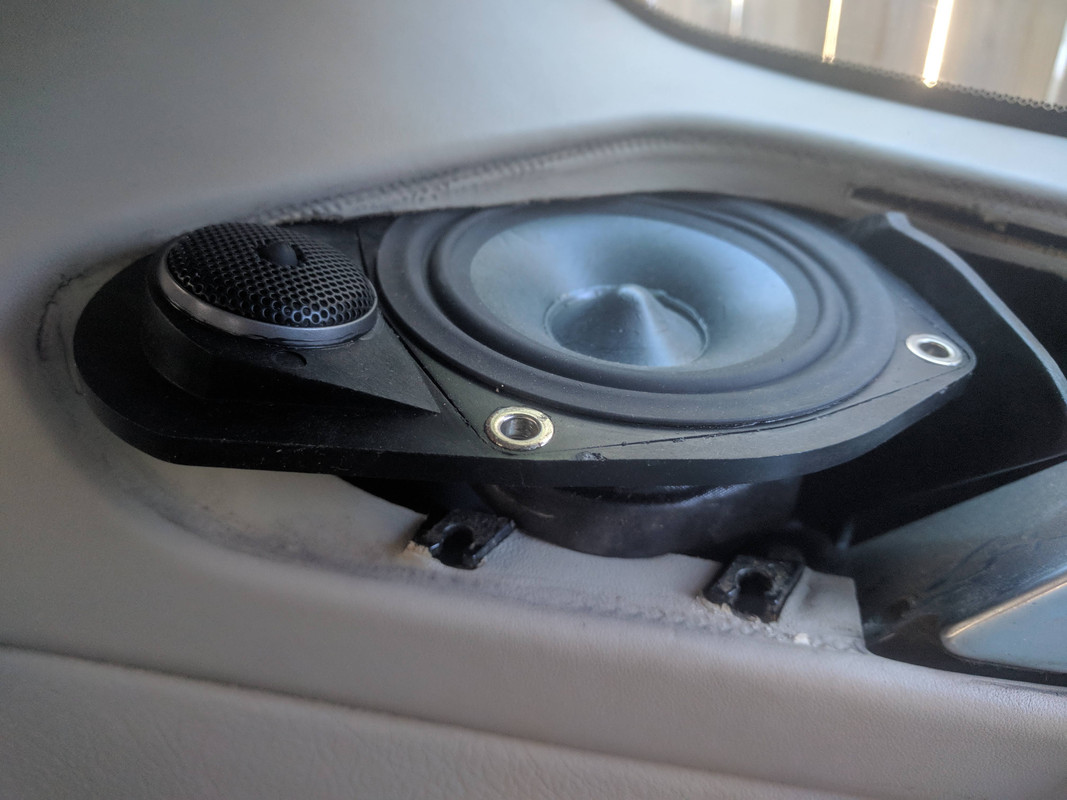
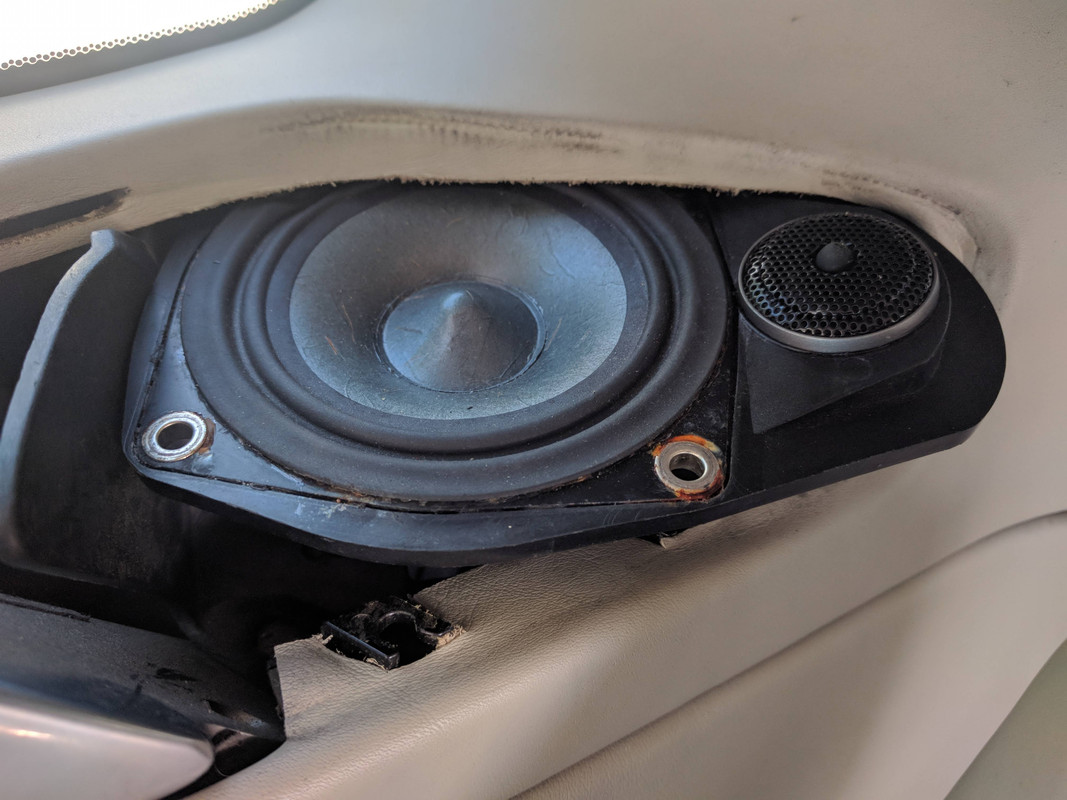
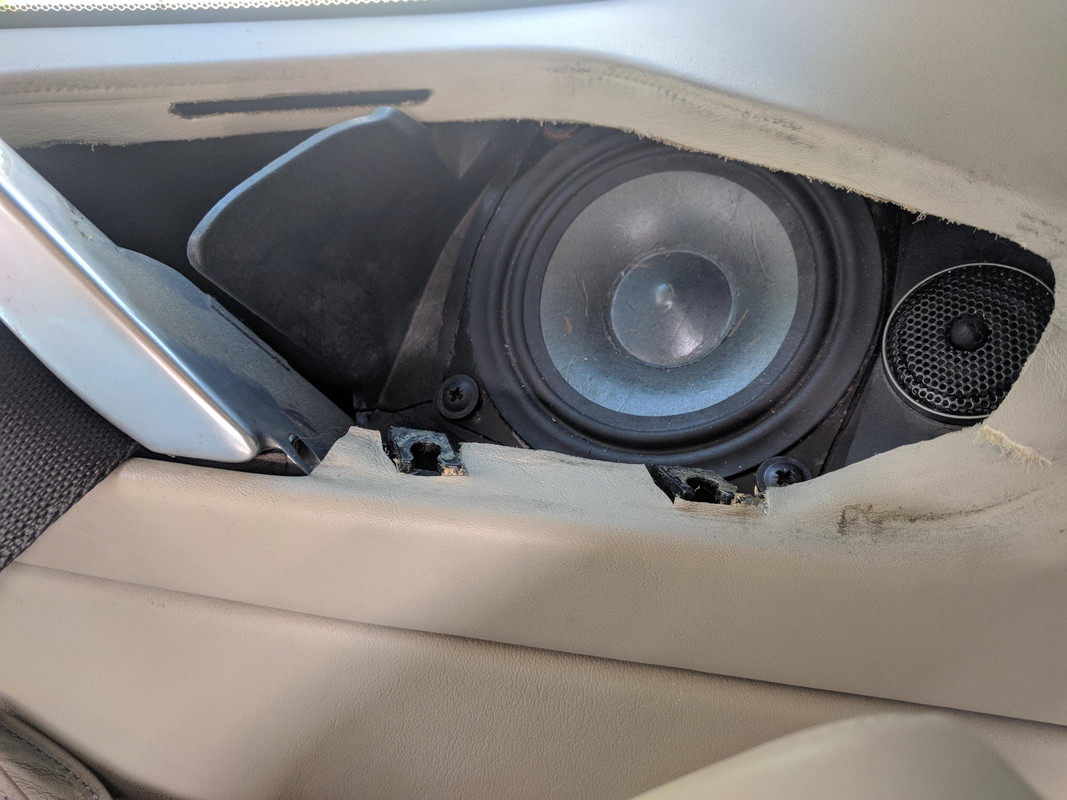
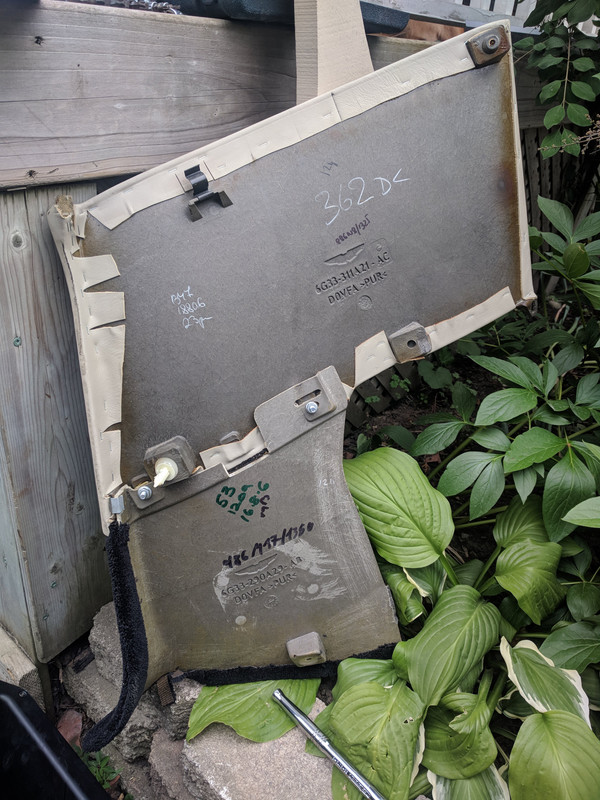
I started with the door speakers (left and right part numbers) as I had the door panel off already:

Here you can see the larger bracket is for the door (front) and the smaller is the rear speaker:
Some sequence photos I took of fastener locations before removing the door panel to replace the passenger door speaker:

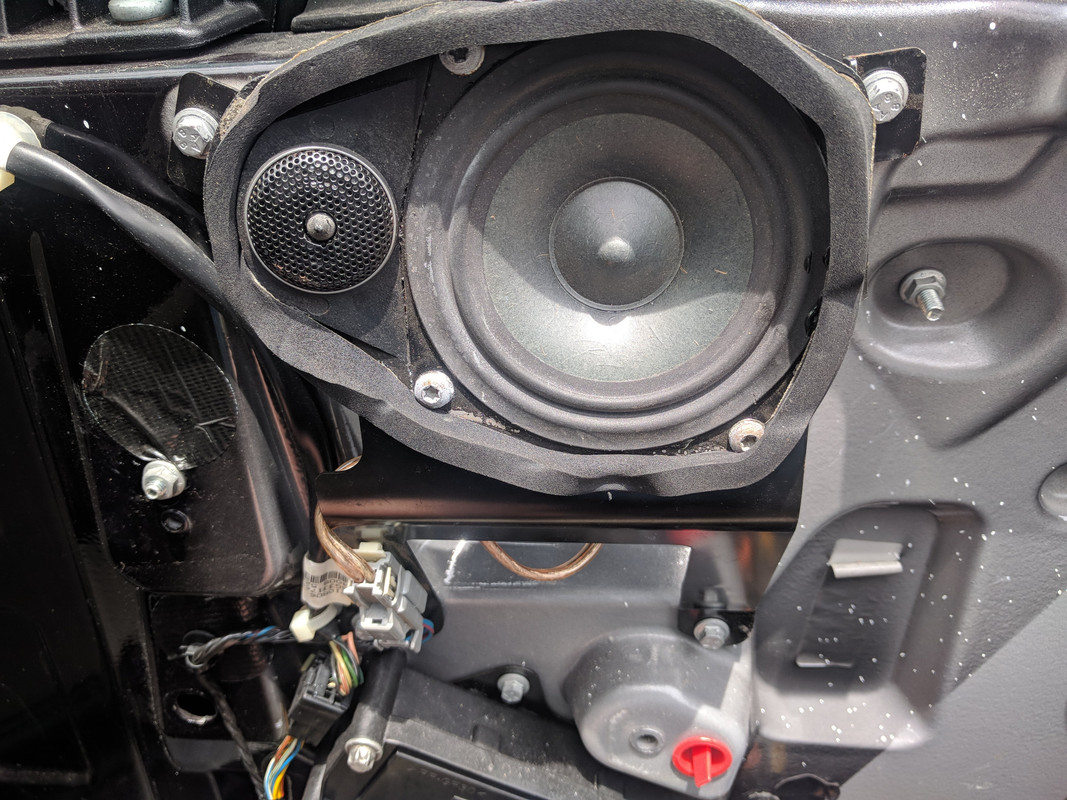
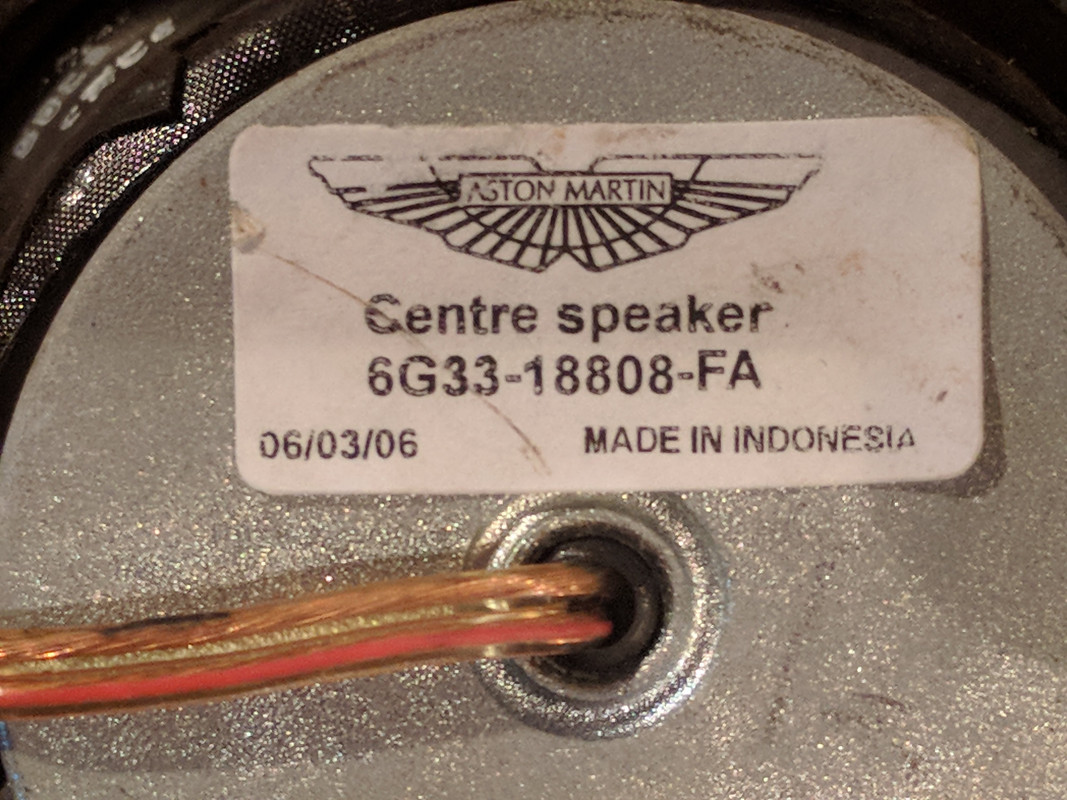
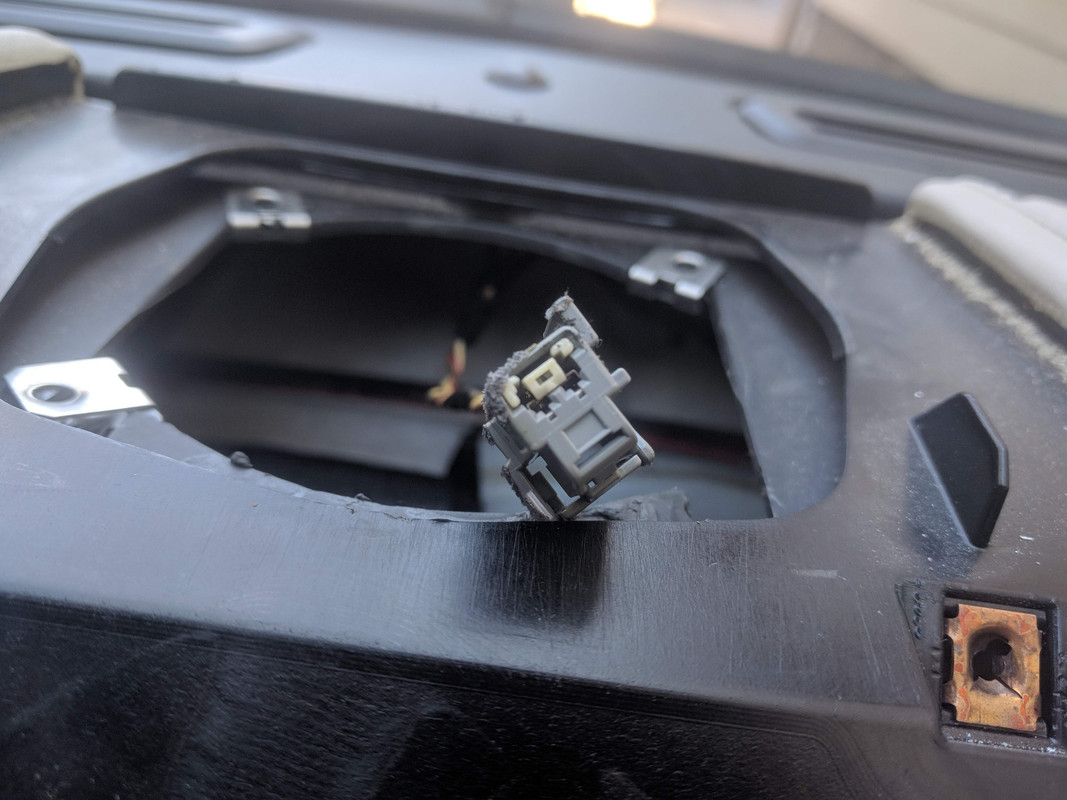
Next was the centre channel speaker where I removed the aftermarket bluetooth speaker and installed this:
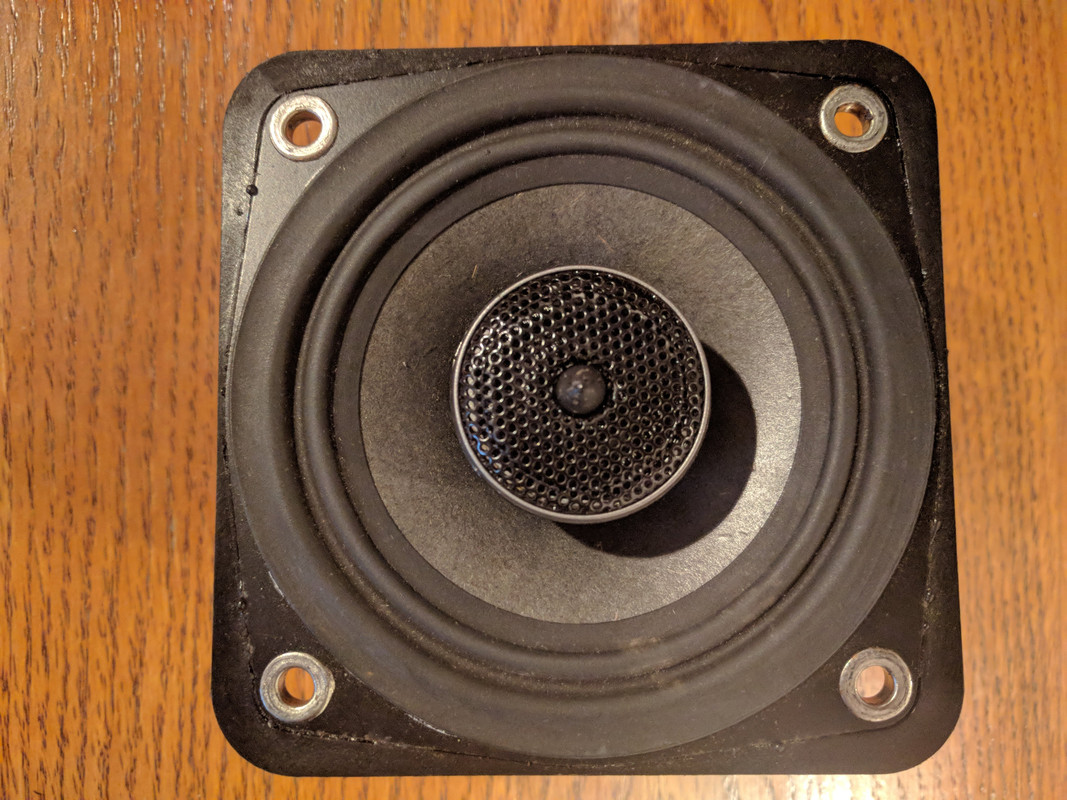
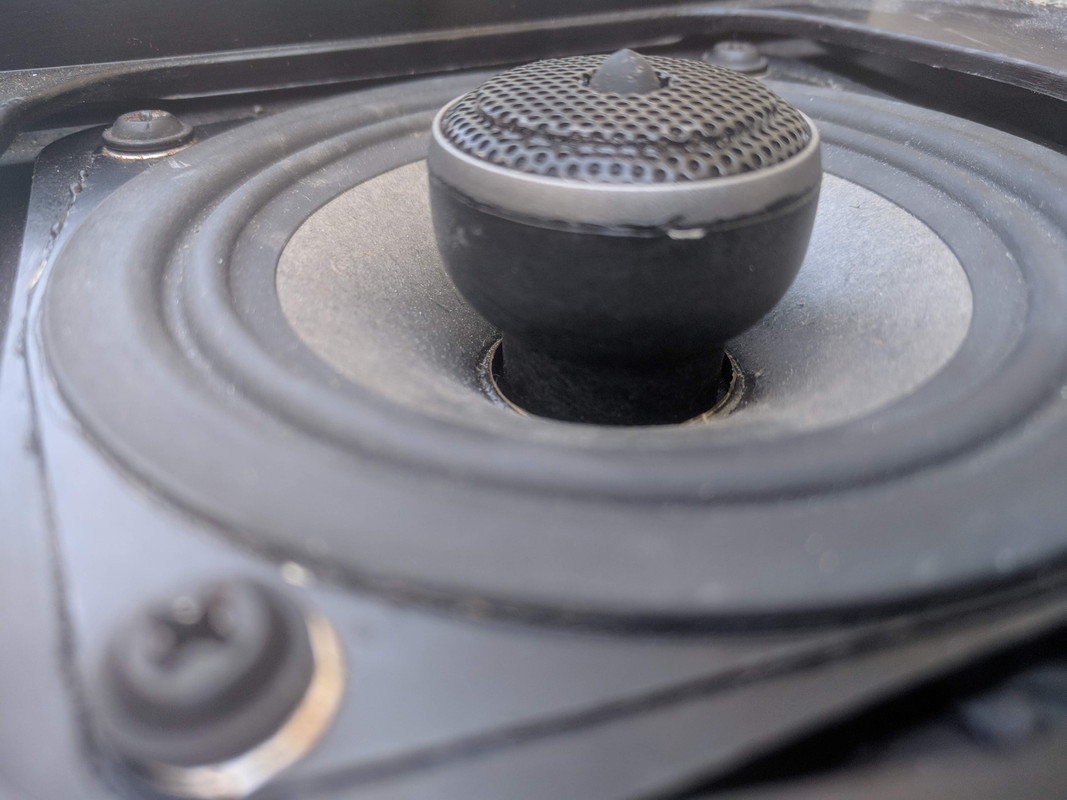
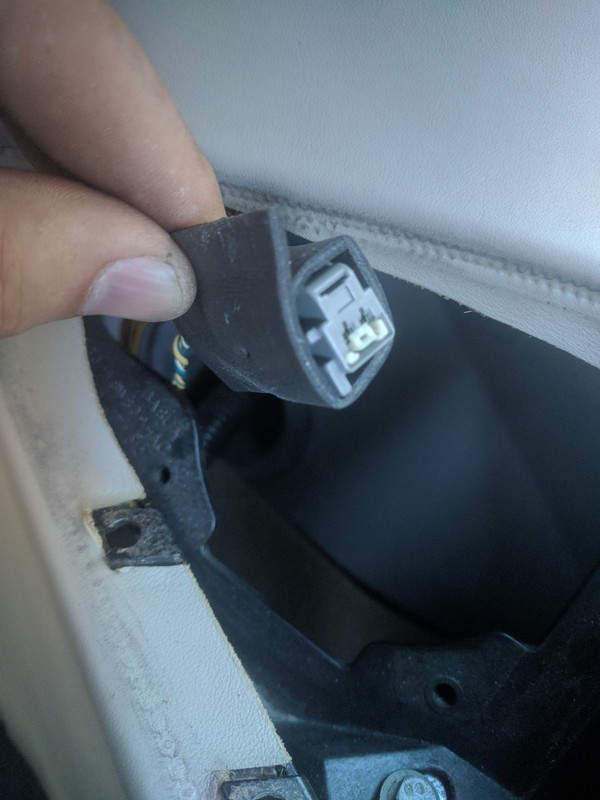
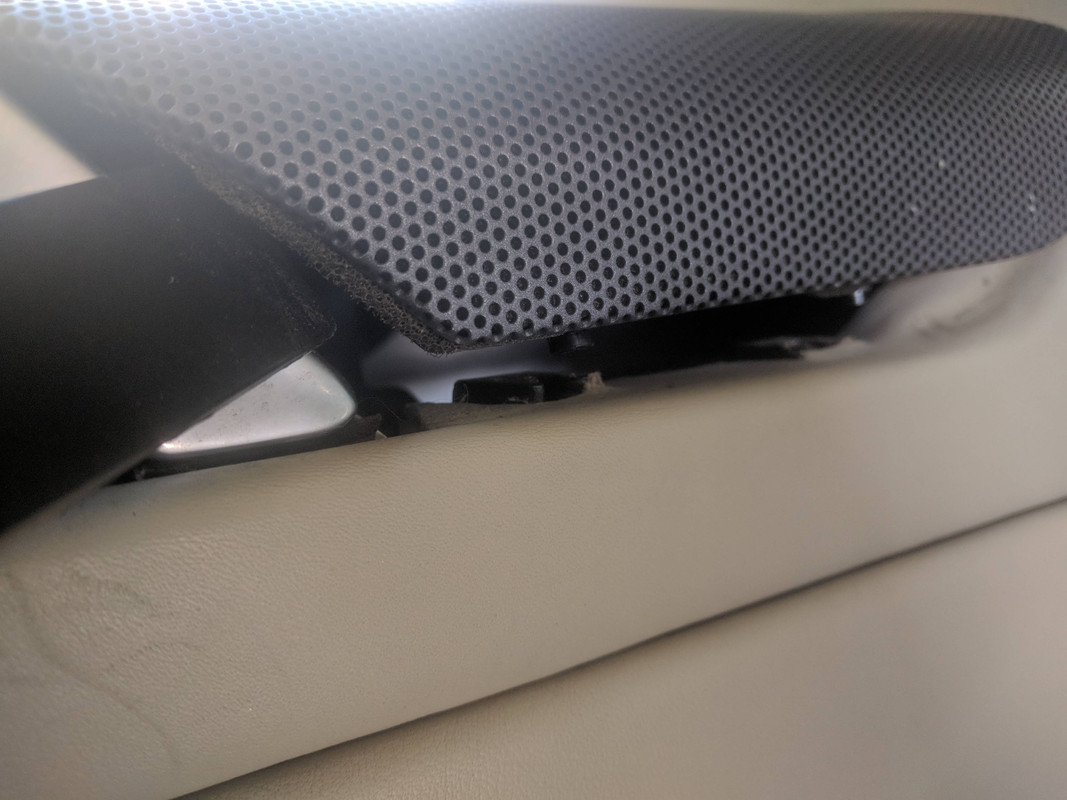
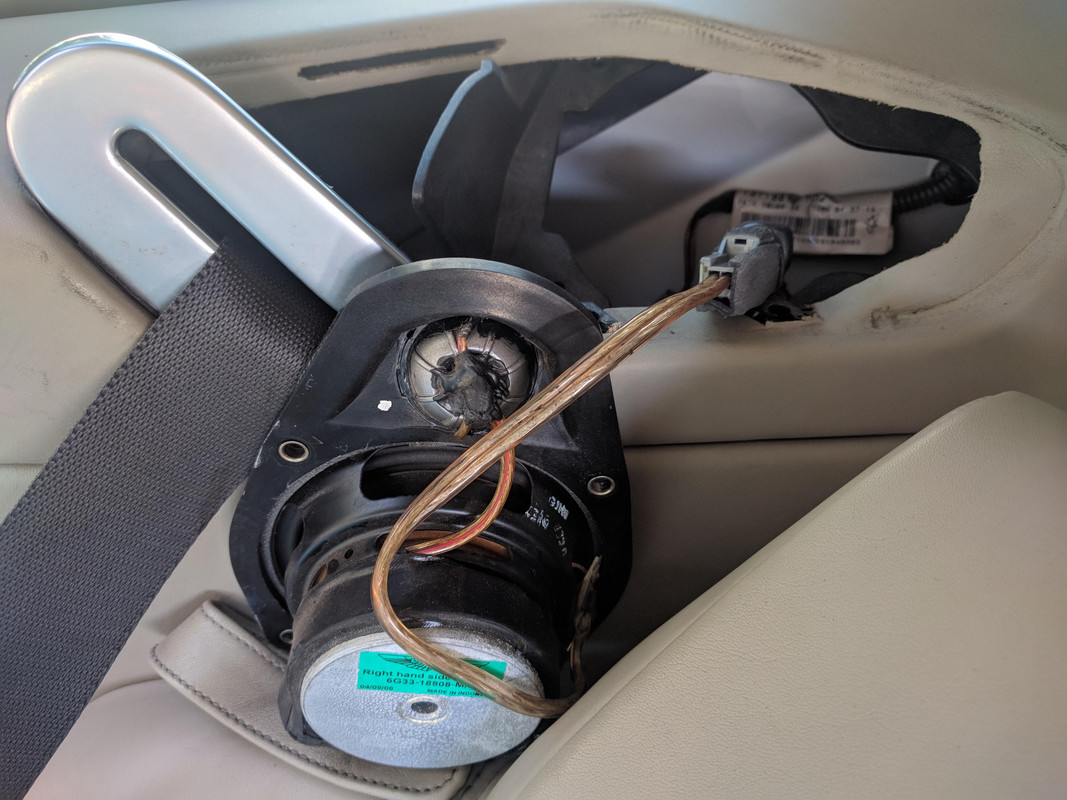
Adding the new rear speakers was relatively easy because the harness plugs ARE already there behind the speaker grills.
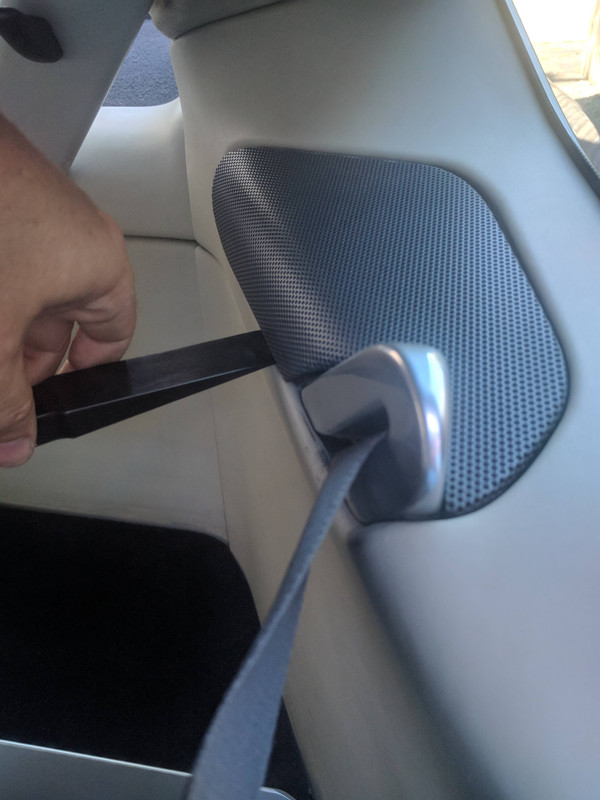
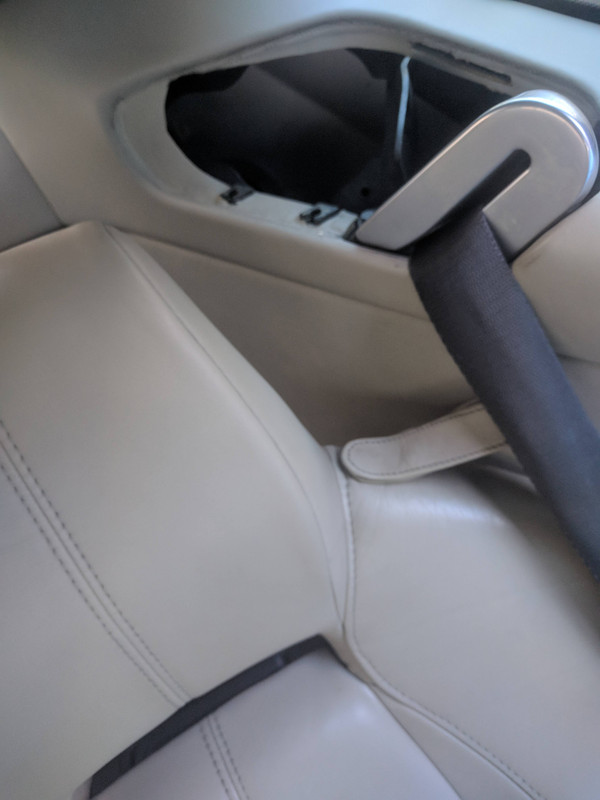

Sequence photos of Right Rear speaker install (just take your time and be patient):
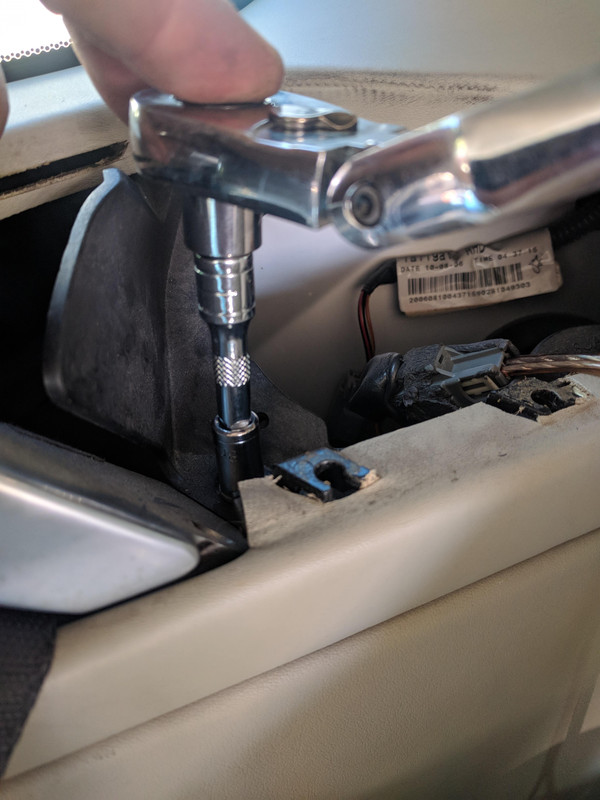
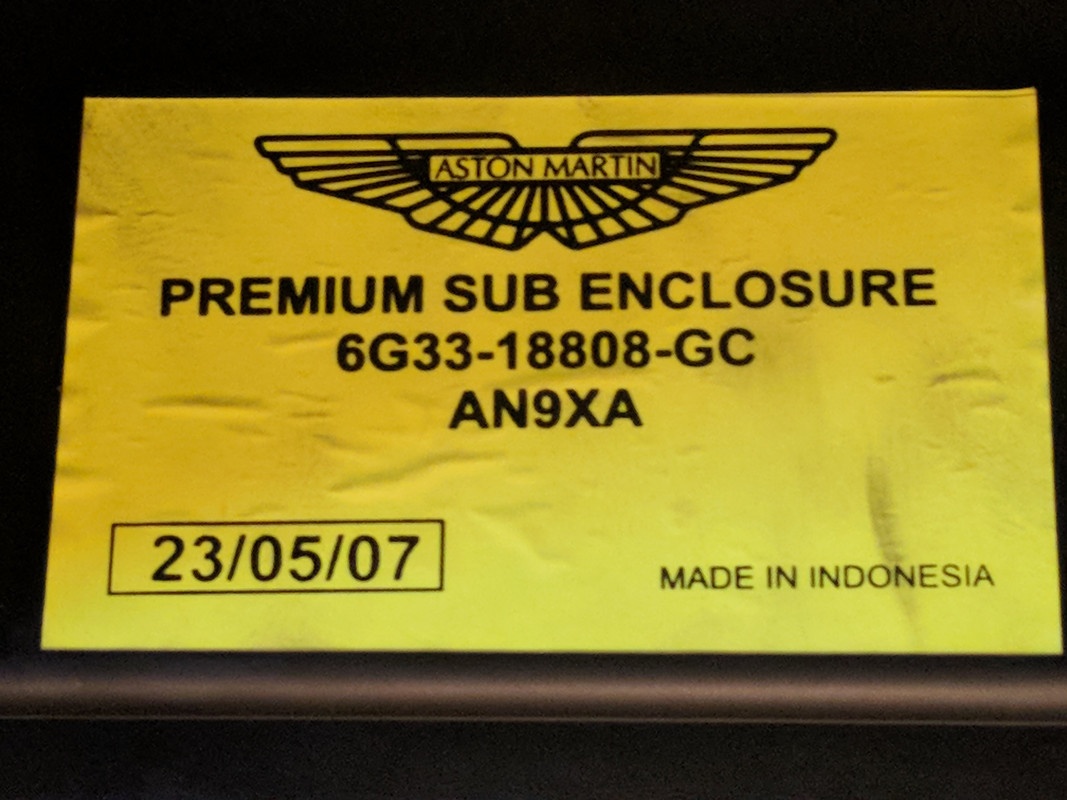
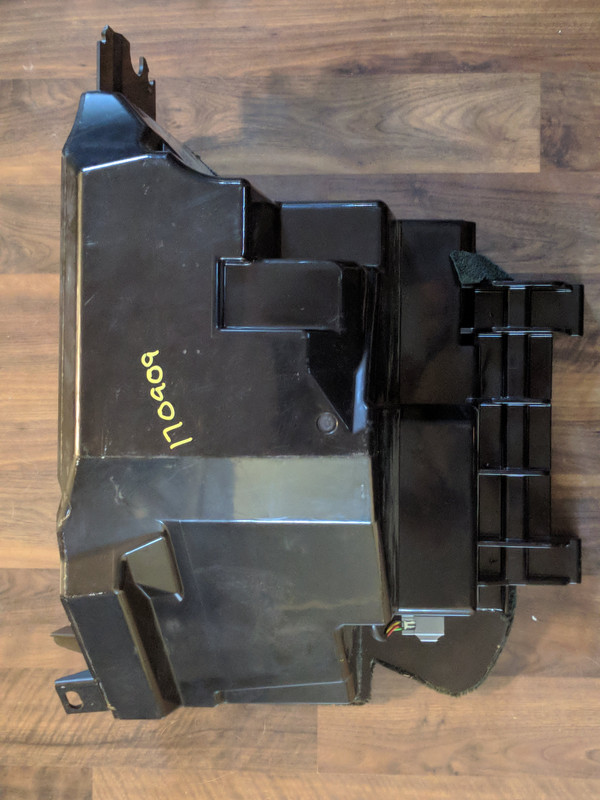
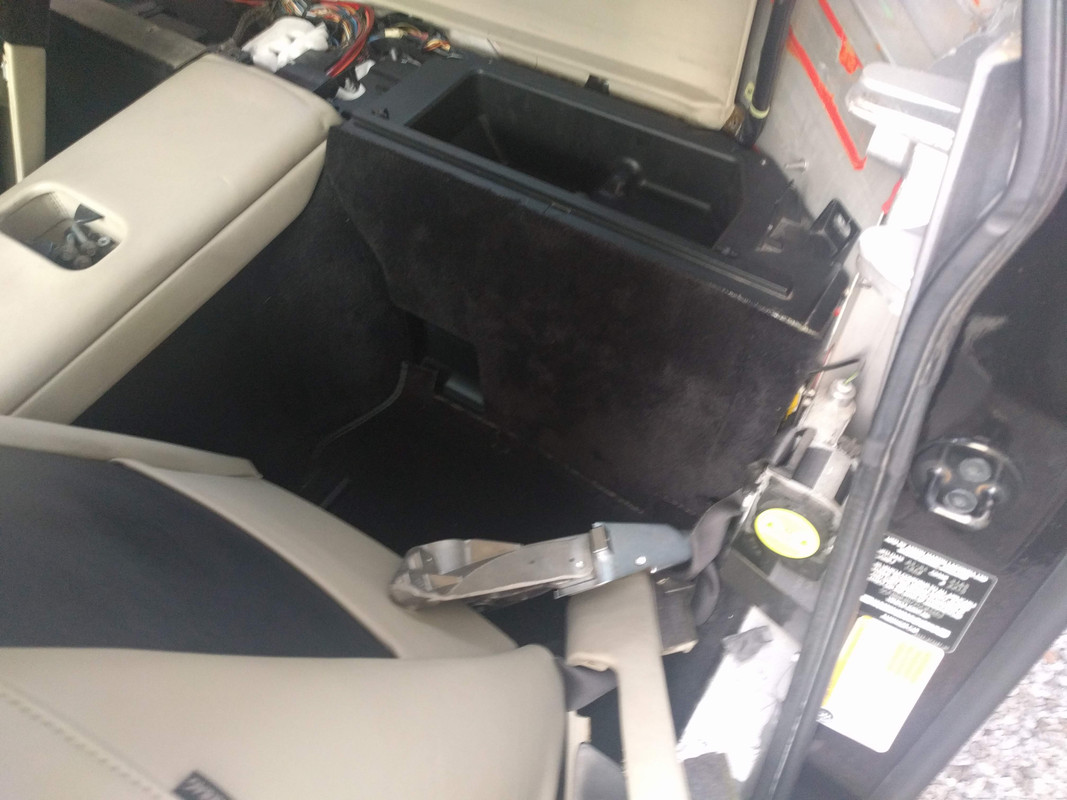
Then the subwoofer swap for the higher wattage unit:
Doing the swap takes some time and trim panel removal - here are the pics I took in case it can help other forum members:
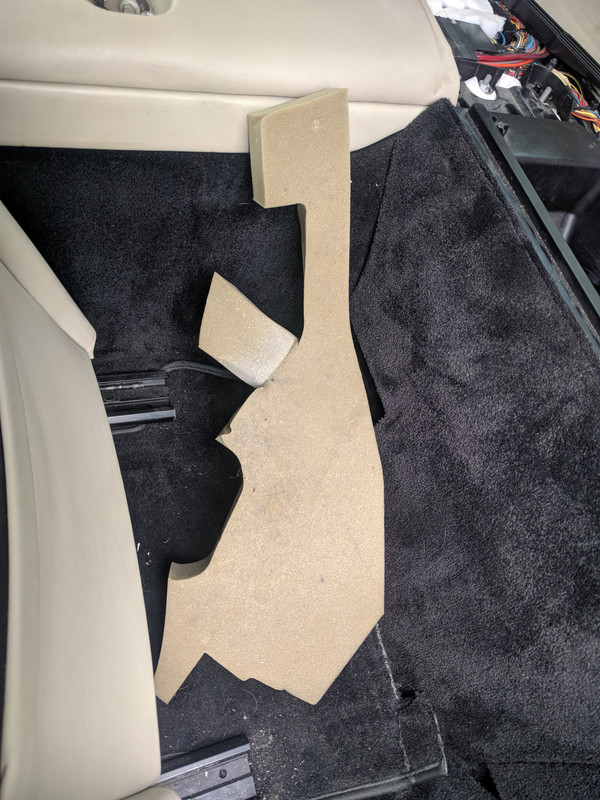

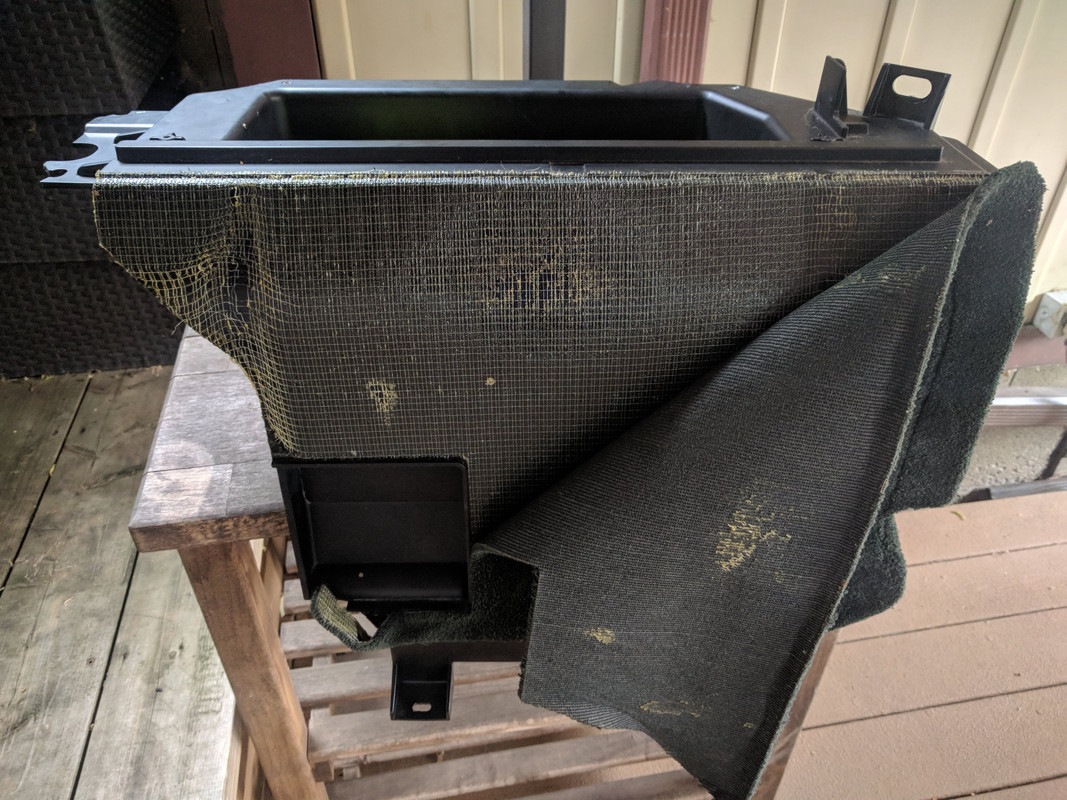
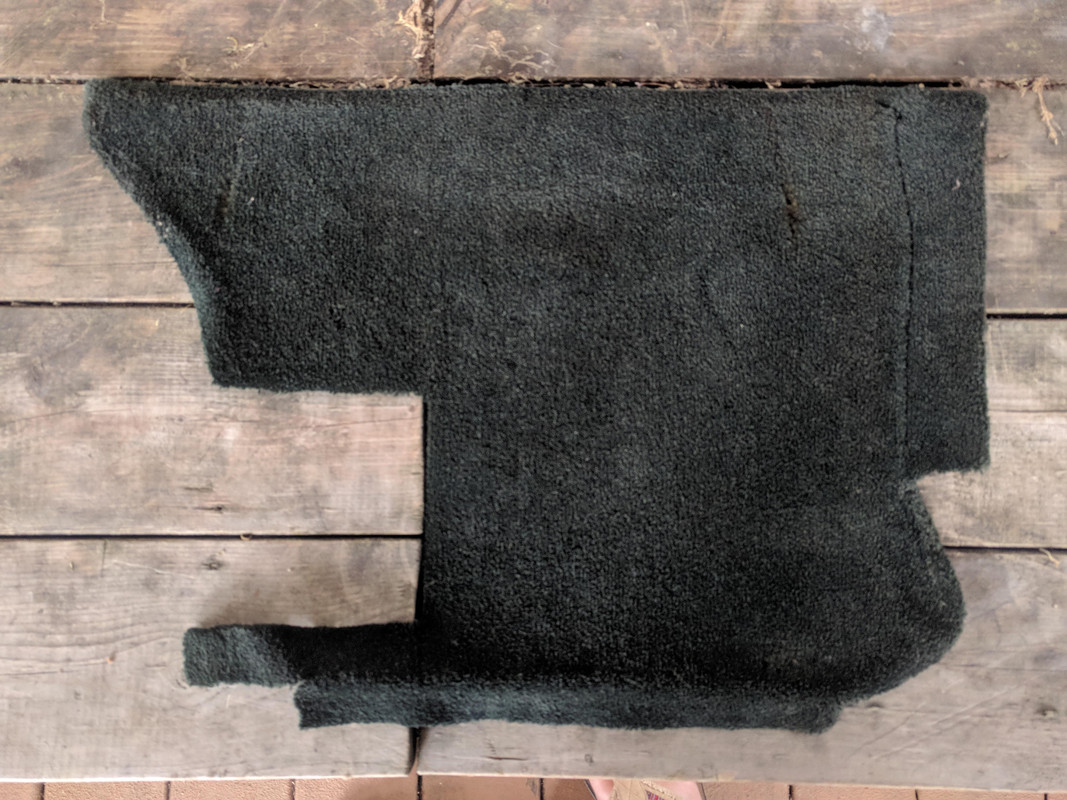
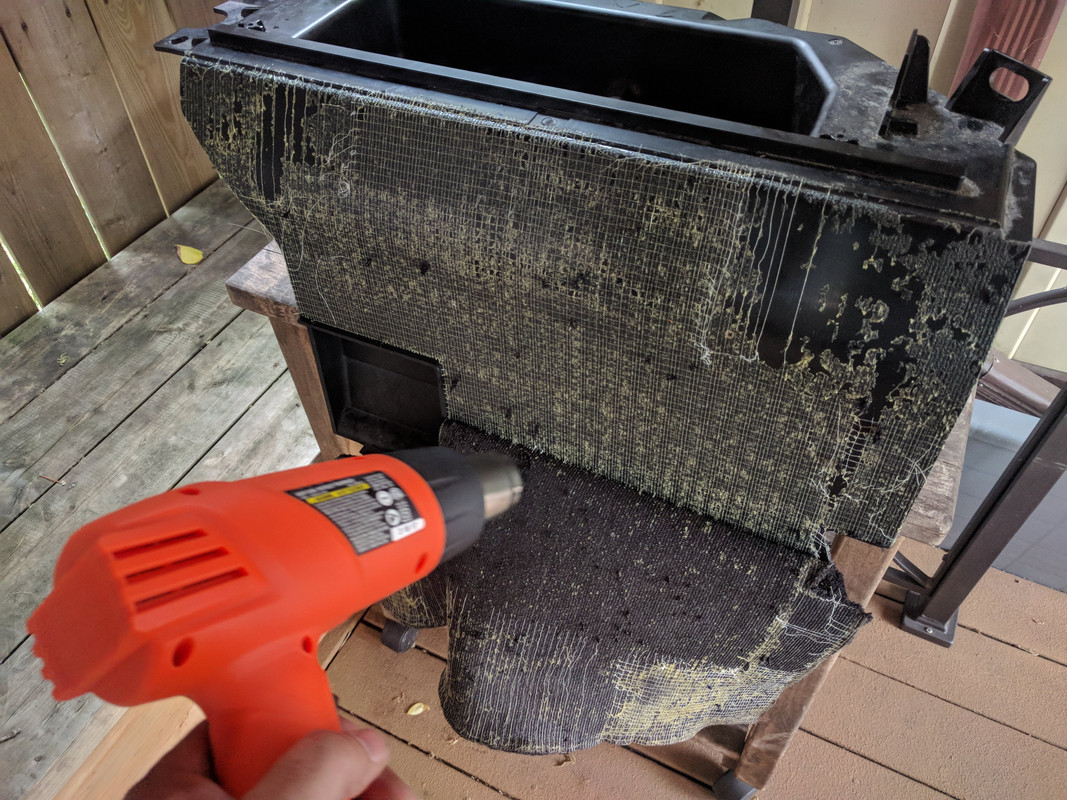
I found the best way was to replace the entire sub box and transfer my matching colour carpet onto the enclosure with spray glue.
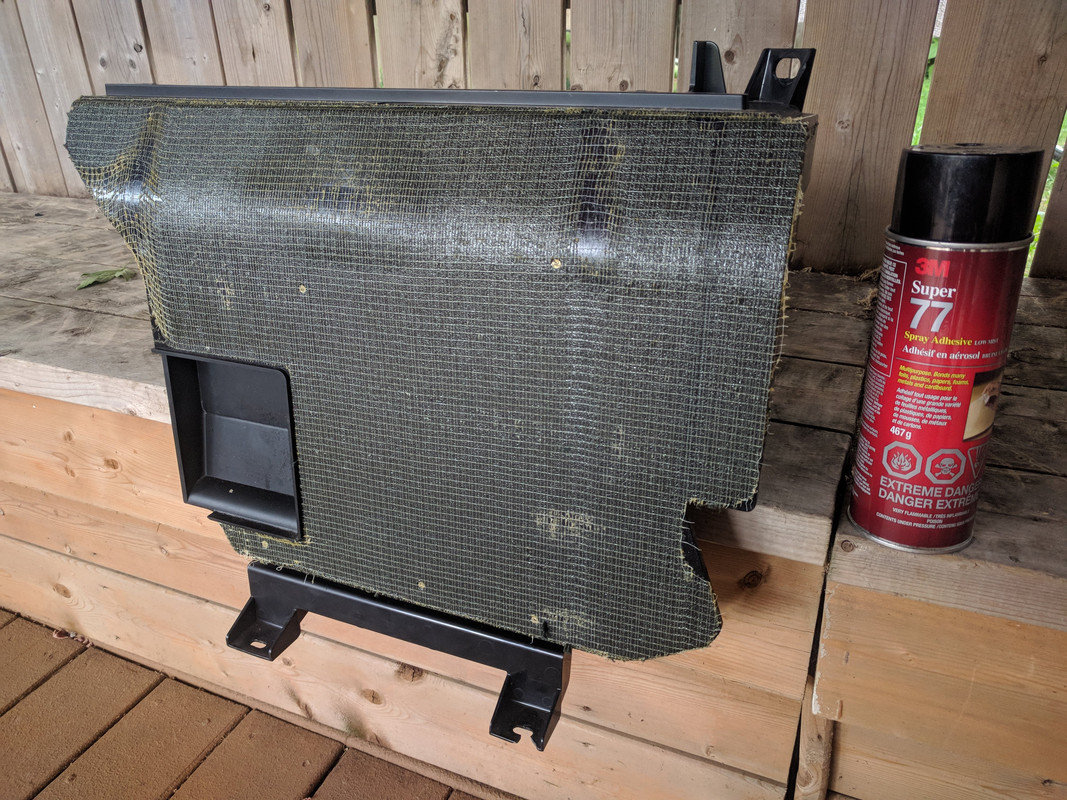
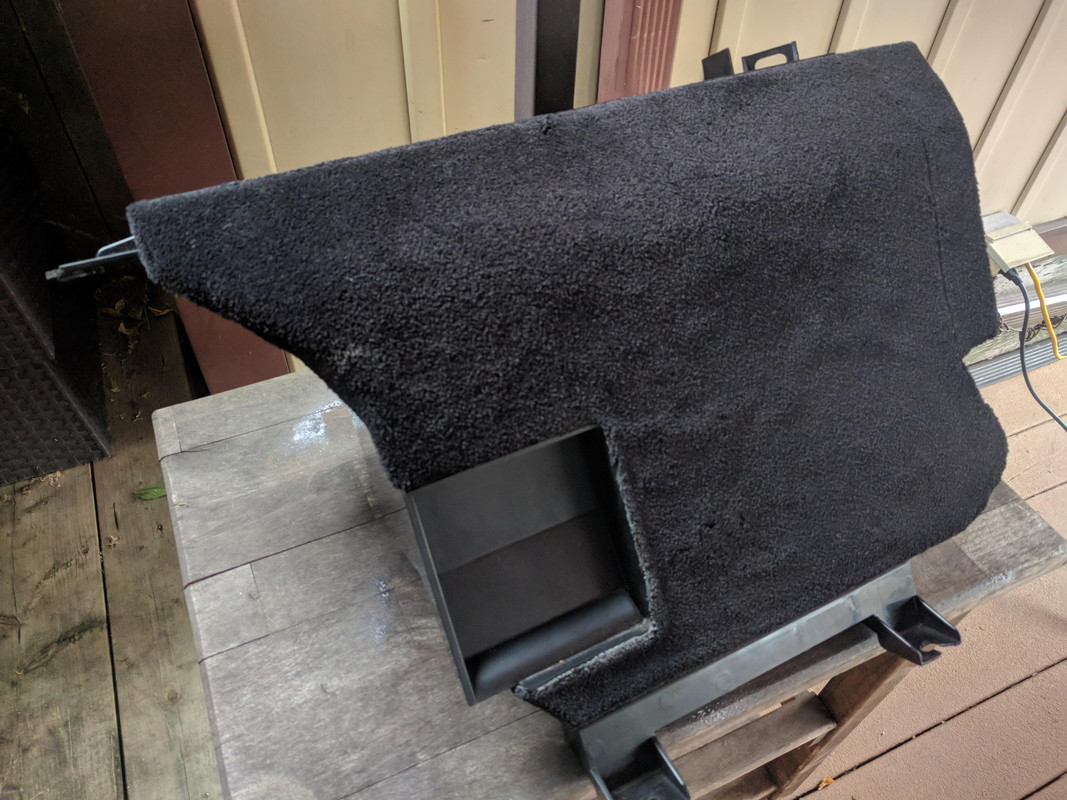
Re-installation of Premium Sub Enclosure photos:
Next up will be moving to the boot for the amplifier upgrades...
When I purchased my Vantage, I had experienced both the standard and premium audio systems and of course preferred the premium.
However that is one of many options and many other things to consider.
The good news, was that this was an option that could be added by:
1) upgrading and adding OEM Premium speakers.
2) removing single amplifier and installing dual amplifiers.
3) replacing single amp harness with dual amp harness.
4) Dealer reflash of PCM to tell head unit that "you are now Premium Audio".
Most advice on this forum was to upgrade standard audio via aftermarket options (most commonly due to cost reasons).
While I have modified car audio using aftermarket when I was younger, for the Aston I liked the idea of staying OEM if possible.
It would be a clean factory install and I already know what the end result would be and that I will love it.
I was inspired by forum member Batman-76 who despite advice otherwise did this conversion (successfully).
His thread (link below complete with part numbers) and a few encouraging PM's later and I was all-in.
https://www.6speedonline.com/forums/...de-thread.html
I started collecting parts two years ago (see pages 23 and 24 of this thread) from a salvage yard in Michigan.
The speakers and amps all came from the same 2008 Vantage, while the harness I bought online.
I started with the door speakers (left and right part numbers) as I had the door panel off already:
Here you can see the larger bracket is for the door (front) and the smaller is the rear speaker:
Some sequence photos I took of fastener locations before removing the door panel to replace the passenger door speaker:
Next was the centre channel speaker where I removed the aftermarket bluetooth speaker and installed this:
Adding the new rear speakers was relatively easy because the harness plugs ARE already there behind the speaker grills.
Sequence photos of Right Rear speaker install (just take your time and be patient):
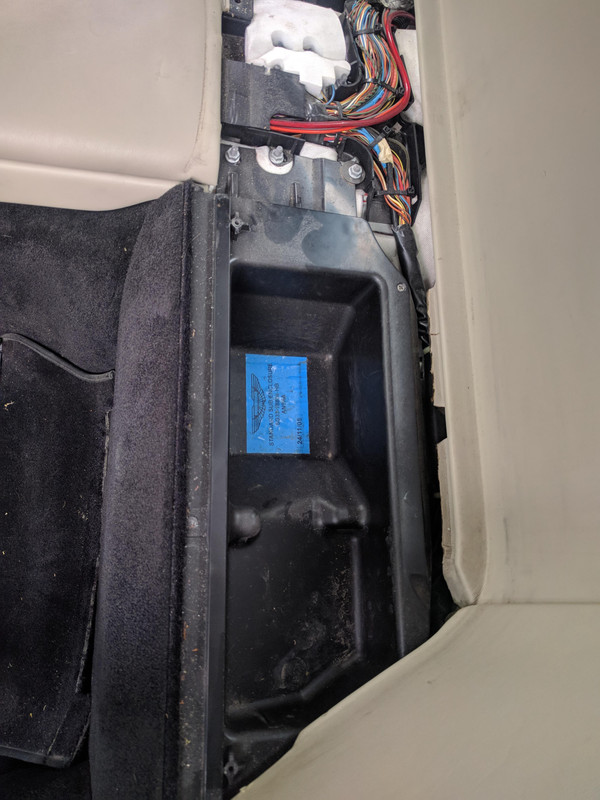
Then the subwoofer swap for the higher wattage unit:
Doing the swap takes some time and trim panel removal - here are the pics I took in case it can help other forum members:
I found the best way was to replace the entire sub box and transfer my matching colour carpet onto the enclosure with spray glue.
Re-installation of Premium Sub Enclosure photos:
Next up will be moving to the boot for the amplifier upgrades...
Thread Starter
|
Registered User
Joined: Apr 2017
Posts: 399
From: Niagara Region
Rep Power: 29
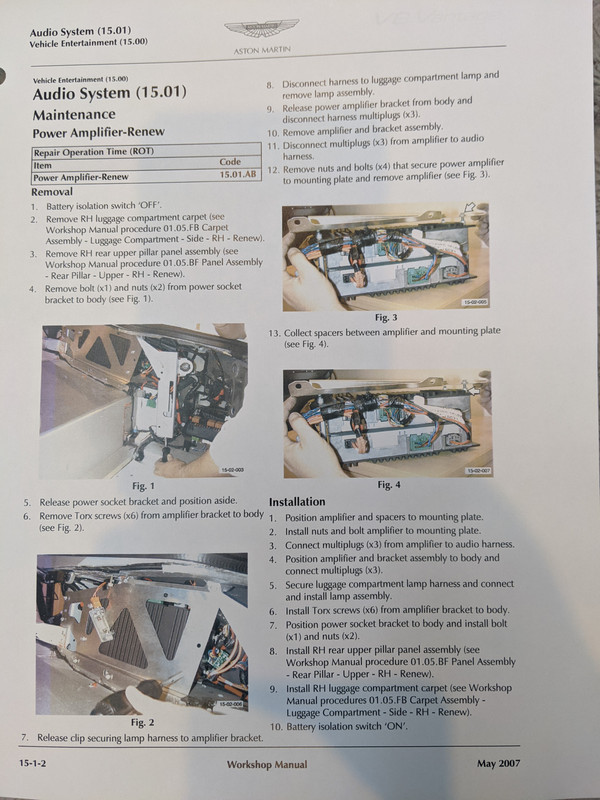
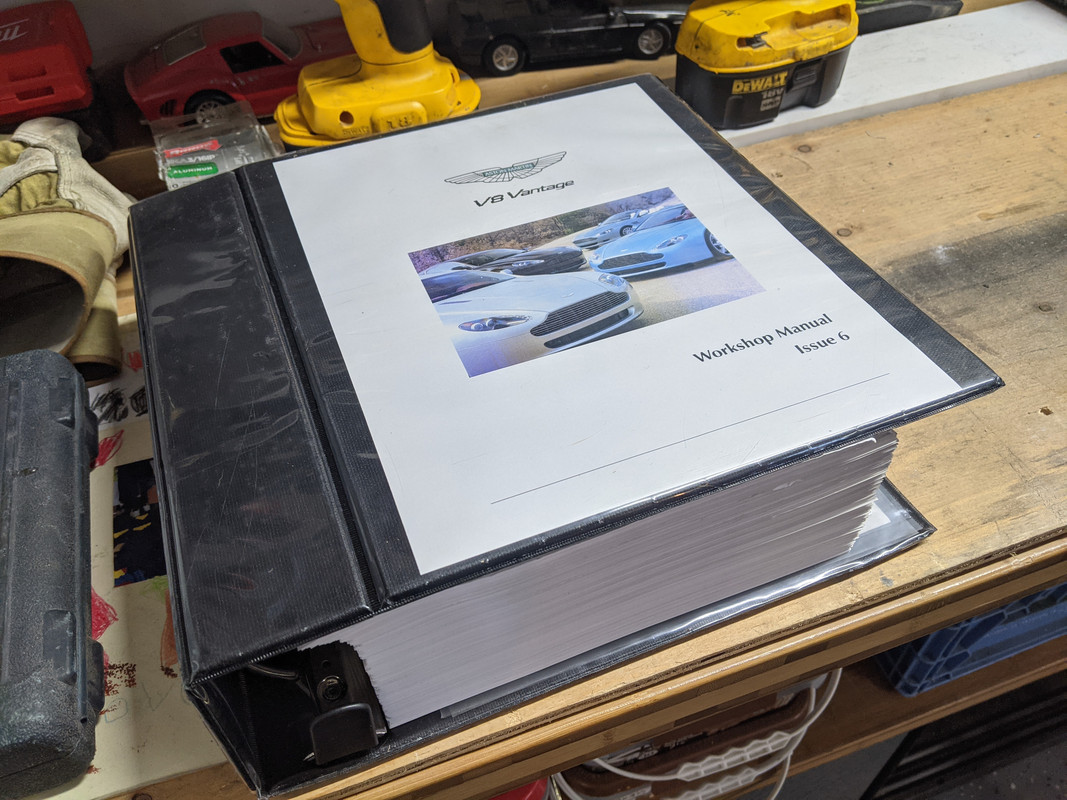
Started by reviewing steps in the Service Manual.
Top tip - the photos show premium audio and therefore a hit as to how they will be installed:
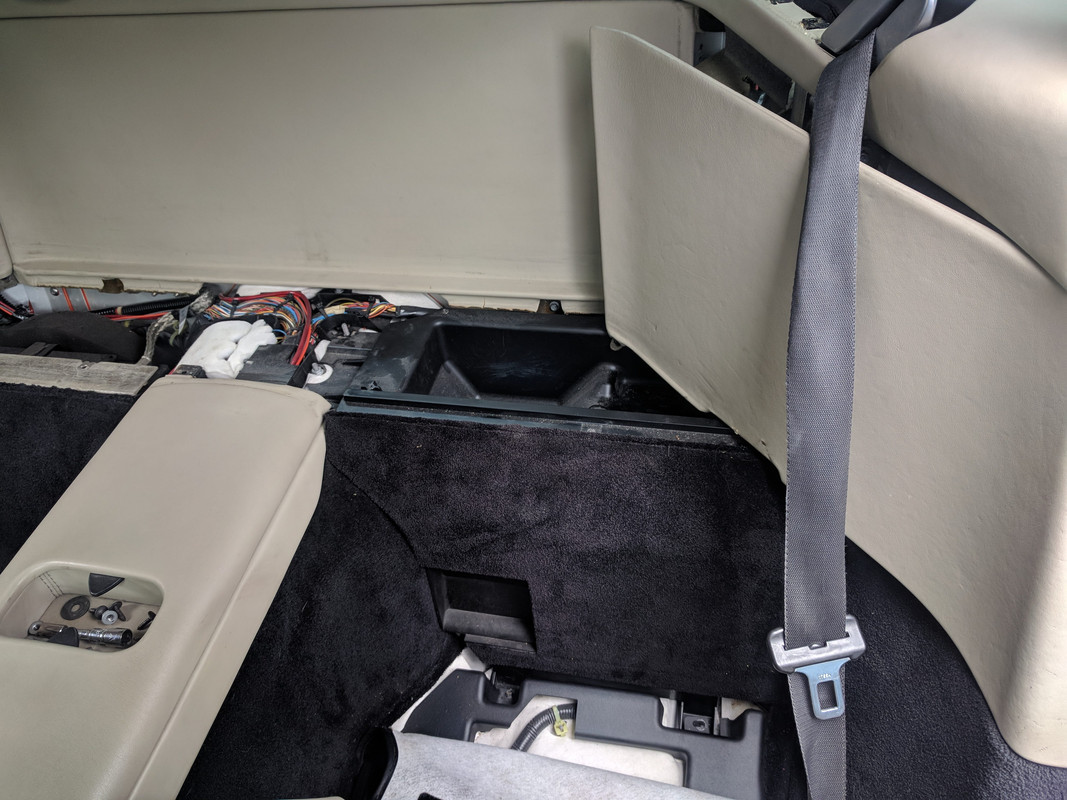
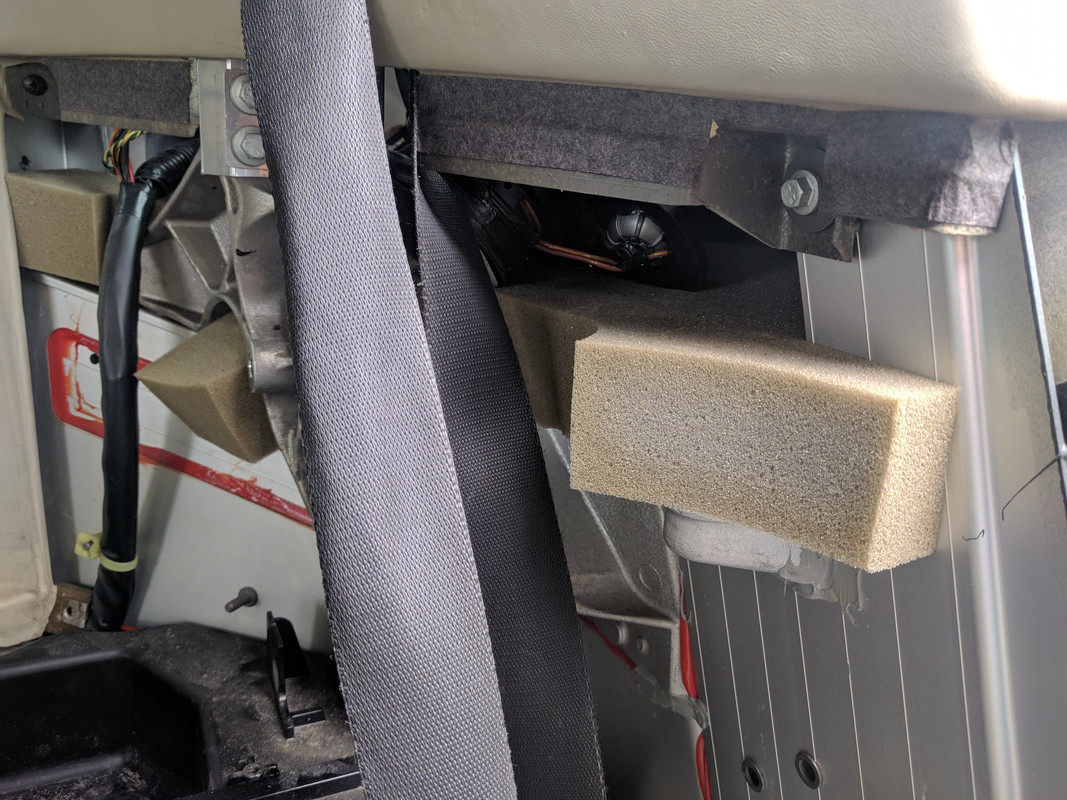
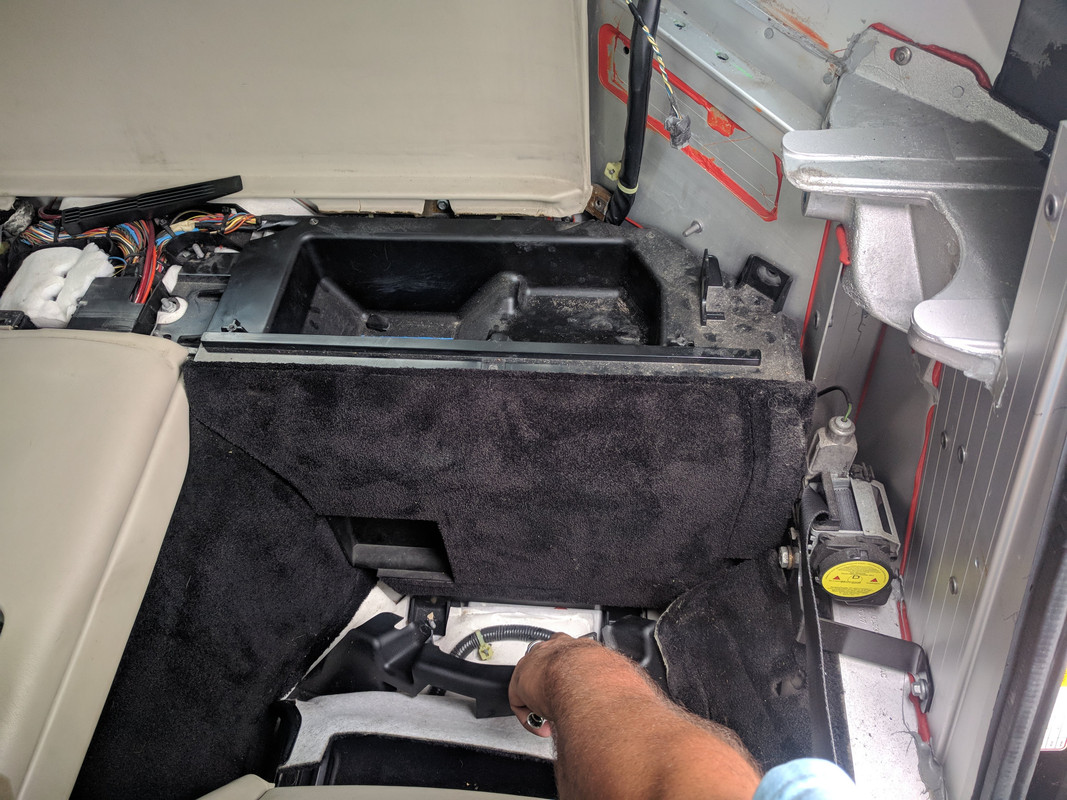
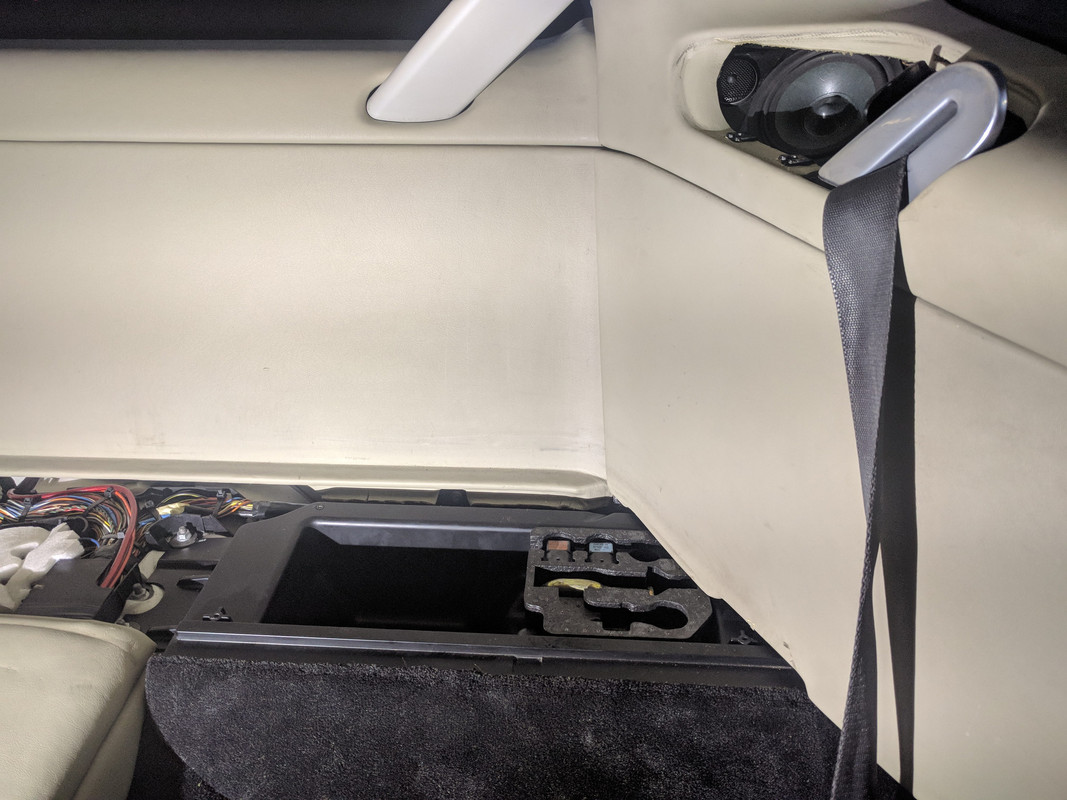
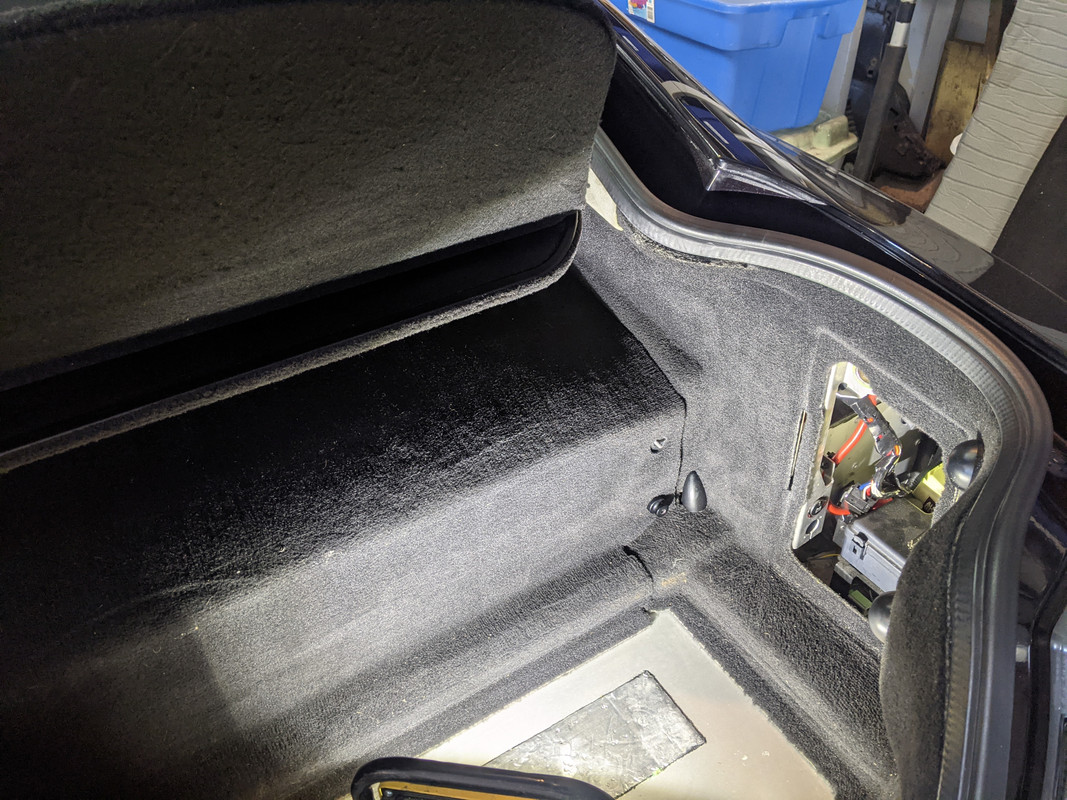
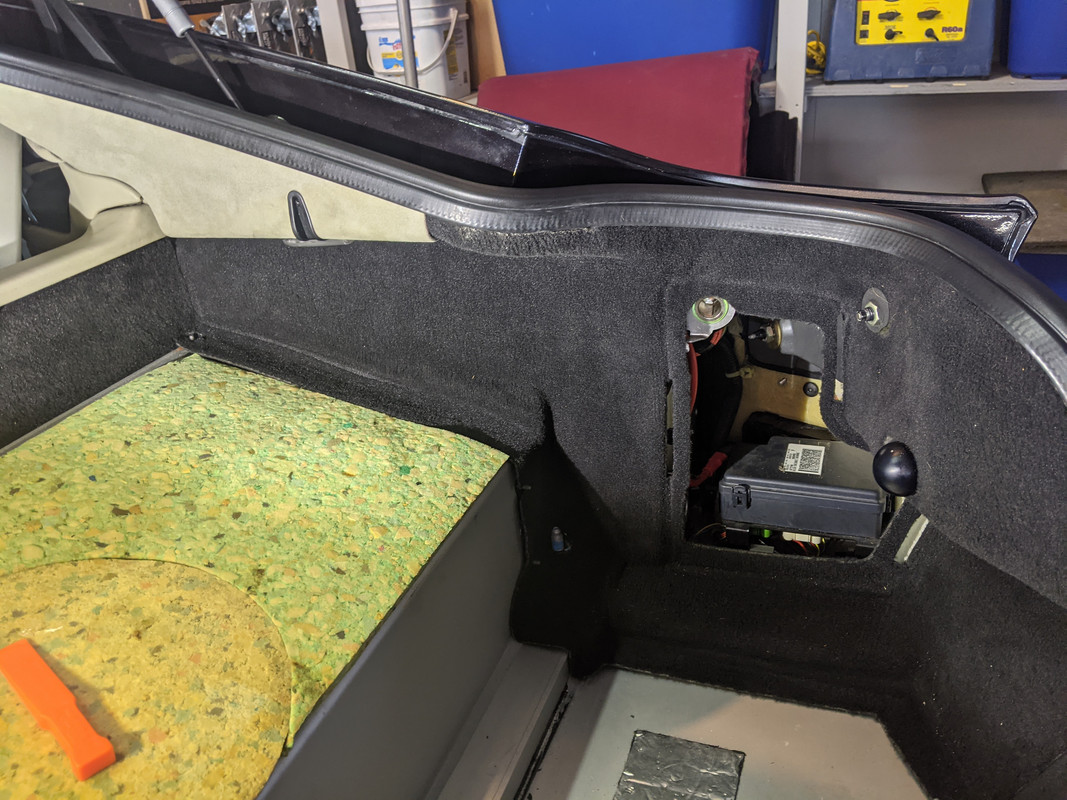
Remove lower boot carpet panel and security cover:
The carpeting just above the petrol tank is removed by unscrewing 6 cargo net hold down screws:
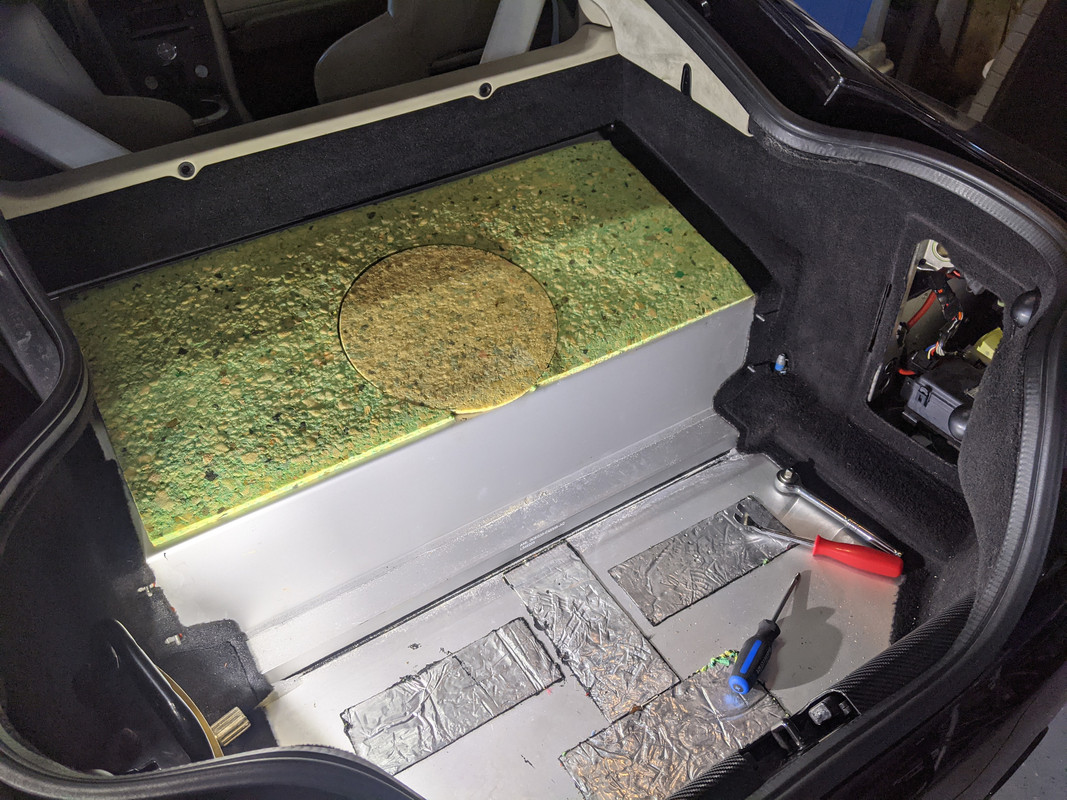
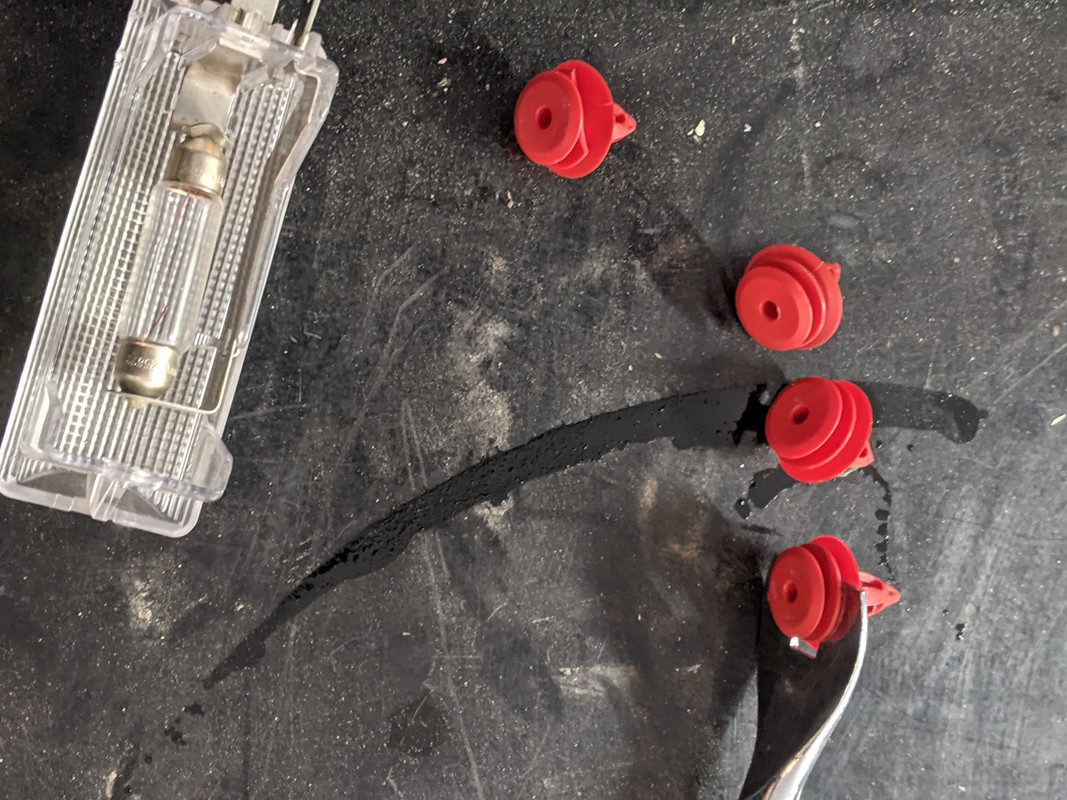
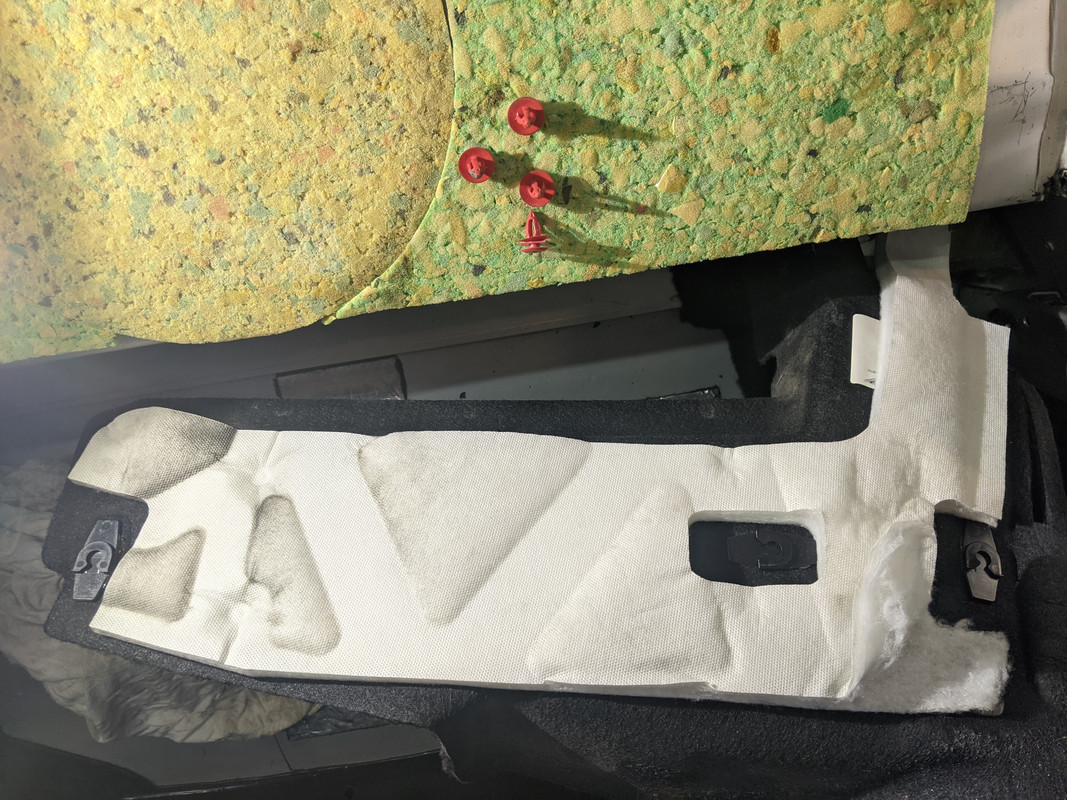
Remove the right side carpeted panel held in by 5 red clips.
I didn't remove tail light as that end of the carpet panel isn't in the way to access the amplifier:
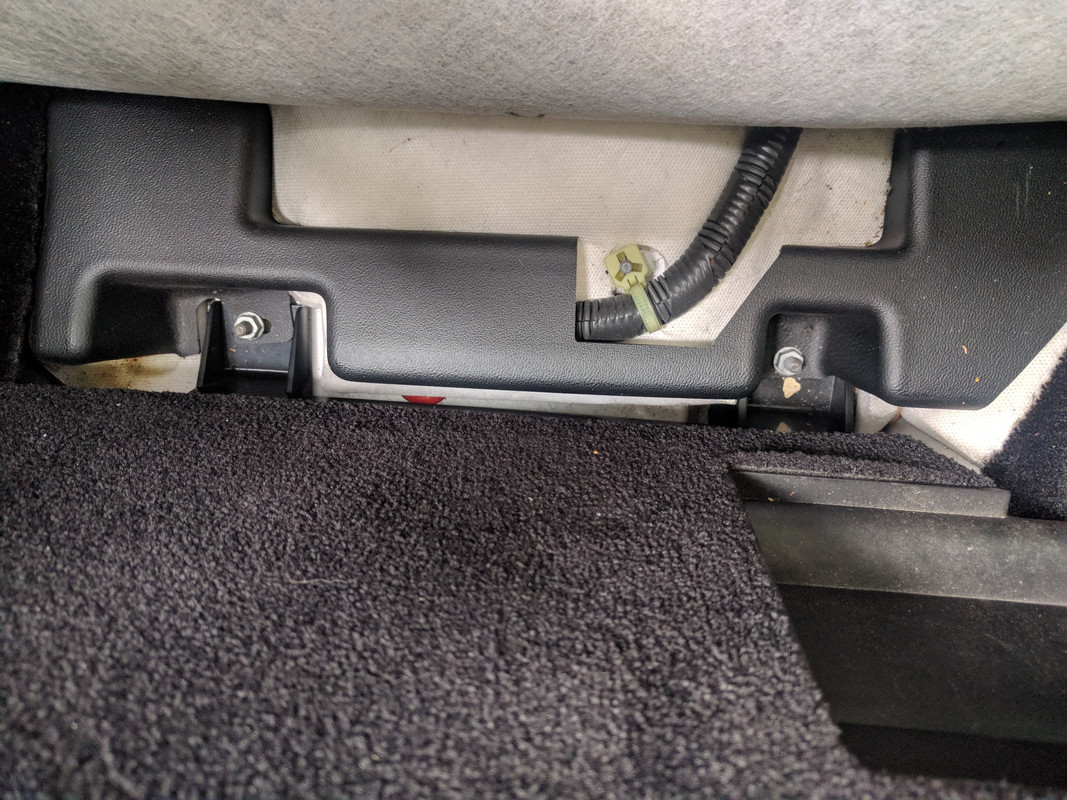
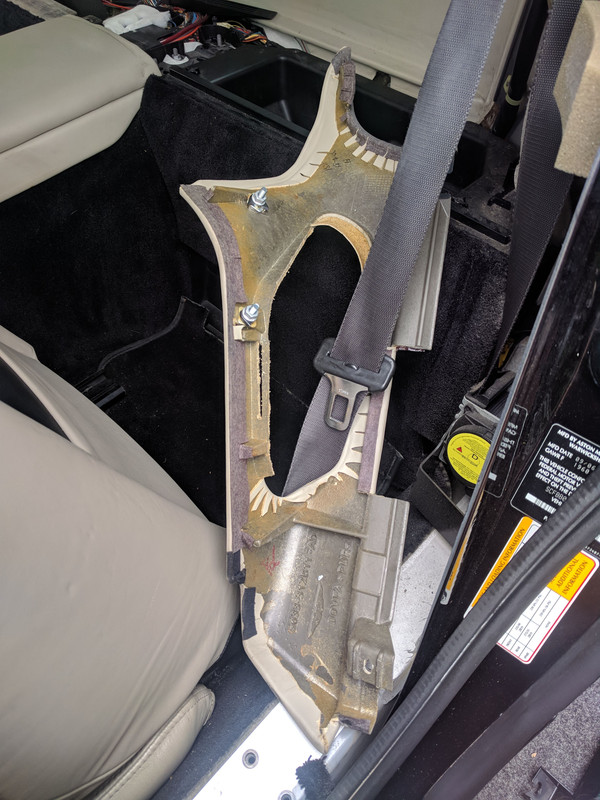
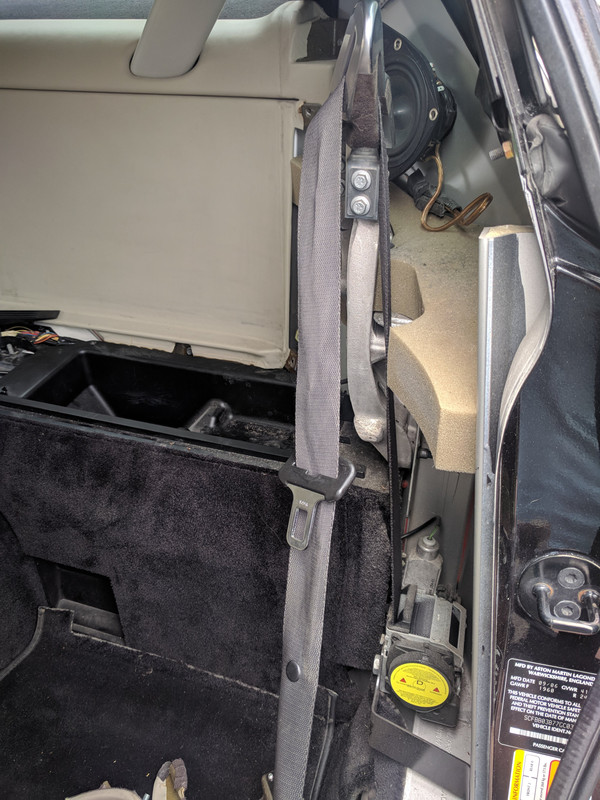
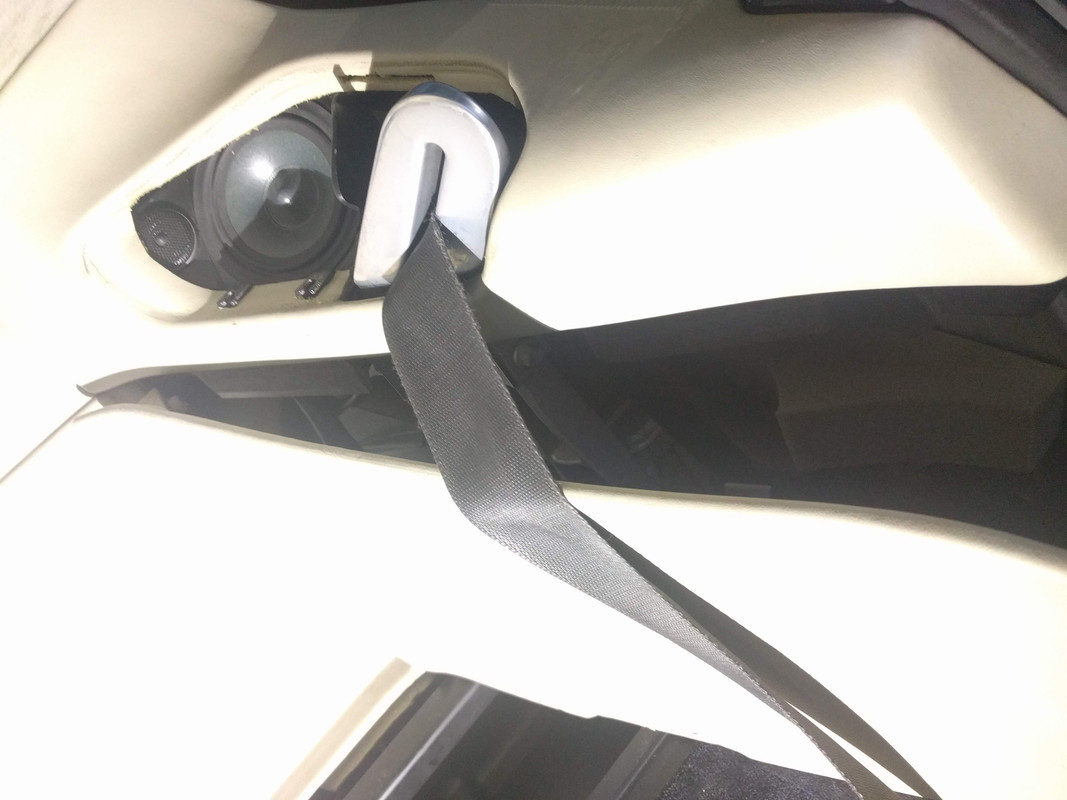
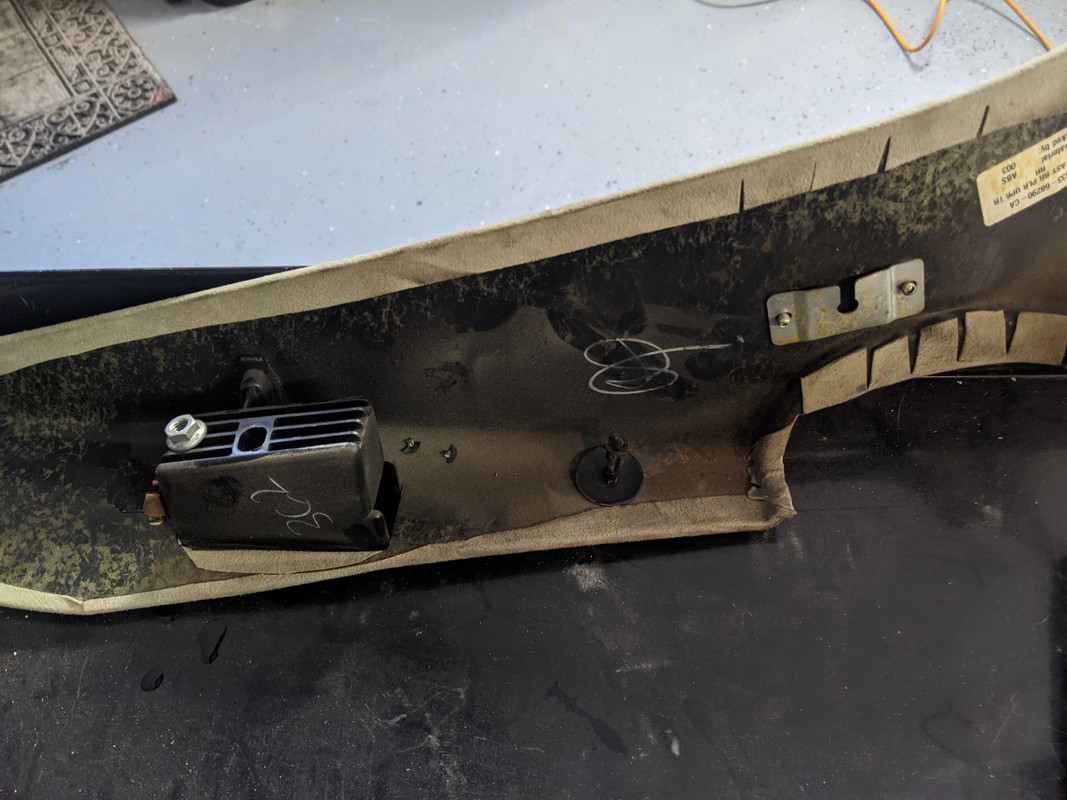
Instructions I followed to remove trim panel:
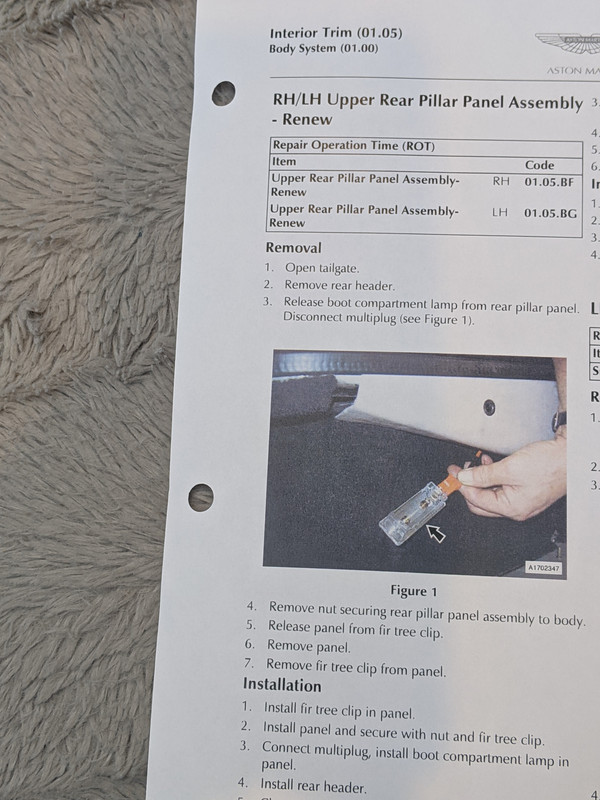
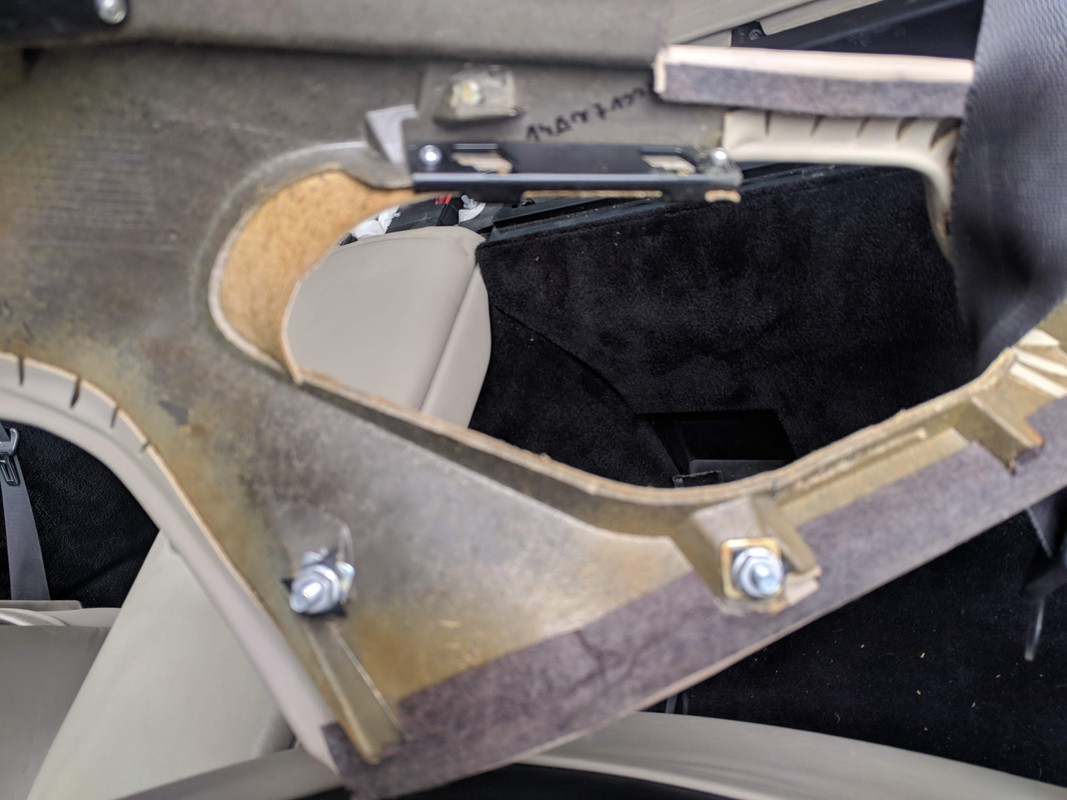
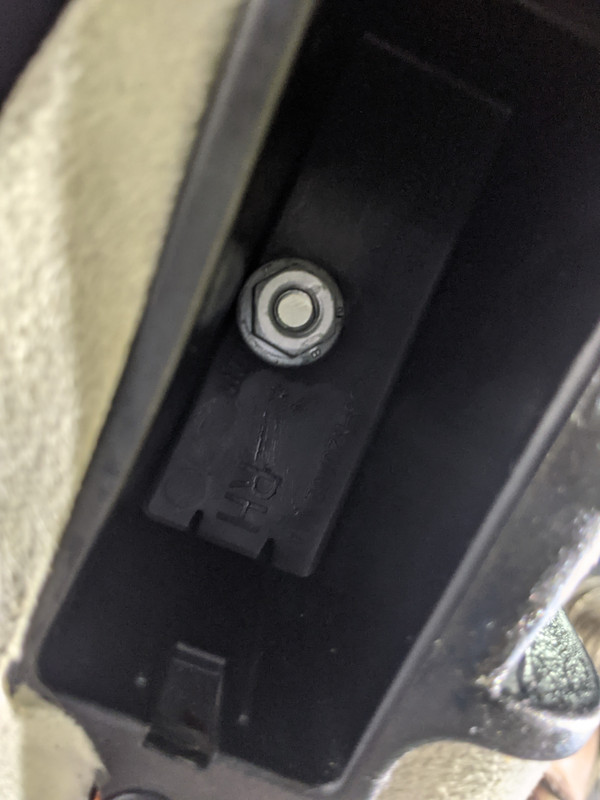
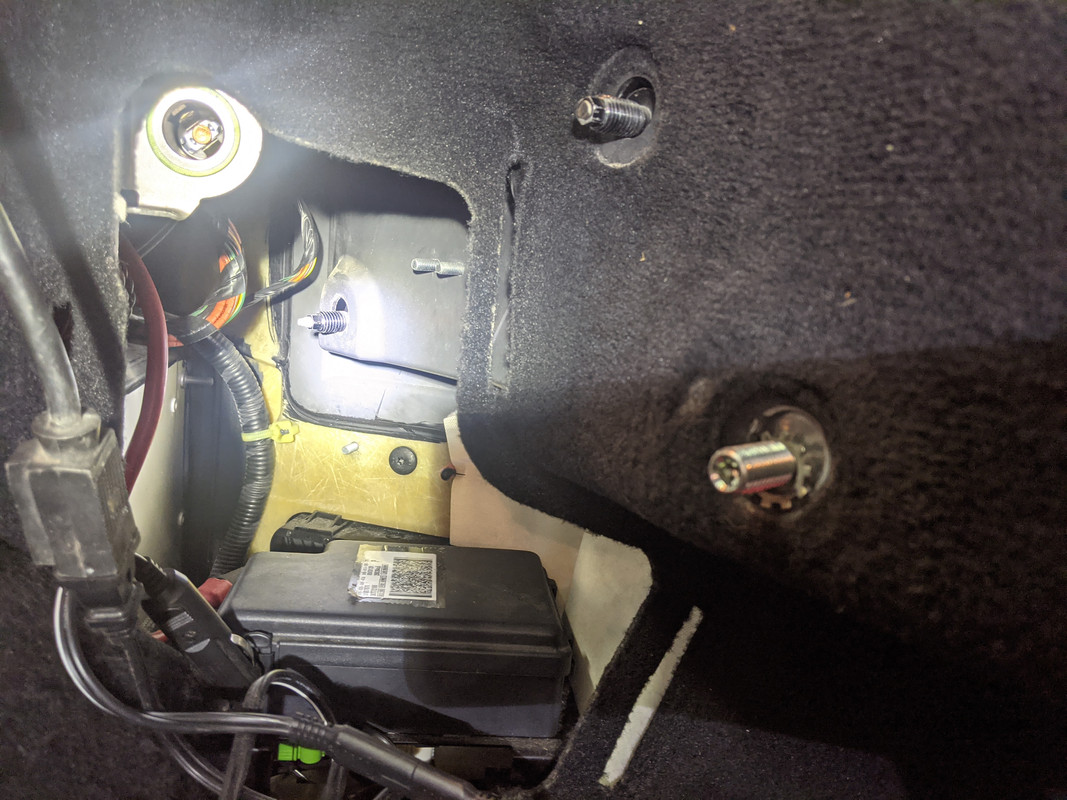
Once interior light lense was removed and light unplugged, you can access the 10mm nut on the underside of panel:
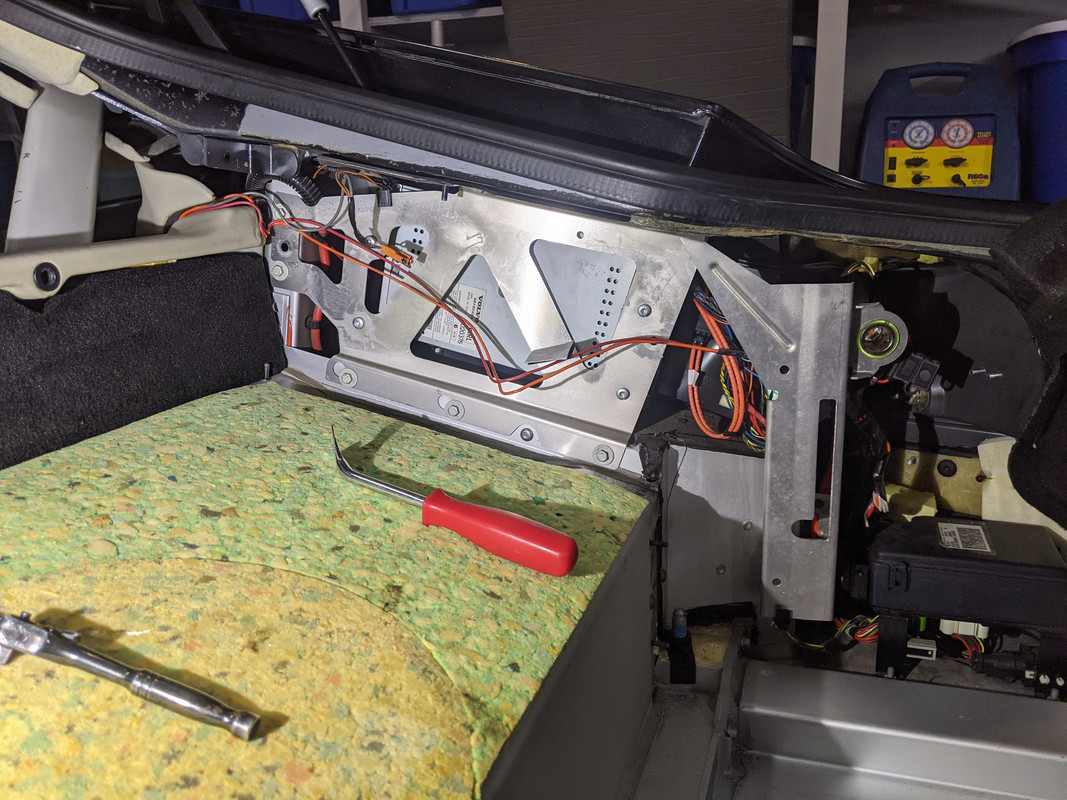
The forward end of the panel is held in by a large fir tree clip (use a trim tool to pry it out):
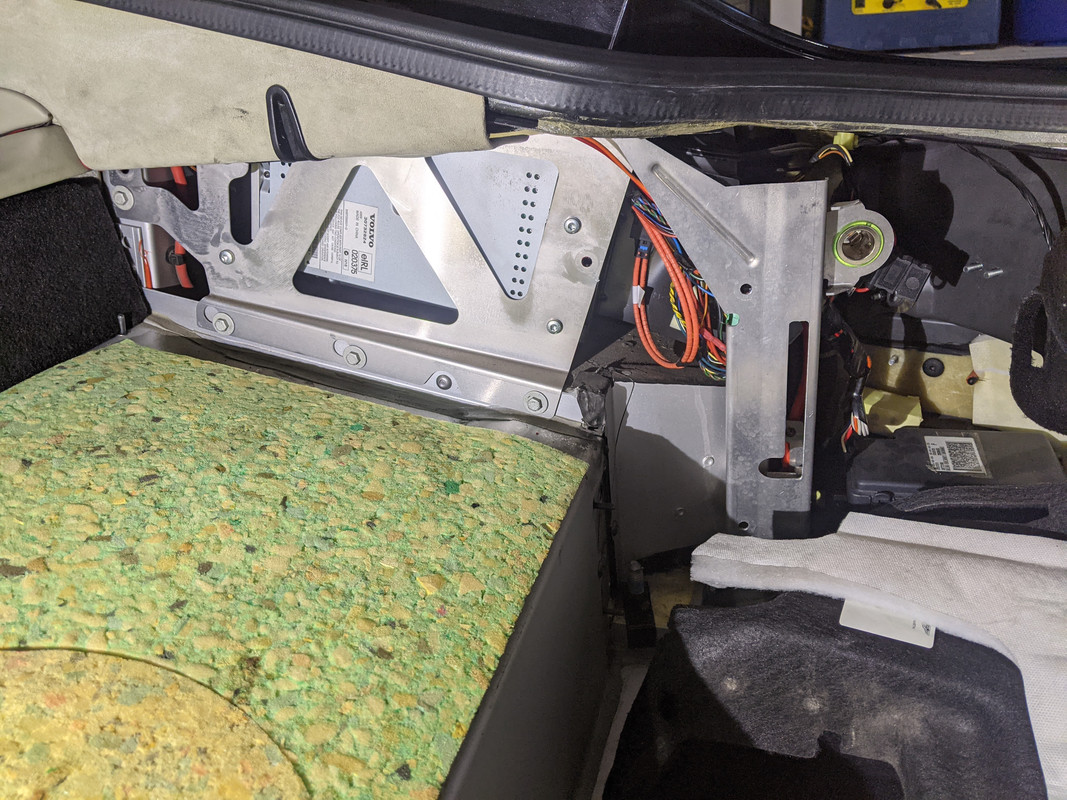
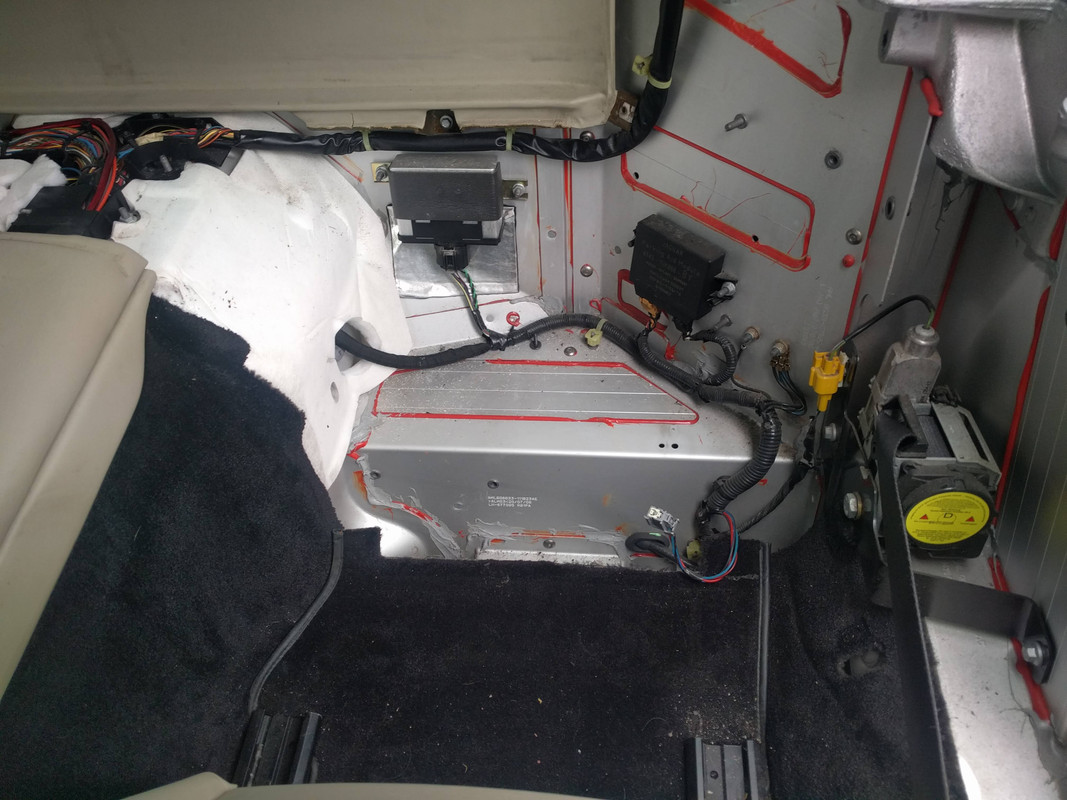
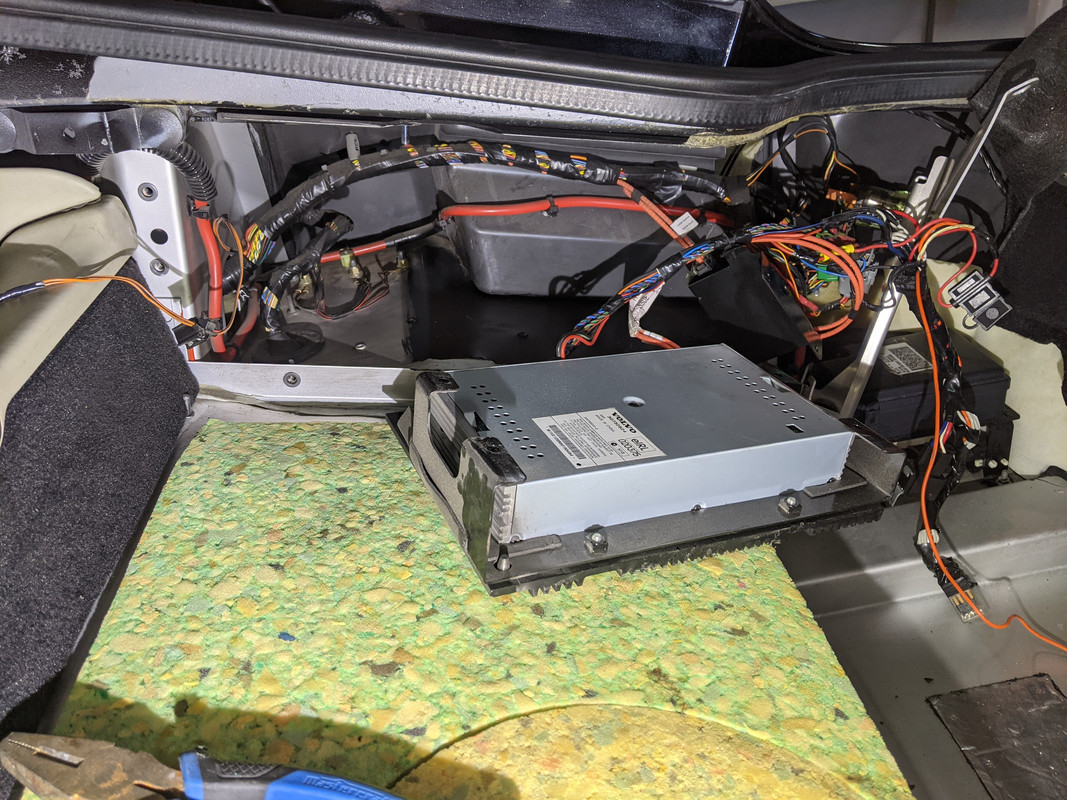
Now I have access to do the swap:
Top tip - the photos show premium audio and therefore a hit as to how they will be installed:
Remove lower boot carpet panel and security cover:
The carpeting just above the petrol tank is removed by unscrewing 6 cargo net hold down screws:
Remove the right side carpeted panel held in by 5 red clips.
I didn't remove tail light as that end of the carpet panel isn't in the way to access the amplifier:
Instructions I followed to remove trim panel:
Once interior light lense was removed and light unplugged, you can access the 10mm nut on the underside of panel:
The forward end of the panel is held in by a large fir tree clip (use a trim tool to pry it out):
Now I have access to do the swap:


Thread Starter
|
Registered User
Joined: Apr 2017
Posts: 399
From: Niagara Region
Rep Power: 29
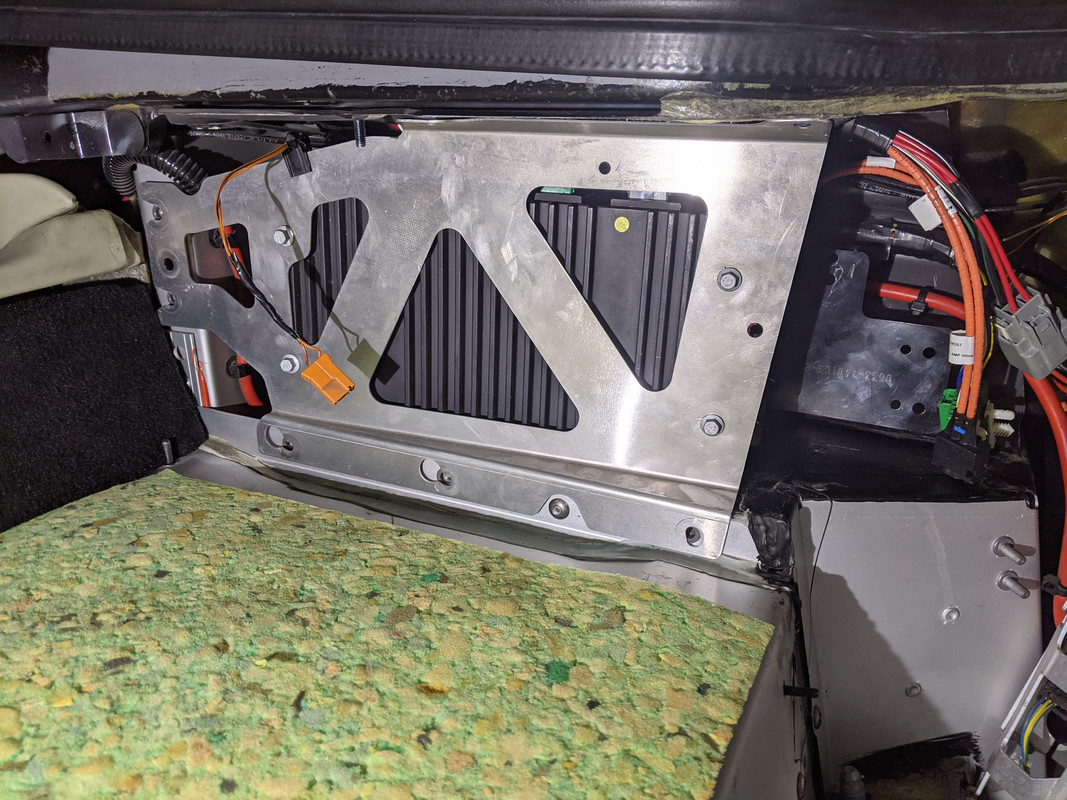
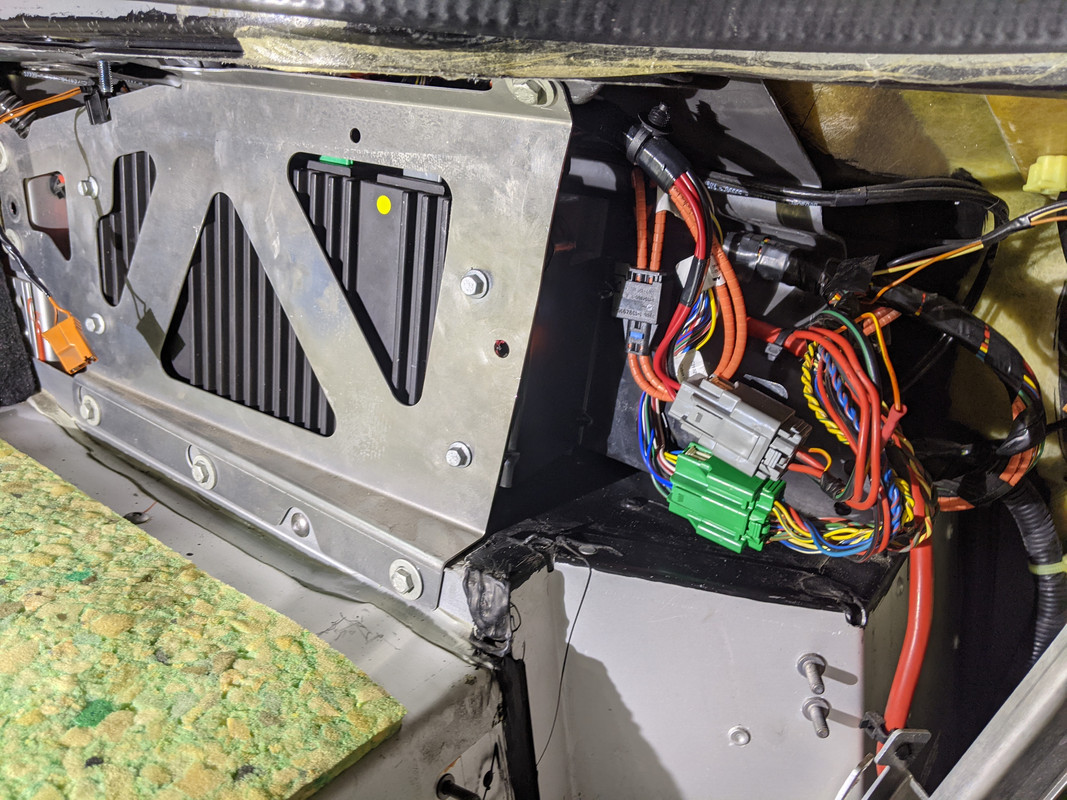
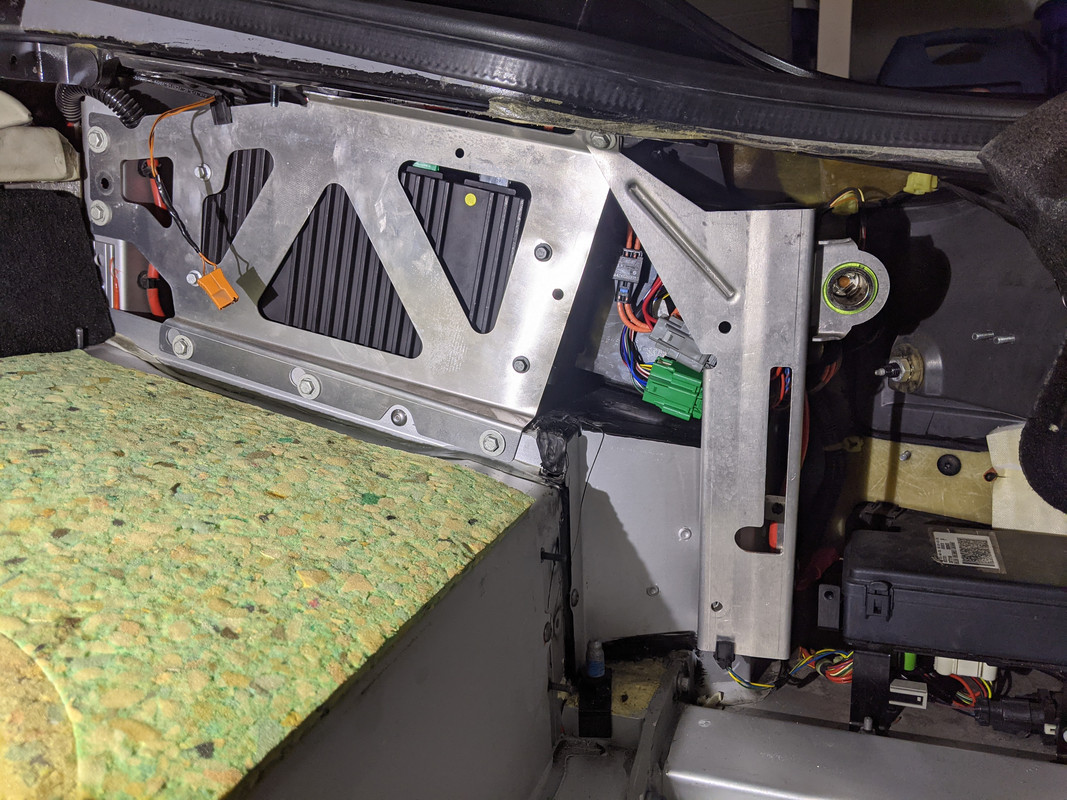
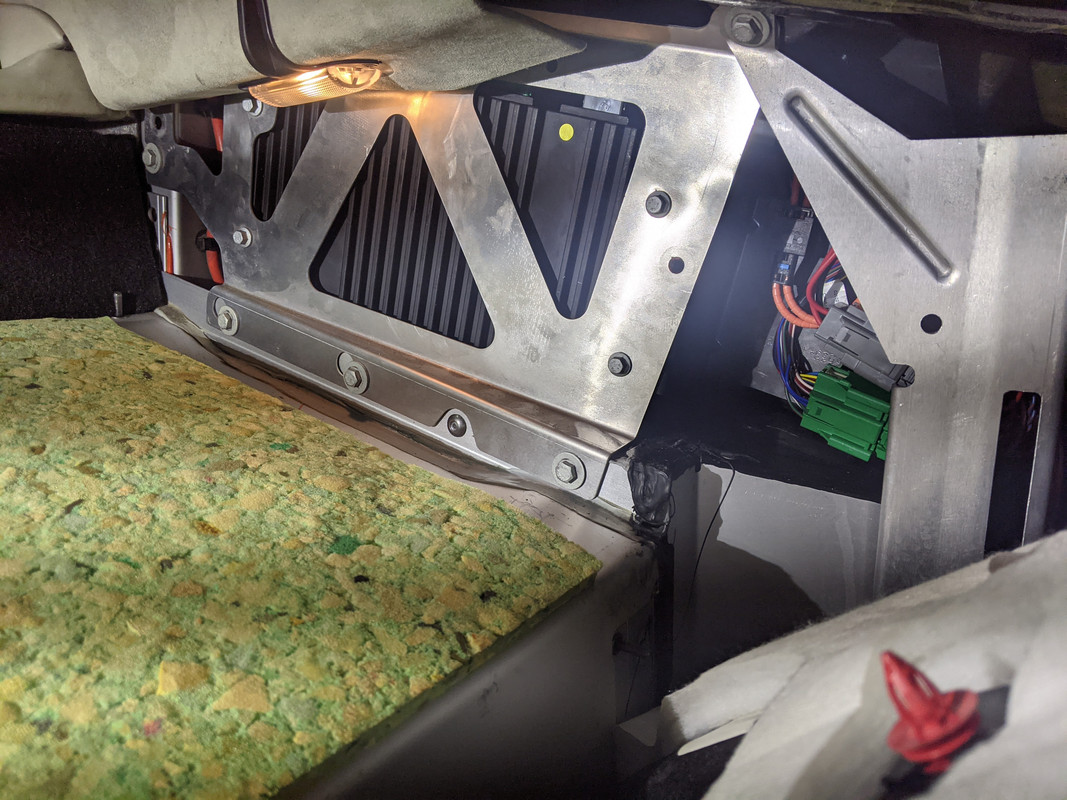
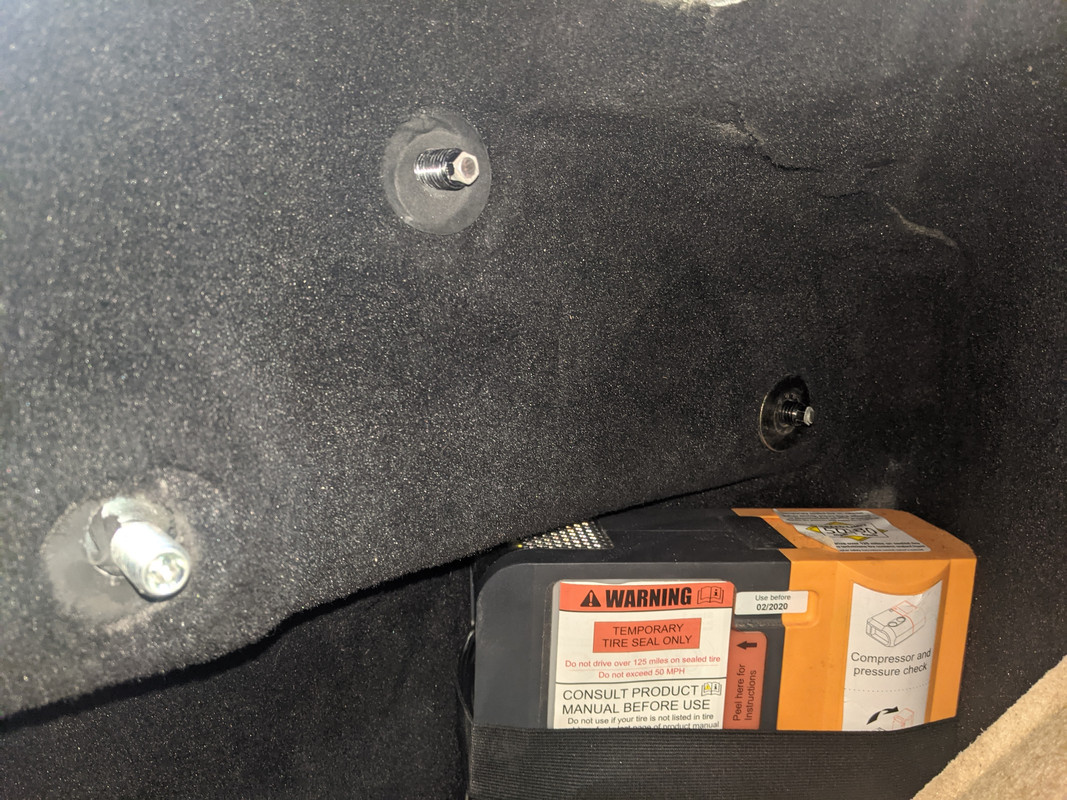
Next remove the power outlet bracket (bolt at the top and two nuts at the bottom):
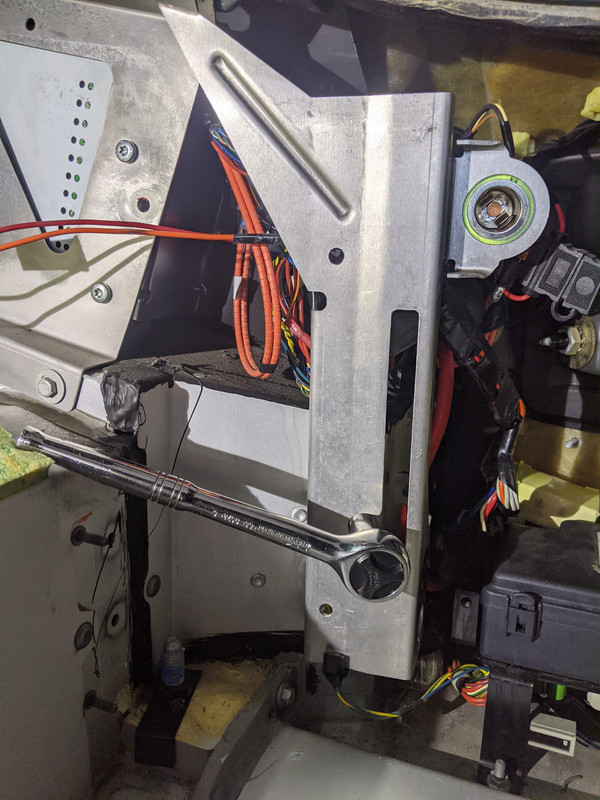
Then 6-10mm bolts to remove the aluminum mounting bracket:
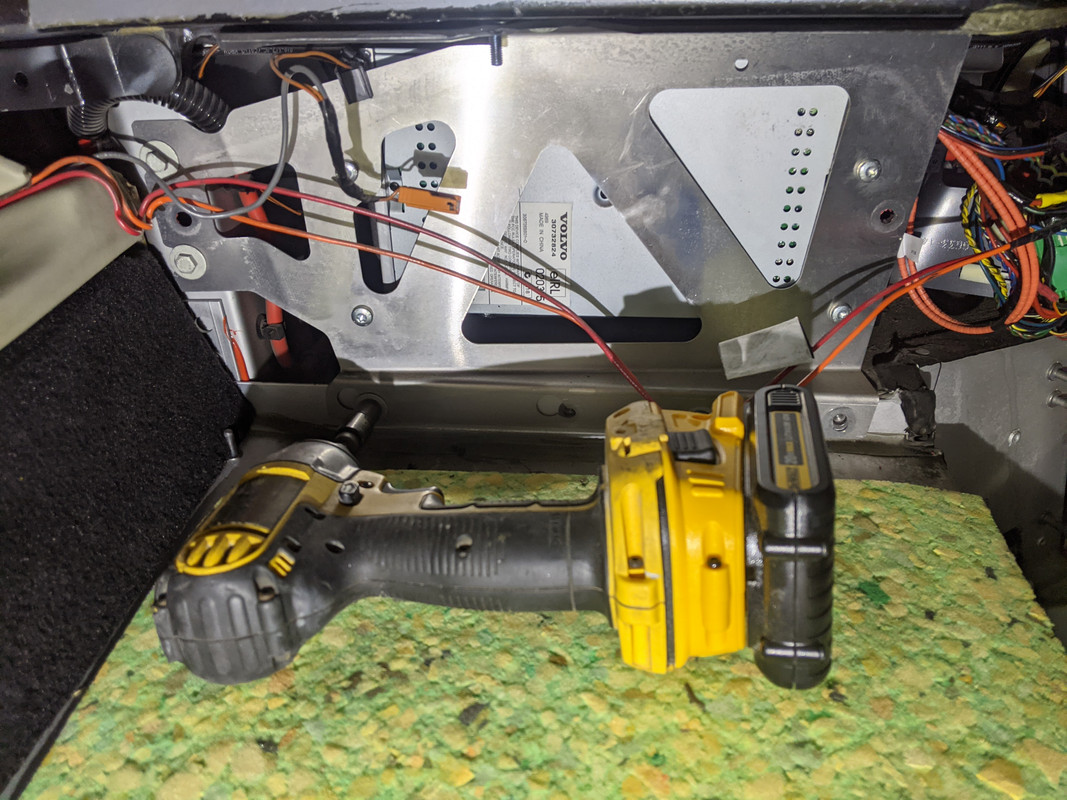
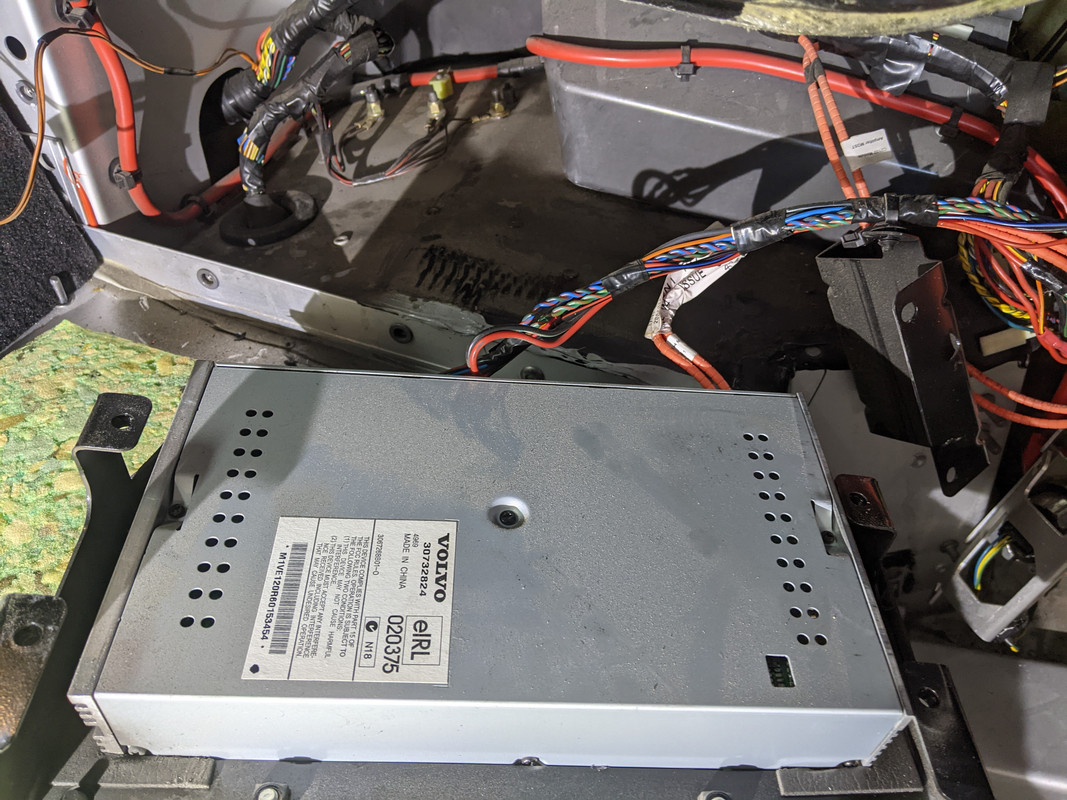
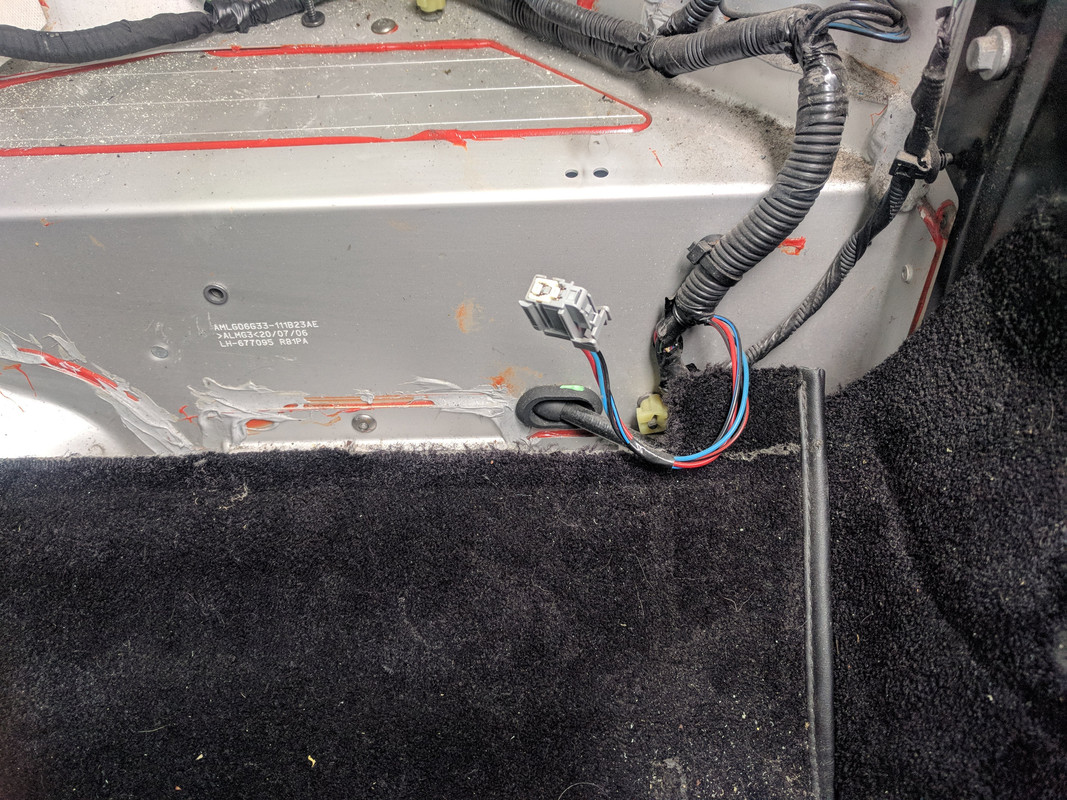
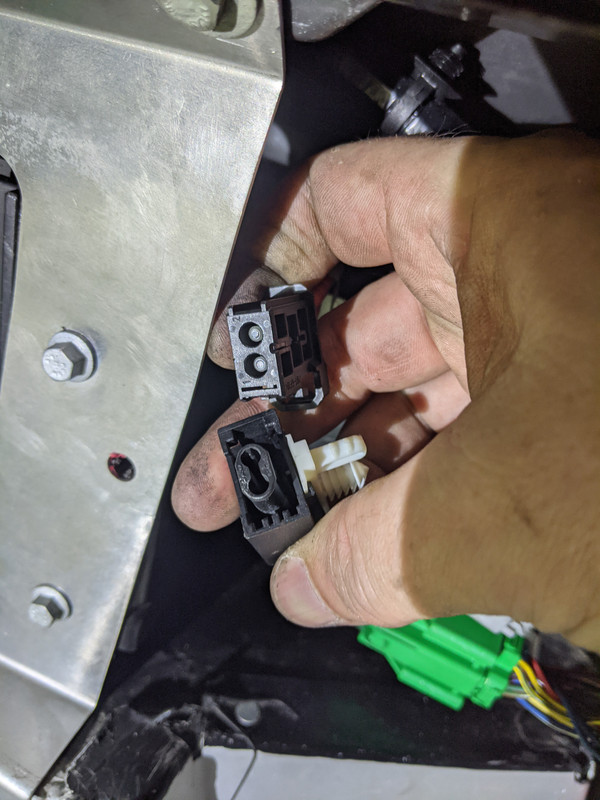
Harness has 3 plugs to unclip:
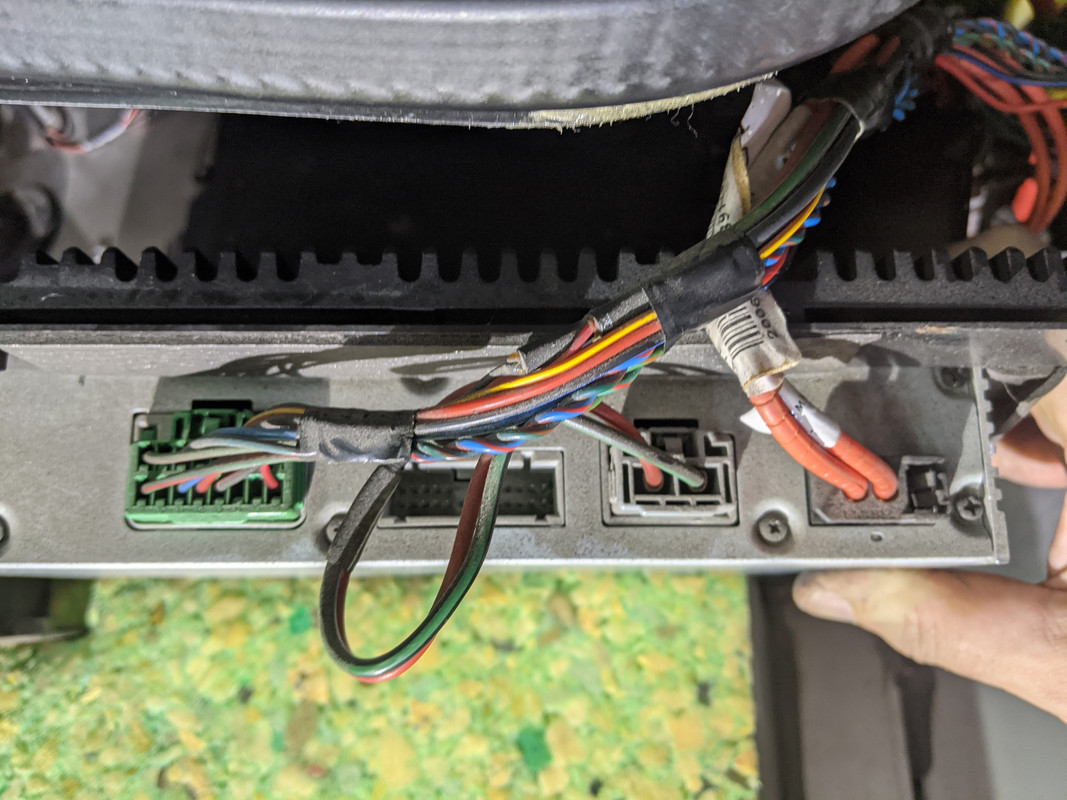
The aluminum cover was removed from this black one with 4 bolts - important it is not reused for the dual amp install:
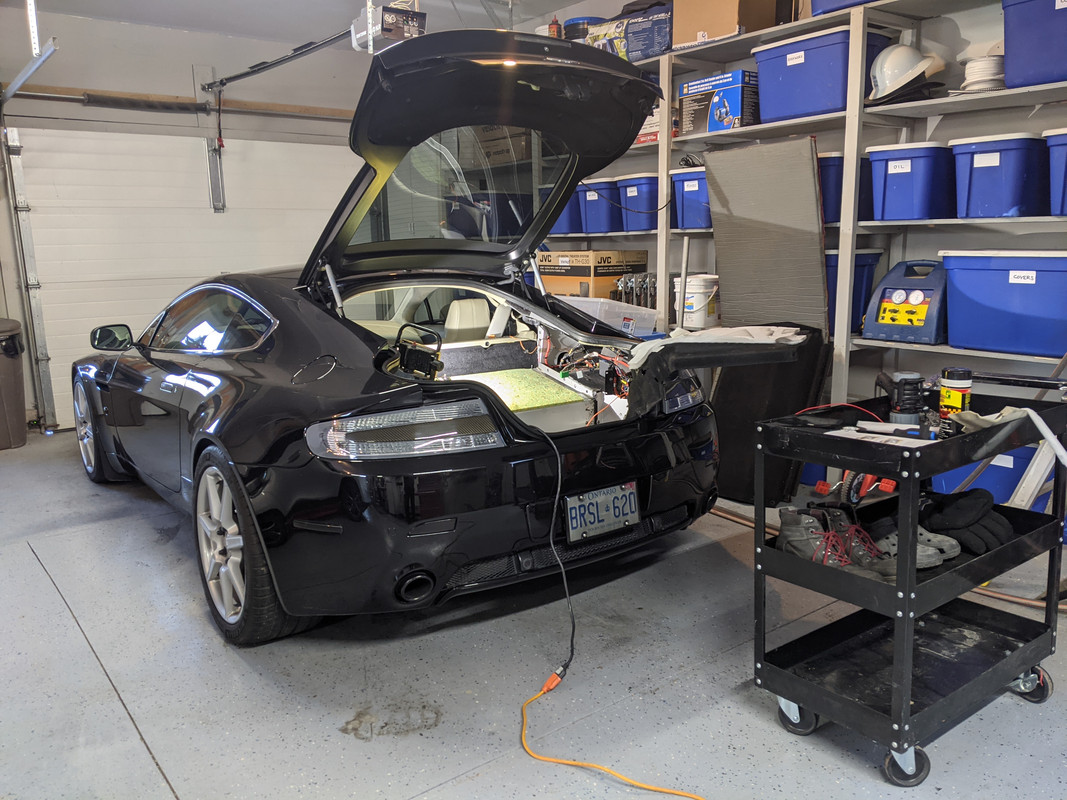
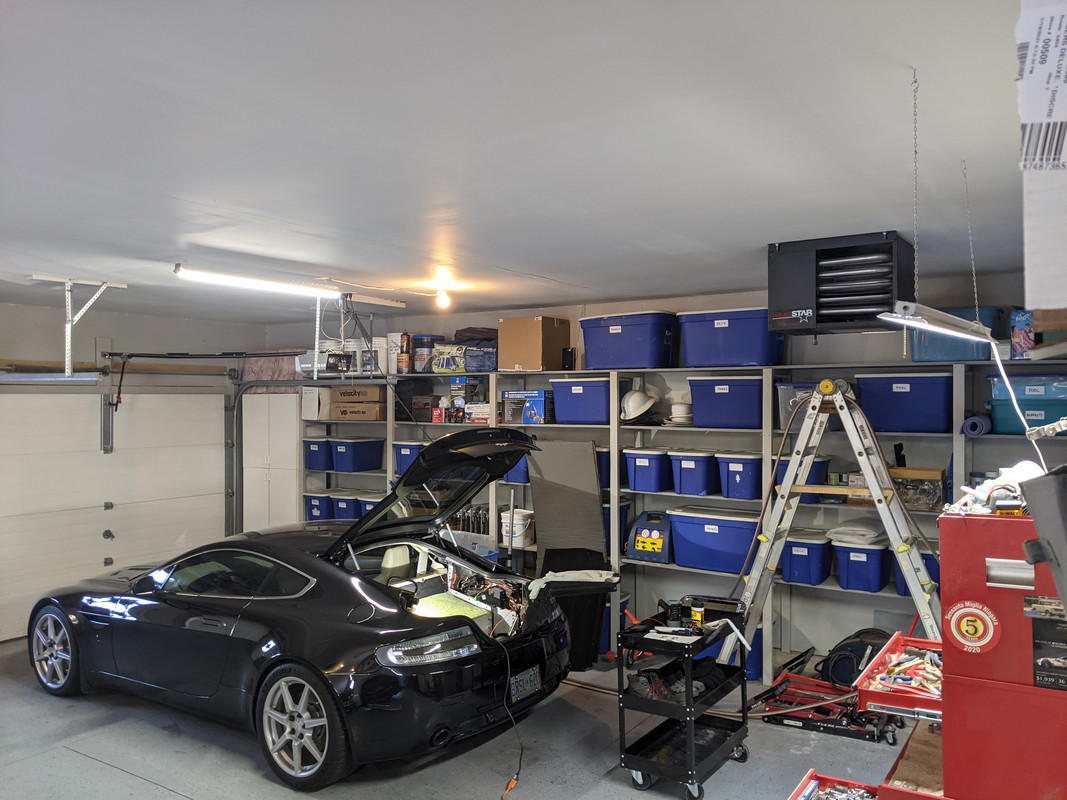
Progress is being made and my new tool cart is coming in handy to also store all the fasteners I am removing:
Then 6-10mm bolts to remove the aluminum mounting bracket:
Harness has 3 plugs to unclip:
The aluminum cover was removed from this black one with 4 bolts - important it is not reused for the dual amp install:
Progress is being made and my new tool cart is coming in handy to also store all the fasteners I am removing:
Thread Starter
|
Registered User
Joined: Apr 2017
Posts: 399
From: Niagara Region
Rep Power: 29
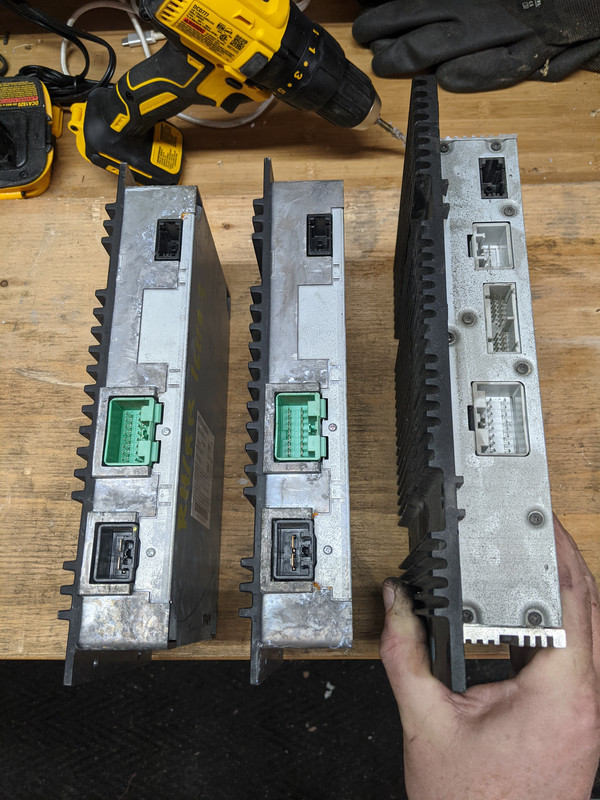
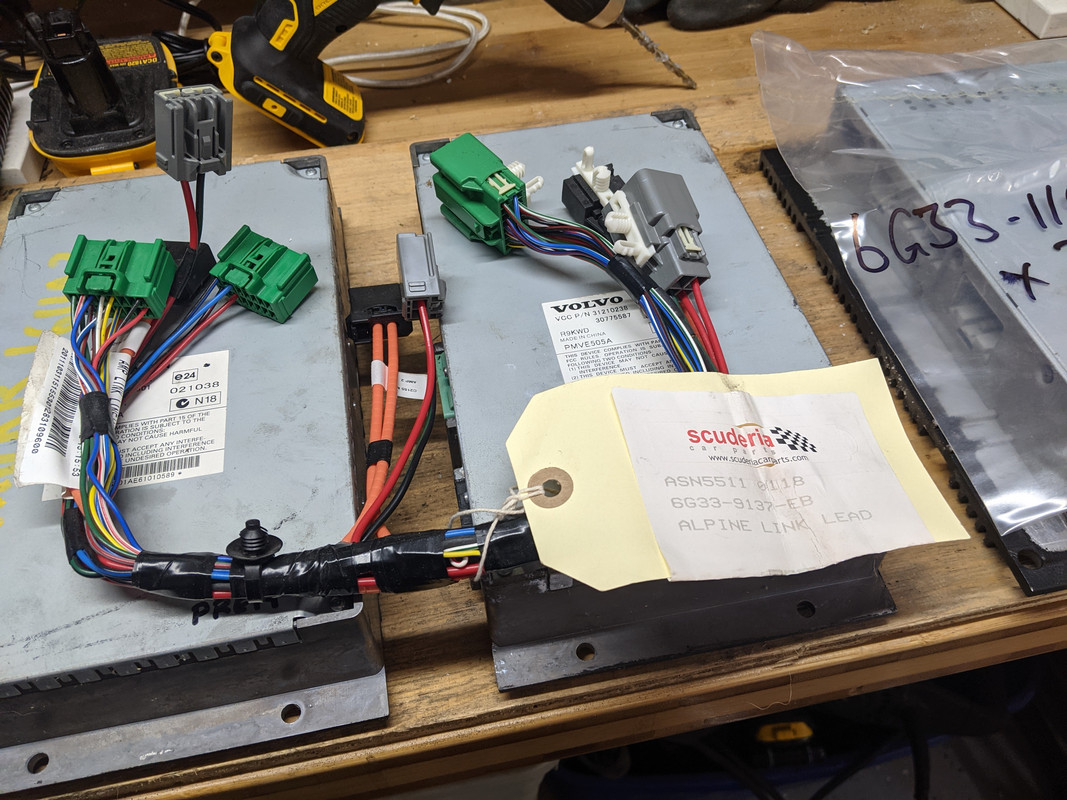
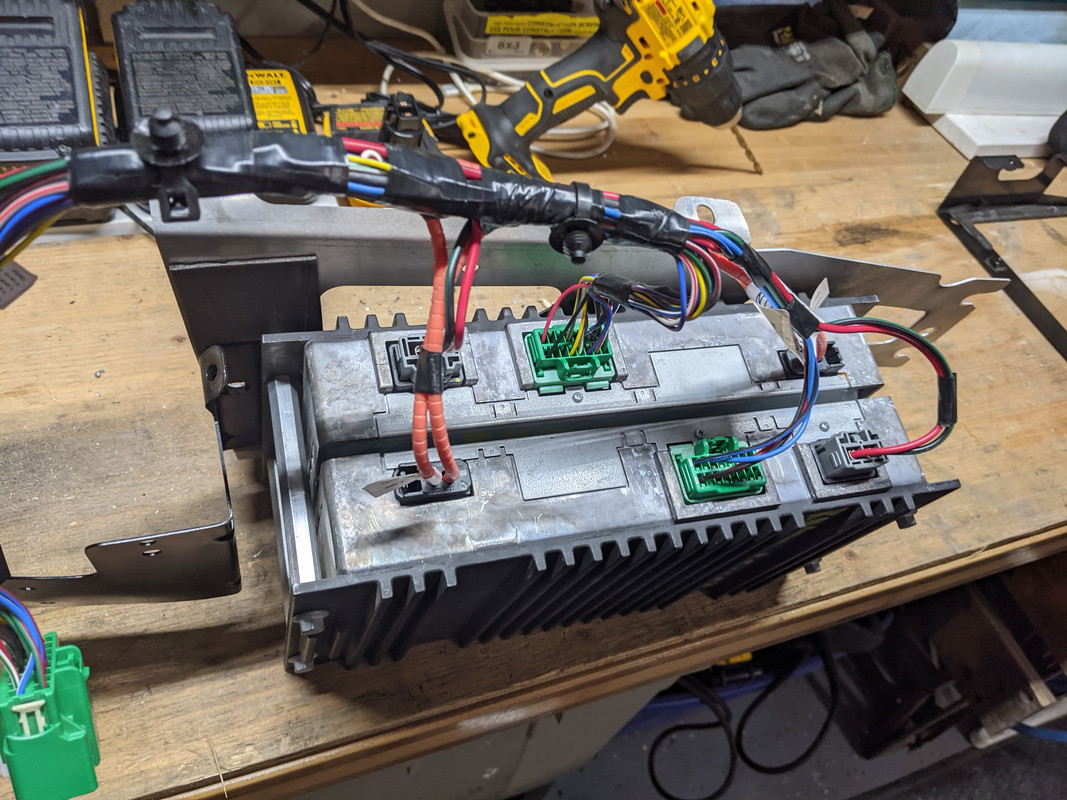
Here's a size comparison of the single versus the dual amps:
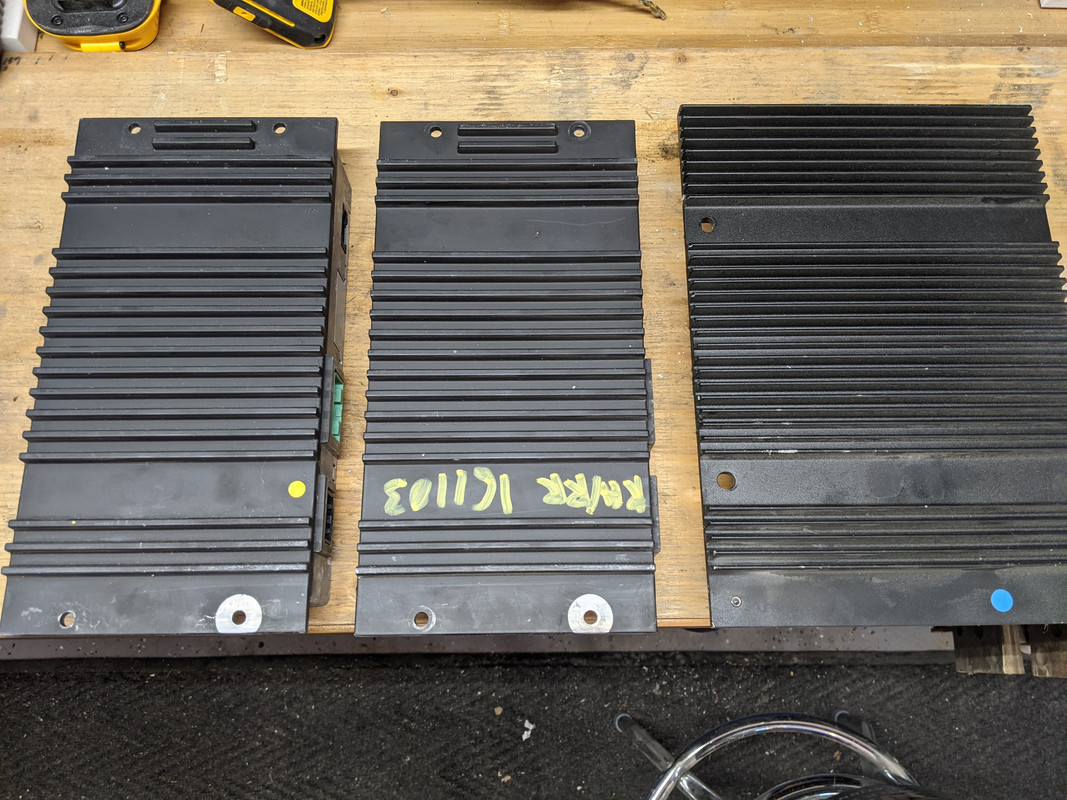
The plugs will still be on the top and the cooling fins with be opposite each other:
Here's the new hardware (8 bolts, 4 bars and 4 spacers):
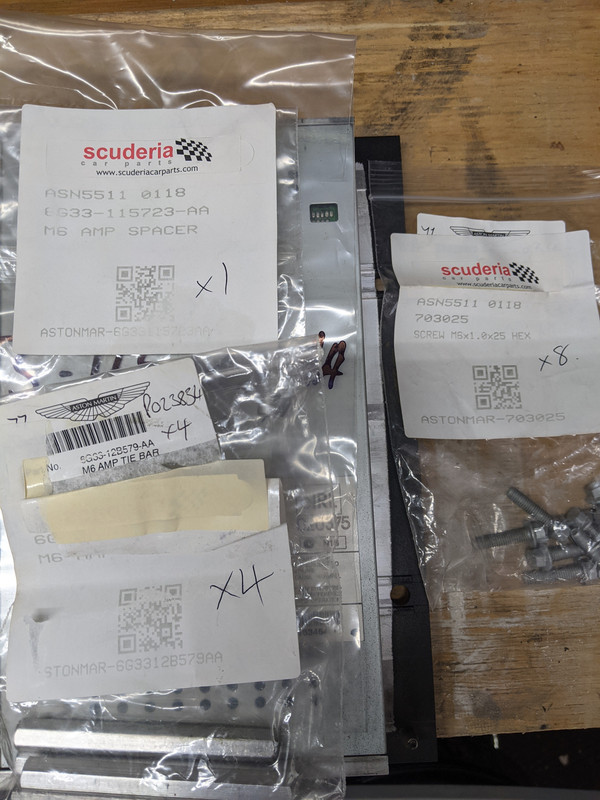
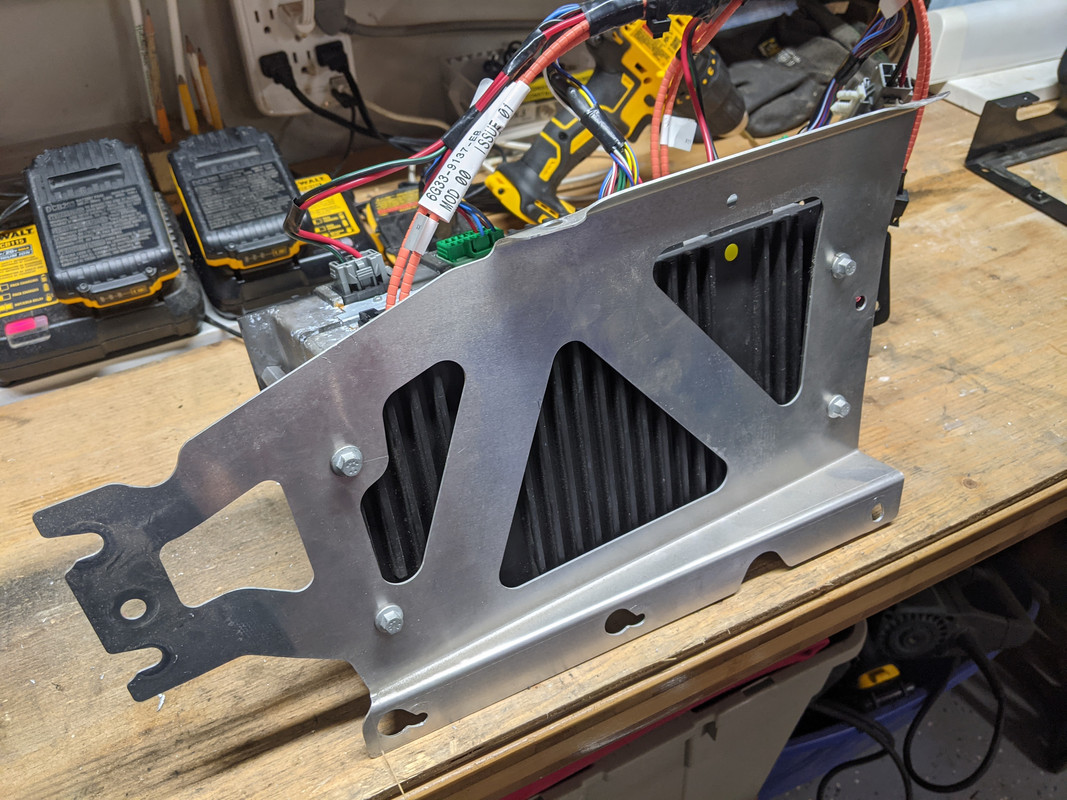
The amps are connected via the 4 spacer bars:
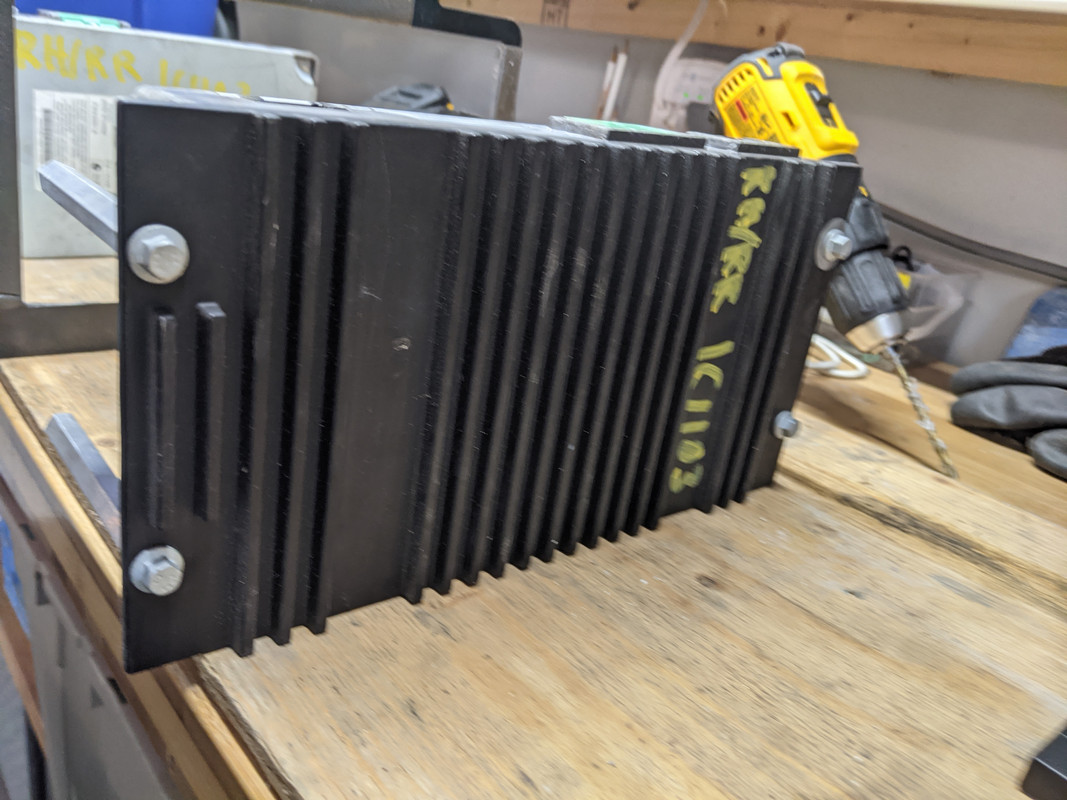
The short spacers are to give clearance for the cooling fins to the aluminum mounting bracket:
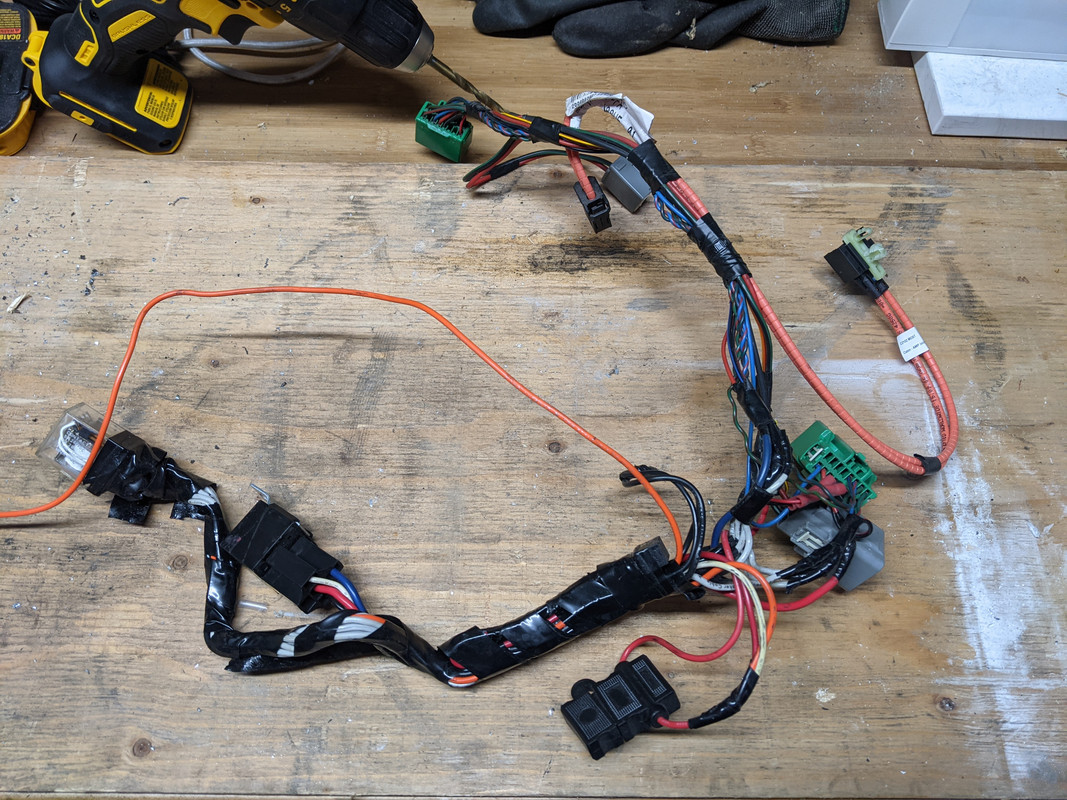
This is the new dual amp harness adapter (think of it as a 2 way splitter).
I found them available used on eBay from Europe and new from US online retailers (just depends how much you want to spend):
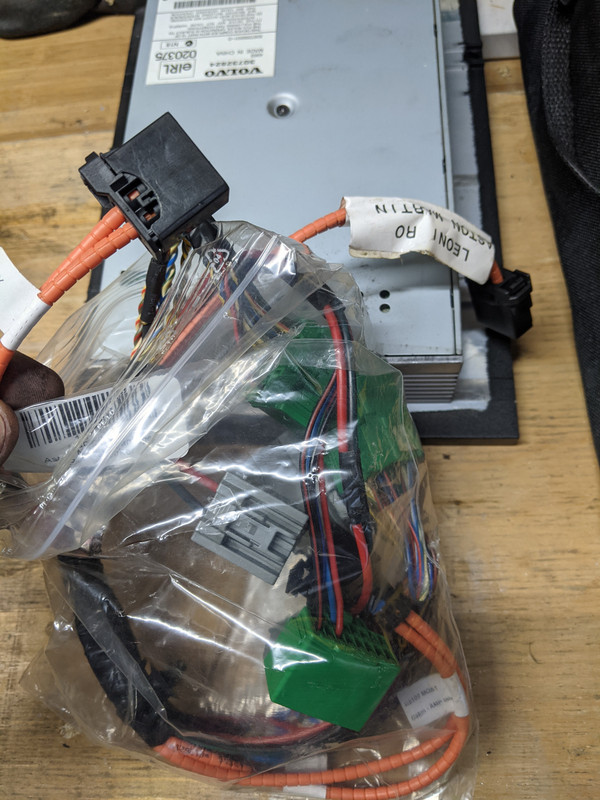
The harness is quite straightforward to plug in due to the varying lengths and helped determine how to orient the pair of amps.
Each amp has a power, speaker input and fiber optic plugs.
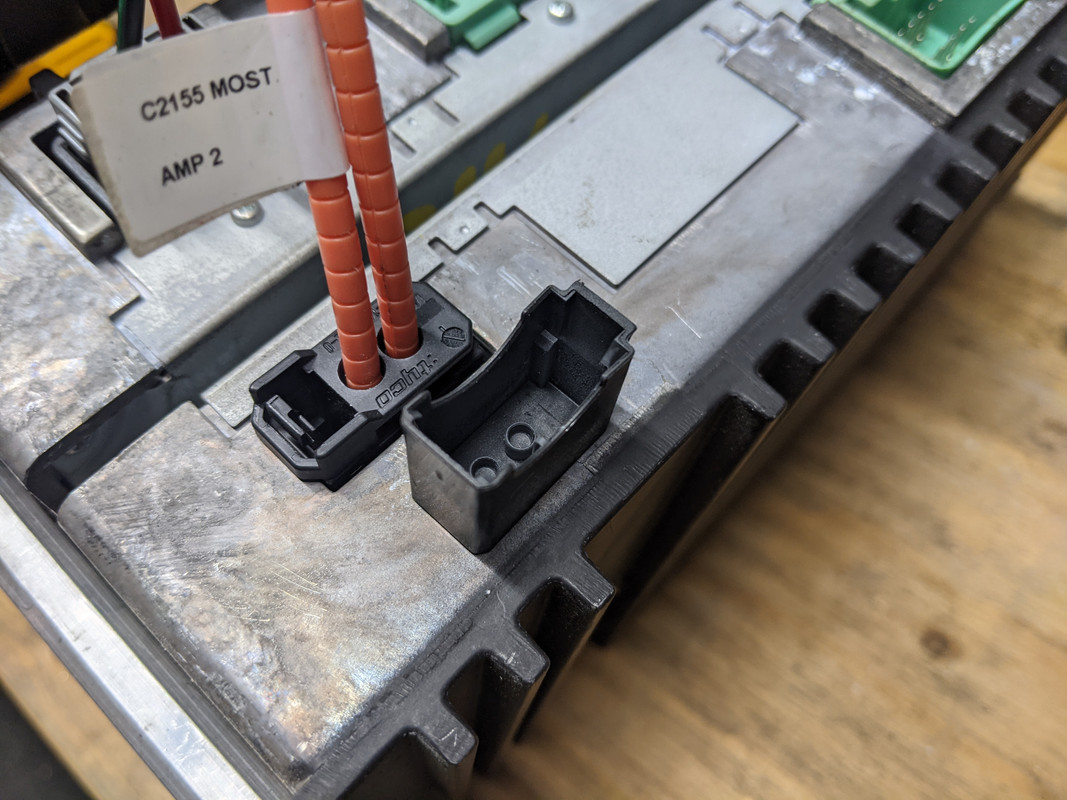
The fiber optic plugs are labelled AMP 1 and AMP 2:
Top Tip -
Amp 1 is for the 5 speakers and mounted closest to the aluminum bracket.
Amp 2 is behind it and is for the Subwoofer hence the fewer input wires on the harness plug.
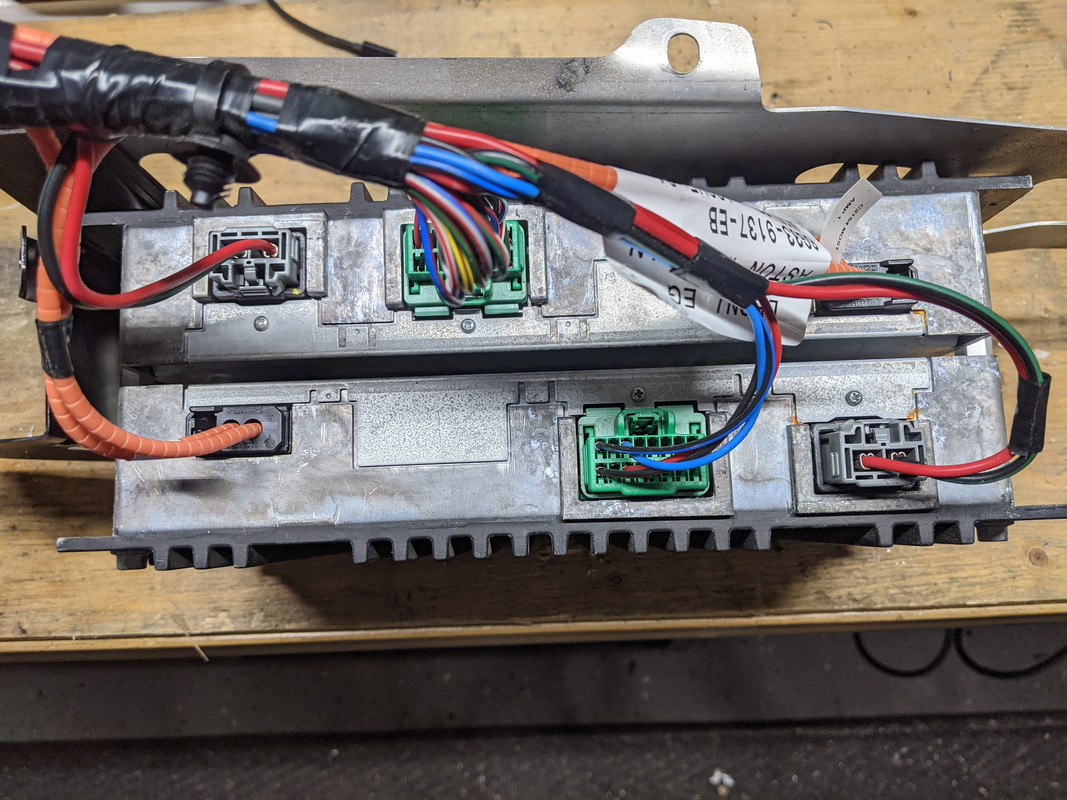
Top Tip - The Fiber Optic cables have protective covers on them so don't panic when they don't fit (they will once the covers are removed)
I also transferred the bracket over that the other end of the harness connectors mount to:
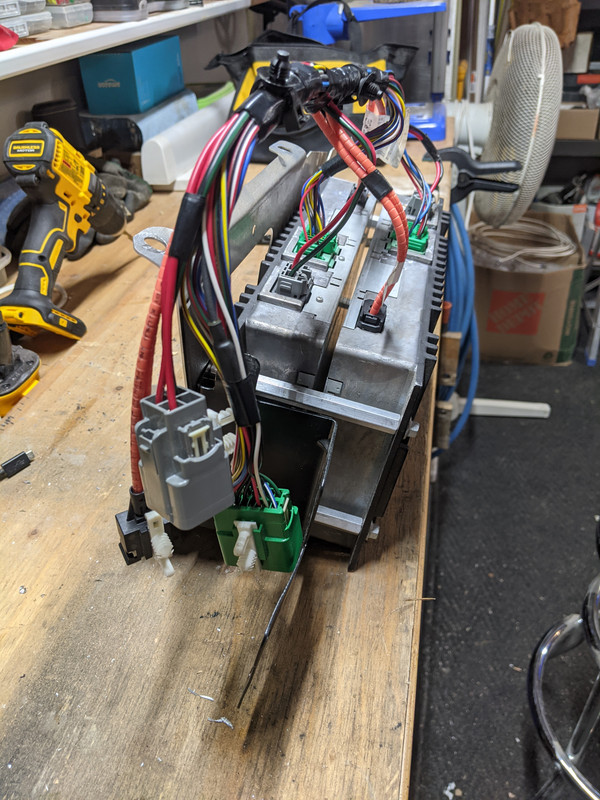
So many angles were shown here as there are very few photos in the shop manual - makes sense as they don't show how to do conversions:
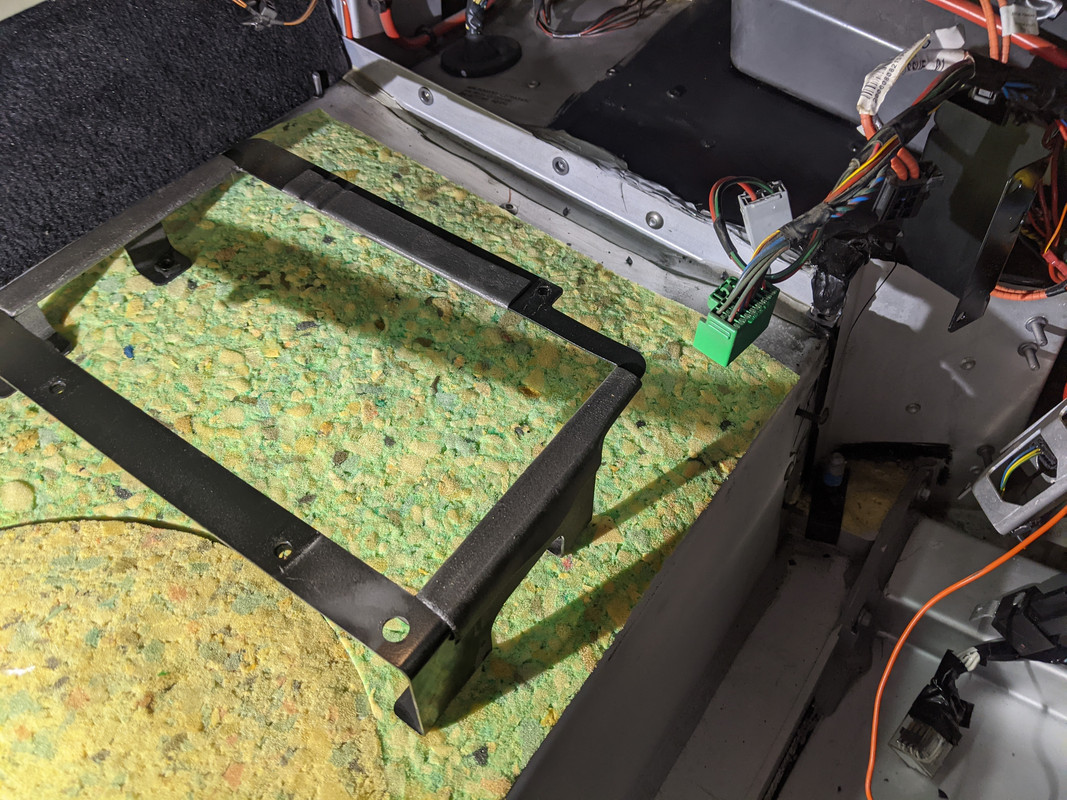
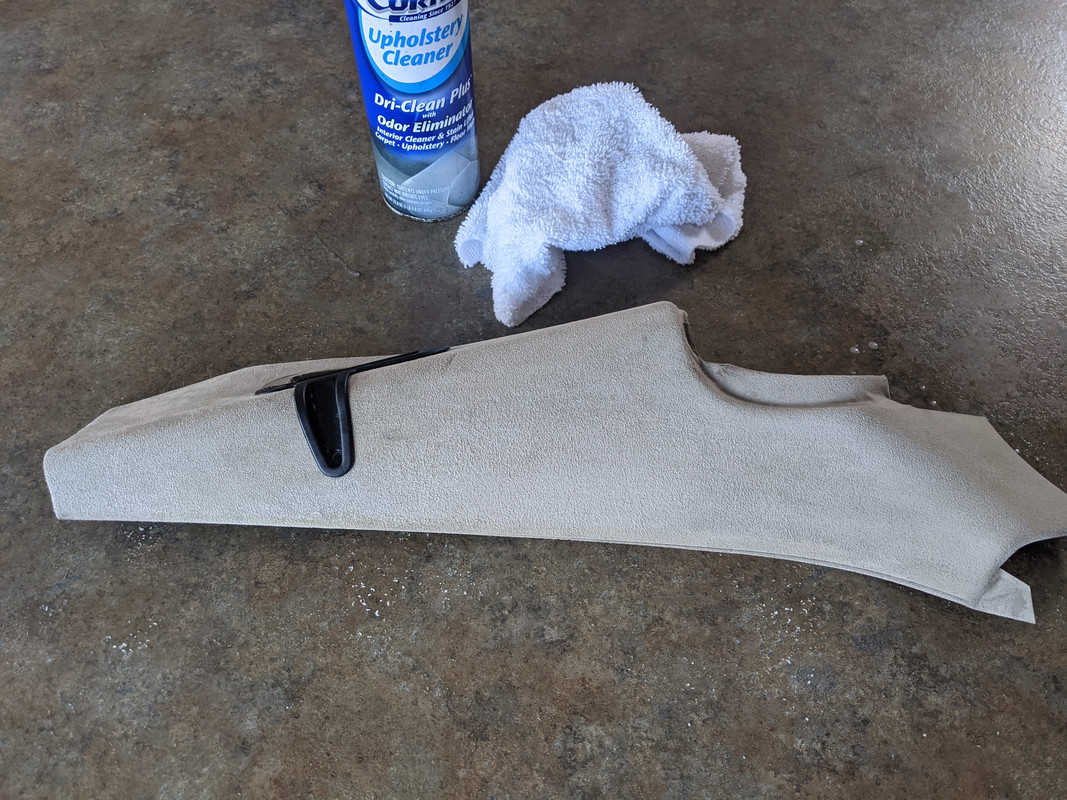
Next I gave the trunk area a good cleaning before reinstalling:
An upholstery cleaner and a brush did a good job of cleaning up the soiled and stained alcantara:
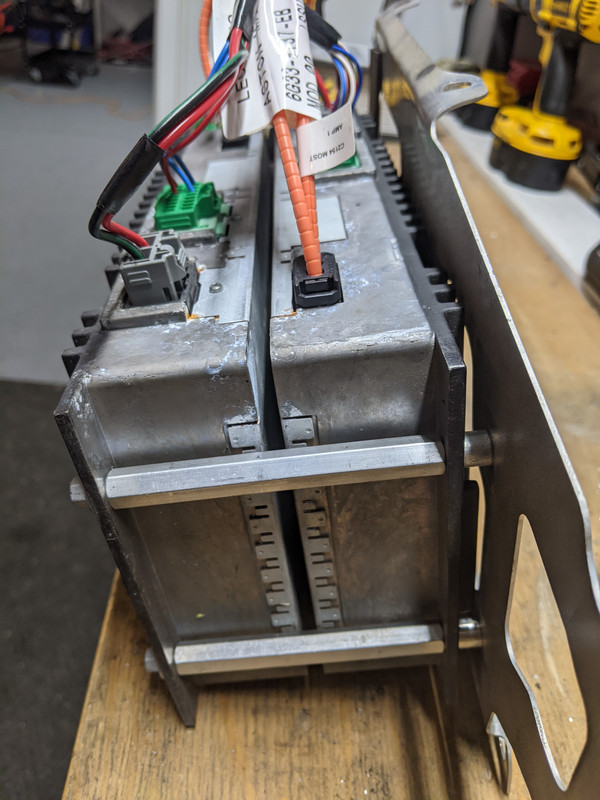
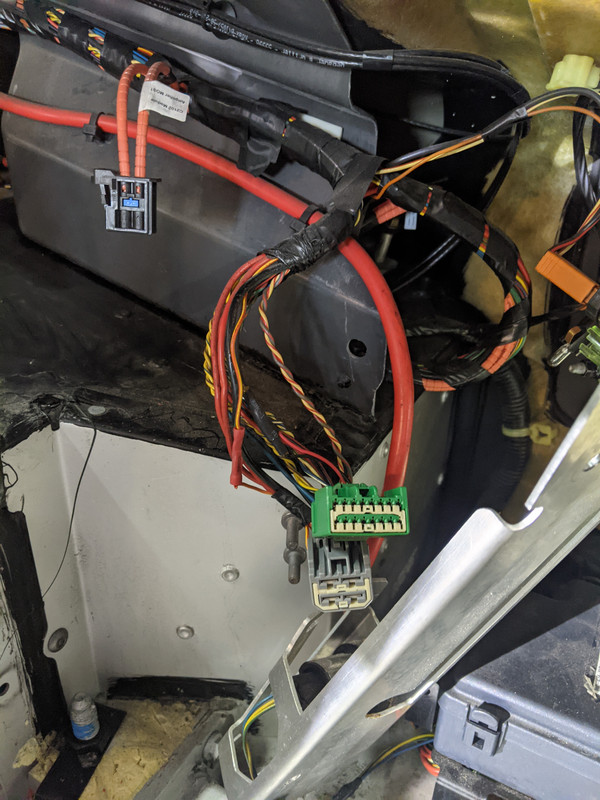
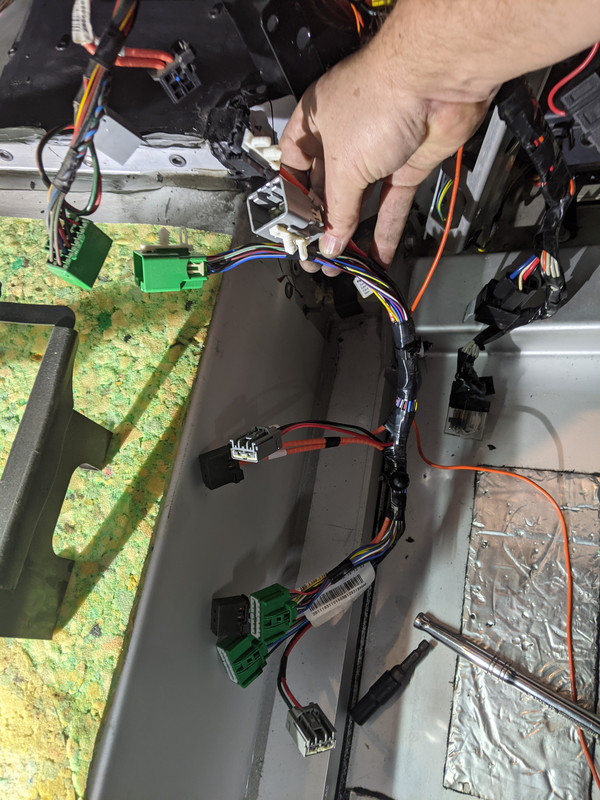
Last thing I realized was that the old harness needed to be removed as the new one will replace it.
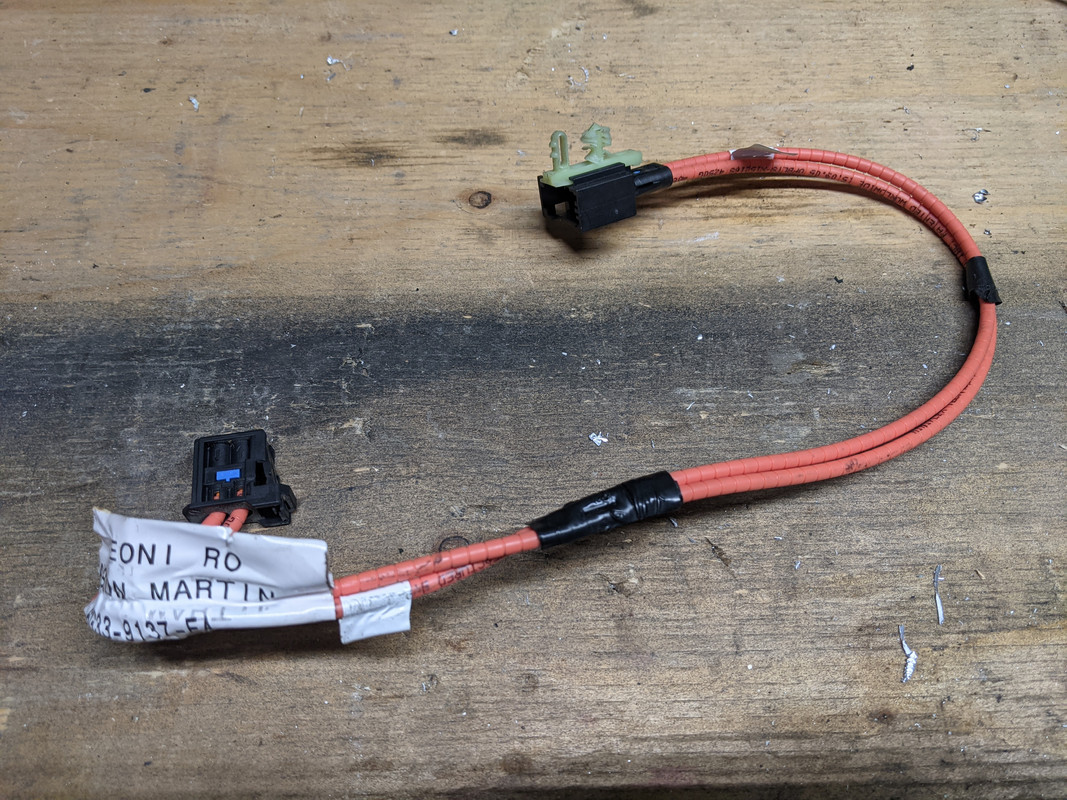
This is the single fiber optic extension that is being replaced as well with the new harness:
As a side benefit, the lower section of aftermarket relays from the previous owners bluetooth and security tracker system is also eliminated:
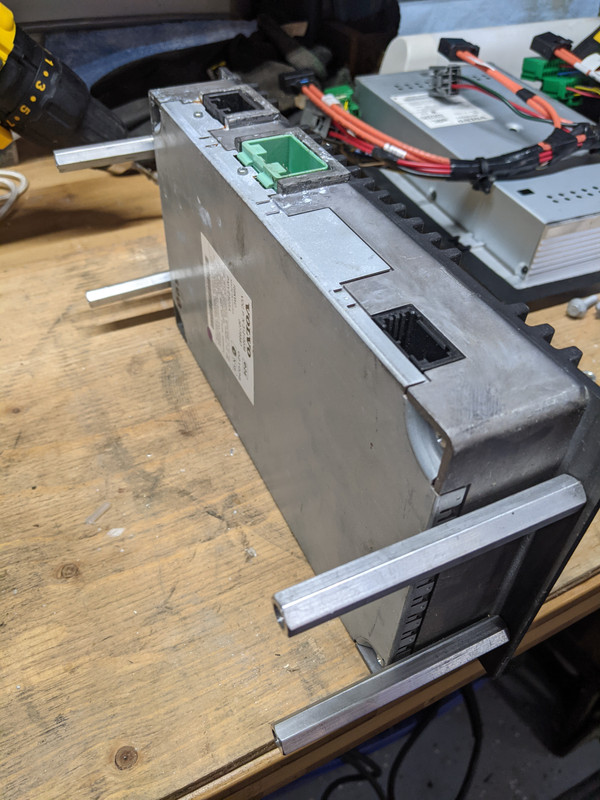
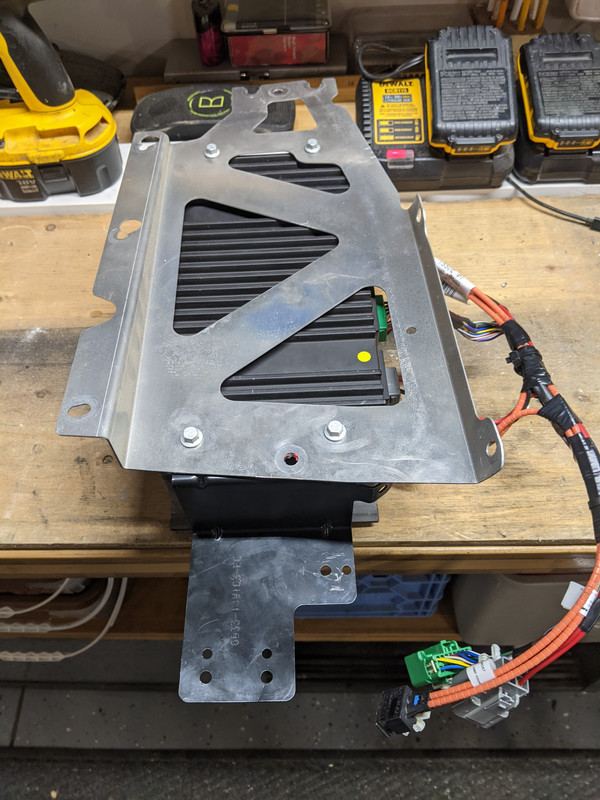
Last check was to take a measurement to ensure the assembly is going to fit with clearance:

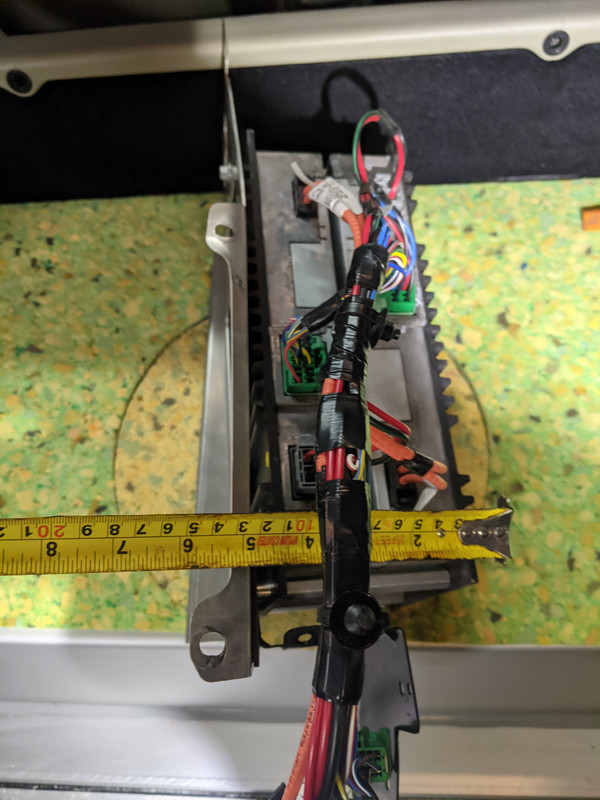
Ready to install and connect the dual amps
The plugs will still be on the top and the cooling fins with be opposite each other:
Here's the new hardware (8 bolts, 4 bars and 4 spacers):
The amps are connected via the 4 spacer bars:
The short spacers are to give clearance for the cooling fins to the aluminum mounting bracket:
This is the new dual amp harness adapter (think of it as a 2 way splitter).
I found them available used on eBay from Europe and new from US online retailers (just depends how much you want to spend):
The harness is quite straightforward to plug in due to the varying lengths and helped determine how to orient the pair of amps.
Each amp has a power, speaker input and fiber optic plugs.
The fiber optic plugs are labelled AMP 1 and AMP 2:
Top Tip -
Amp 1 is for the 5 speakers and mounted closest to the aluminum bracket.
Amp 2 is behind it and is for the Subwoofer hence the fewer input wires on the harness plug.
Top Tip - The Fiber Optic cables have protective covers on them so don't panic when they don't fit (they will once the covers are removed)
I also transferred the bracket over that the other end of the harness connectors mount to:
So many angles were shown here as there are very few photos in the shop manual - makes sense as they don't show how to do conversions:
Next I gave the trunk area a good cleaning before reinstalling:
An upholstery cleaner and a brush did a good job of cleaning up the soiled and stained alcantara:
Last thing I realized was that the old harness needed to be removed as the new one will replace it.
This is the single fiber optic extension that is being replaced as well with the new harness:
As a side benefit, the lower section of aftermarket relays from the previous owners bluetooth and security tracker system is also eliminated:
Last check was to take a measurement to ensure the assembly is going to fit with clearance:
Ready to install and connect the dual amps
Last edited by 007V8Vantage; Feb 6, 2021 at 03:32 PM.
Thread Starter
|
Registered User
Joined: Apr 2017
Posts: 399
From: Niagara Region
Rep Power: 29
Ok I bolted in the new assembly complete with brackets as one unit:
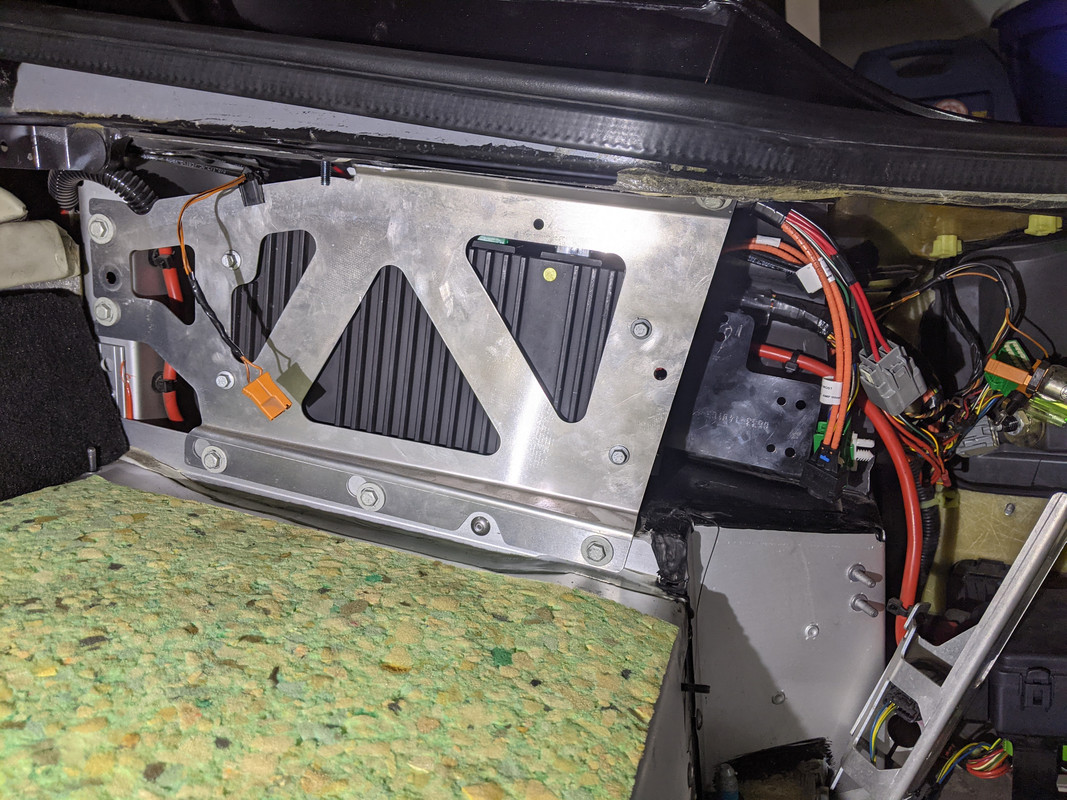
When connecting the 3 harness plugs, you will again see a protective cover on the amps end of the fiber optic cable.
Just pull the plastic cap off so you can connect them:

Next the harness plugs are attached to the black metal bracket via the integrated clips on the plugs:
Next install the power outlet bracket:
Then before installing the carpet do a audio check - all speakers should work except the subwoofer if you've done things correctly.
Re-insert the red clips into the carpet slots:
Press them into the holes in the aluminium bracket working from the back of the car to front:
Install the alcantara trim above the carpet using the 10mm nut and fir tree clip and then plug in light and snap in the lens cover:
Trunk floor carpets can go back in:
Installation is complete other than a dealer reflash of PCM to enable Premium Audio at the head unit.
Cheers,
Ryan
When connecting the 3 harness plugs, you will again see a protective cover on the amps end of the fiber optic cable.
Just pull the plastic cap off so you can connect them:
Next the harness plugs are attached to the black metal bracket via the integrated clips on the plugs:
Next install the power outlet bracket:
Then before installing the carpet do a audio check - all speakers should work except the subwoofer if you've done things correctly.
Re-insert the red clips into the carpet slots:
Press them into the holes in the aluminium bracket working from the back of the car to front:
Install the alcantara trim above the carpet using the 10mm nut and fir tree clip and then plug in light and snap in the lens cover:
Trunk floor carpets can go back in:
Installation is complete other than a dealer reflash of PCM to enable Premium Audio at the head unit.
Cheers,
Ryan
Thread Starter
|
Registered User
Joined: Apr 2017
Posts: 399
From: Niagara Region
Rep Power: 29
Thanks Ron for looking!
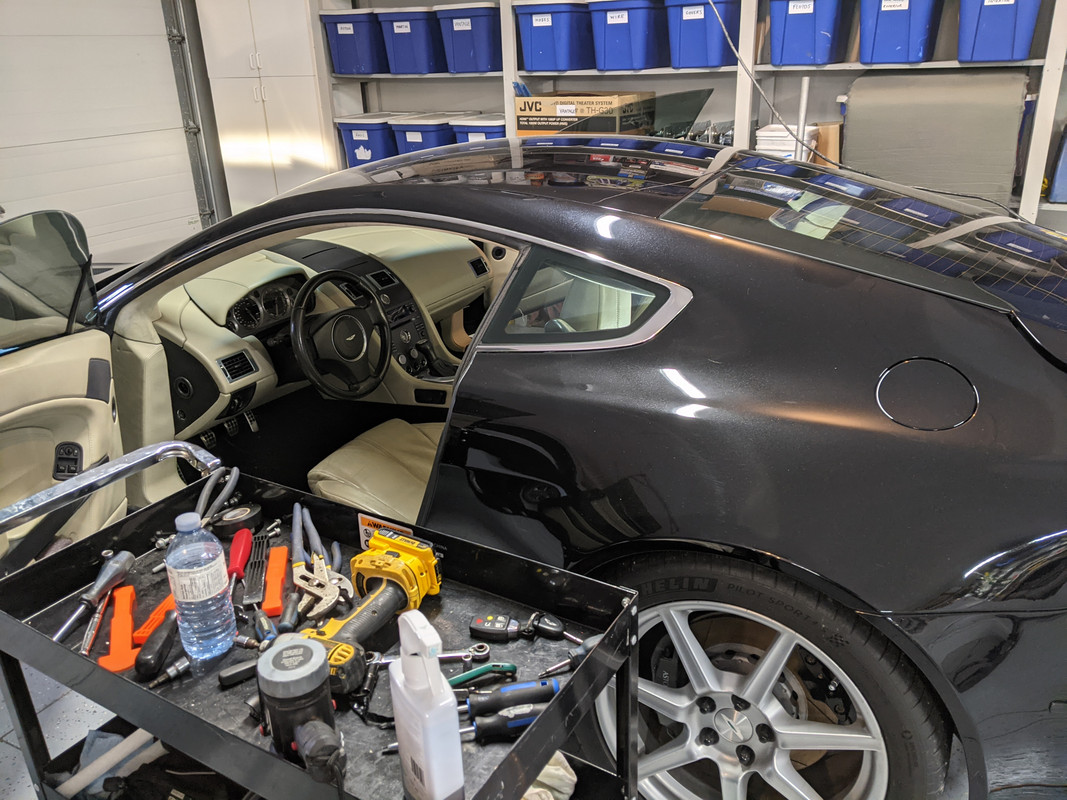
Something I've been planning to do for a while on my list was to eliminate the roof mounted FM antenna.
The Vantage lines are too nice to be interrupted by the roof mounted antenna IMHO - it's no wonder the factory eliminated it from 2008 MY on.
A shorter aerial was a nice interim modification and simple to do, but I decided to take it to the next level.
Backstory: The only radio station I listened to in the Aston doesn't come in clearly since I moved out of the city.
Often on drives I don't have the stereo on but when I do, I listen to preloaded CD's or Spotify streaming via my smartphone and a bluetooth FM transmitter.
Therefore I will be either reinstalling it horizontally within the headliner or unplugging it and removing it altogether which will ensure an quiet FM frequency for the bluetooth.
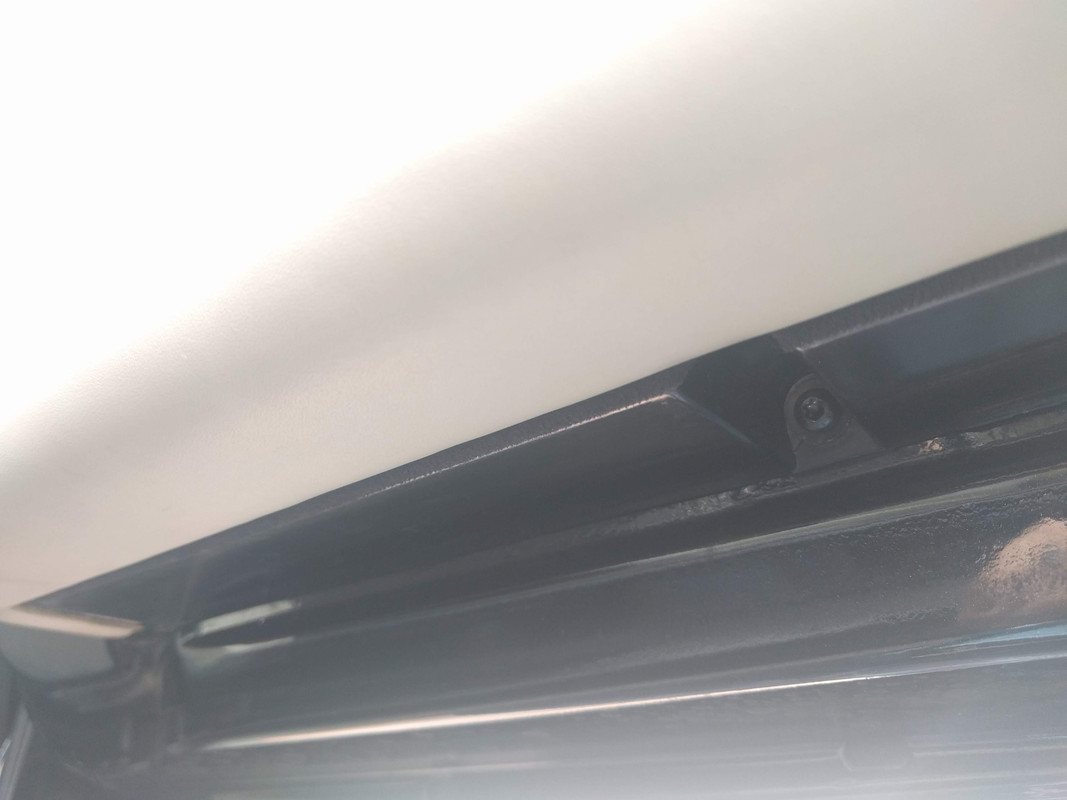
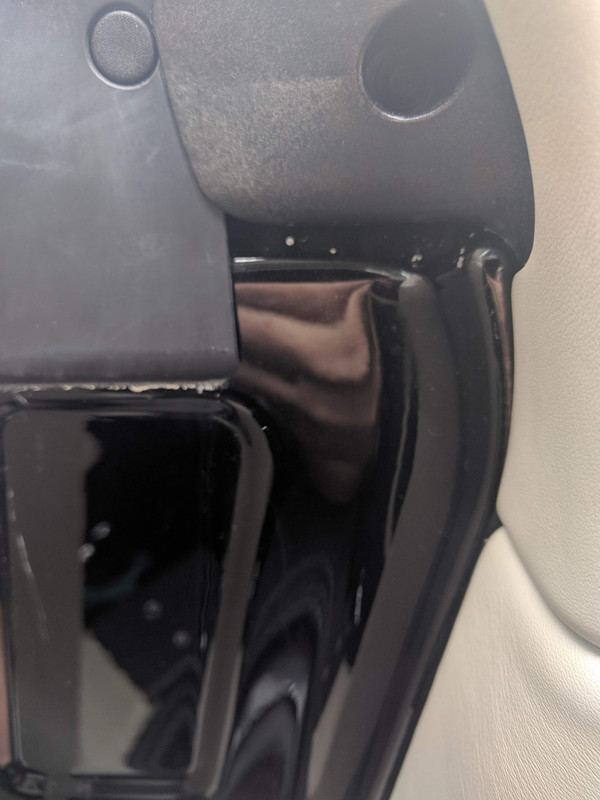
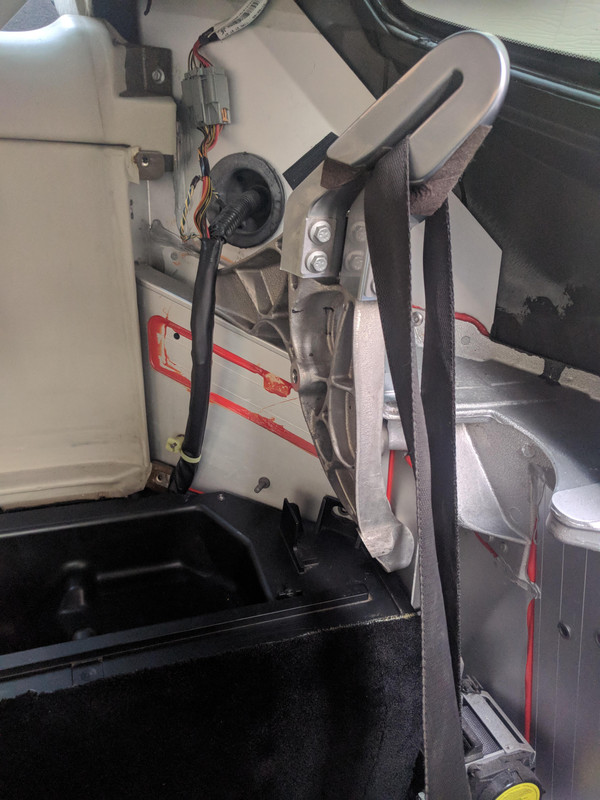
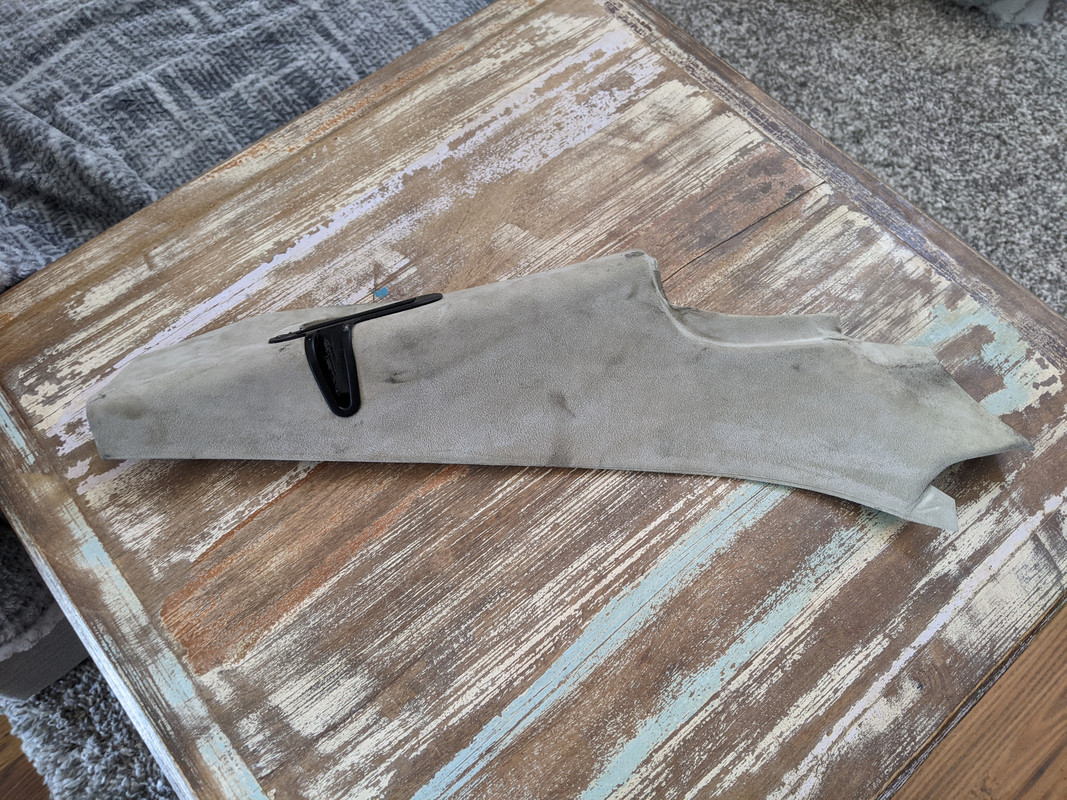
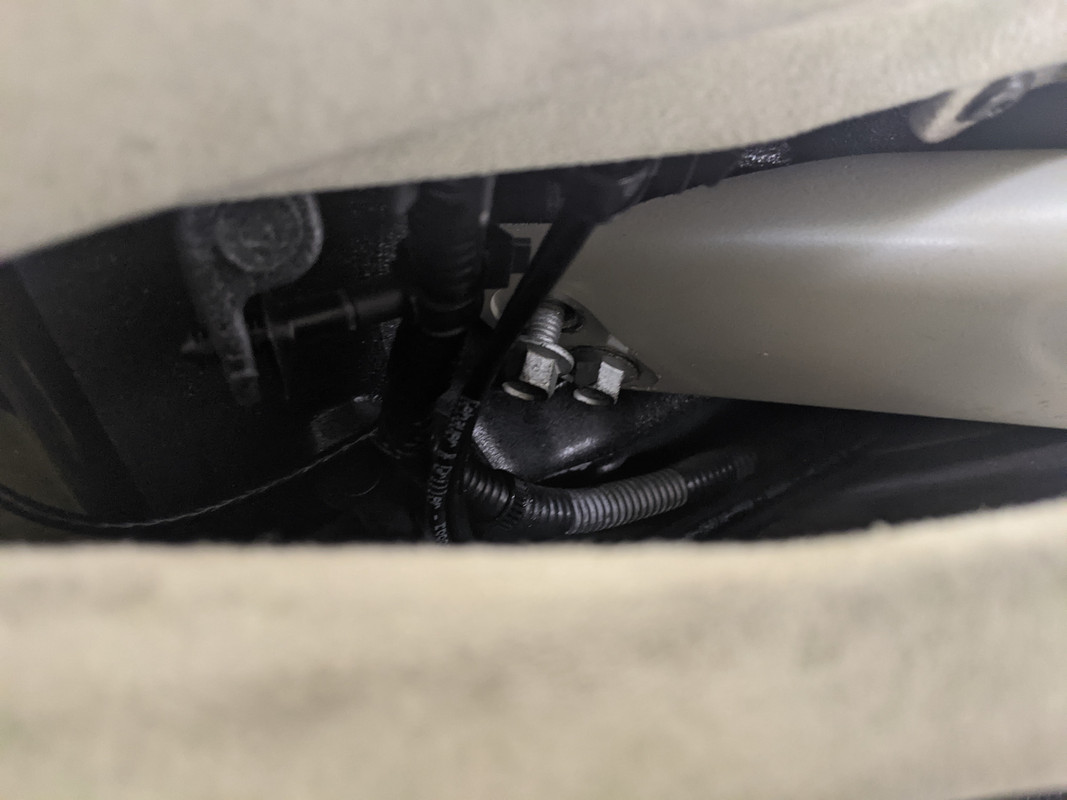
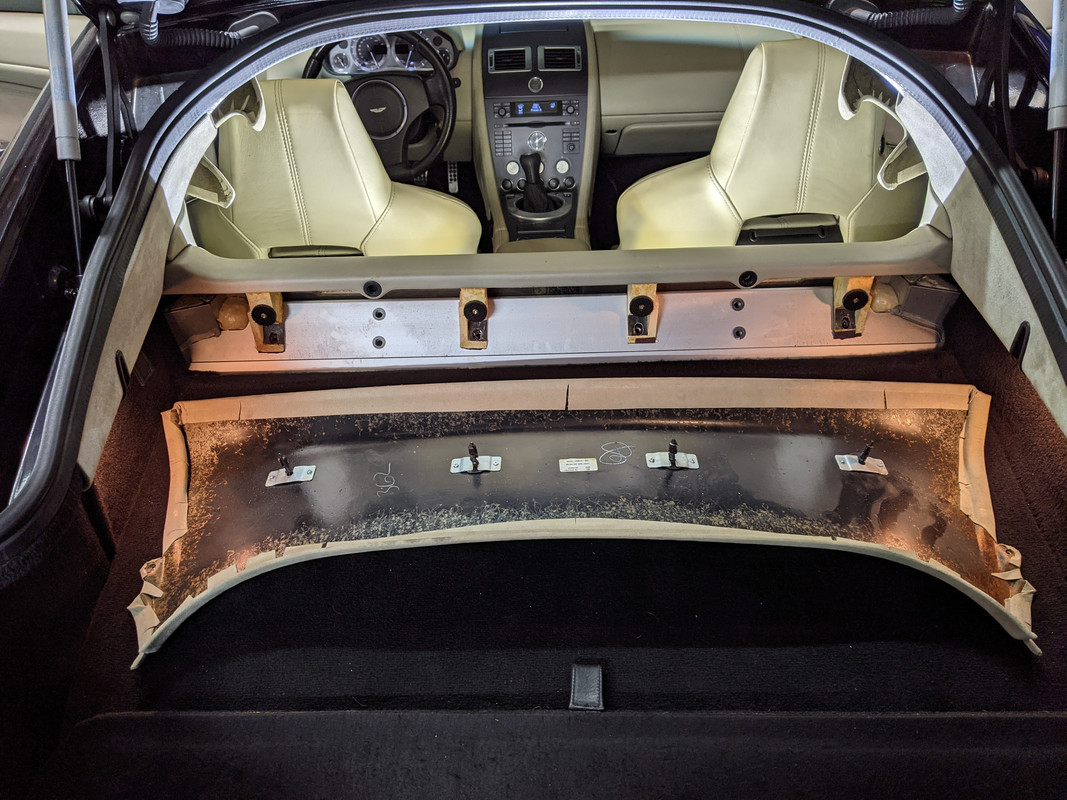
Ok here are the photos I took gaining access to the aerial:
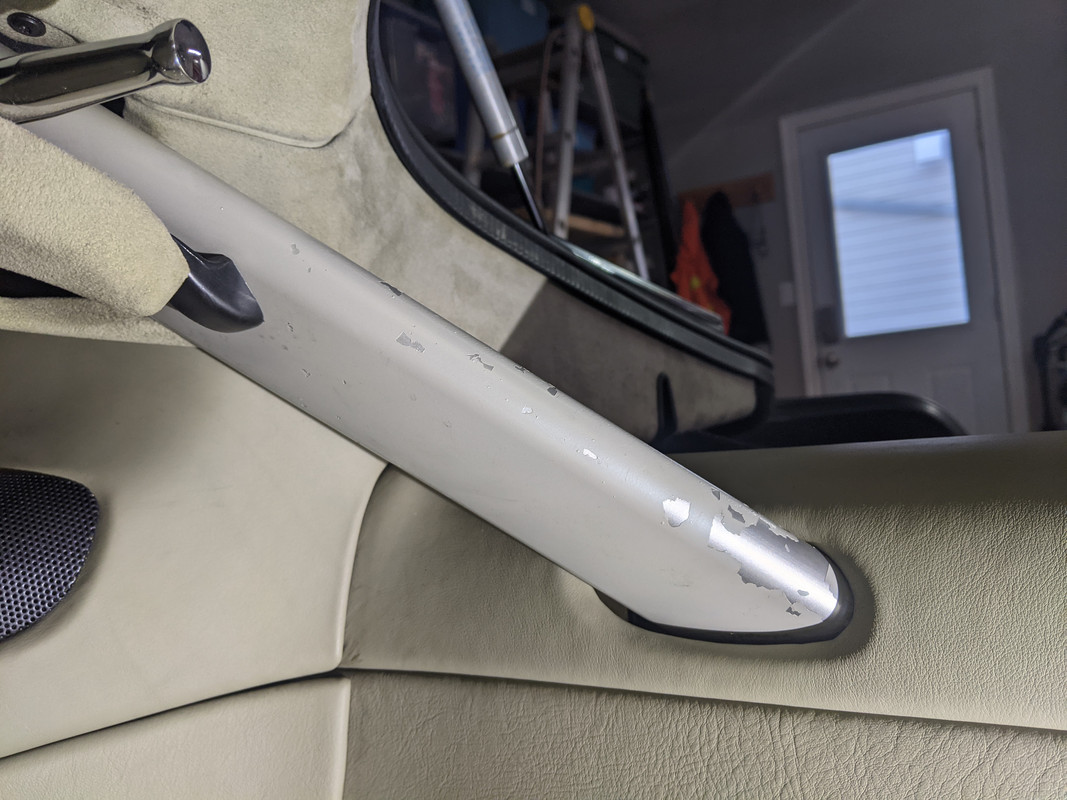
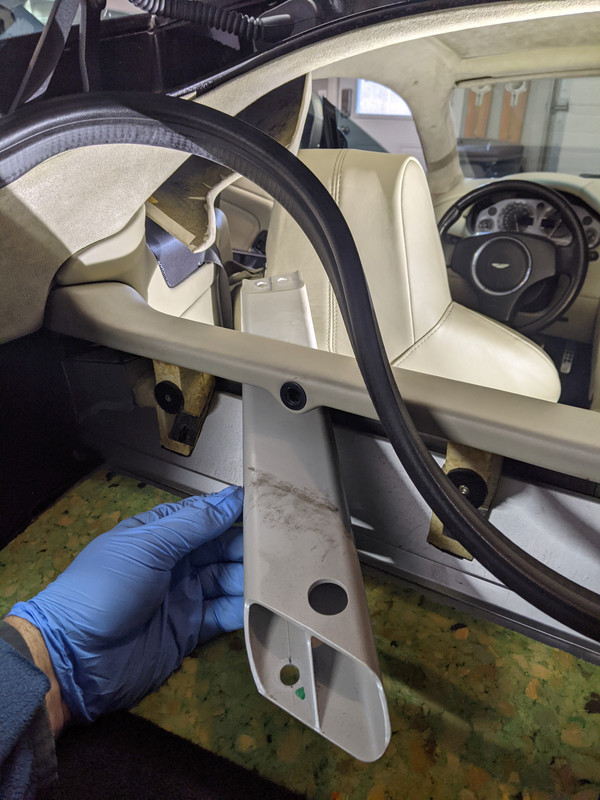
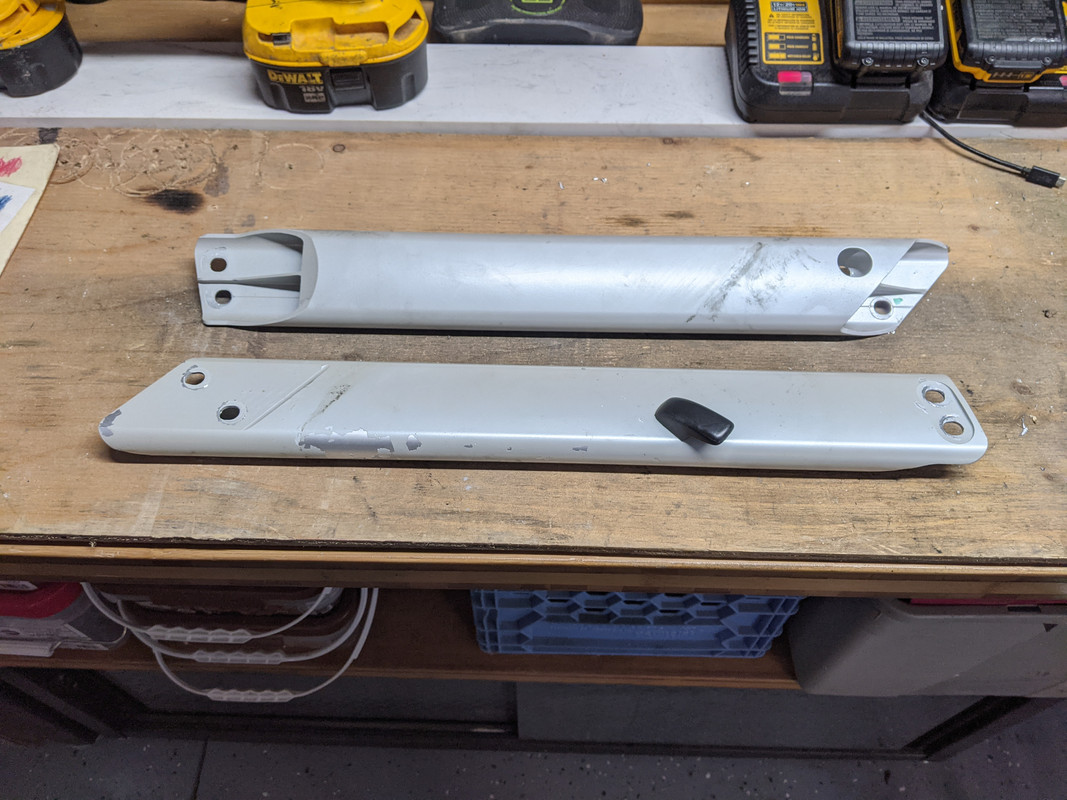
First thing I noticed was the braces are peeling paint - it appears someone previously painted them to better compliment the alcantara colour.
The silver OEM colour underneath matches the shifter bezel, seat belt guides, air vent trim etc so I will need to take those items into consideration as well.
I haven't decided yet but painting, vinyl wrap or powder coating in a colour of my choice are likely my 3 options...
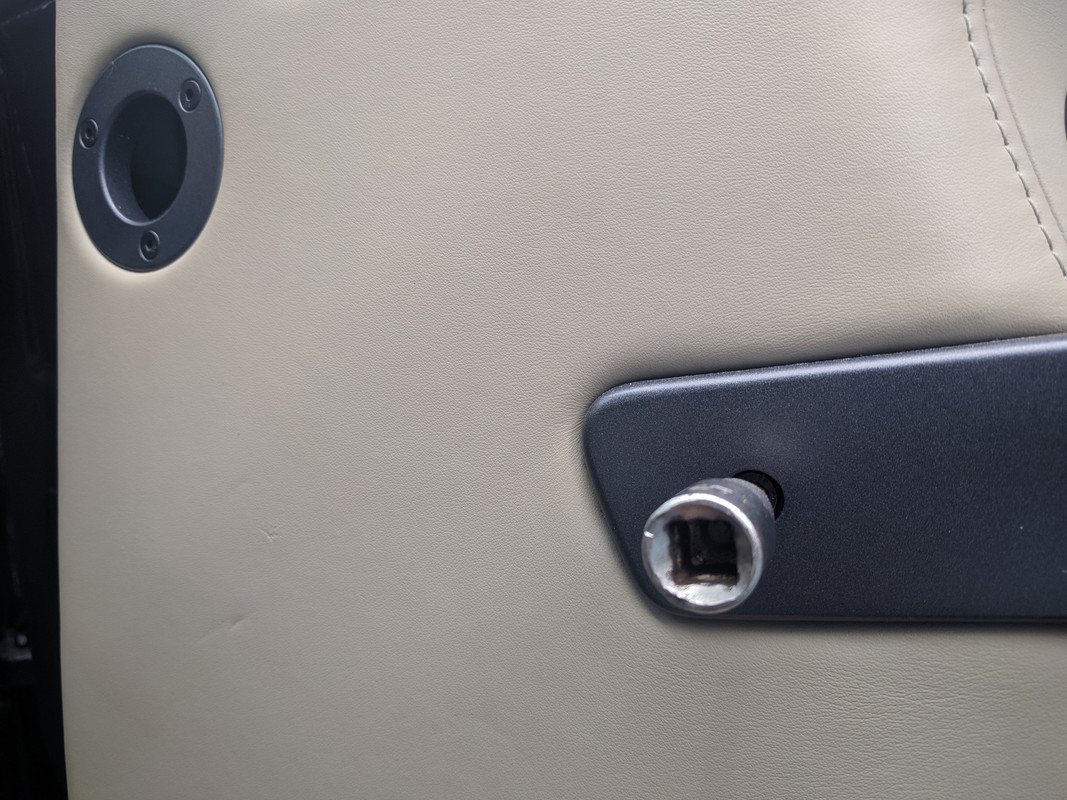
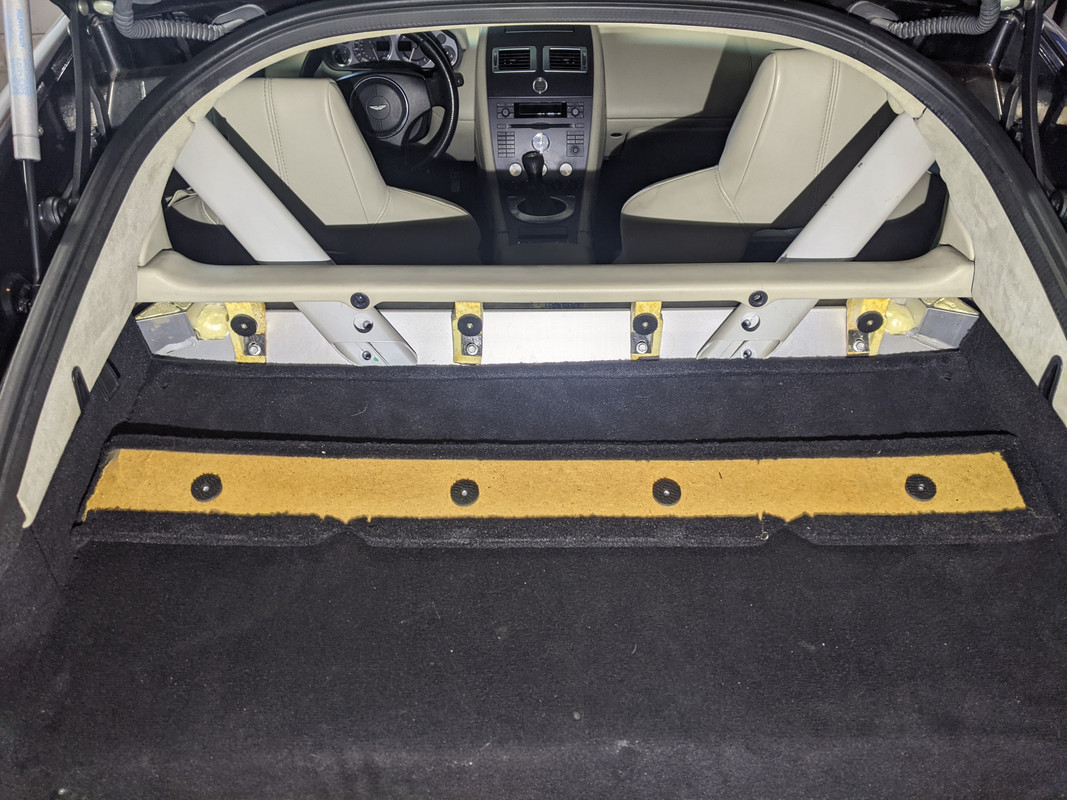
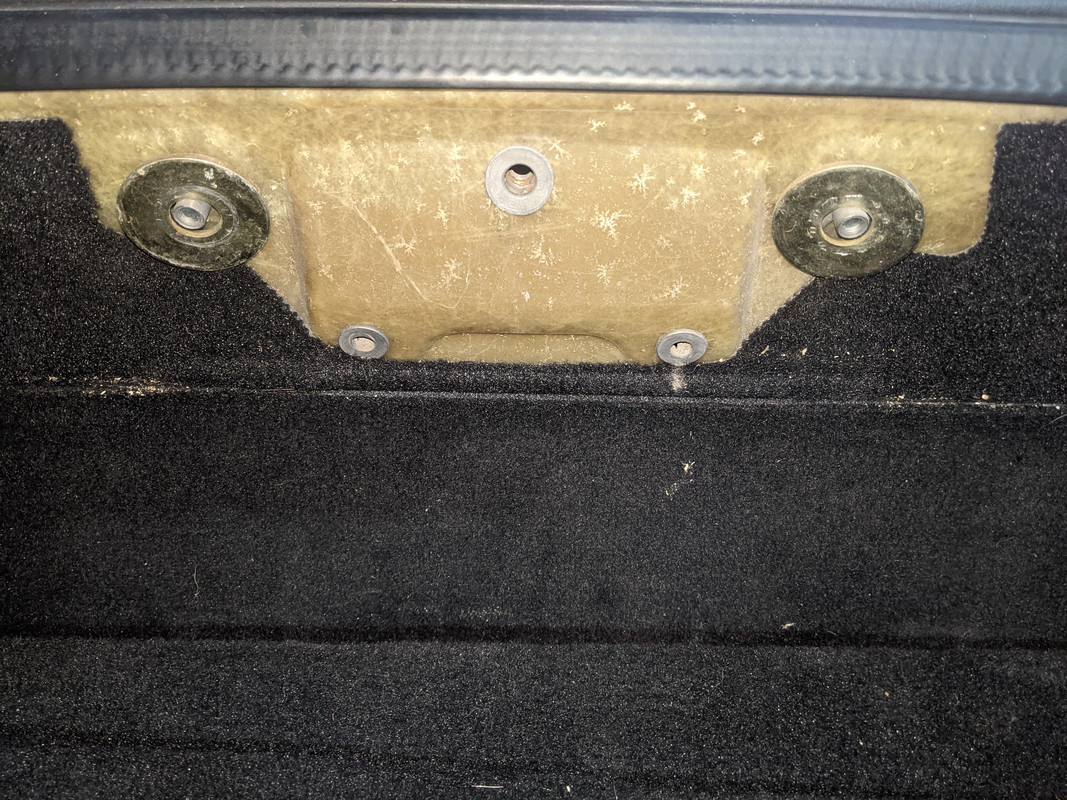
The braces are held in by four 10mm bolts - a pair at each end:
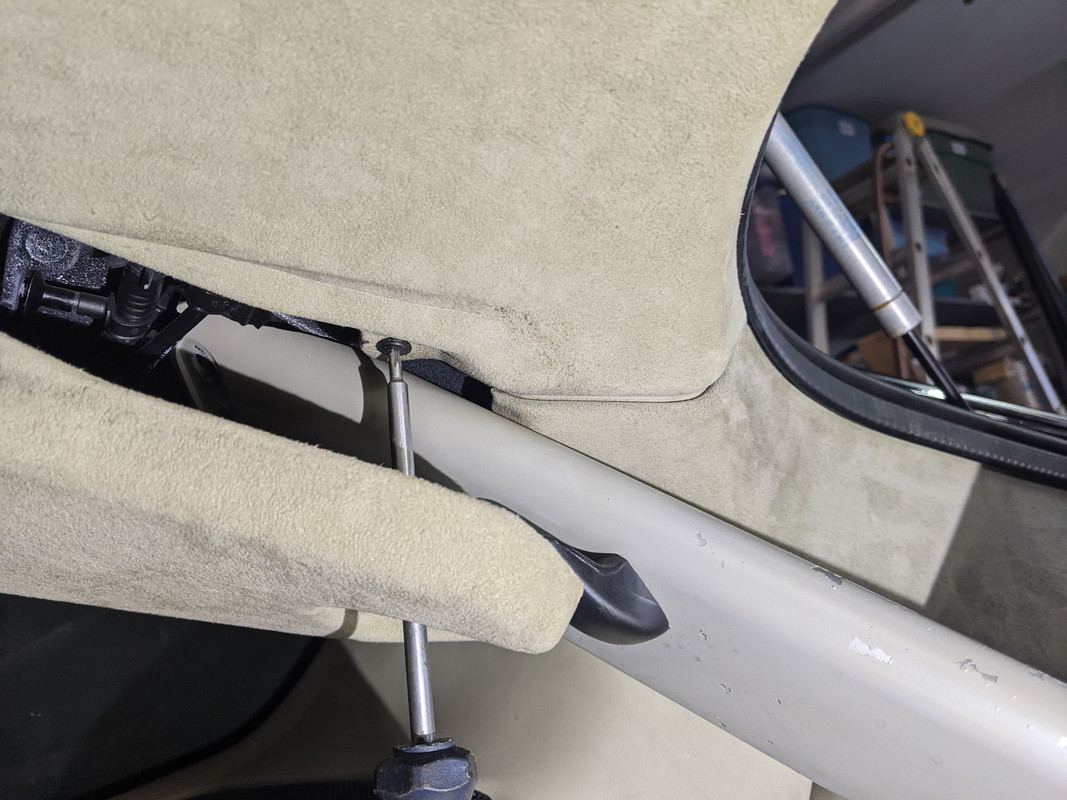

Once bolts are removed, you slide them into the hatch area:
Removing the coat hanger hooks is easy with a T-25 Torx:

The two holes and a mounting clip make reattaching at the correct angle foolproof:
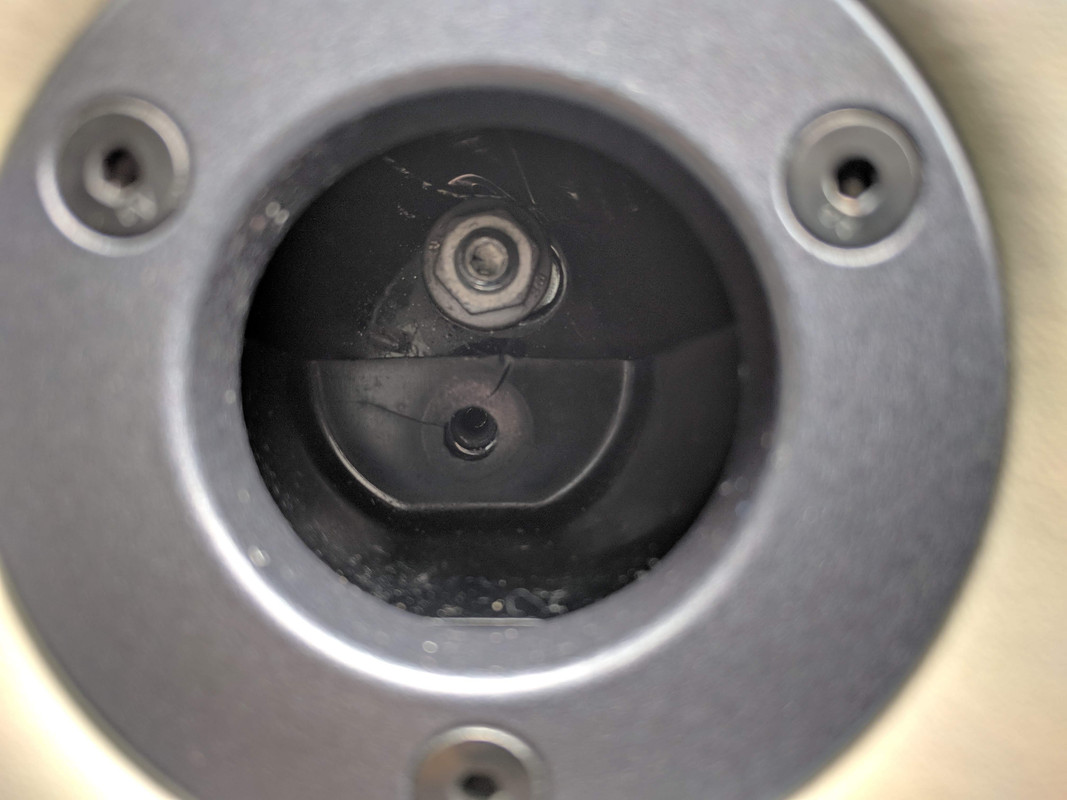
Next removing the header panel that covers the headliner, remove hatch weatherstripping, two Phillips screws at each end, then from the rear pry out 5 Fir tree clips:

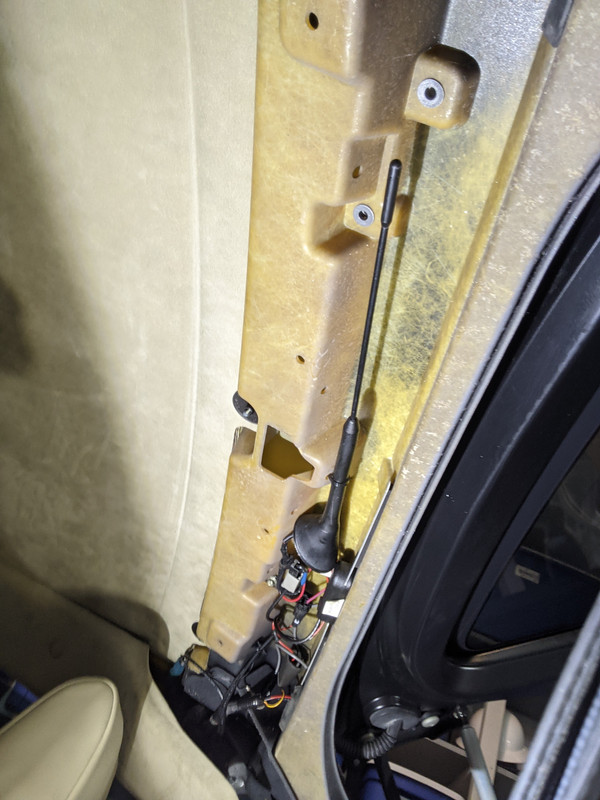
Now you have access to the antenna mounting nut from inside:
To be continued....
Something I've been planning to do for a while on my list was to eliminate the roof mounted FM antenna.
The Vantage lines are too nice to be interrupted by the roof mounted antenna IMHO - it's no wonder the factory eliminated it from 2008 MY on.
A shorter aerial was a nice interim modification and simple to do, but I decided to take it to the next level.
Backstory: The only radio station I listened to in the Aston doesn't come in clearly since I moved out of the city.
Often on drives I don't have the stereo on but when I do, I listen to preloaded CD's or Spotify streaming via my smartphone and a bluetooth FM transmitter.
Therefore I will be either reinstalling it horizontally within the headliner or unplugging it and removing it altogether which will ensure an quiet FM frequency for the bluetooth.
Ok here are the photos I took gaining access to the aerial:
First thing I noticed was the braces are peeling paint - it appears someone previously painted them to better compliment the alcantara colour.
The silver OEM colour underneath matches the shifter bezel, seat belt guides, air vent trim etc so I will need to take those items into consideration as well.
I haven't decided yet but painting, vinyl wrap or powder coating in a colour of my choice are likely my 3 options...
The braces are held in by four 10mm bolts - a pair at each end:
Once bolts are removed, you slide them into the hatch area:
Removing the coat hanger hooks is easy with a T-25 Torx:
The two holes and a mounting clip make reattaching at the correct angle foolproof:
Next removing the header panel that covers the headliner, remove hatch weatherstripping, two Phillips screws at each end, then from the rear pry out 5 Fir tree clips:
Now you have access to the antenna mounting nut from inside:
To be continued....
Thread Starter
|
Registered User
Joined: Apr 2017
Posts: 399
From: Niagara Region
Rep Power: 29
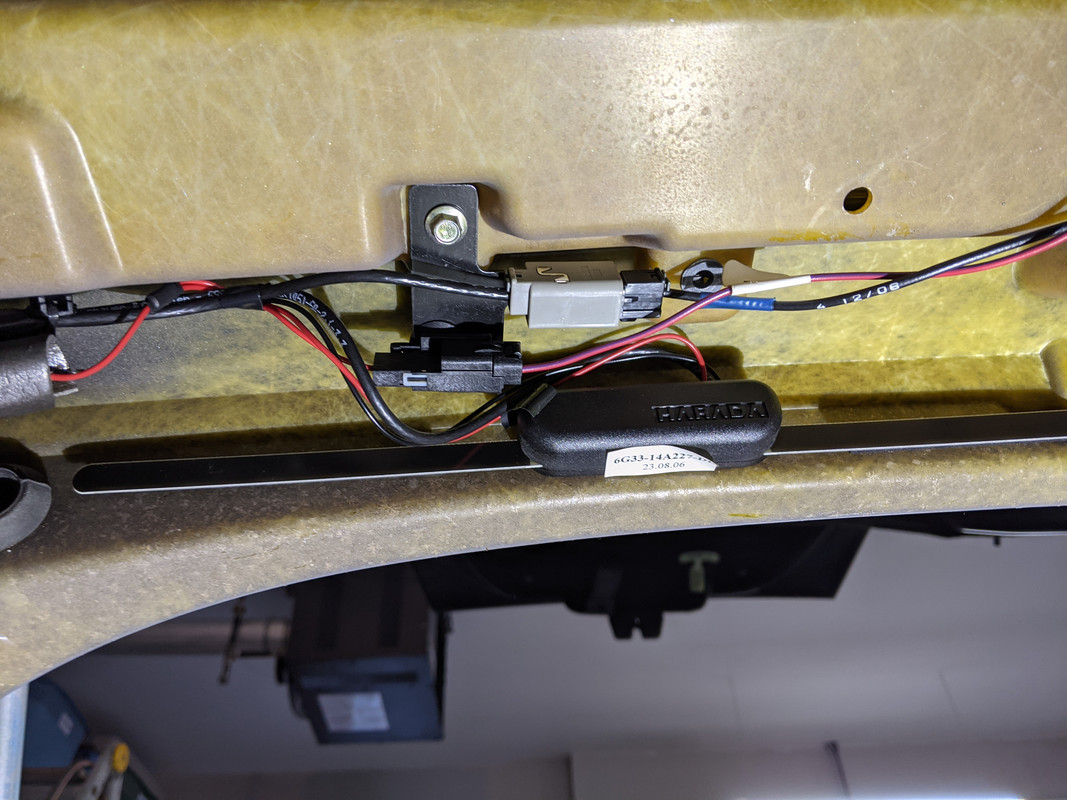
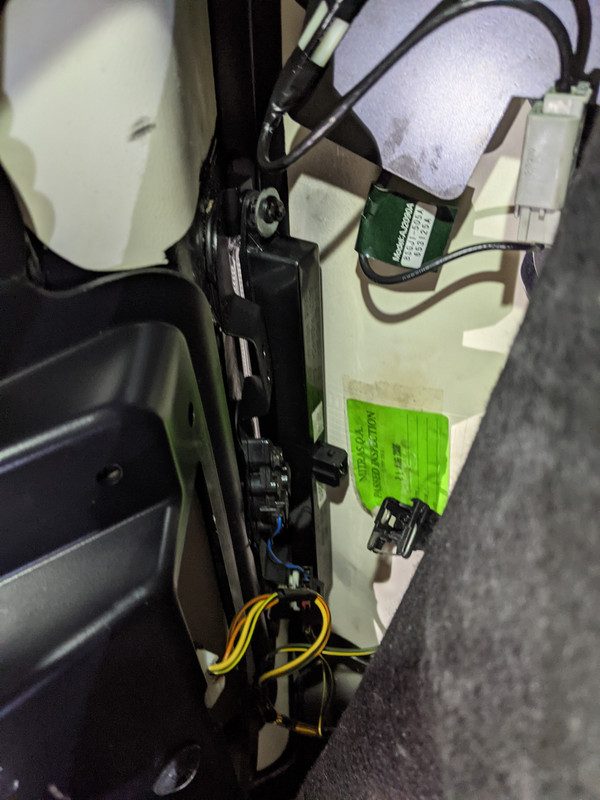
Here are more pictures mainly for my future reference:
The antenna has two plugs, one is power and other is shielded cable - they are located by the GPS antenna:
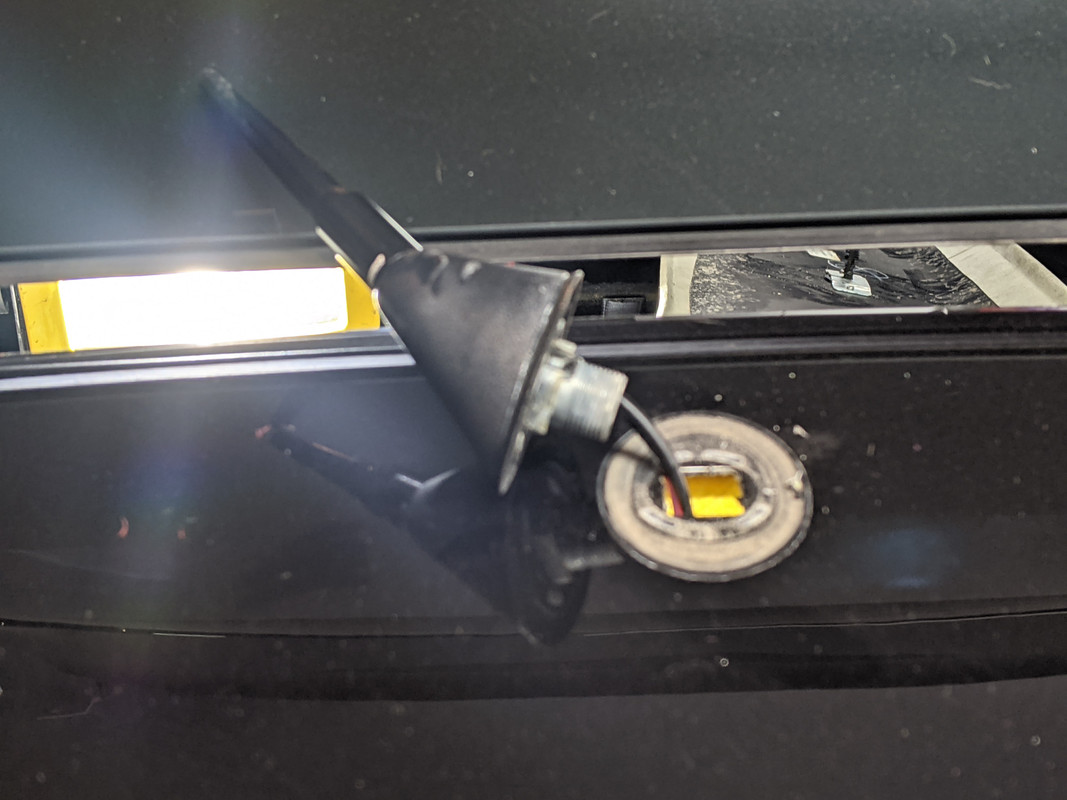
Once removing the single nut the unit can be removed from inside to outside the car:
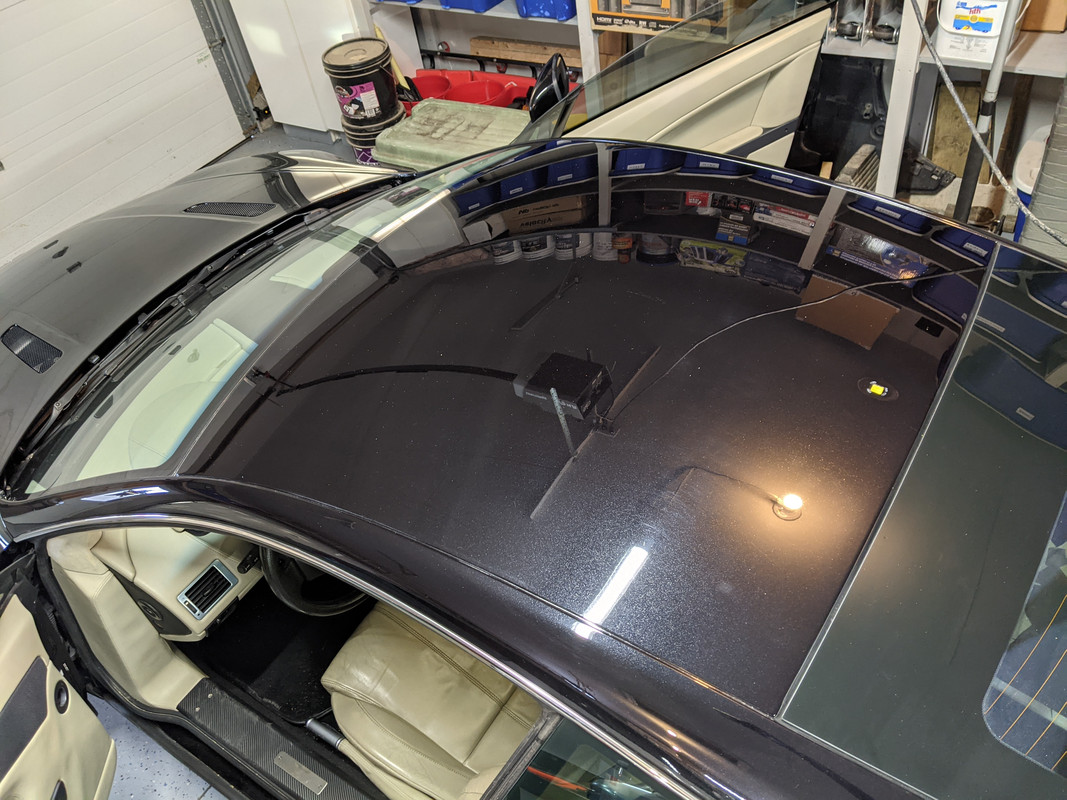
Looks better already and my Vantage won't be so easily spotted as a 2007 by enthusiasts:
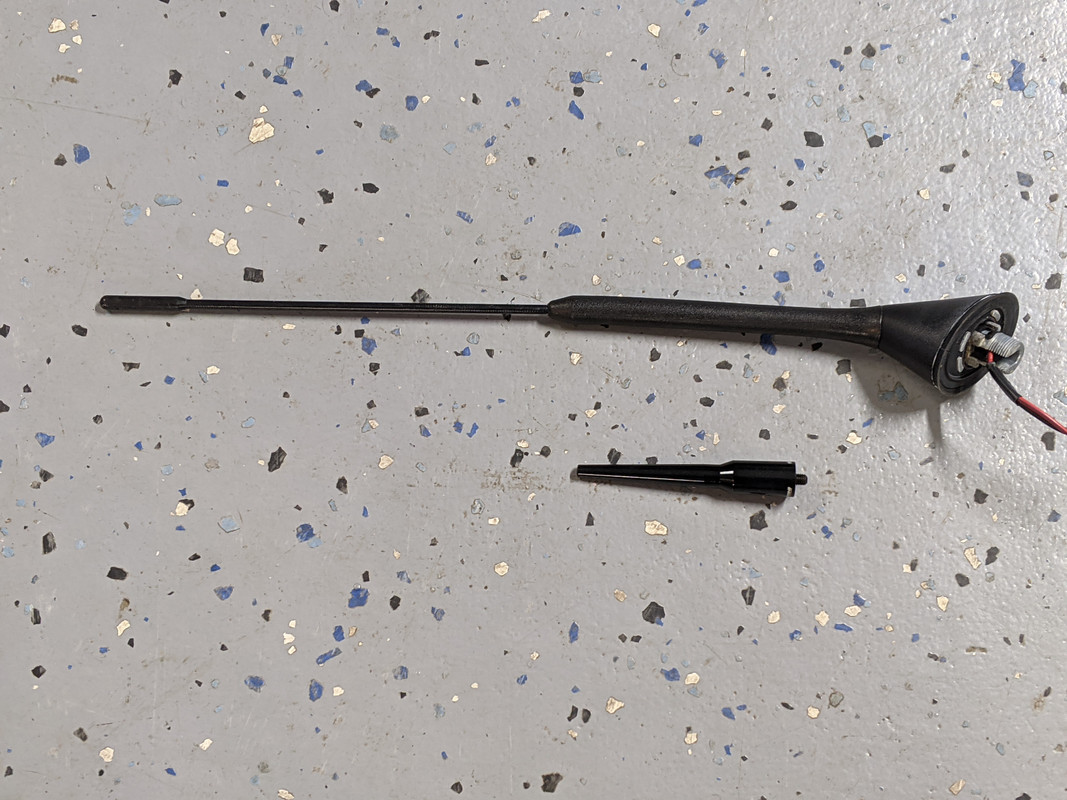
Here are the two aerials I was referring too:
If you are going to reuse the antenna - install a ground wire to the body:
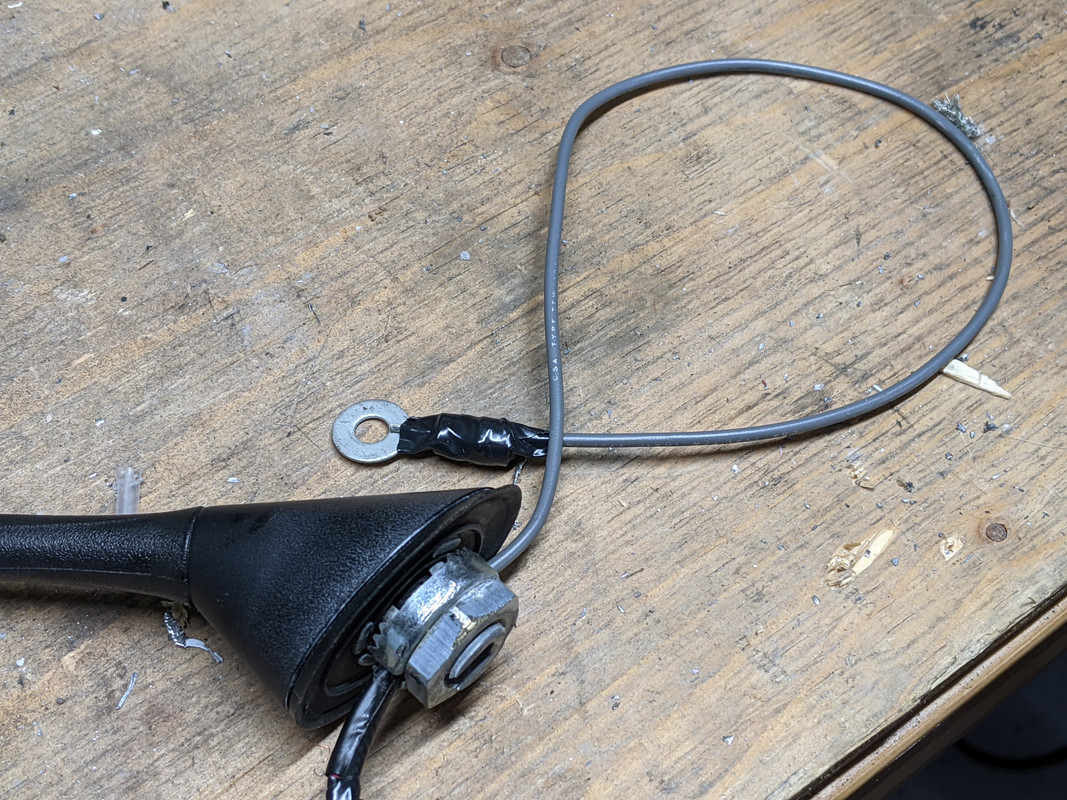
One option is to mount it here with a zip tie:
I won't be installing trim panel until the brace bars are refinished and reinstalled:
BTW - the already poor FM reception is worse with the antenna inside the cabin (obviously) so I am leaning towards it being unplugged or removed entirely.
If I ever need a new windshield, I may opt for the one that has a built-in antenna...
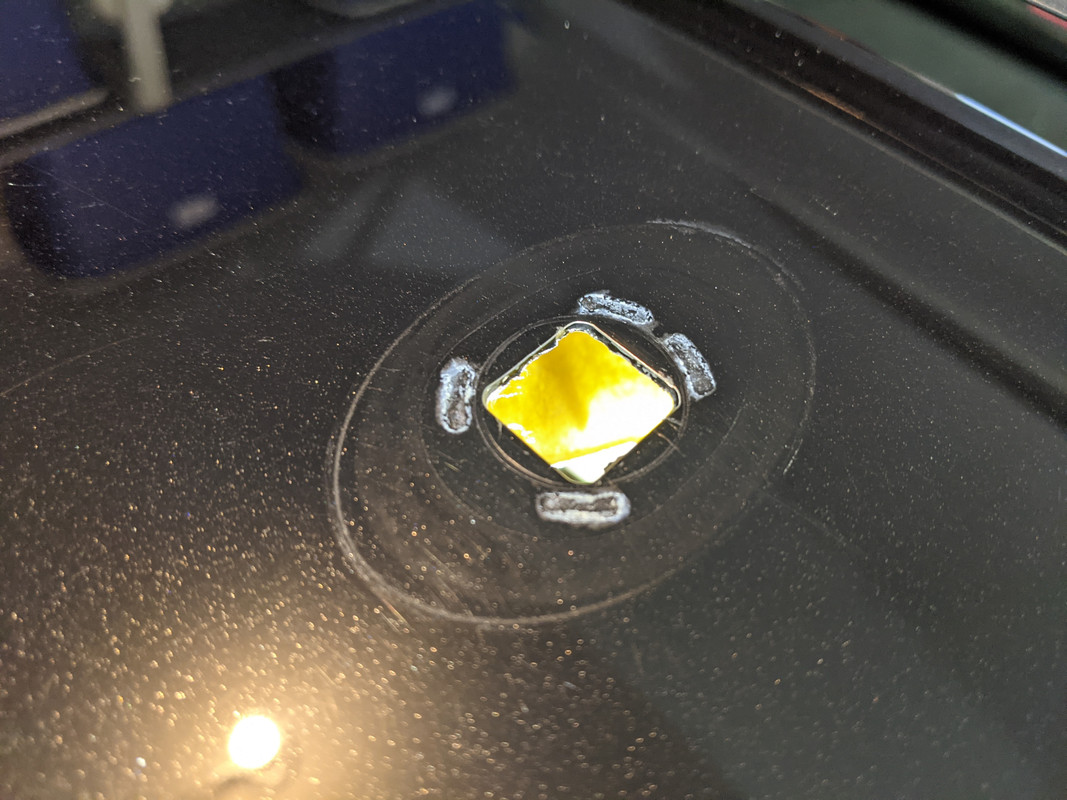
Next I will need a solution for the hole in the roof
My DIY plan is to fill the hole, smooth and install a vinyl wrap on the roof panel from windshield to rear glass.
I need to choose a colour and order the film, I'm leaning towards satin black.
Of course like all my modifications it could be put back to stock if ever necessary.
But with 80k miles on the clock I don't think that will be happening to this particular car in my lifetime
Plus hey I like all the changes I've made for uniqueness and I don't plan on selling it anytime soon.
Cheers,
Ryan
The antenna has two plugs, one is power and other is shielded cable - they are located by the GPS antenna:
Once removing the single nut the unit can be removed from inside to outside the car:
Looks better already and my Vantage won't be so easily spotted as a 2007 by enthusiasts:
Here are the two aerials I was referring too:
If you are going to reuse the antenna - install a ground wire to the body:
One option is to mount it here with a zip tie:
I won't be installing trim panel until the brace bars are refinished and reinstalled:
BTW - the already poor FM reception is worse with the antenna inside the cabin (obviously) so I am leaning towards it being unplugged or removed entirely.
If I ever need a new windshield, I may opt for the one that has a built-in antenna...
Next I will need a solution for the hole in the roof
My DIY plan is to fill the hole, smooth and install a vinyl wrap on the roof panel from windshield to rear glass.
I need to choose a colour and order the film, I'm leaning towards satin black.
Of course like all my modifications it could be put back to stock if ever necessary.
But with 80k miles on the clock I don't think that will be happening to this particular car in my lifetime
Plus hey I like all the changes I've made for uniqueness and I don't plan on selling it anytime soon.
Cheers,
Ryan
Thread Starter
|
Registered User
Joined: Apr 2017
Posts: 399
From: Niagara Region
Rep Power: 29
Thread Starter
|
Registered User
Joined: Apr 2017
Posts: 399
From: Niagara Region
Rep Power: 29
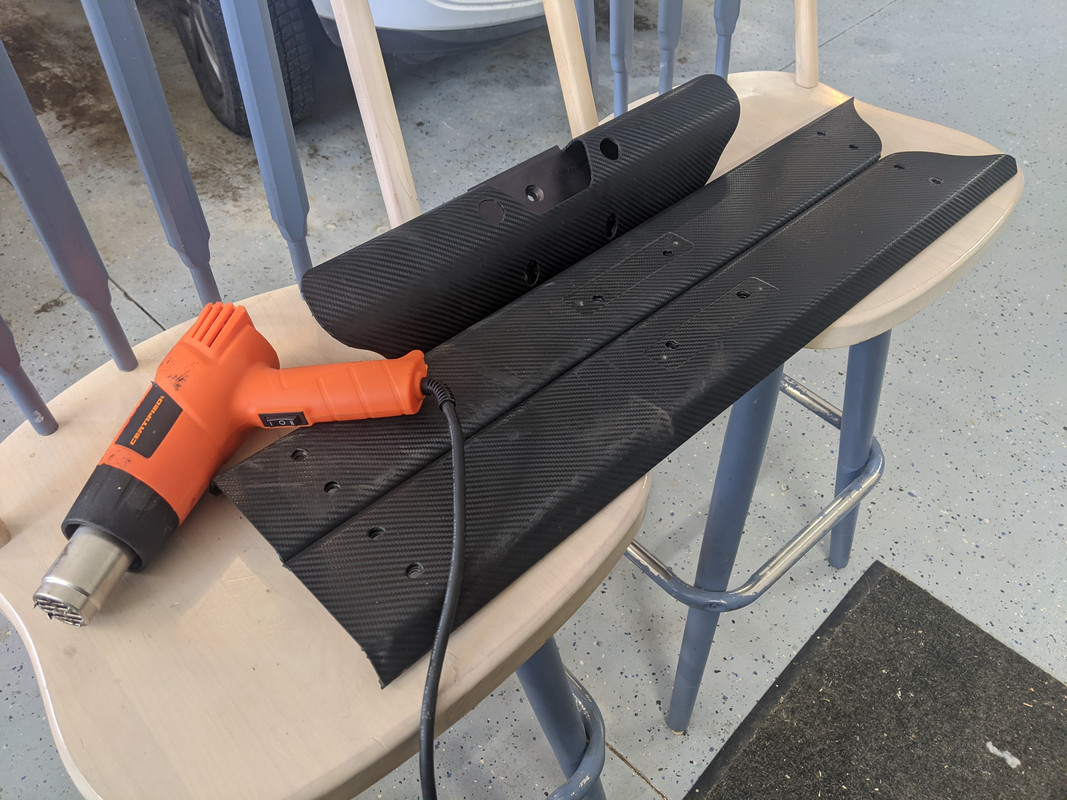
I got a little sidetracked and keep removing interior parts that I wanted to make a cosmetic change to...
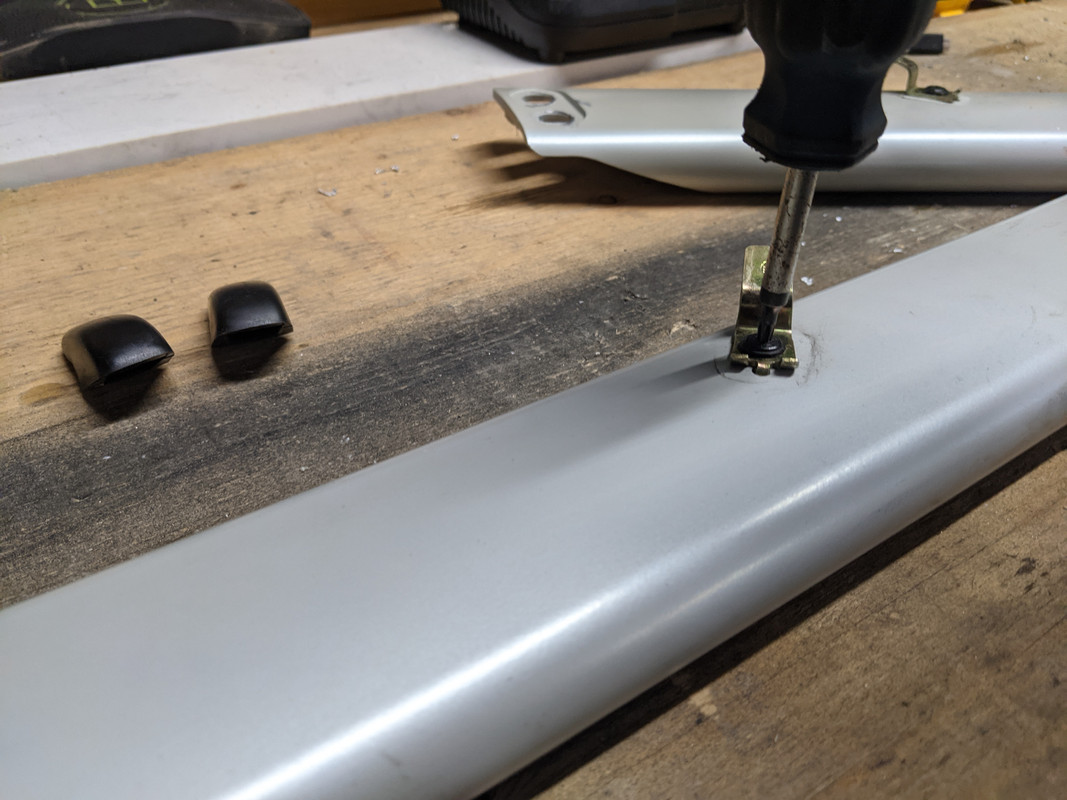
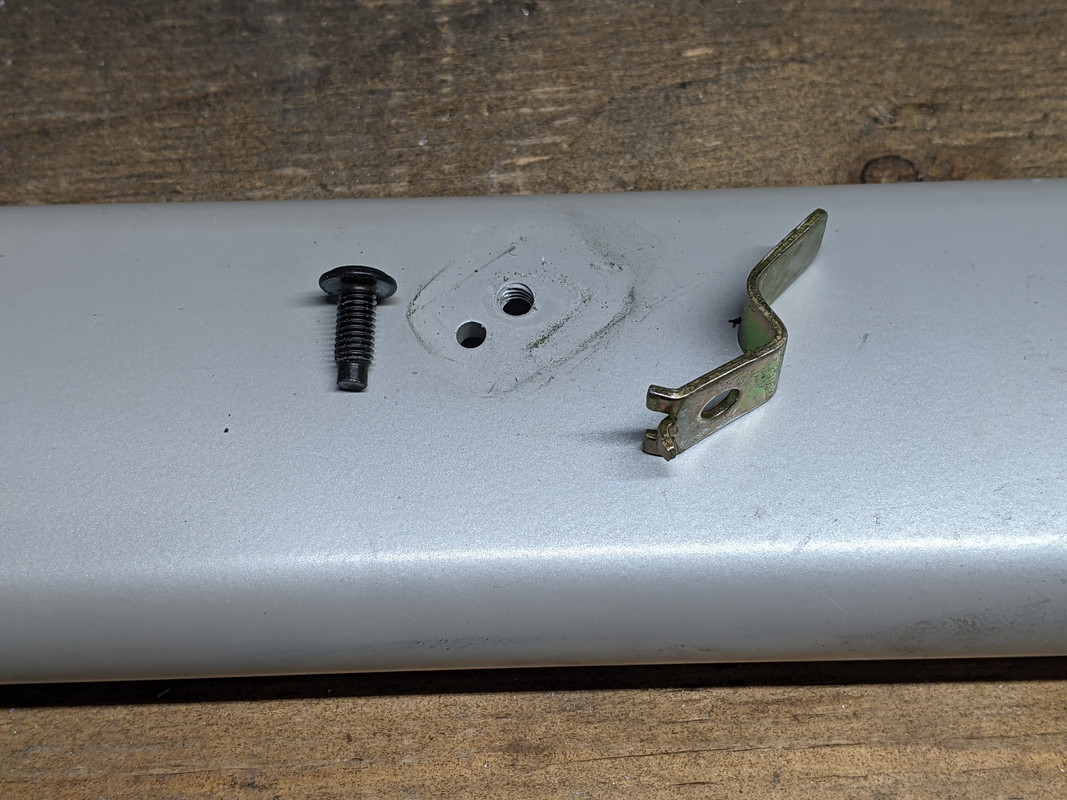
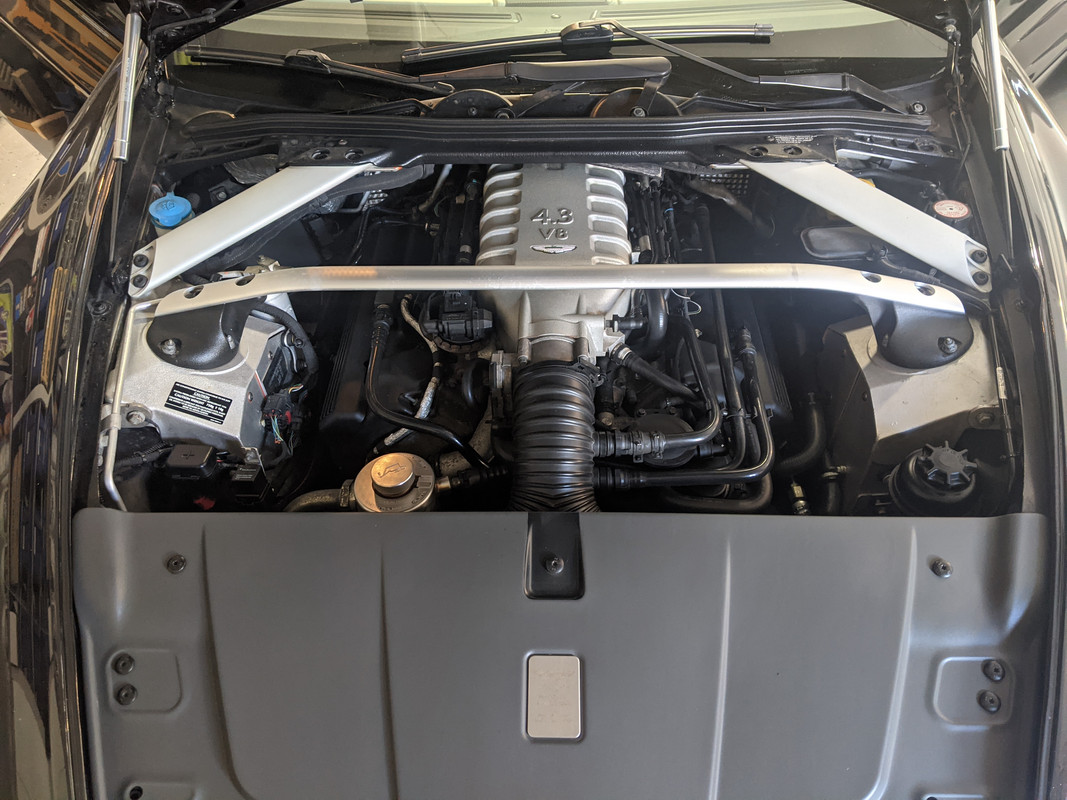
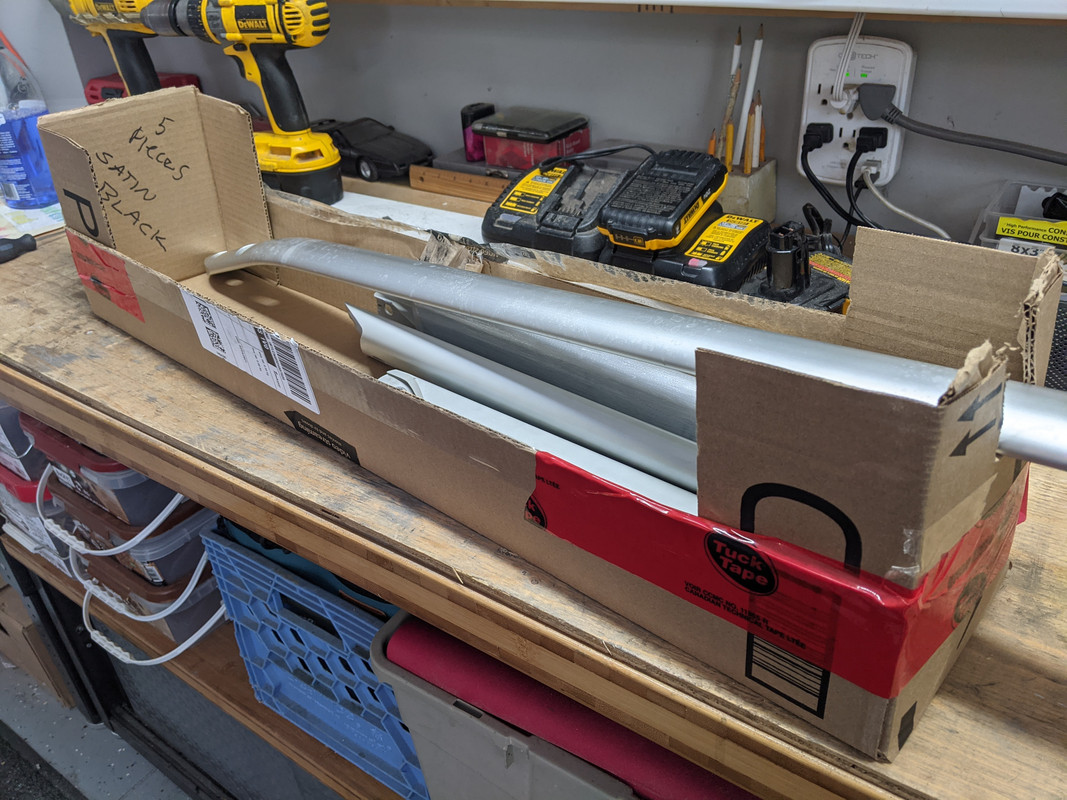
Since I decided on powder coating the roll bar pieces a satin black, I removed some other aluminum parts to get done at the same time.
The door sills and trunk latch were previously vinyl wrapped but are now scuffed up and the braces under the bonnet are stained and could use a refresh so I ended up dropping off 8 pieces at the local powder coating shop:
Last edited by 007V8Vantage; Mar 9, 2021 at 04:56 PM.
Thread Starter
|
Registered User
Joined: Apr 2017
Posts: 399
From: Niagara Region
Rep Power: 29
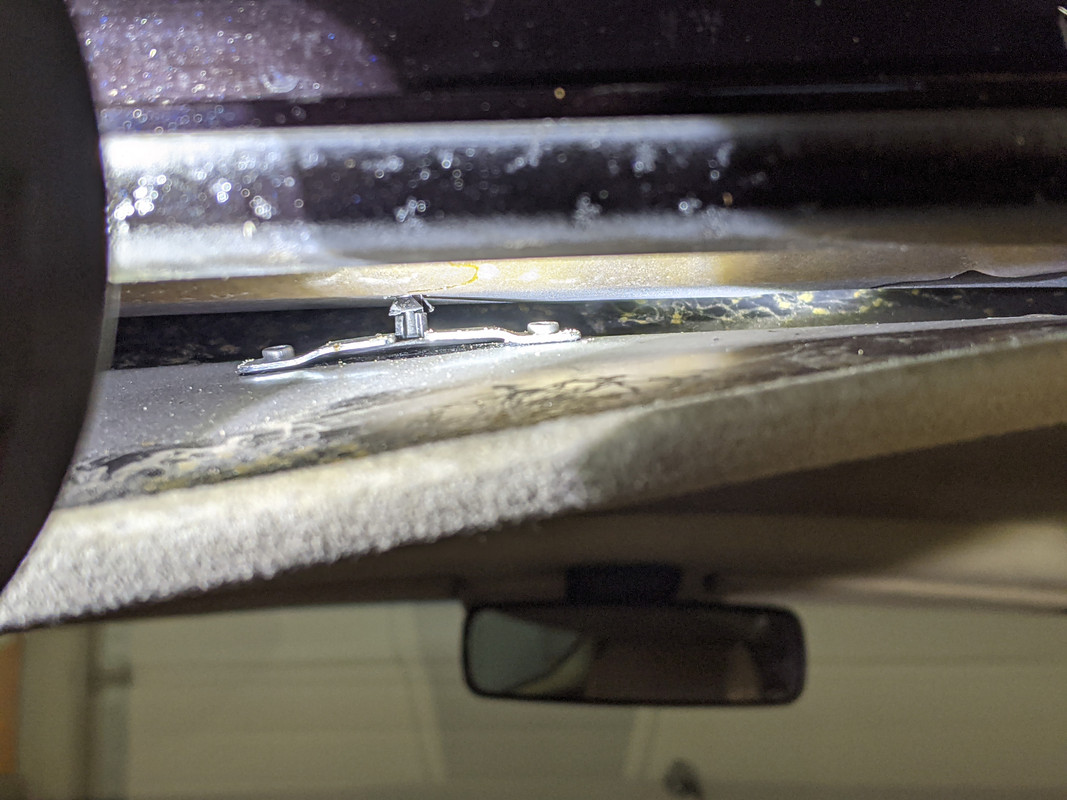
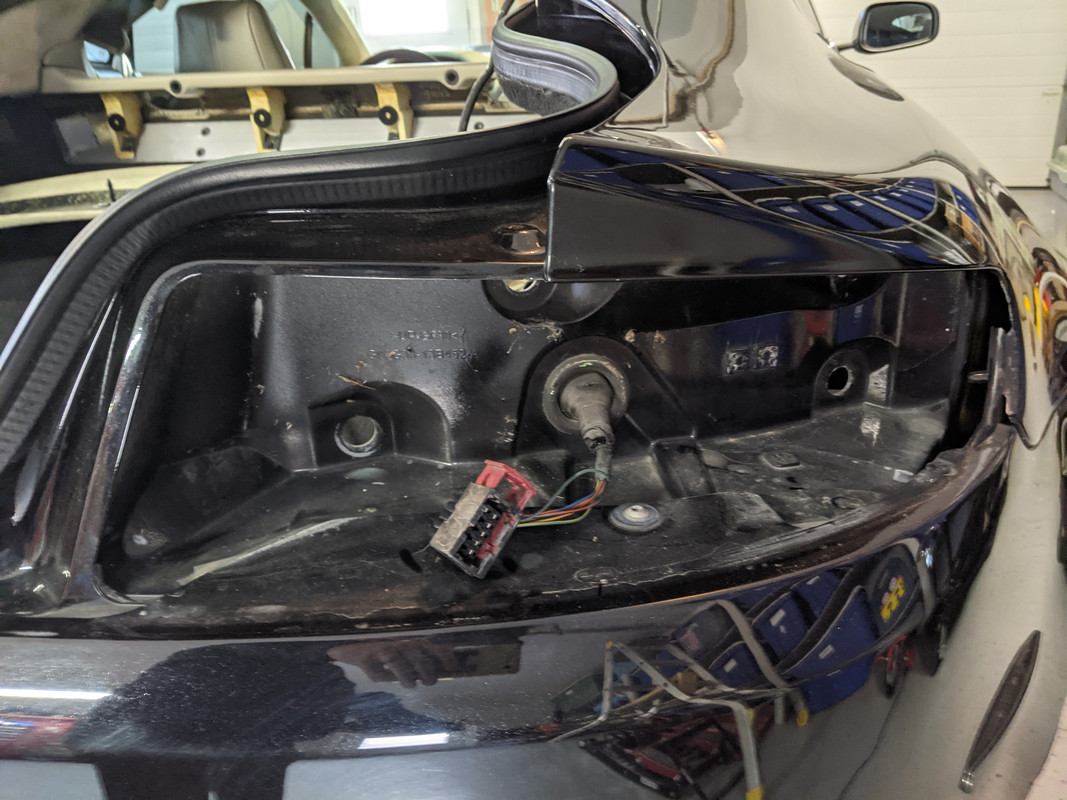
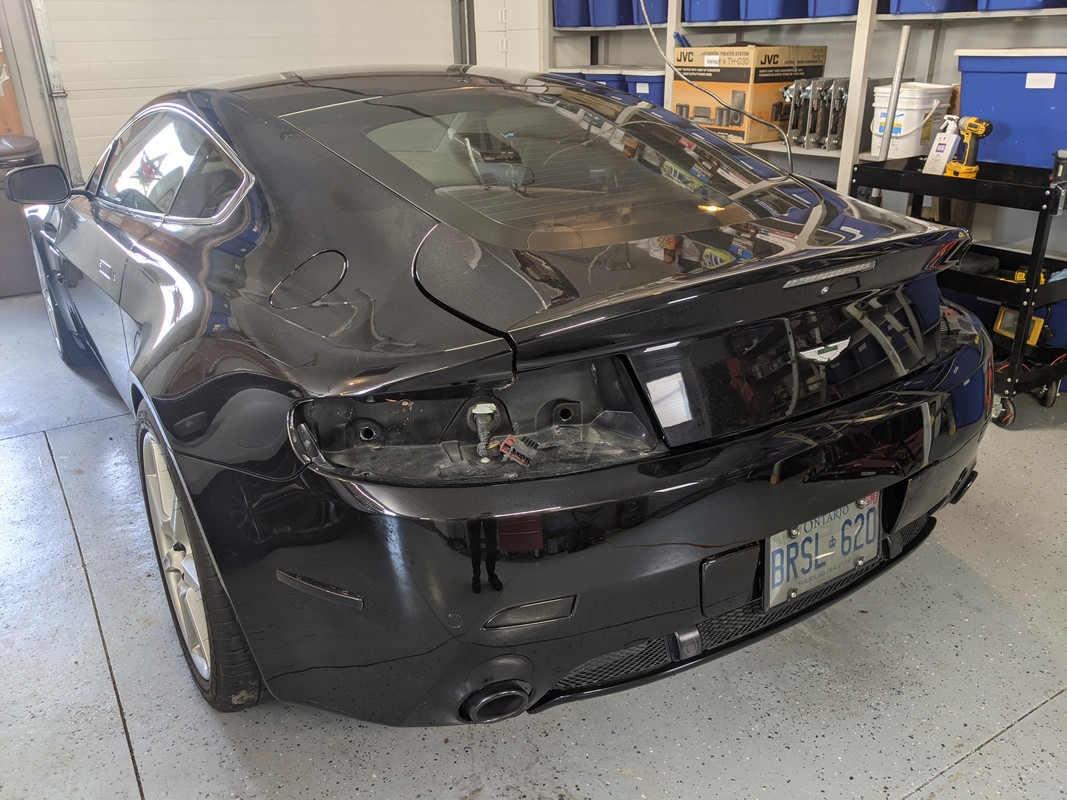
Next I removed the clear tail lights as I am going to tint them with a smoke film:
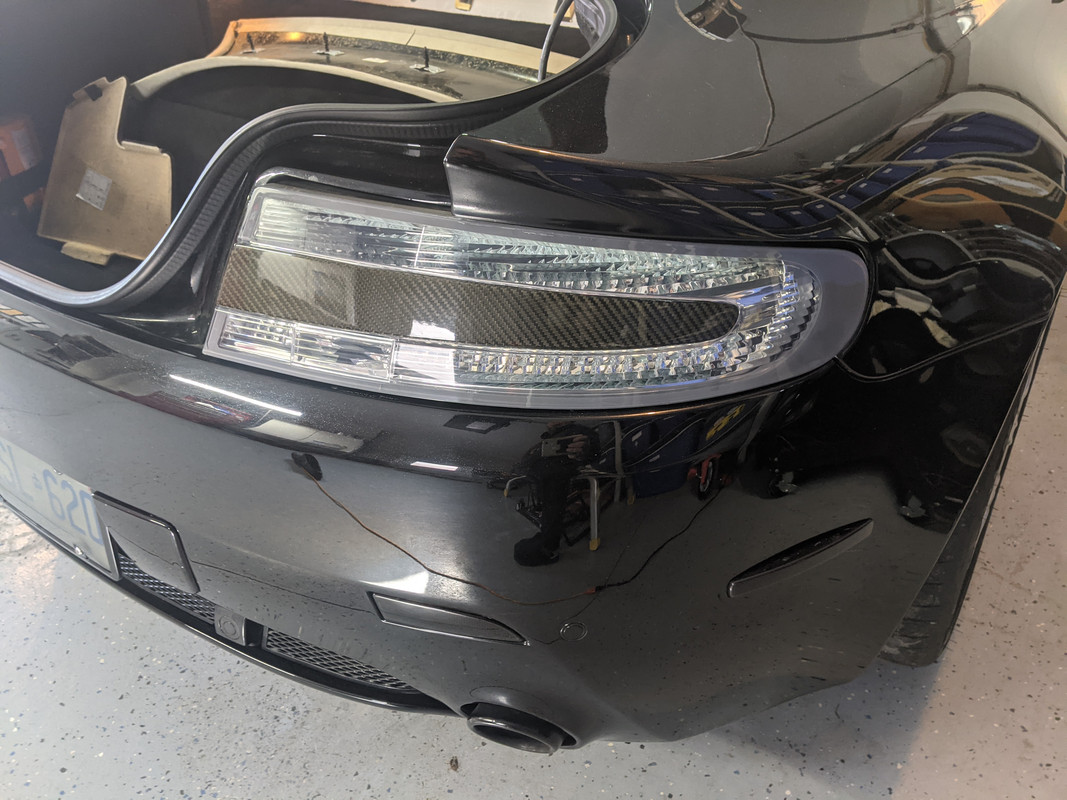
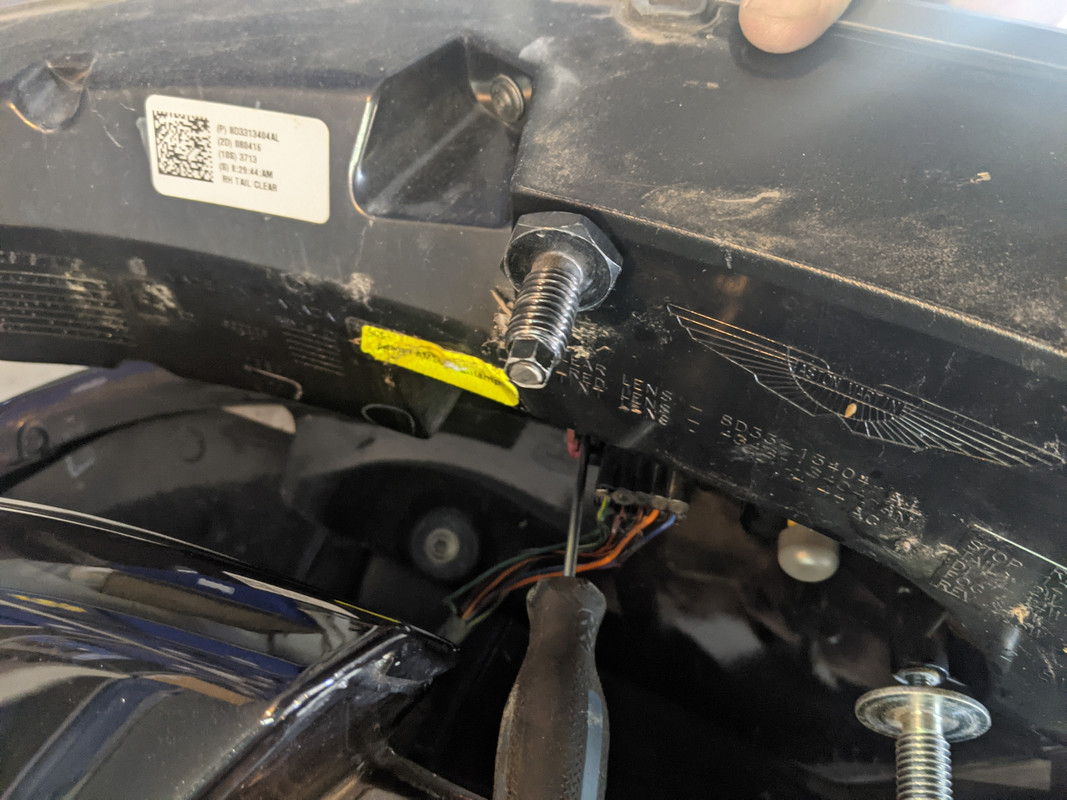
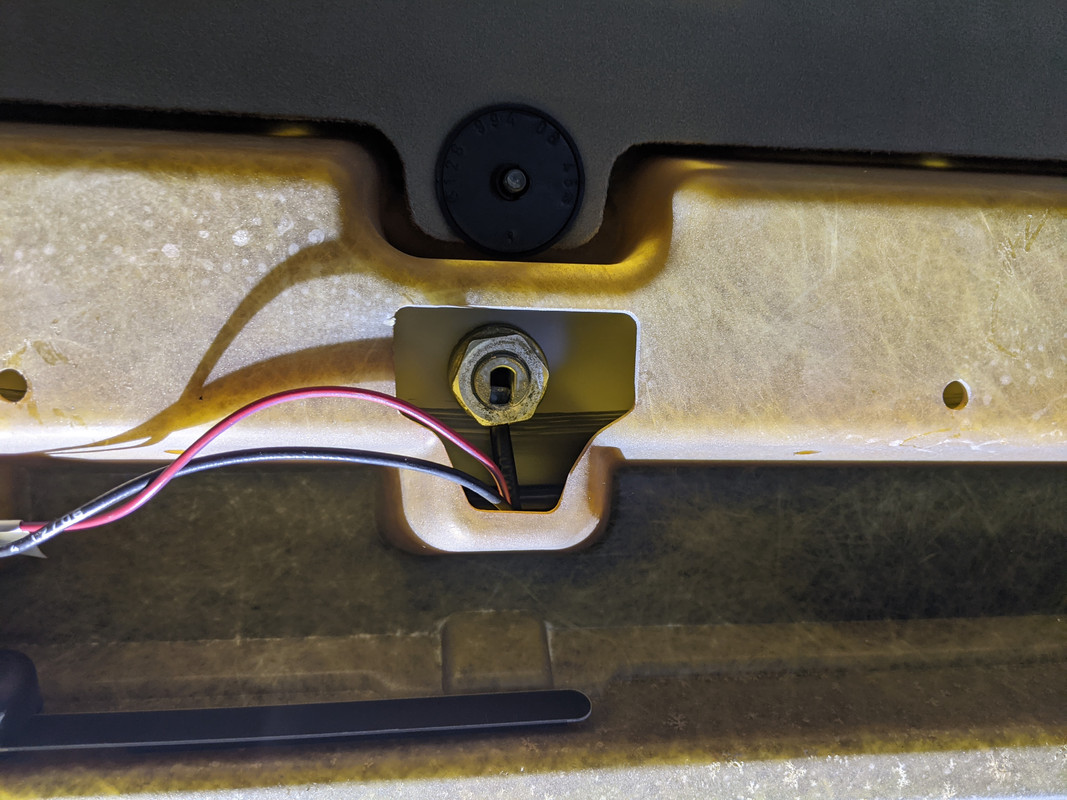
Almost forgot the third brake light - that is removed with two nuts after the carpet on the hatch is pulled back after removal of tree clips:
Could you add film to the lights installed? YES, I just thought it would to easier to apply it to the individual parts in the comfort of my home office...
Almost forgot the third brake light - that is removed with two nuts after the carpet on the hatch is pulled back after removal of tree clips:
Could you add film to the lights installed? YES, I just thought it would to easier to apply it to the individual parts in the comfort of my home office...
Registered User
Joined: May 2016
Posts: 134
From: Phoenix
Rep Power: 15
If you've not had the tail lights out before, one thing to watch when reinstalling is the alignment. There really is not anything to accurately position them so you have to adjust by hand and snug up the 3 nuts.
Wrongly done it is possible to have them positioned such that the angled part of the deck lid hits the light when you close it. Don't ask how I know.
Wrongly done it is possible to have them positioned such that the angled part of the deck lid hits the light when you close it. Don't ask how I know.