
Greetings from Niagara, Ontario, Canada


Thread Starter
|
Registered User
Joined: Apr 2017
Posts: 399
From: Niagara Region
Rep Power: 29

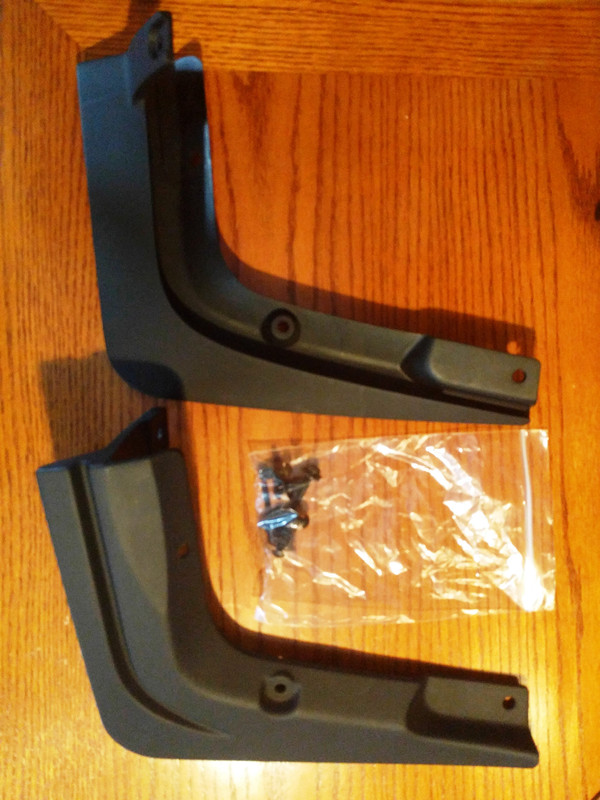
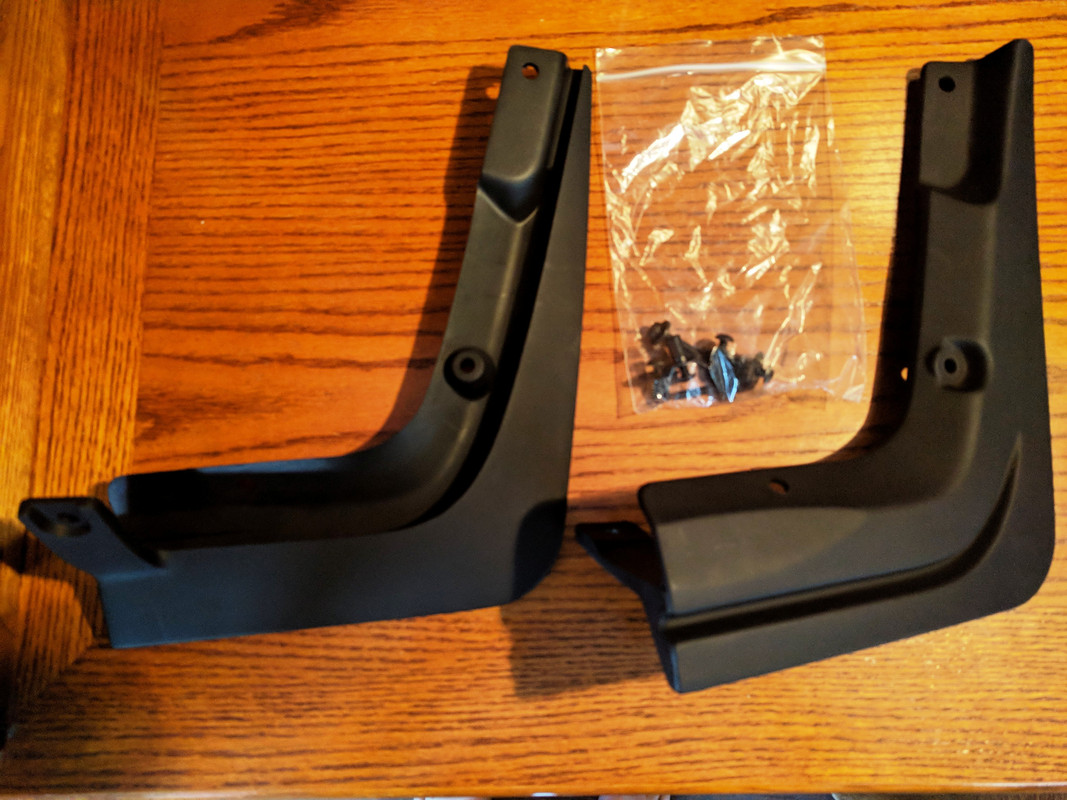
They arrived in only a few days from the UK.
I wanted to get these on ASAP to protect the new paint work.
Very straightforward screw on with hardware included.
I wanted to get these on ASAP to protect the new paint work.
Very straightforward screw on with hardware included.
Registered User
Joined: Aug 2014
Posts: 1,038
From: Oxnard, Ca
Rep Power: 62

Ron


Registered User
Joined: May 2018
Posts: 18
From: Alberta
Rep Power: 0
Hi i am new to the site and am 99 percent decided i want to own one of my dream cars the AM Vantage. What has your experience been like coming from the Toyobaru? I also currently drive a BRZ that I consider the most fun car I have ever owned in a long list of cars and bikes. Is there anything you miss or does the Vantage make alot of that go away everytime you hear that exhaust note? I have owned mostly japanese and german cars over the years some I modified some I did not. what would you tell a potential AM owner knowing what you know now?


Thread Starter
|
Registered User
Joined: Apr 2017
Posts: 399
From: Niagara Region
Rep Power: 29
Hi i am new to the site and am 99 percent decided i want to own one of my dream cars the AM Vantage. What has your experience been like coming from the Toyobaru? I also currently drive a BRZ that I consider the most fun car I have ever owned in a long list of cars and bikes. Is there anything you miss or does the Vantage make alot of that go away everytime you hear that exhaust note? I have owned mostly japanese and german cars over the years some I modified some I did not. what would you tell a potential AM owner knowing what you know now?
RWD, 6 speed manual, good balance and handling, and fun keeping the revs up to get the most out of it. The only thing you miss going to the Vantage is the light weight of the BRZ. However the extra power helps make up for it.
On the Vantage, the hydraulic steering is amazing, and the Brembo's are nice. The exterior styling is much better and the luxury interior is a massive upgrade. You are correct, the exhaust note is additive. It also requires you to keep the revs up for max enjoyment. With a 49/51 weight distribution, the handling and car control is very rewarding. You will get even more compliments at the gas station than the BRZ did. When I bought my BRZ it was one of 500 in Canada - if you like rare vehicles, the Aston won't disappoint.
I could go on, but I've think I've covered off your remaining 1%

Thread Starter
|
Registered User
Joined: Apr 2017
Posts: 399
From: Niagara Region
Rep Power: 29
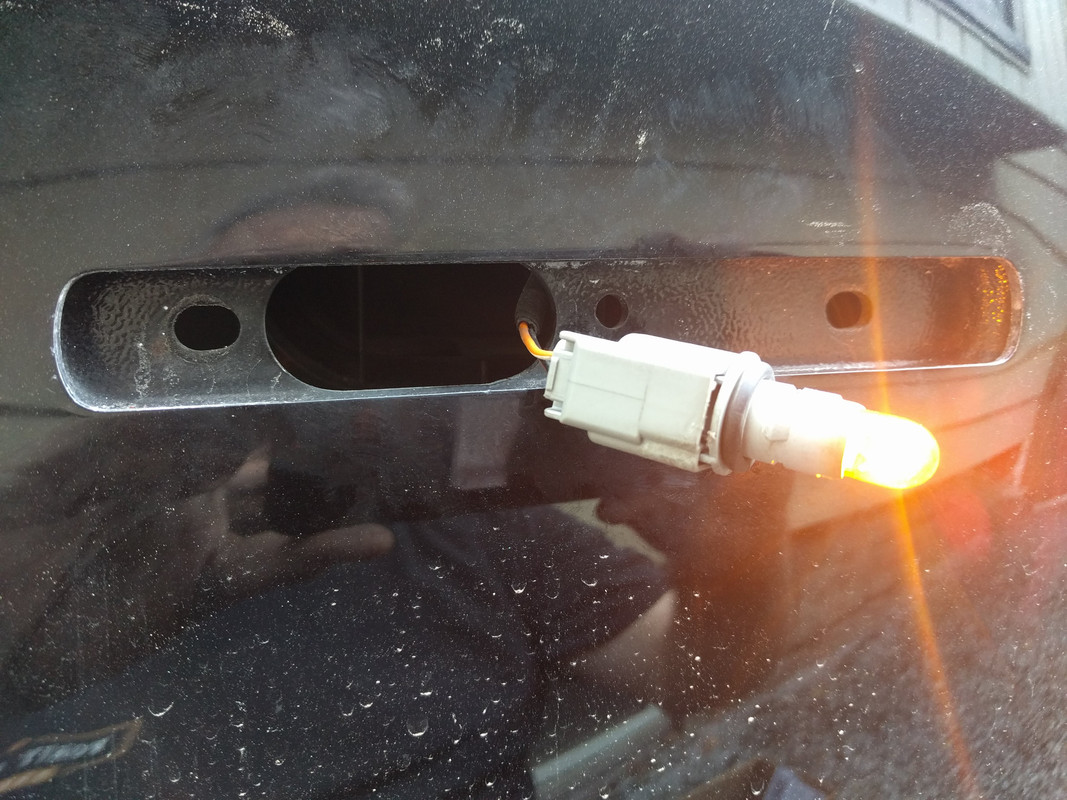
Started with the side repeaters as they are easiest to access.
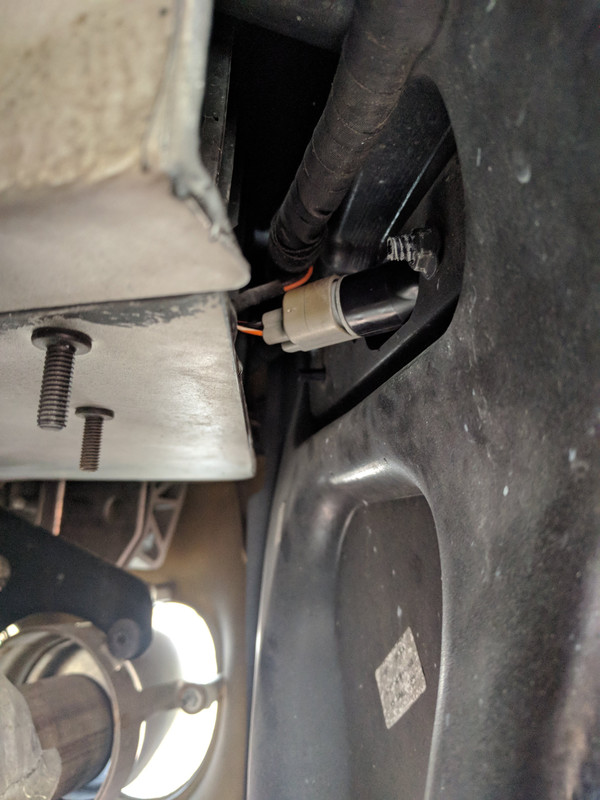
Just turn the steering wheel and remove a few screws in the wheel liner. Then you can stick your arm in and twist the plug and lens for removal.
Don't forget to transfer the rubber o-ring gasket (like I did):
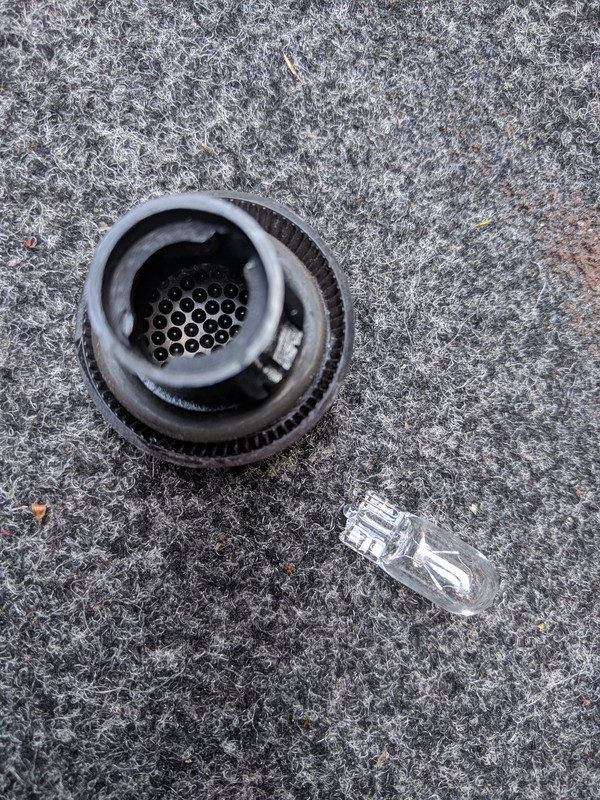
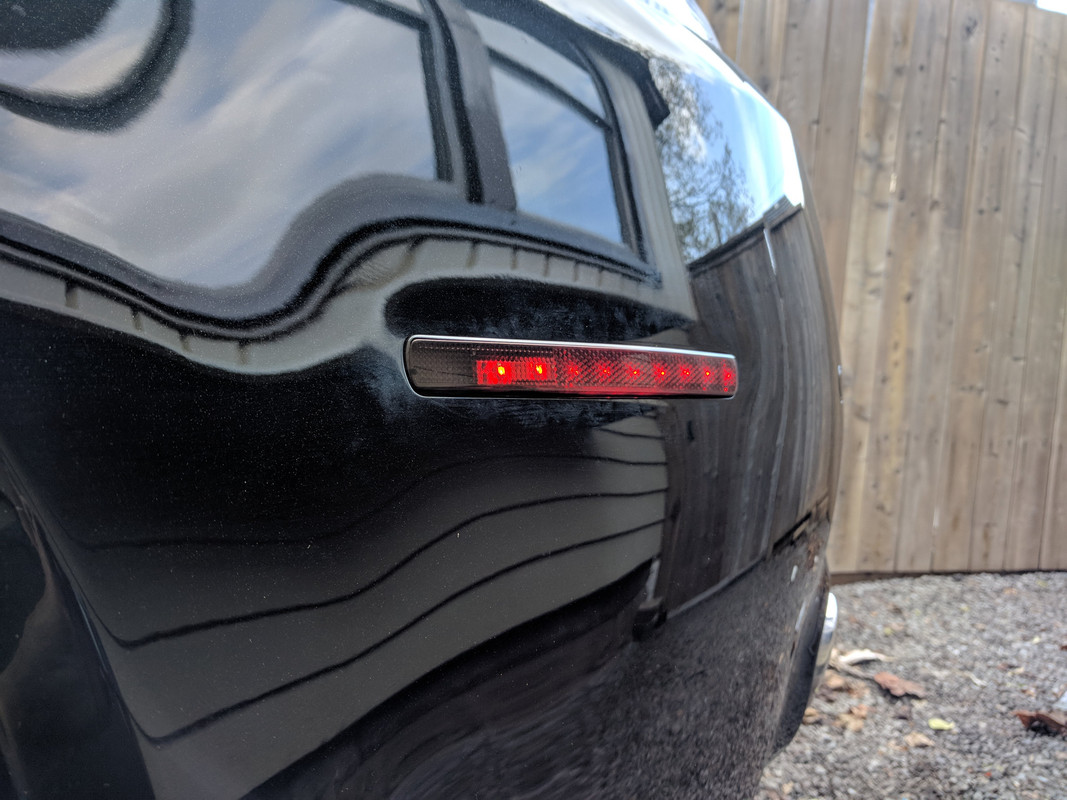
I tried the amber bulb, then a clear bulb and finally an LED white. The 3rd time was the charm (the look and brightness I was after). The LED white lights are the interior ones that Redpants sells...


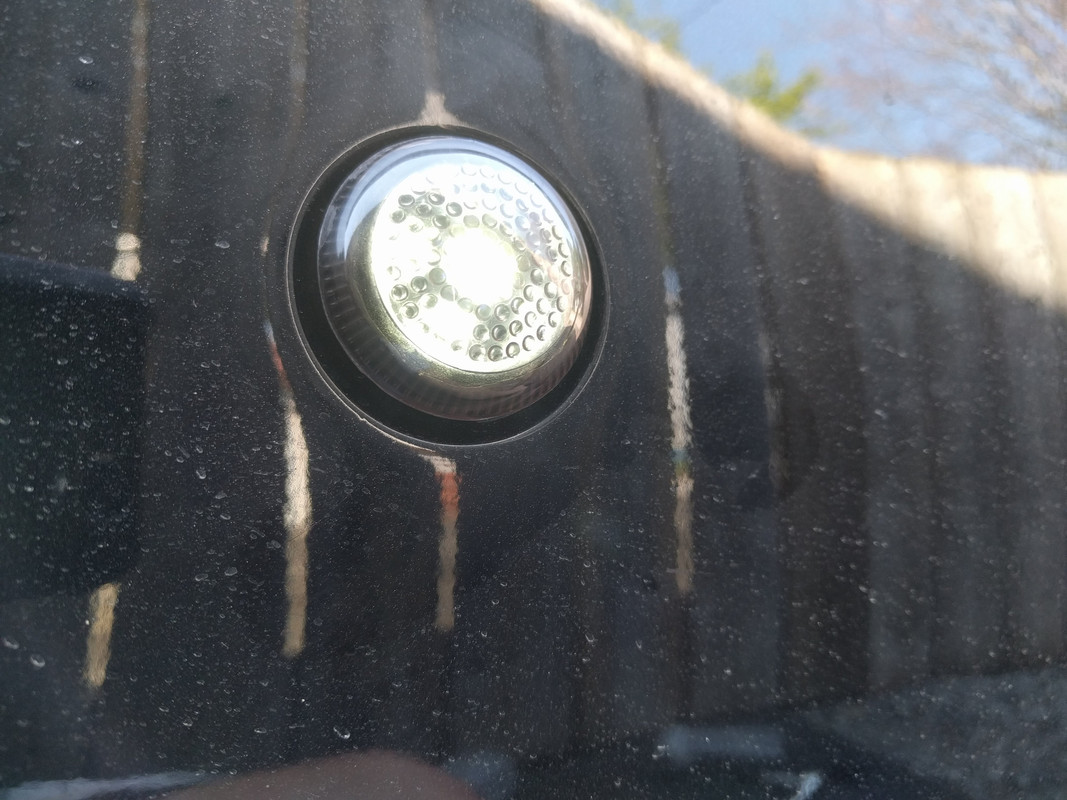
Sweet, the LED is very bright despite the smoked lens and you see all the individual lights when you press the lock/unlock buttons.
Just turn the steering wheel and remove a few screws in the wheel liner. Then you can stick your arm in and twist the plug and lens for removal.
Don't forget to transfer the rubber o-ring gasket (like I did):
I tried the amber bulb, then a clear bulb and finally an LED white. The 3rd time was the charm (the look and brightness I was after). The LED white lights are the interior ones that Redpants sells...
Sweet, the LED is very bright despite the smoked lens and you see all the individual lights when you press the lock/unlock buttons.
Thread Starter
|
Registered User
Joined: Apr 2017
Posts: 399
From: Niagara Region
Rep Power: 29
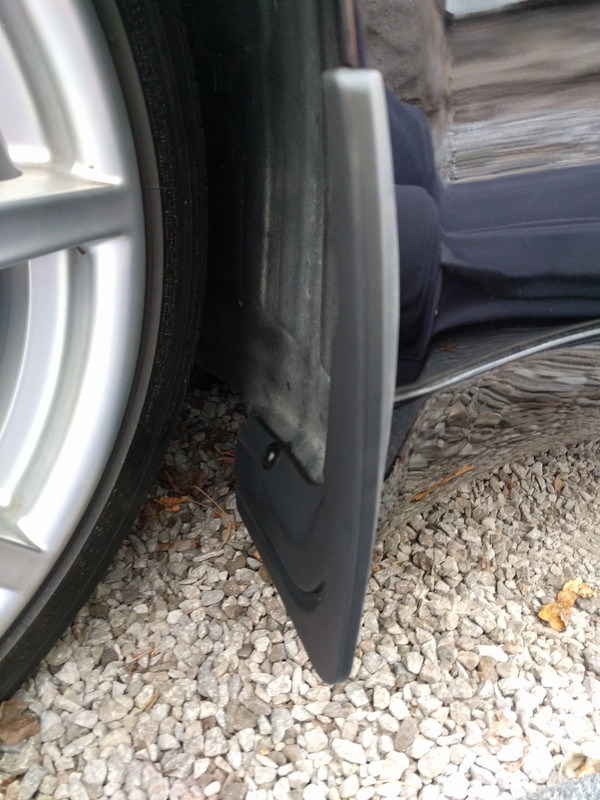
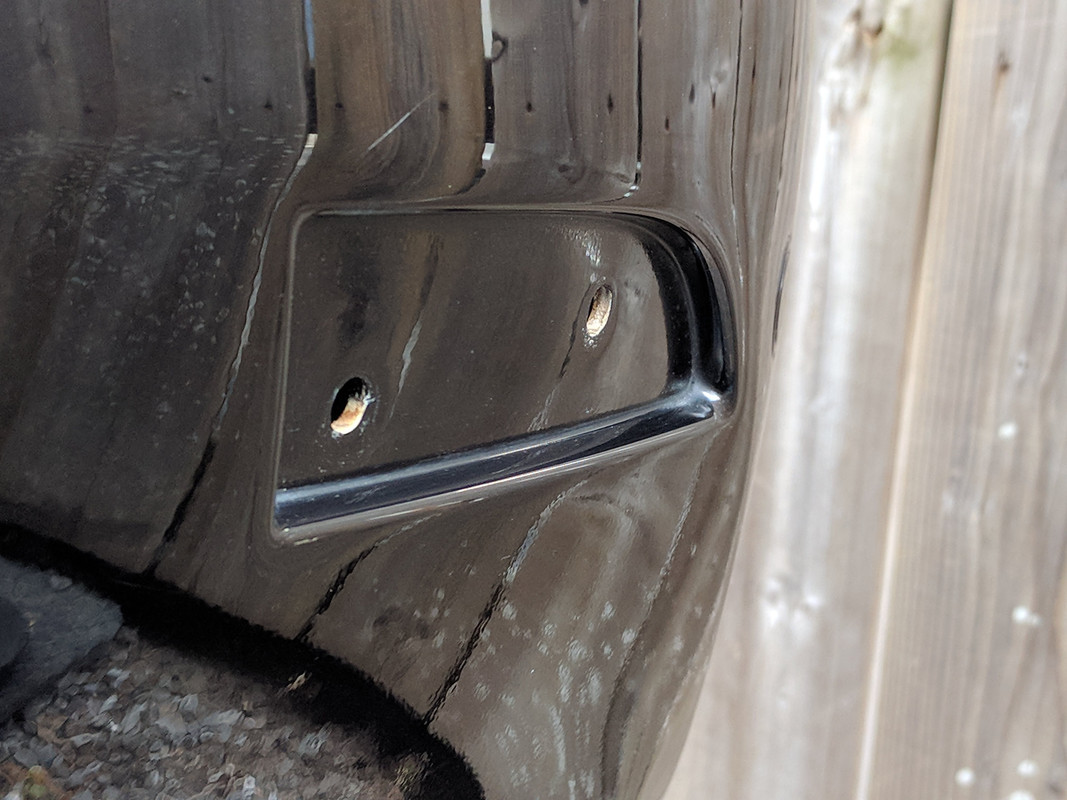
After investigating the rear bumper cover removal procedure, I decided to go with an install method that didn't require removing the complete bumper cover. Do whatever tickles your fancy on your own car, I'm just posting how I decided to install mine.
First I used plastic trim tools to pry off the red reflectors:

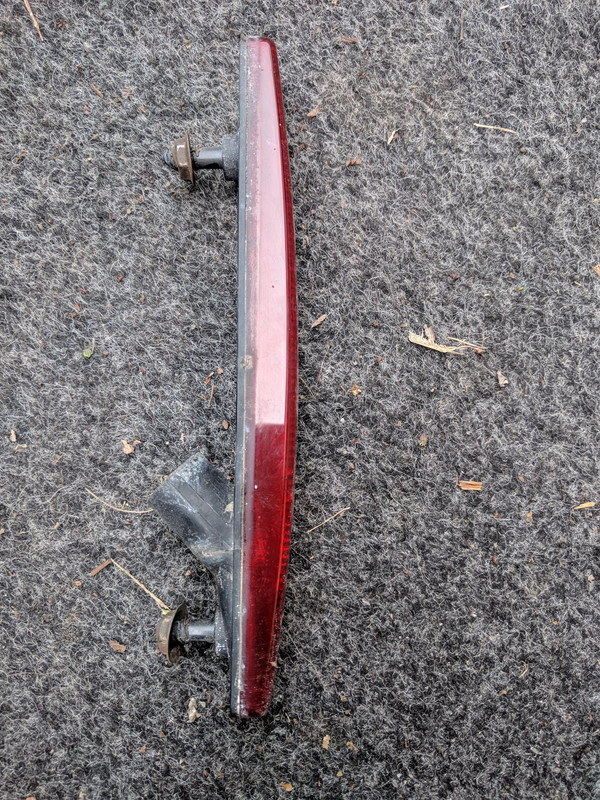
For comparison you will see the new marker is straight while the one you remove has taken the curved shape of the bumper cover. I tried warming one of them and decided it wasn't necessary as the other installed fine without any heat:

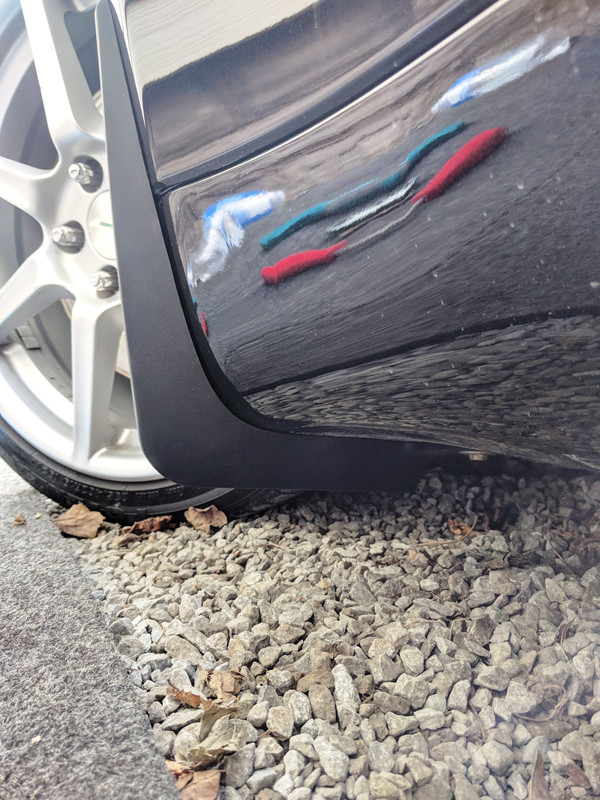
Wow what a difference, they almost disappear on a black car:

Here's a side by side comparison:
For attachment I tried 3 methods:
1) Plugs in the holes to hold the plastic pins
2) 3M two way tape (didn't give the flush look I was after)
3) A small amount of Gorilla glue at each end (this method worked the best at giving the lens the curve you would get if attaching with the self tapping nuts)

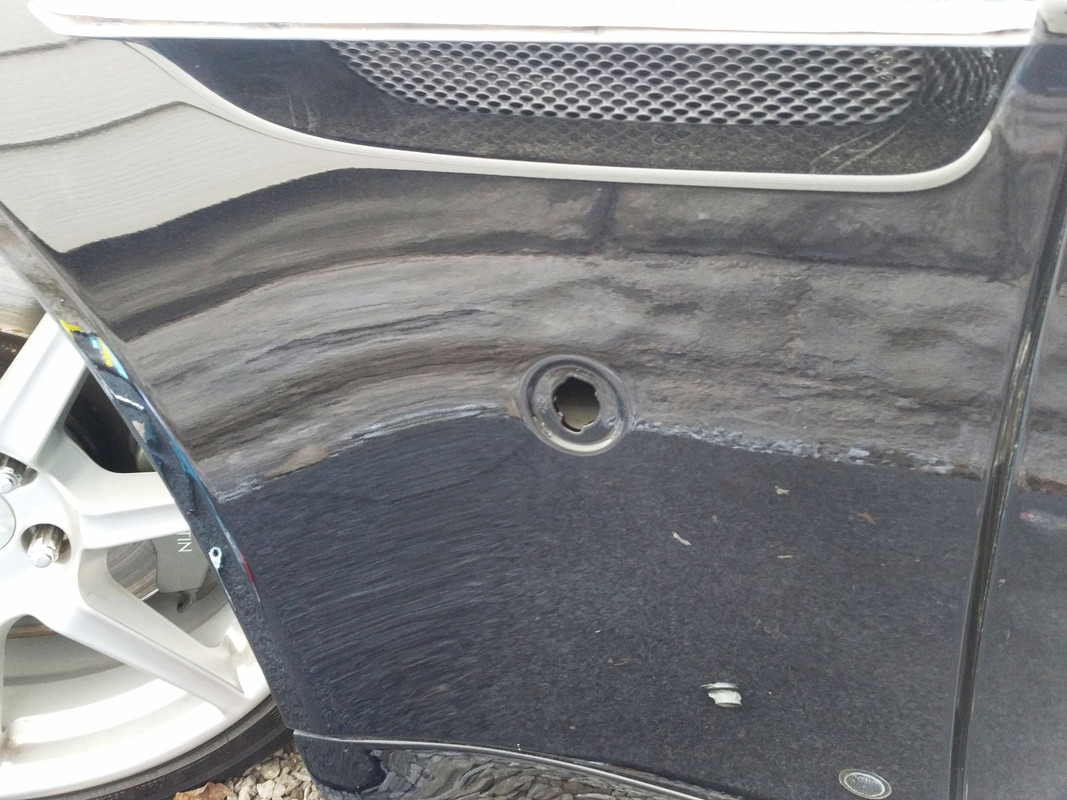
Now more than ever the red marker lights have to go to complete the transformation from all red including taillights to a combo of clear and smoked:

First I used plastic trim tools to pry off the red reflectors:
For comparison you will see the new marker is straight while the one you remove has taken the curved shape of the bumper cover. I tried warming one of them and decided it wasn't necessary as the other installed fine without any heat:
Wow what a difference, they almost disappear on a black car:
Here's a side by side comparison:
For attachment I tried 3 methods:
1) Plugs in the holes to hold the plastic pins
2) 3M two way tape (didn't give the flush look I was after)
3) A small amount of Gorilla glue at each end (this method worked the best at giving the lens the curve you would get if attaching with the self tapping nuts)
Now more than ever the red marker lights have to go to complete the transformation from all red including taillights to a combo of clear and smoked:
Thread Starter
|
Registered User
Joined: Apr 2017
Posts: 399
From: Niagara Region
Rep Power: 29
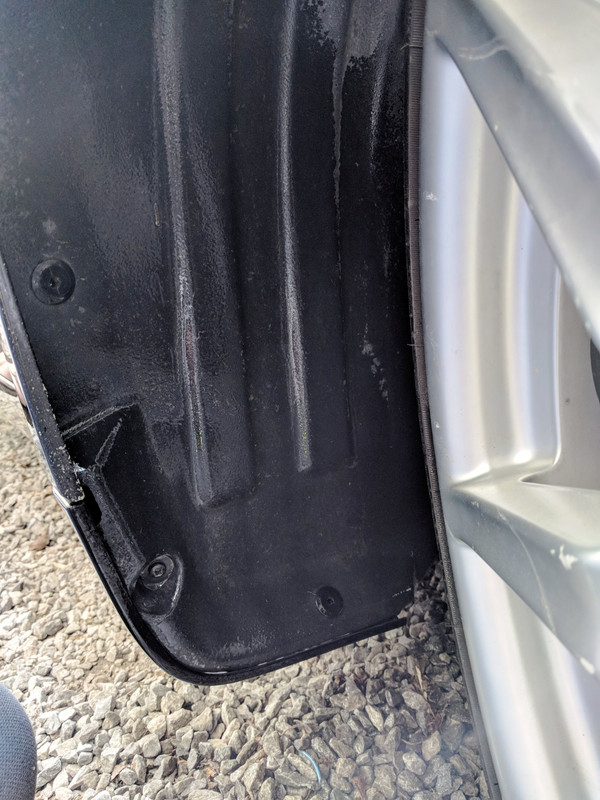
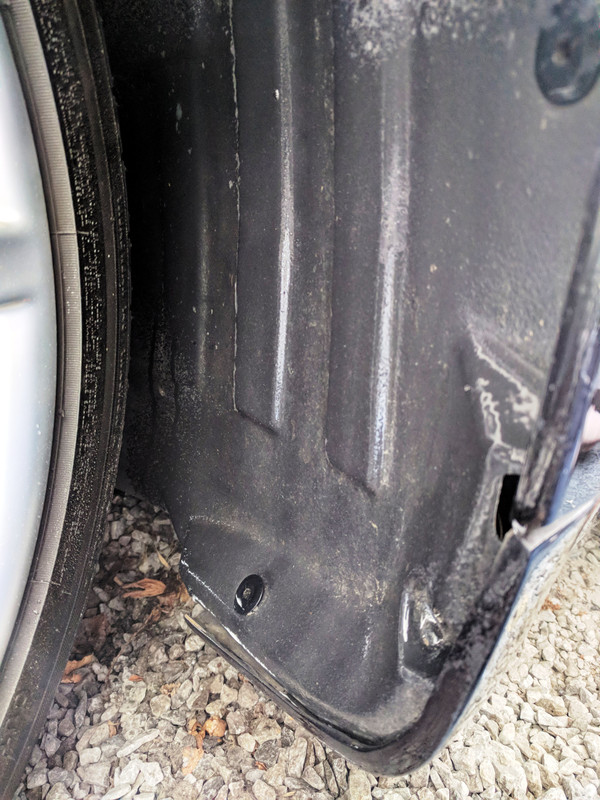
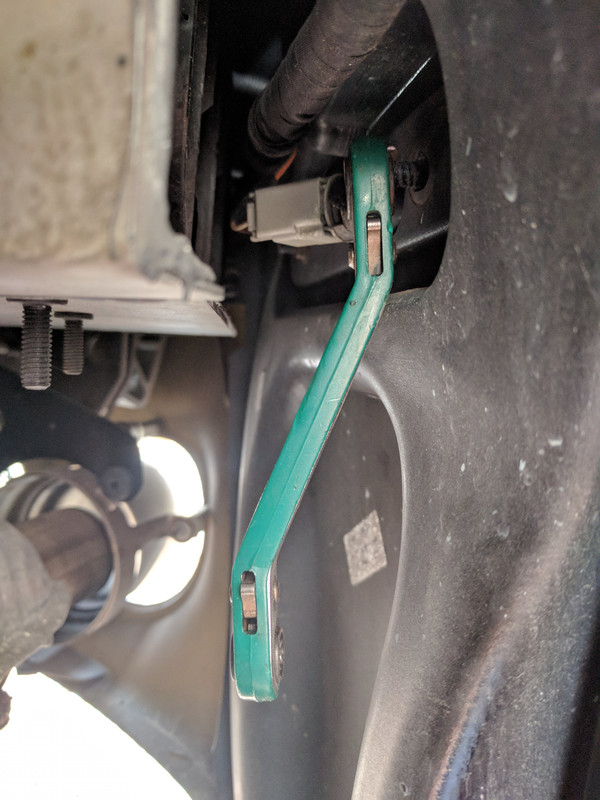
Removed rear wheel and back half of wheel liner.
Trusty 2 x 4 was used to hold open the gap needed to work:

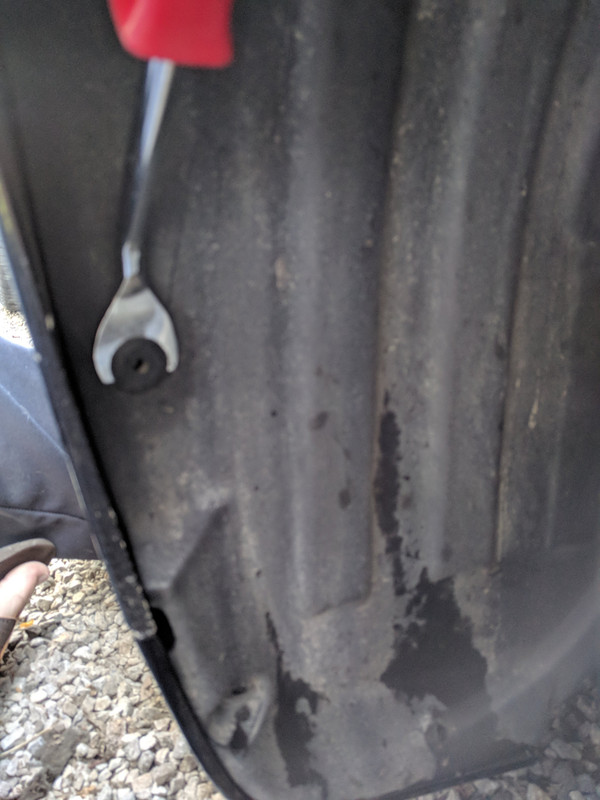
I found a ratcheting 10mm wrench was best tool for the job:
With the nuts removed pop the lens out the front, then remove the plug:
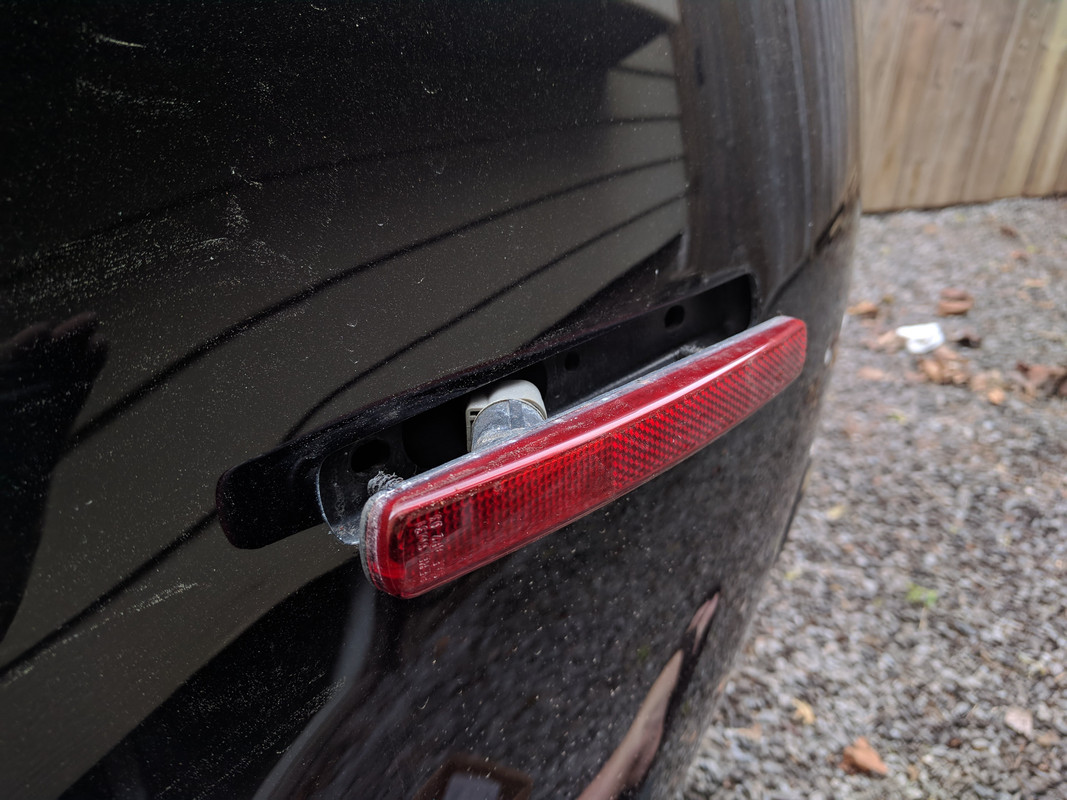
I'm keeping the old ones with the old nuts as new ones are provided in the kit from Redpants:
Neither of my rears lights were working before I started - one was a bad bulb and other was a socket plug with a broken pin. I was able to MacGyver a new pin with a trimmed Staple Gun staple
You could just buy a new socket but that wouldn't be as fun or satisfying, this way I have a story to tell

A multi-meter, electrical cleaner and a test bulb got things working reliably after the sockets were nice and clean:
Then it's just a matter of installing the nuts on the new lens. I recommend starting the threads before installing at there isn't much room to work in there. Also remember they are plastic so don't over-tighten the nuts.
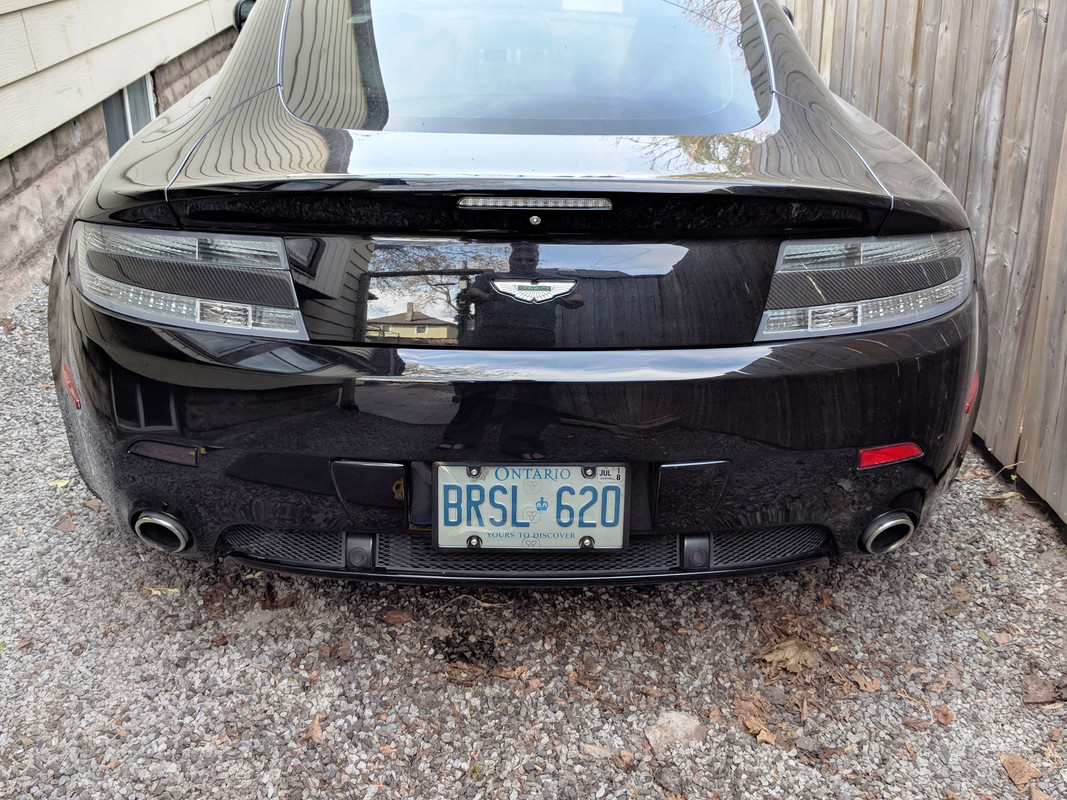
I'm really happy with how the 9 light LEDs look - they are fairly hidden in daytime because of the smoked lens. However they are nice and bright even during the daylight:
Trusty 2 x 4 was used to hold open the gap needed to work:
I found a ratcheting 10mm wrench was best tool for the job:
With the nuts removed pop the lens out the front, then remove the plug:
I'm keeping the old ones with the old nuts as new ones are provided in the kit from Redpants:
Neither of my rears lights were working before I started - one was a bad bulb and other was a socket plug with a broken pin. I was able to MacGyver a new pin with a trimmed Staple Gun staple
You could just buy a new socket but that wouldn't be as fun or satisfying, this way I have a story to tell
A multi-meter, electrical cleaner and a test bulb got things working reliably after the sockets were nice and clean:
Then it's just a matter of installing the nuts on the new lens. I recommend starting the threads before installing at there isn't much room to work in there. Also remember they are plastic so don't over-tighten the nuts.
I'm really happy with how the 9 light LEDs look - they are fairly hidden in daytime because of the smoked lens. However they are nice and bright even during the daylight:
Last edited by 007V8Vantage; May 14, 2018 at 01:05 PM.
Thread Starter
|
Registered User
Joined: Apr 2017
Posts: 399
From: Niagara Region
Rep Power: 29
I think my "smart"phone died while I was doing this job so I don't have progress pics. The good news is that it's an easy job.
Just follow Redpants YouTube video on the swap here:
My Steps:
1. Remove wheel and front of wheel liner.
2. Remove airbox bolts so it will move enough for clearance to marker nuts.
3. Replace lens with new one and new 10mm nuts.
4. Connect electrical plug after installing bulb colour / type of your choice
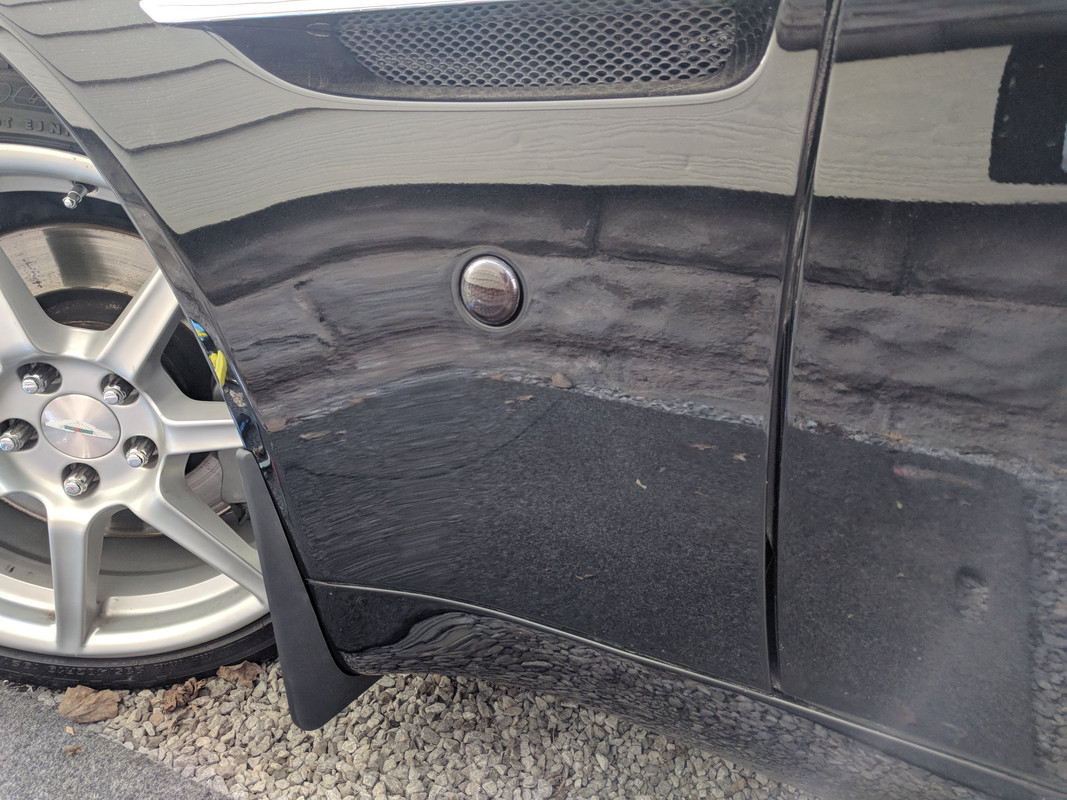
Here is a before and after pics on an Onyx Black Vantage.

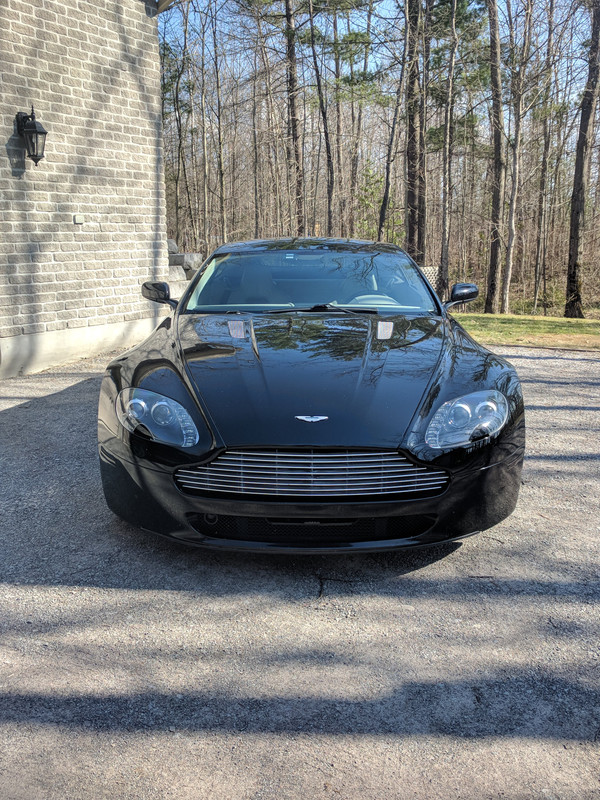
Let me know if you like the results, I think the "after" blends almost as good as a ROW bumper cover but for a lot less $$$$
Just follow Redpants YouTube video on the swap here:
My Steps:
1. Remove wheel and front of wheel liner.
2. Remove airbox bolts so it will move enough for clearance to marker nuts.
3. Replace lens with new one and new 10mm nuts.
4. Connect electrical plug after installing bulb colour / type of your choice
Here is a before and after pics on an Onyx Black Vantage.
Let me know if you like the results, I think the "after" blends almost as good as a ROW bumper cover but for a lot less $$$$
Thread Starter
|
Registered User
Joined: Apr 2017
Posts: 399
From: Niagara Region
Rep Power: 29
I agree the light ones will definitely look better on many paint colours.
Of course "looks" is subjective but I am happy I purchased them.
Registered User

Joined: Aug 2016
Posts: 1,051
From: Reno, NV
Rep Power: 62
If mine was still black, I would do the exact same thing selections you did with maybe a yellow light in the side repeater! Your "beat up" vantage is really shaping up nicely, can't wait to hear it once the headers and everything is all installed