
Greetings from Niagara, Ontario, Canada


Registered User

Joined: Oct 2011
Posts: 160
From: Passing on the right
Rep Power: 21

https://www.6speedonline.com/forums/...-today-12.html
Check my posts starting on Page 12 to 14. I haven't been able to "evaluate" the driving experience with these much. It's still cold here. I had it out in 10 degree weather. In 10 degree weather it would spin the tires on full throttle in first and second gear. Could be cold tires..... Seems to be easier to drive off the line. Could the extra torque down lower on the rev range make the clutch easier to roll on? Maybe? It sounds much more refined than just the cats. I did request the tune eliminate the pops and crackles on the overrun. Come on spring!!!!!
Check my posts starting on Page 12 to 14. I haven't been able to "evaluate" the driving experience with these much. It's still cold here. I had it out in 10 degree weather. In 10 degree weather it would spin the tires on full throttle in first and second gear. Could be cold tires..... Seems to be easier to drive off the line. Could the extra torque down lower on the rev range make the clutch easier to roll on? Maybe? It sounds much more refined than just the cats. I did request the tune eliminate the pops and crackles on the overrun. Come on spring!!!!!
Last edited by silver997; Apr 20, 2018 at 09:35 AM.
Thread Starter
|
Registered User
Joined: Apr 2017
Posts: 399
From: Niagara Region
Rep Power: 29
Thanks silver997
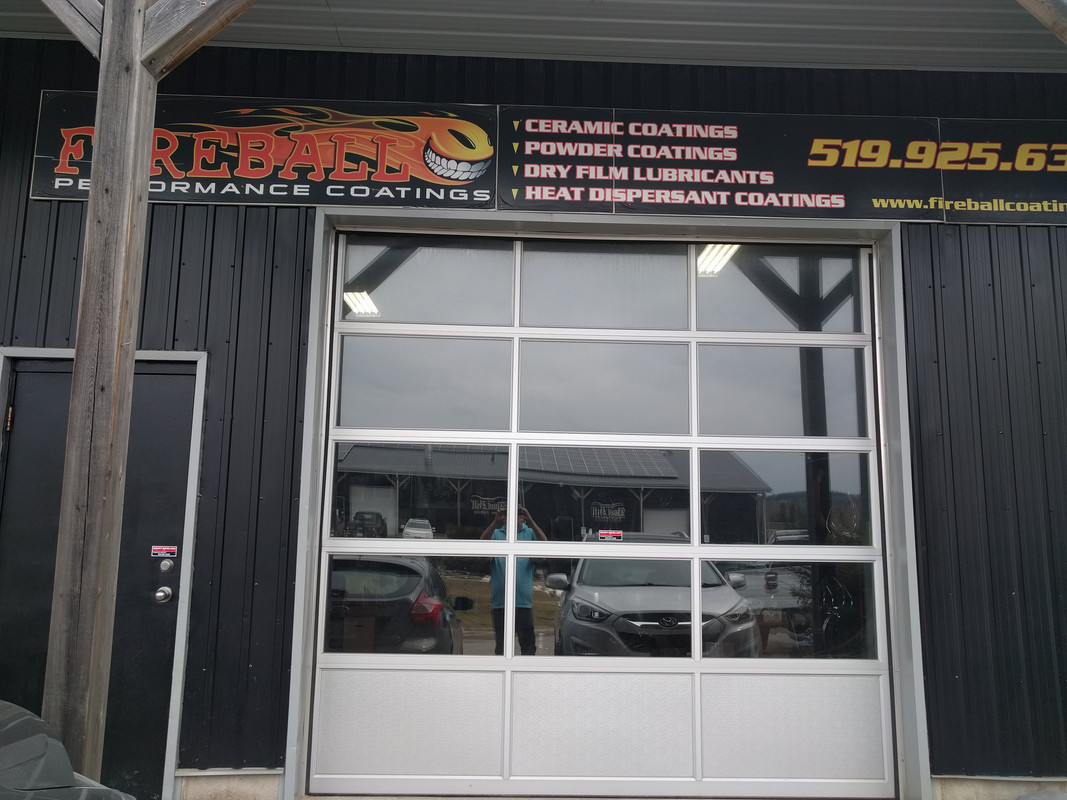
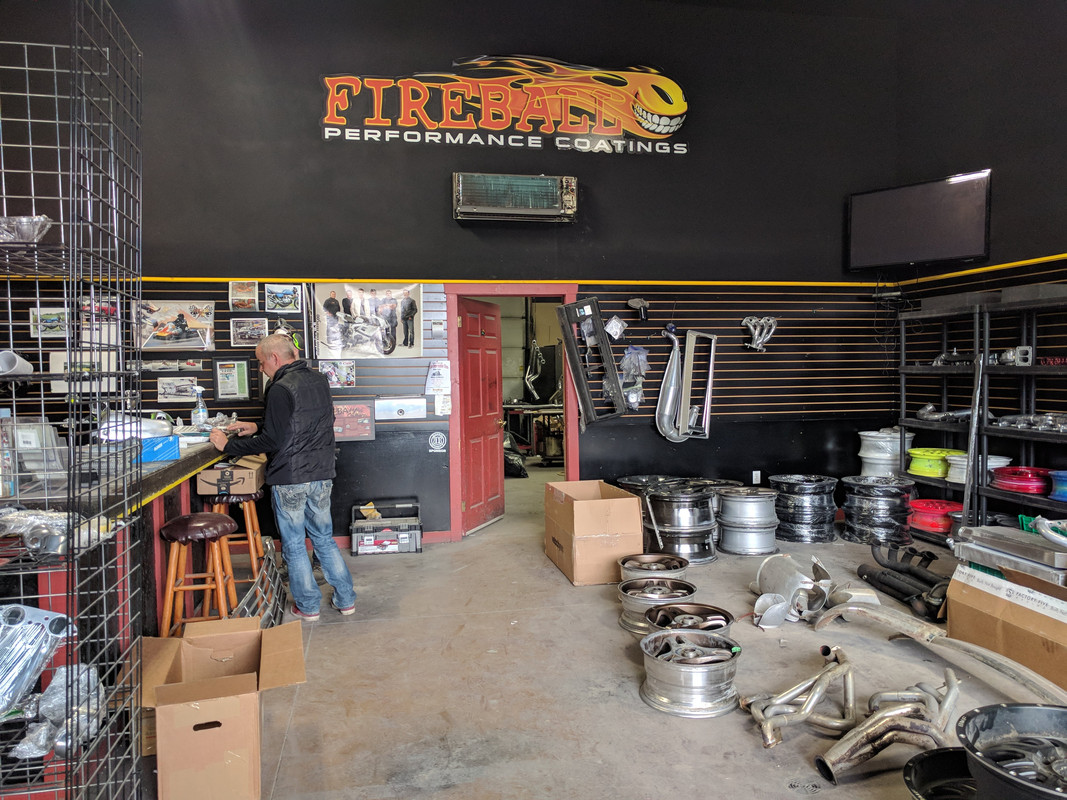
I decided to go with the ceramic coating and dropped the headers off at Fireball Performance Coatings. I went with a bright finish instead of black as they cost too much not to show them off. I think that finish will compliment the colour of the aluminum chassis.
Last edited by 007V8Vantage; May 3, 2018 at 08:32 PM.
Thread Starter
|
Registered User
Joined: Apr 2017
Posts: 399
From: Niagara Region
Rep Power: 29
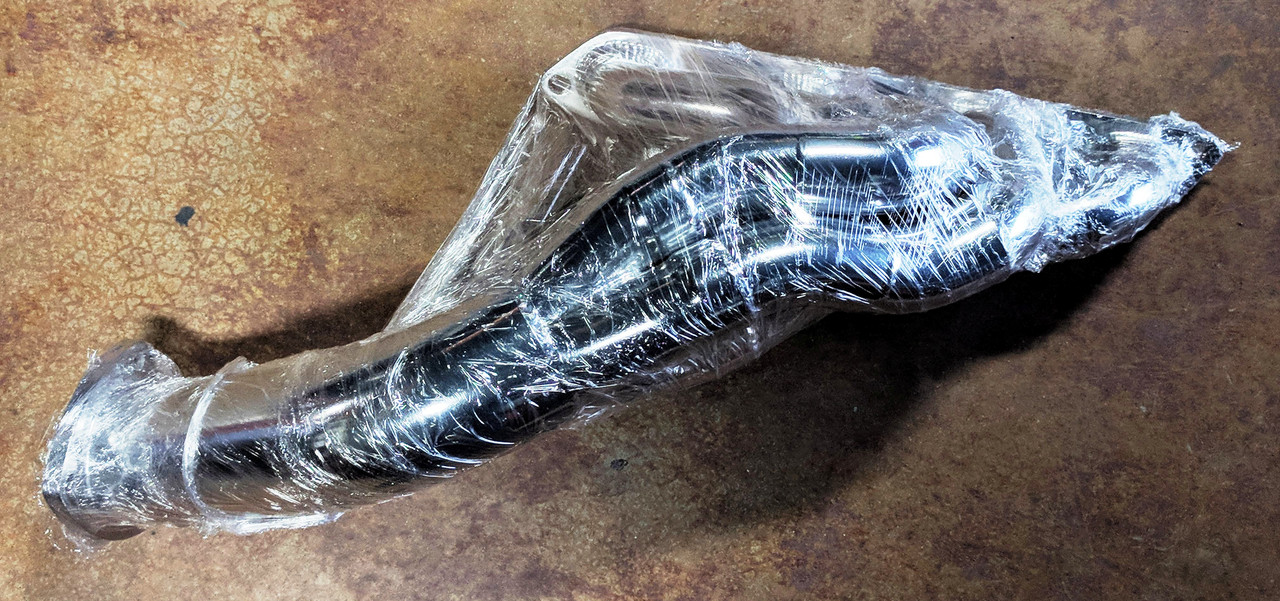
Picked up the ceramic coated headers today.
I did go with the polished finish so they are noticeable in the engine bay.
However they are not easy to reach so they will dull to a gray over time which should still compliment the aluminum chassis colour.
Here's a teaser pic:
I did go with the polished finish so they are noticeable in the engine bay.
However they are not easy to reach so they will dull to a gray over time which should still compliment the aluminum chassis colour.
Here's a teaser pic:
Thread Starter
|
Registered User
Joined: Apr 2017
Posts: 399
From: Niagara Region
Rep Power: 29
Paint job and buffing entire car is complete 
I had CAA tow it home since it hasn't started since the shop killed the battery.
I got my first chance to use the tow ring
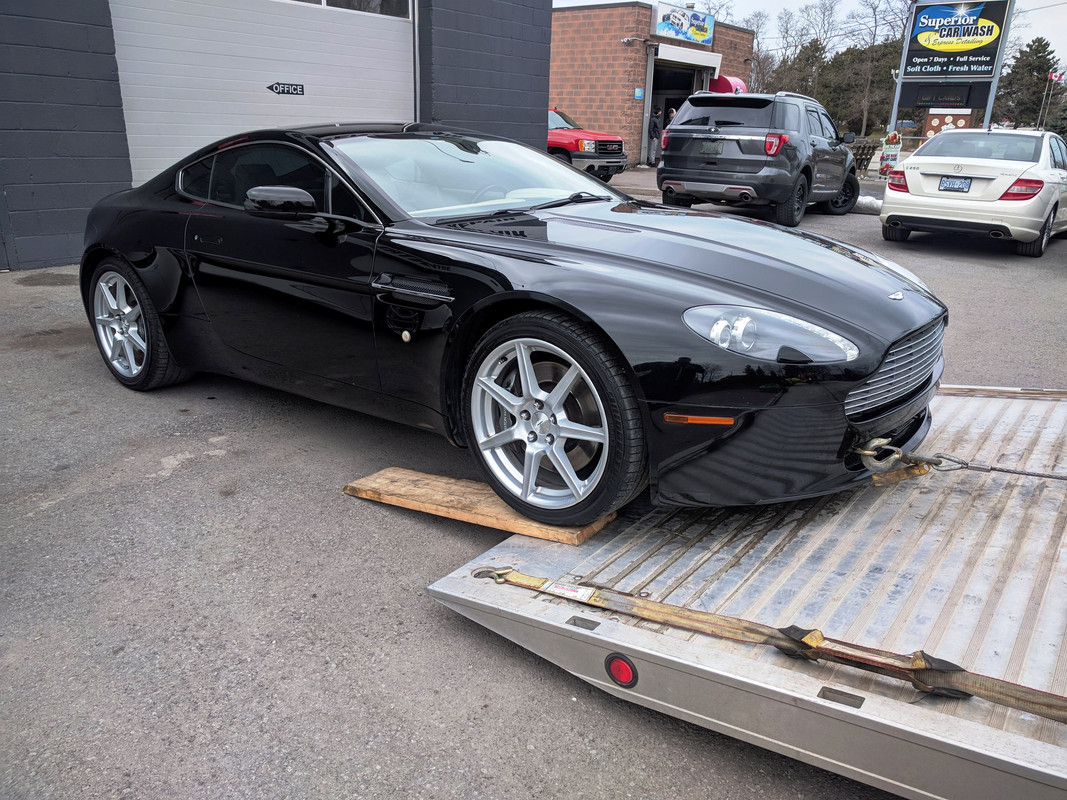
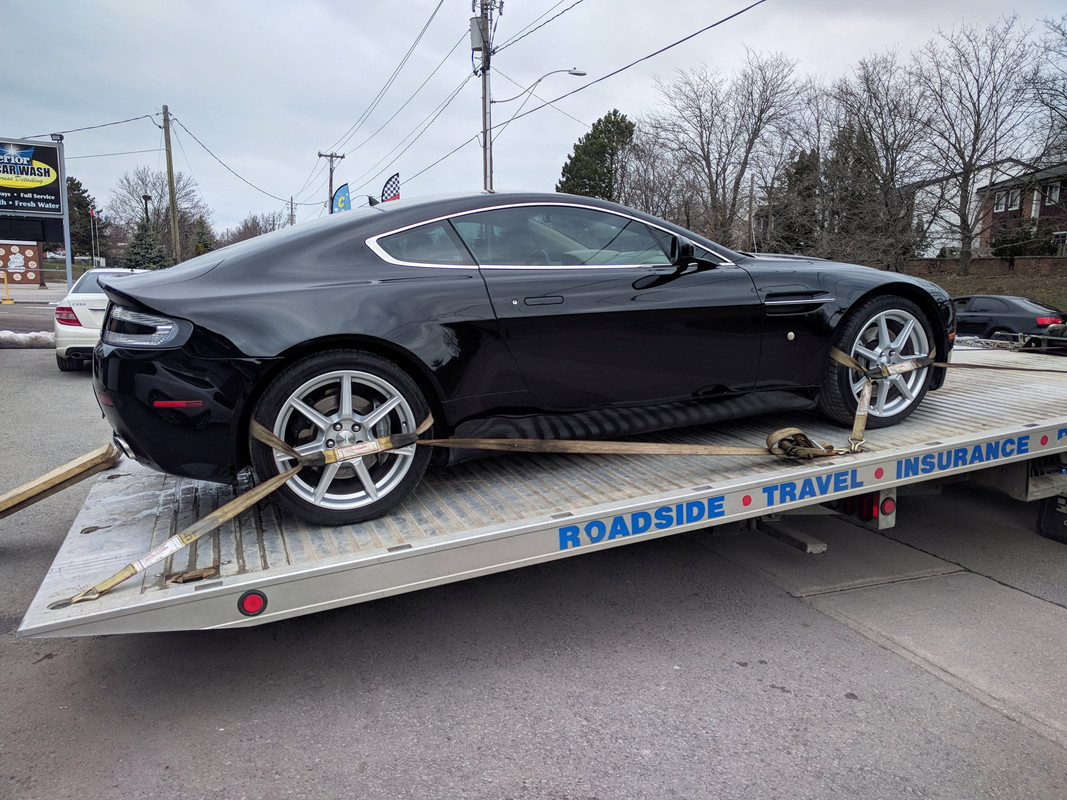
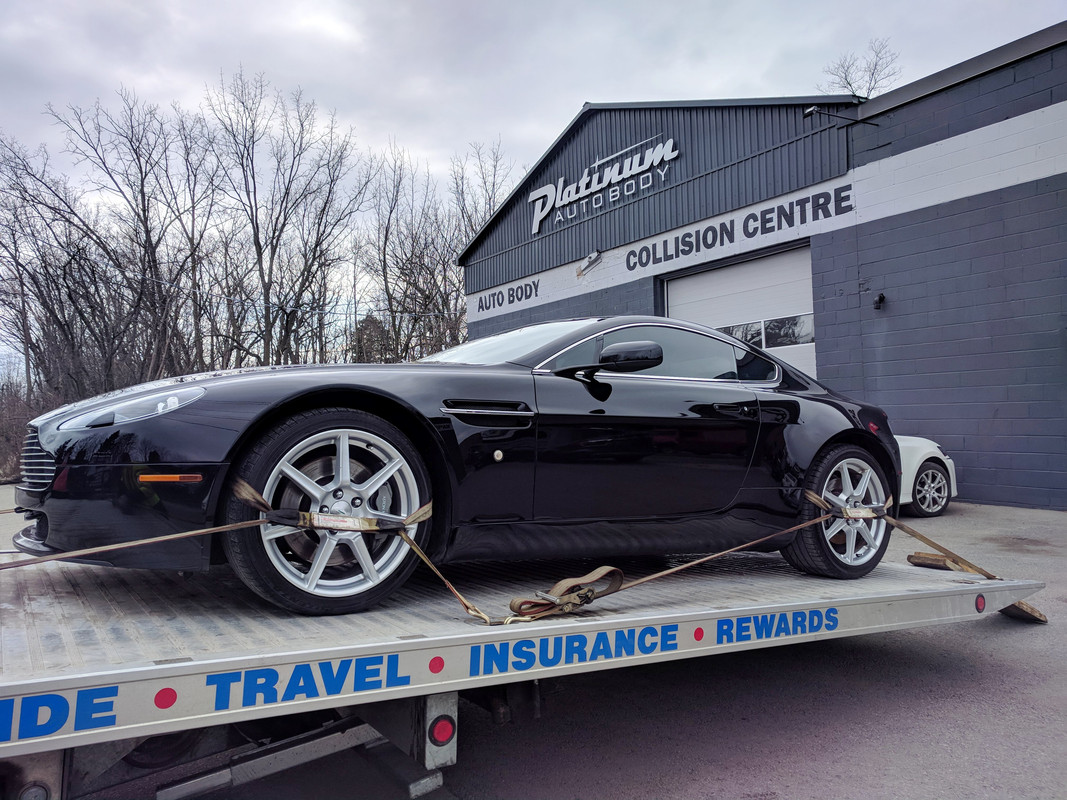
I'm very satisfied with the quality of the bodywork, colour match and paint blending.
I do see minor orange peel on one panel as Aston OEM paint is of a very high standard to compare.
Overall I'm happy with the results, the car is looking its best since I purchased it and the price was excellent value for money!
Time to find out why it doesn't start - on the bright side since they had to push it around the shop, I know it wasn't out on any joyrides
I had CAA tow it home since it hasn't started since the shop killed the battery.
I got my first chance to use the tow ring
I'm very satisfied with the quality of the bodywork, colour match and paint blending.
I do see minor orange peel on one panel as Aston OEM paint is of a very high standard to compare.
Overall I'm happy with the results, the car is looking its best since I purchased it and the price was excellent value for money!
Time to find out why it doesn't start - on the bright side since they had to push it around the shop, I know it wasn't out on any joyrides
Registered User
Joined: Aug 2014
Posts: 1,038
From: Oxnard, Ca
Rep Power: 62

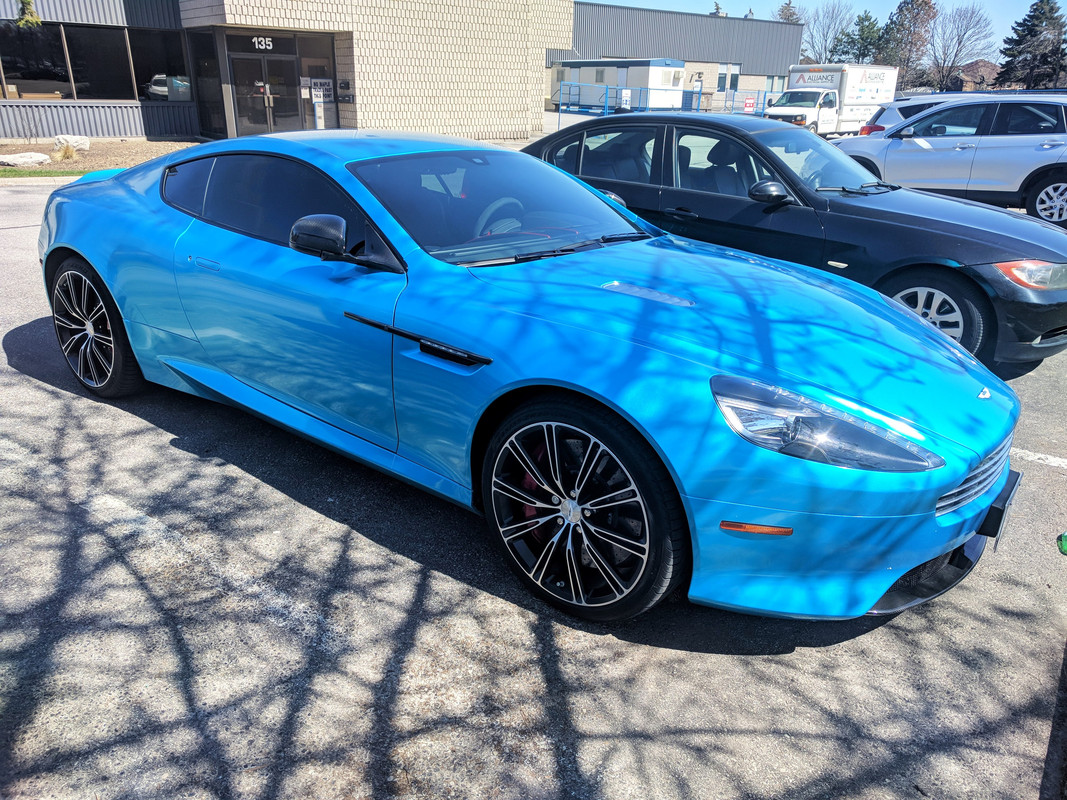
Looks like a new Vantage. It's a little known fact that ASTON MARTIN was going to call the color of your car 20 second high. Because it's only clean for 20 seconds and that's the high you get when it's clean!
Ron
Ron
Last edited by Ron Avery; May 4, 2018 at 10:04 PM.
Thread Starter
|
Registered User
Joined: Apr 2017
Posts: 399
From: Niagara Region
Rep Power: 29
Then he asked about reliability and I said "Great except it doesn't start right now"

Great news is I fixed the issue by replacing a blown starter solenoid fuse in the engine bay fuse box. My guess is it blew while the were trying the start the car with a commercial charger connected at the time.
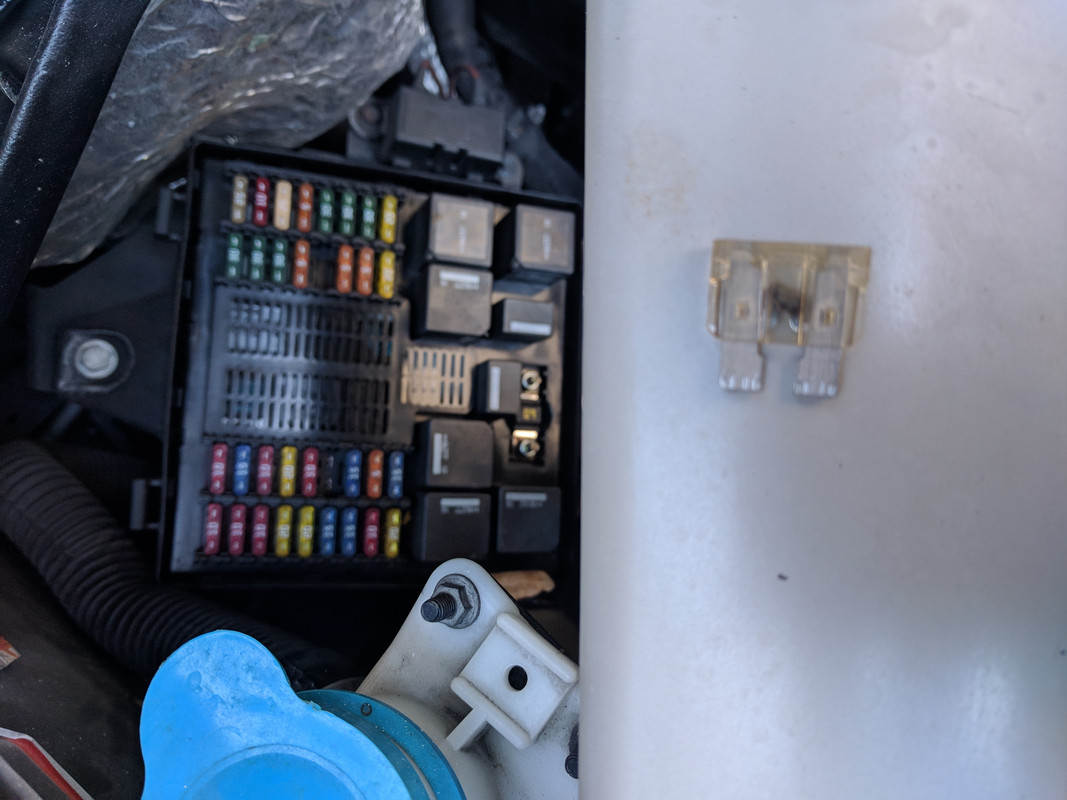
One new 25 amp fuse and I'm back in business
....and yes my paint shows dirt faster than the brake dust appears on my wheels
Last edited by 007V8Vantage; May 4, 2018 at 09:28 PM.
Thread Starter
|
Registered User
Joined: Apr 2017
Posts: 399
From: Niagara Region
Rep Power: 29
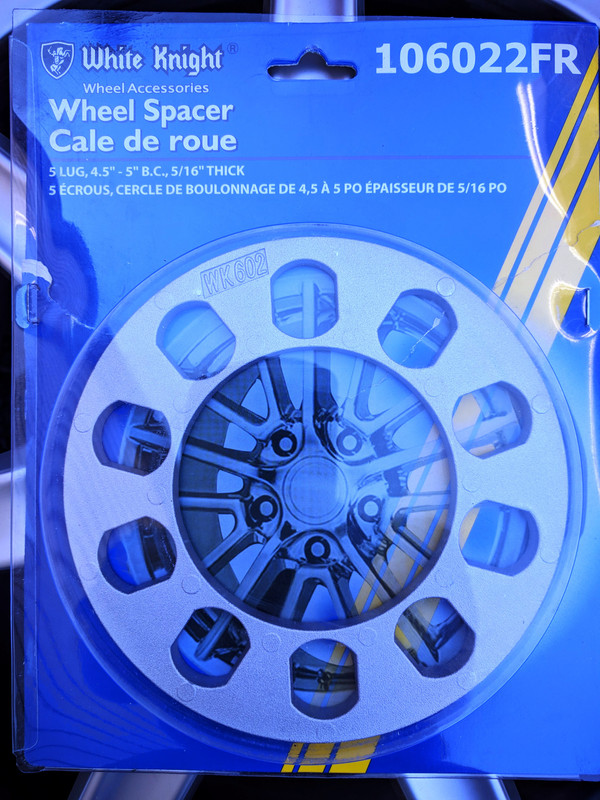
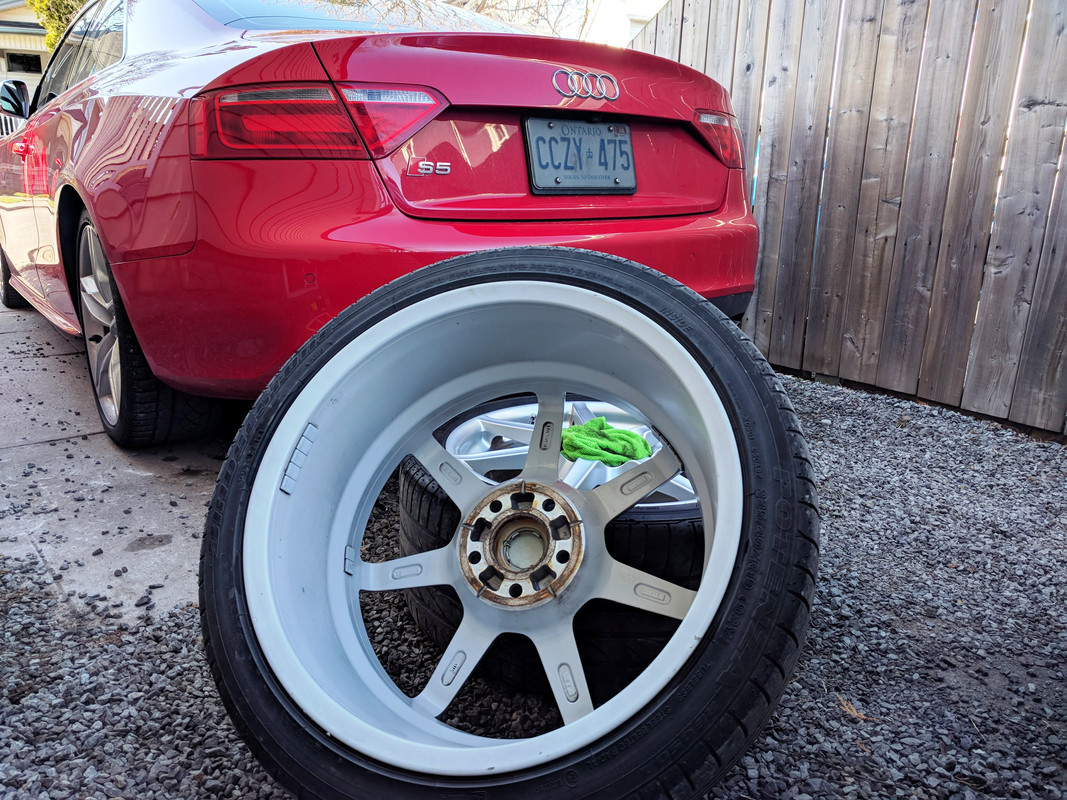
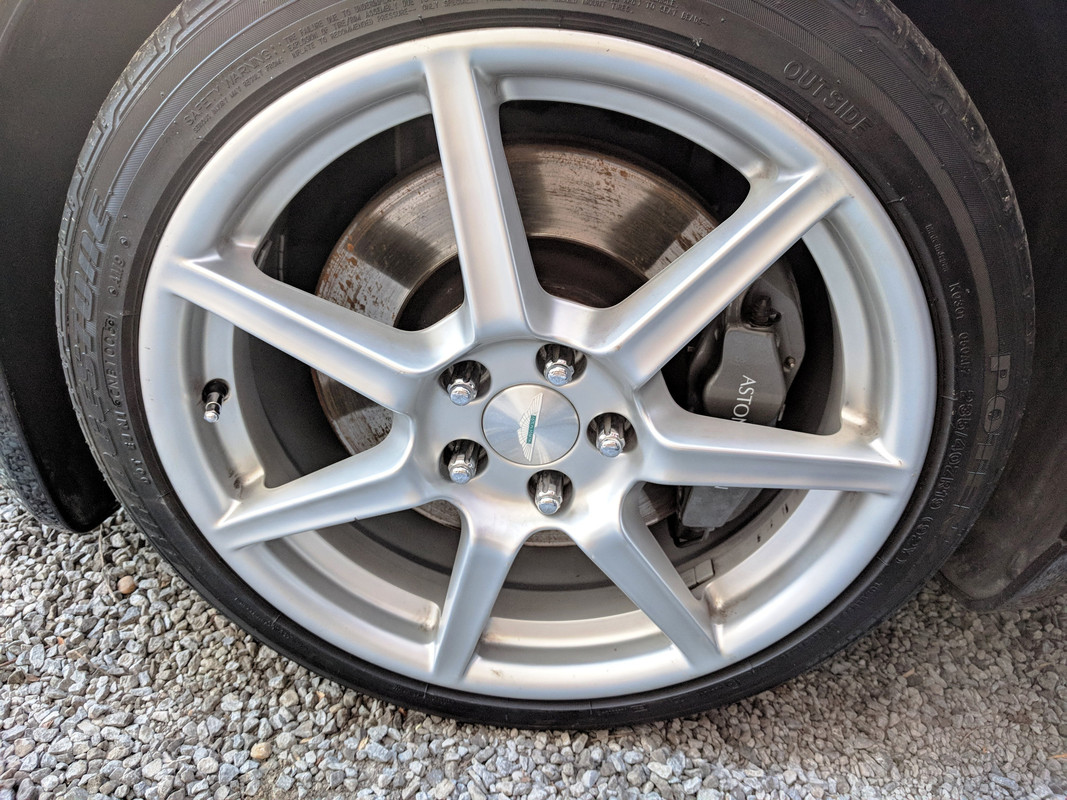
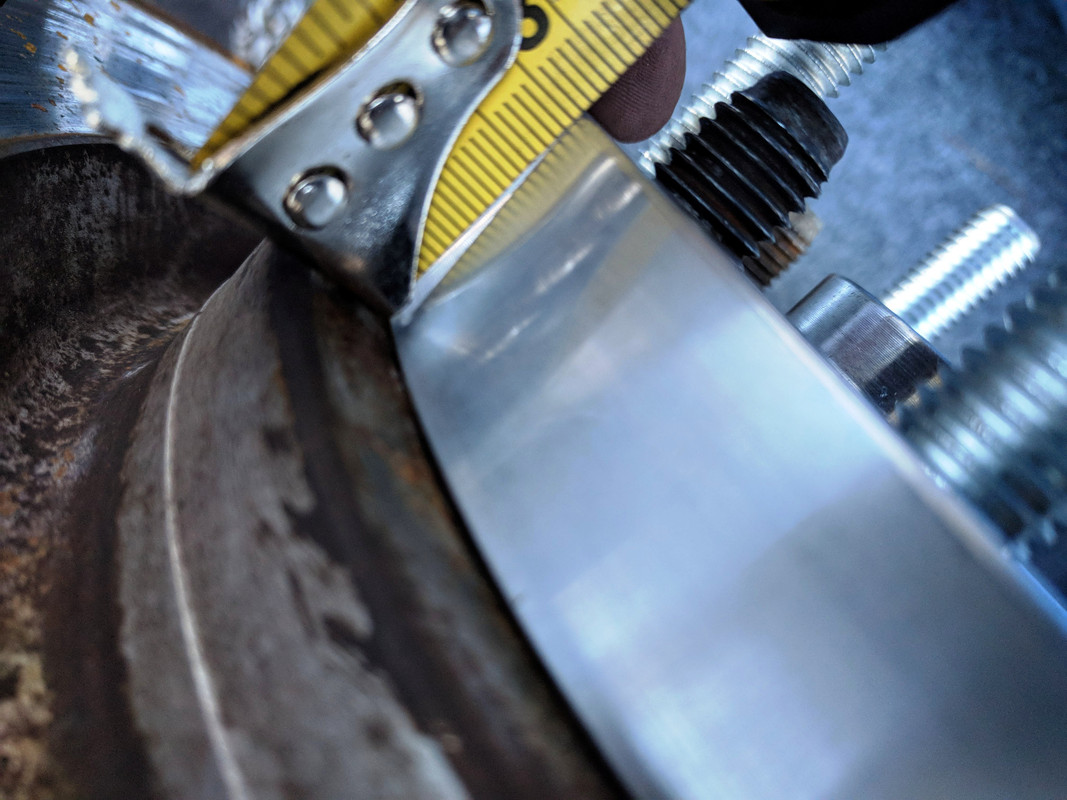
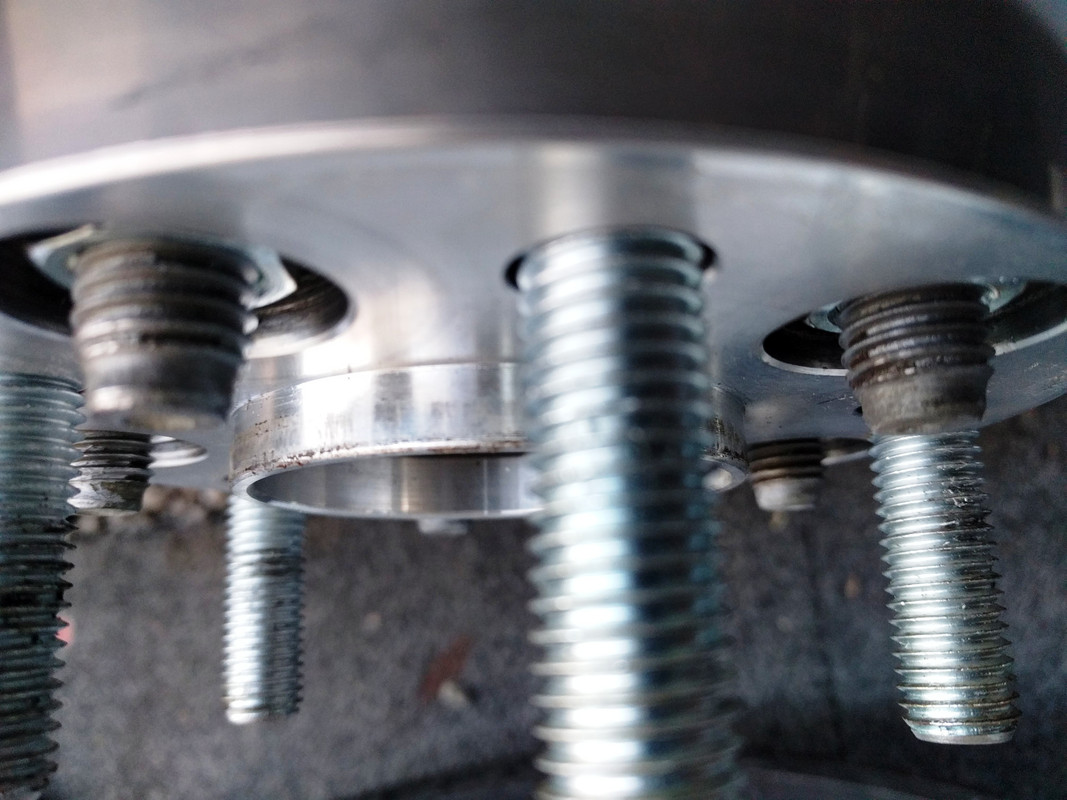
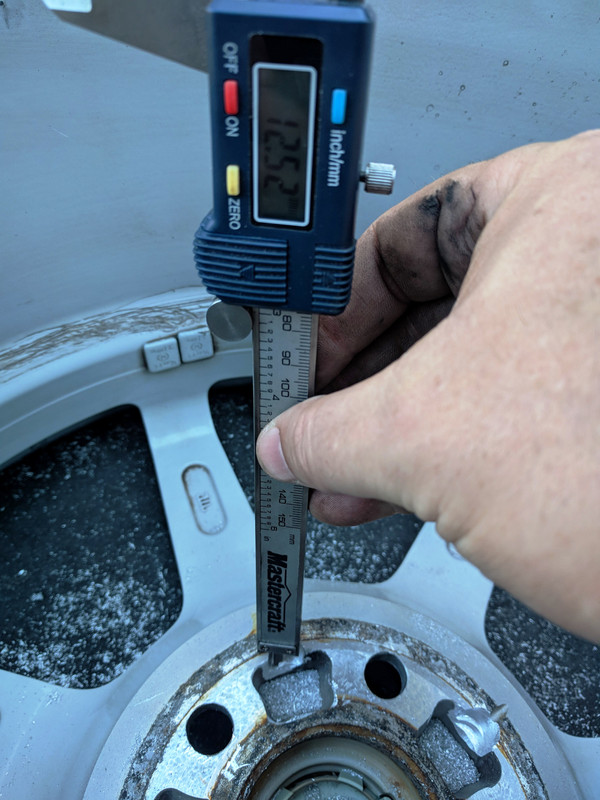
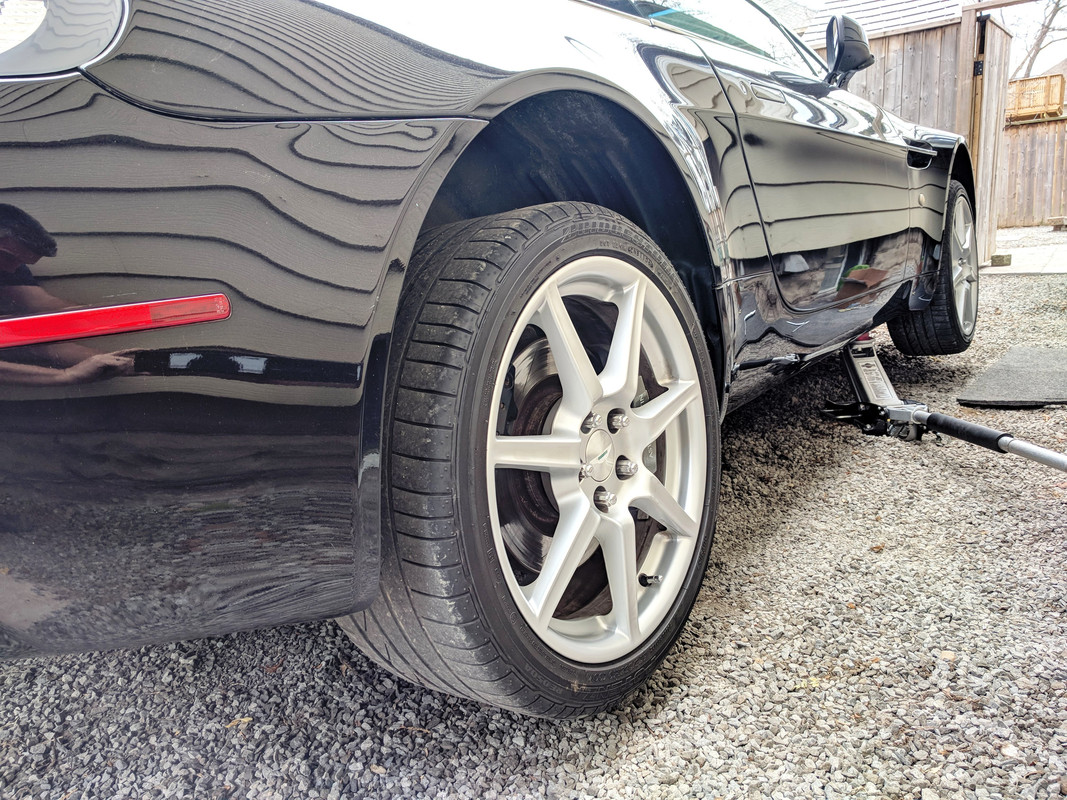
For this season my plan for spacing front wheels is a simple one.
Just using a 5/16" ~ 8 mm plate.
This allows the wheel to still mount hub-centric.
While there is room to move it further out, I was concerned about stone chips so this is my compromise for now.
Here are the pics...
What I bought:
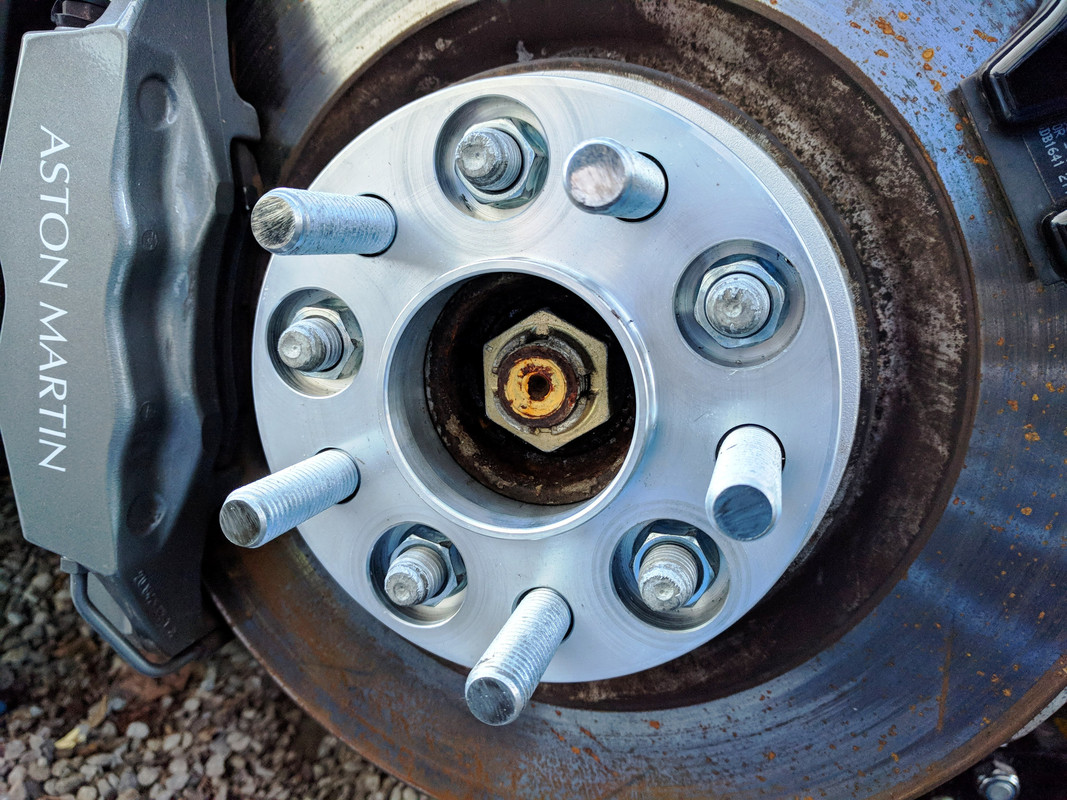
Loving the jack pads for quickly lifting one side of the car for wheel removal:
Great chance to spring clean inside of rim:
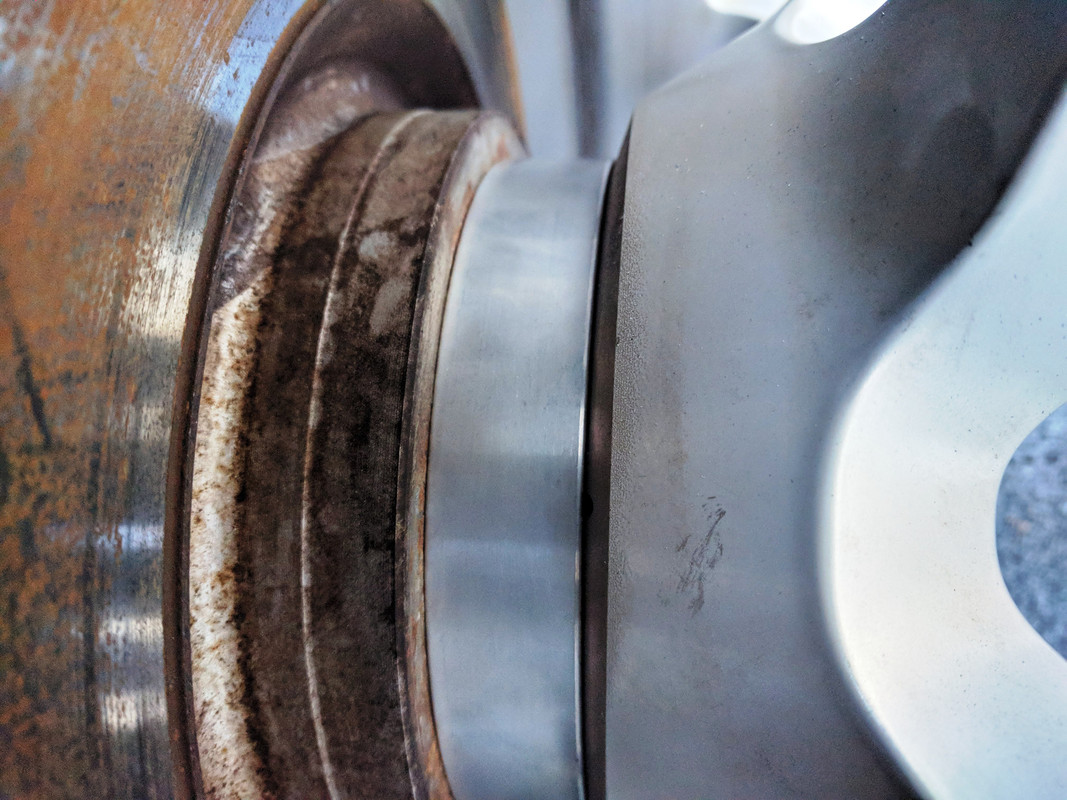
Set up centred on hub:
Still 16 threads exposed on studs:
Approx half of the hub depth exposed that still centres the wheel:
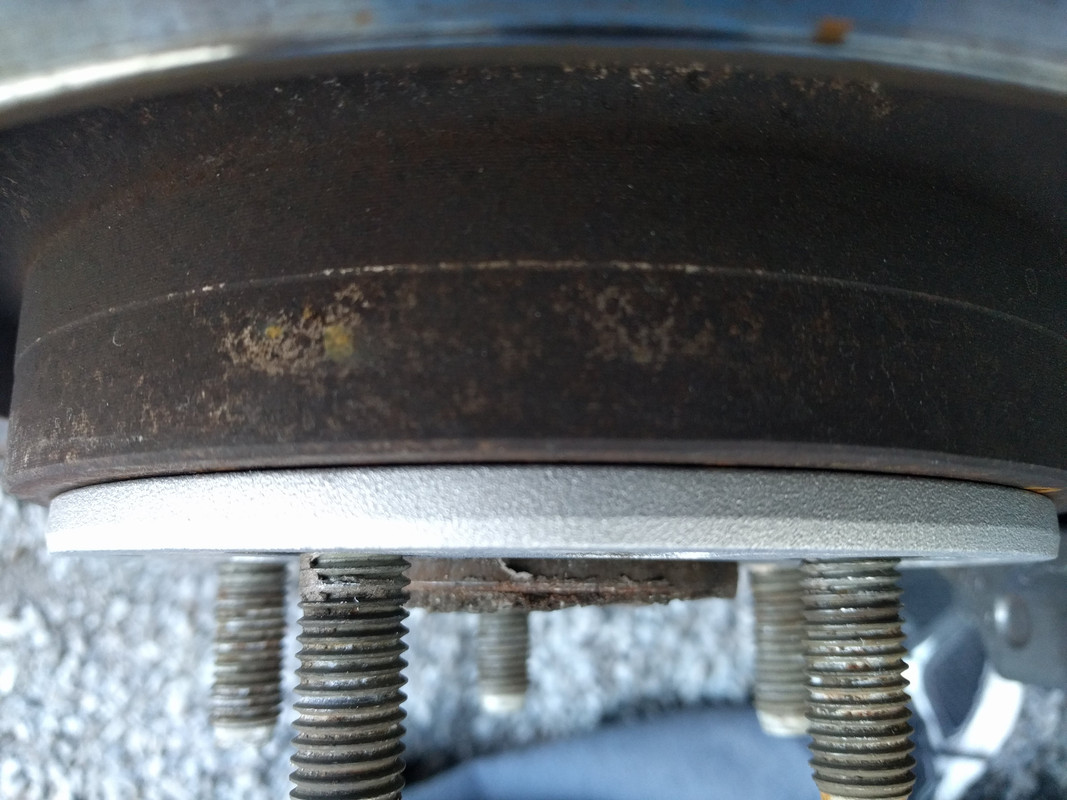
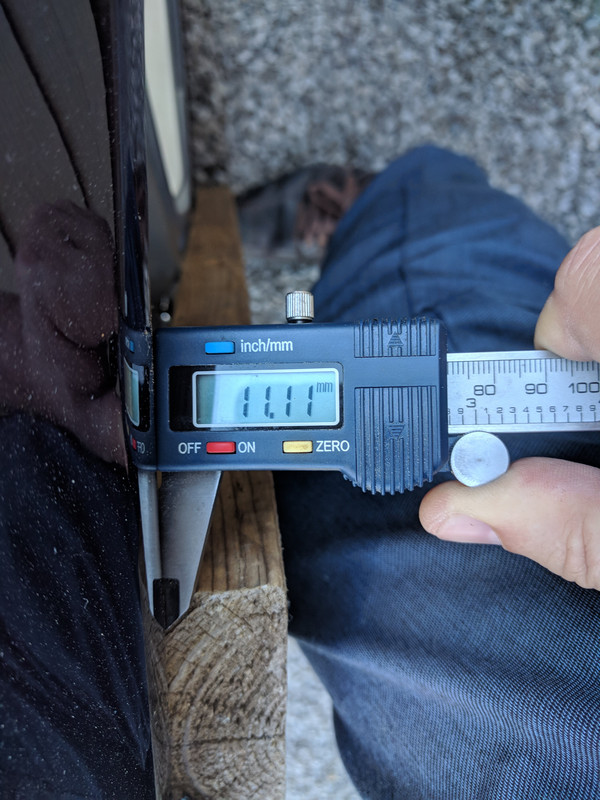
Here is the look with spacer installed:
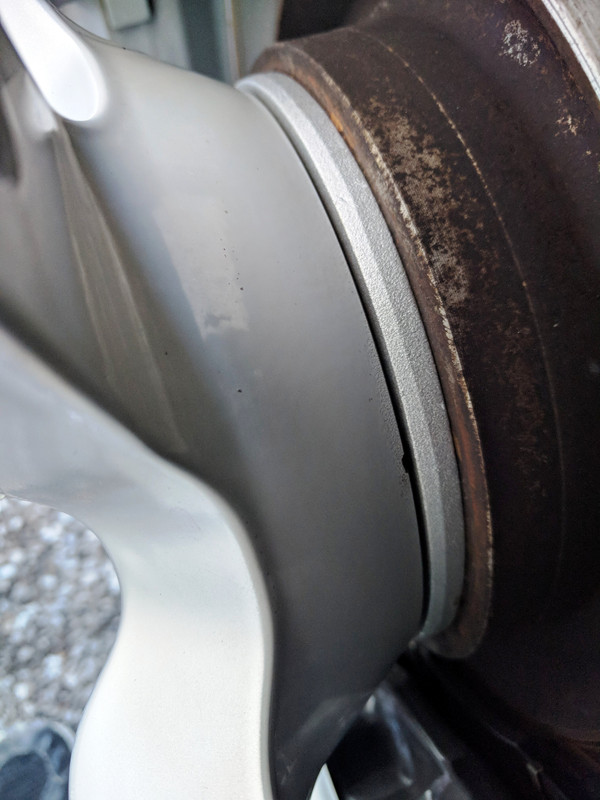
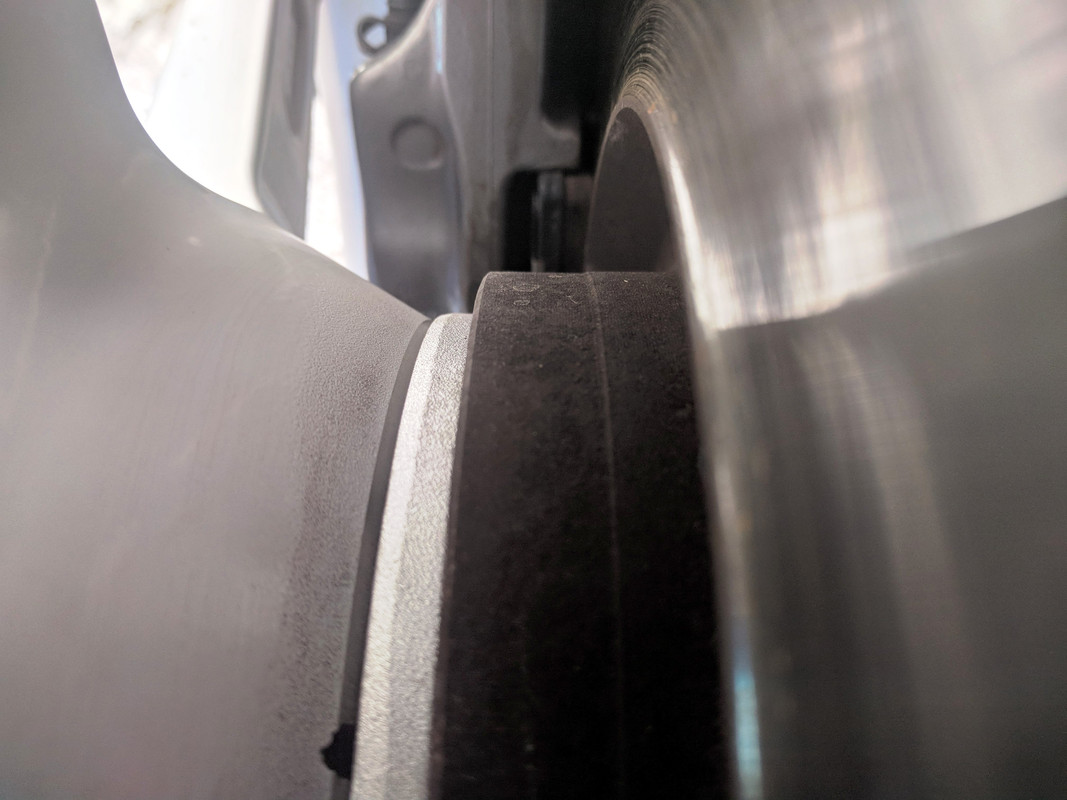
8 mm spacer leaves approx 11 mm from flush:
Here's the look with wheel back on the ground:
Next up is the rear wheel spacers...
Just using a 5/16" ~ 8 mm plate.
This allows the wheel to still mount hub-centric.
While there is room to move it further out, I was concerned about stone chips so this is my compromise for now.
Here are the pics...
What I bought:
Loving the jack pads for quickly lifting one side of the car for wheel removal:
Great chance to spring clean inside of rim:
Set up centred on hub:
Still 16 threads exposed on studs:
Approx half of the hub depth exposed that still centres the wheel:
Here is the look with spacer installed:
8 mm spacer leaves approx 11 mm from flush:
Here's the look with wheel back on the ground:
Next up is the rear wheel spacers...
Thread Starter
|
Registered User
Joined: Apr 2017
Posts: 399
From: Niagara Region
Rep Power: 29
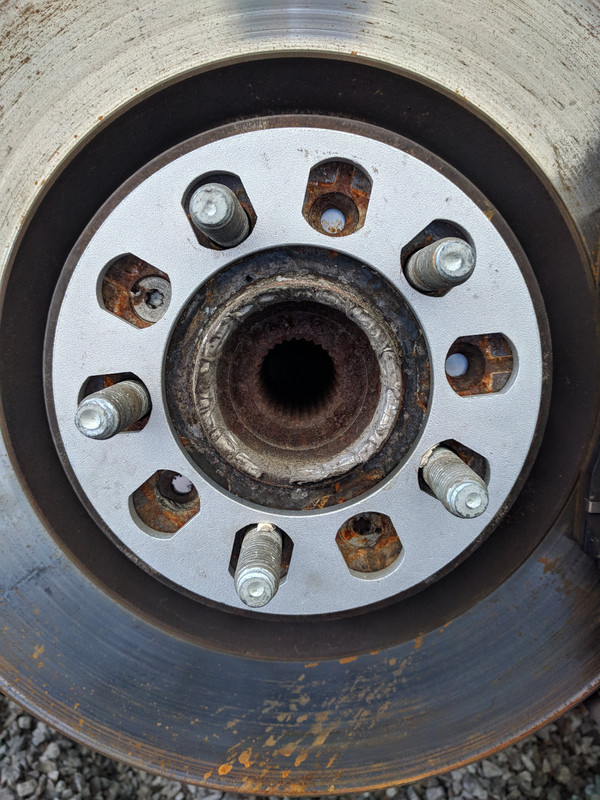
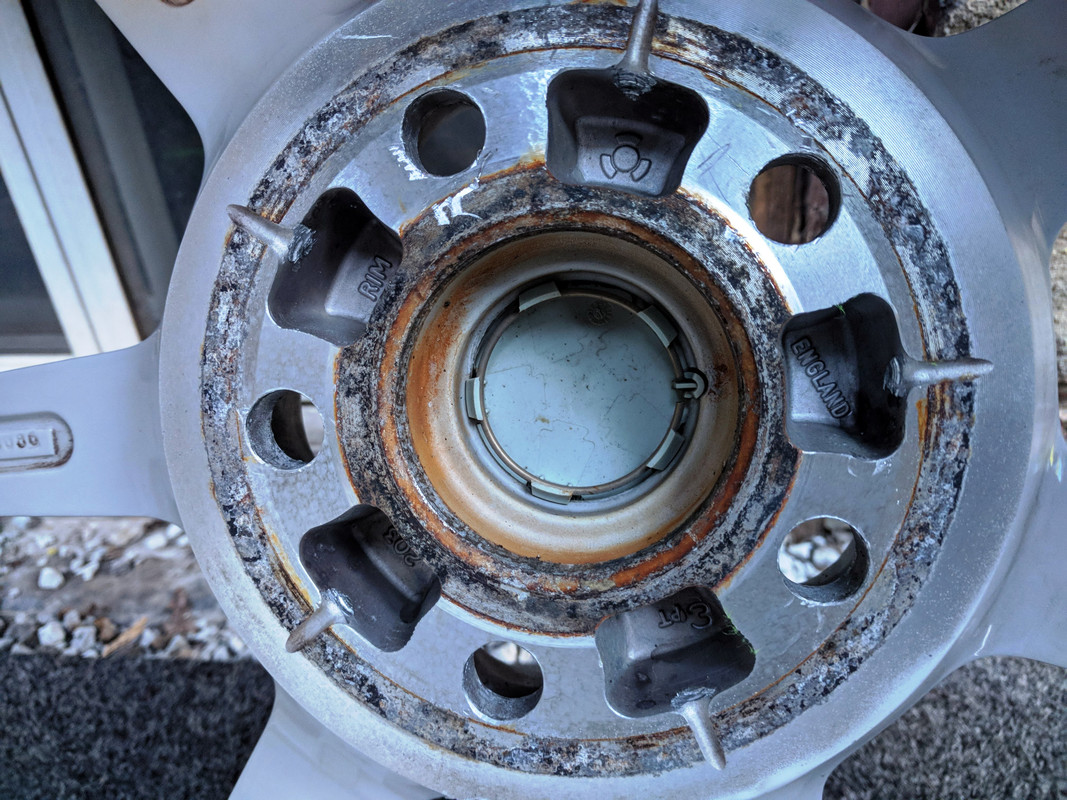
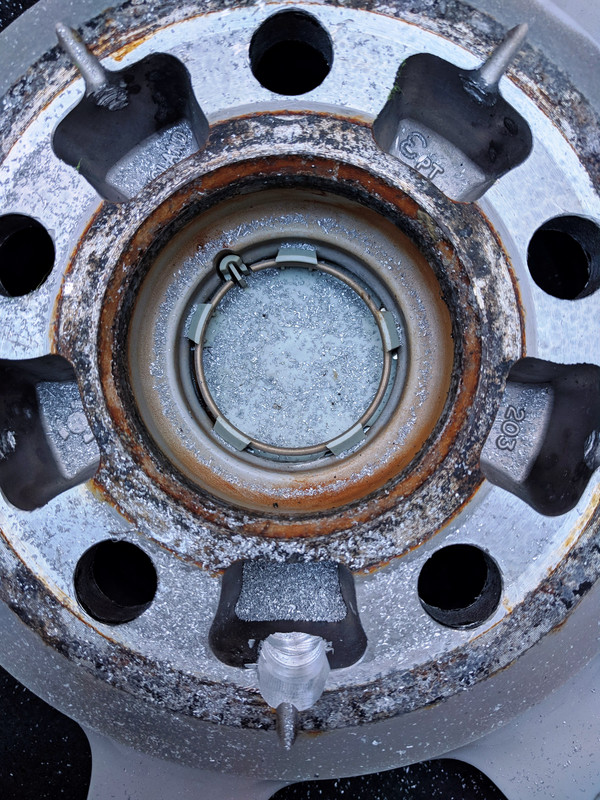
As previously shown I had a pair of hub centric wheel spacers made in a thickness of 25 mm ~ 1 inch.
I knew the OEM 7 spoke rims wouldn't bolt right on without a mod, but given I paid $150 per rim with tire, I wasn't afraid to have a go
Here's how I did it myself for less than $20
1) Removed wheels and fit adapter onto hub
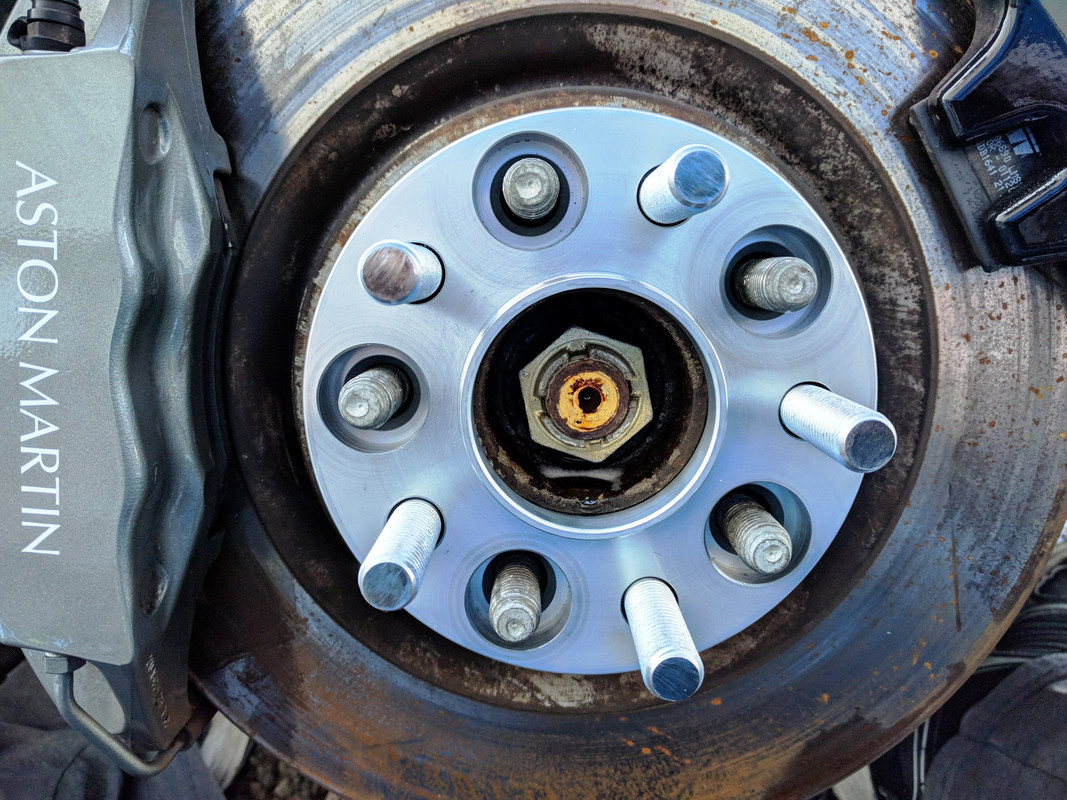
2) Torque the 3/4" supplied nuts to same spec as wheel lugs
3) Fitted wheel and loosely tightened to create interference marks in the wheel pockets then removed wheels to see contact points
4) The depth is not the issue, the studs are a larger circumference - see marks below
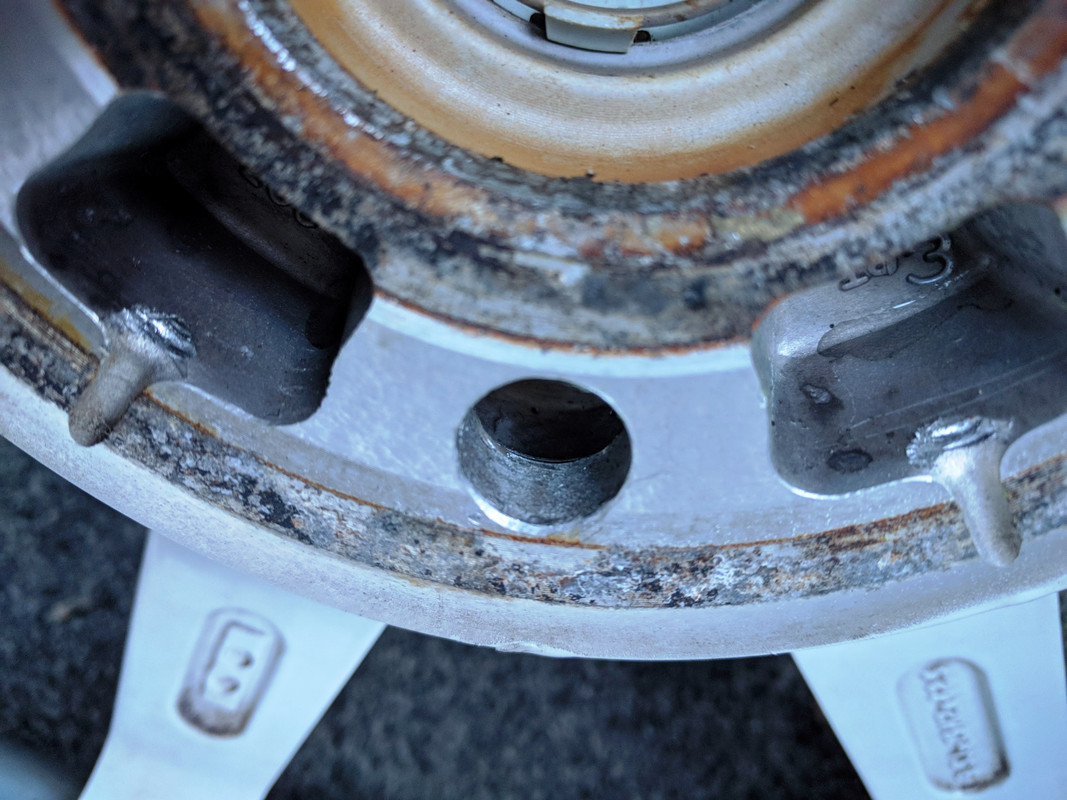
5) Took a measurement of the protruding stock studs - I needed 12 mm clearance depth
6) Bought a few 1/2" rotary high speed steel files and fitted to my 1/2" drill
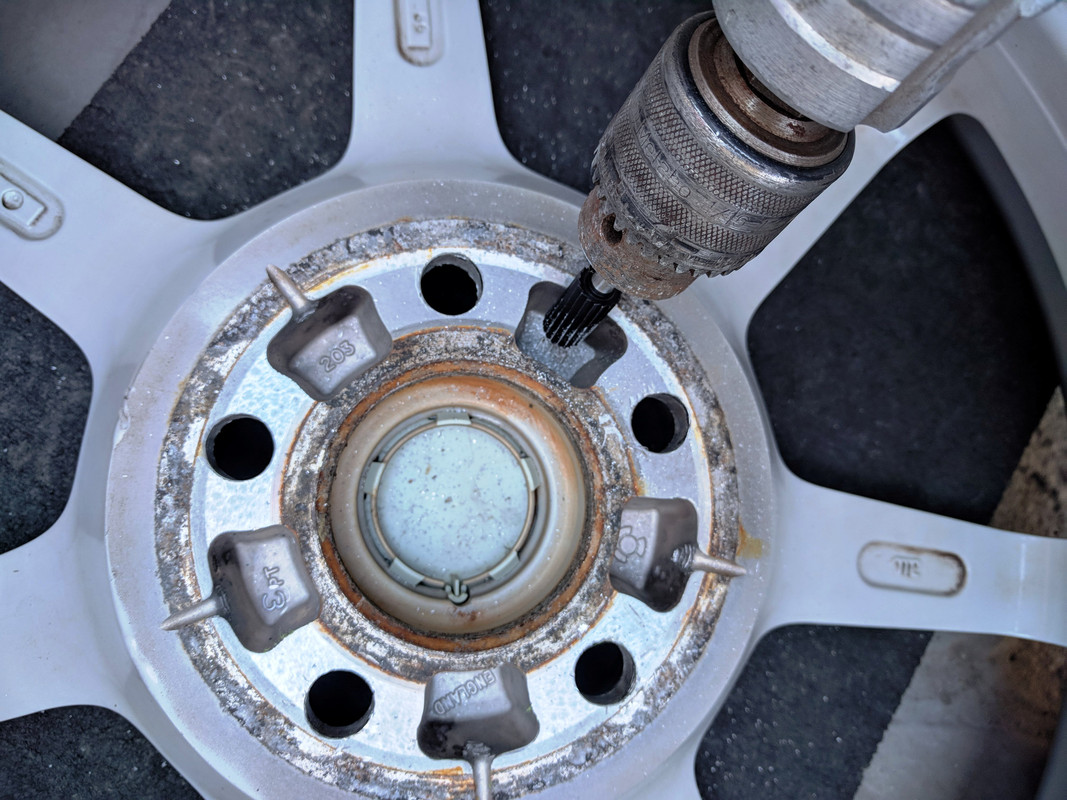
7) Since there is already a centred groove to enlarge, it was easy to keep the drill vertical and use as a milling machine. It easily cuts the soft aluminum. Just took my time until I reached 12.5 mm depth on each of the 5 wheel pockets. Due to the clockwise rotation of the chuck, they all end up slightly right of centre so I just made them big enough to clear the stud threads
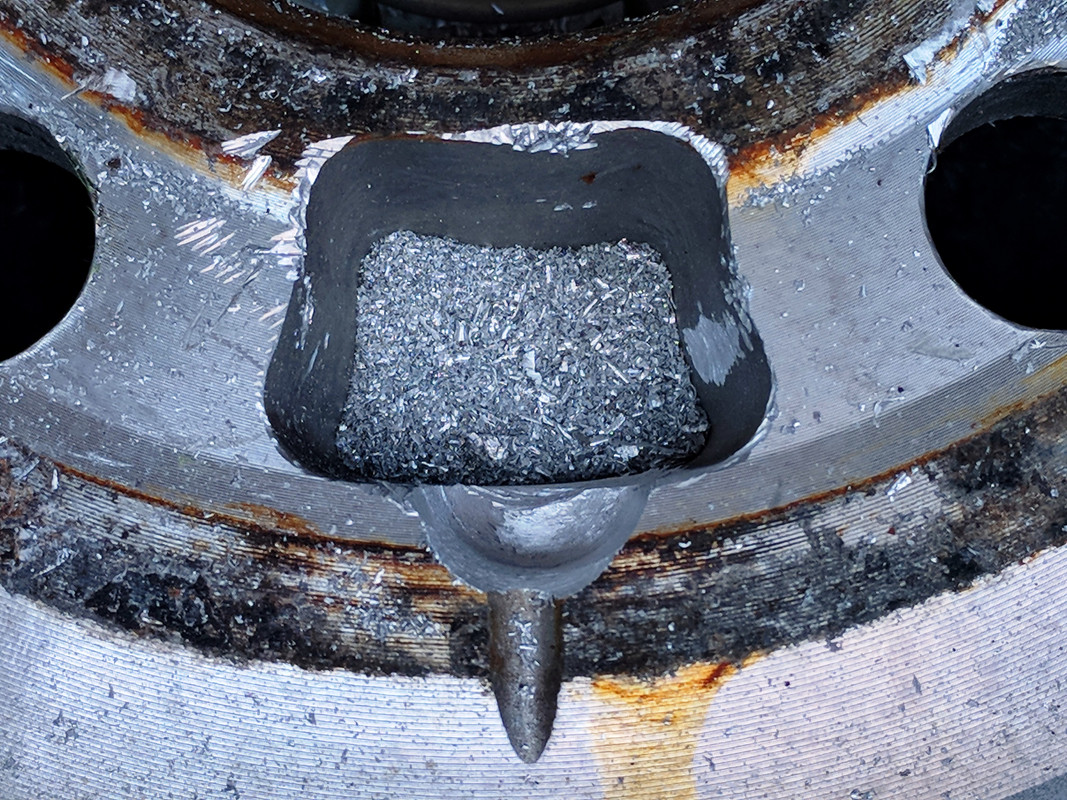
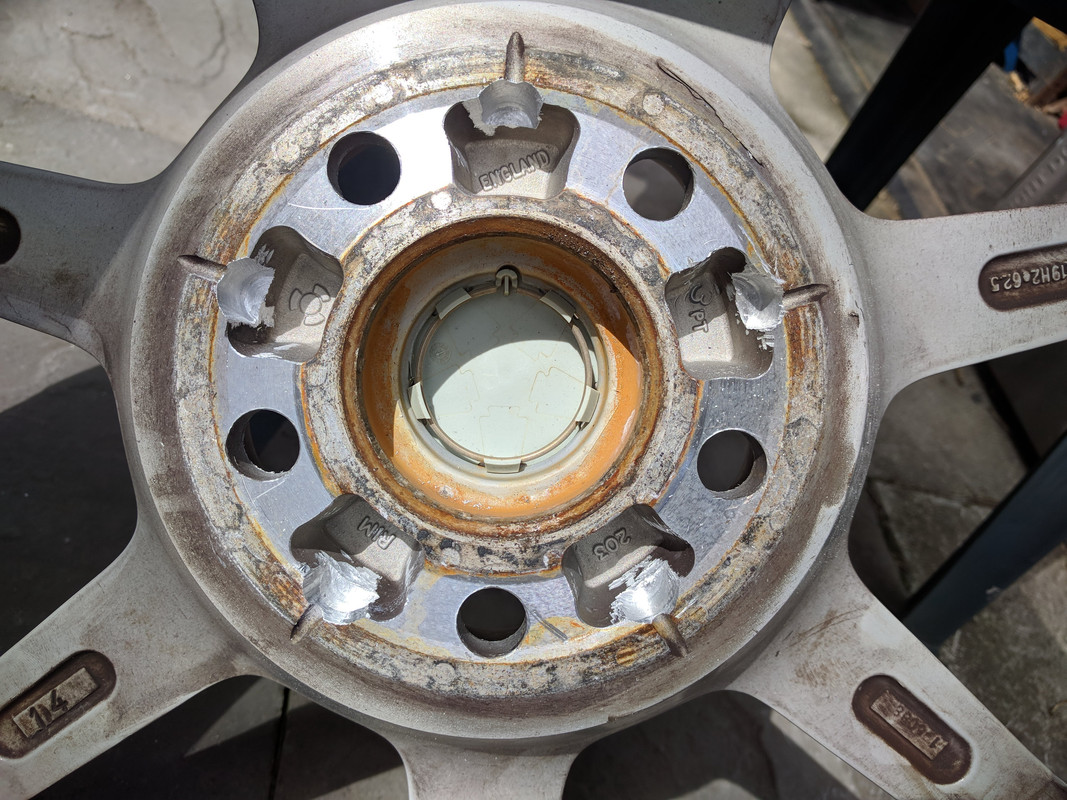
8) Then I just bolted the wheel on with no interference or damage to the OEM studs on my first try

9) Here's the view of the tire flush with the fender lip
10) Repeat on the other side, have your rear wheels re-balanced and your done
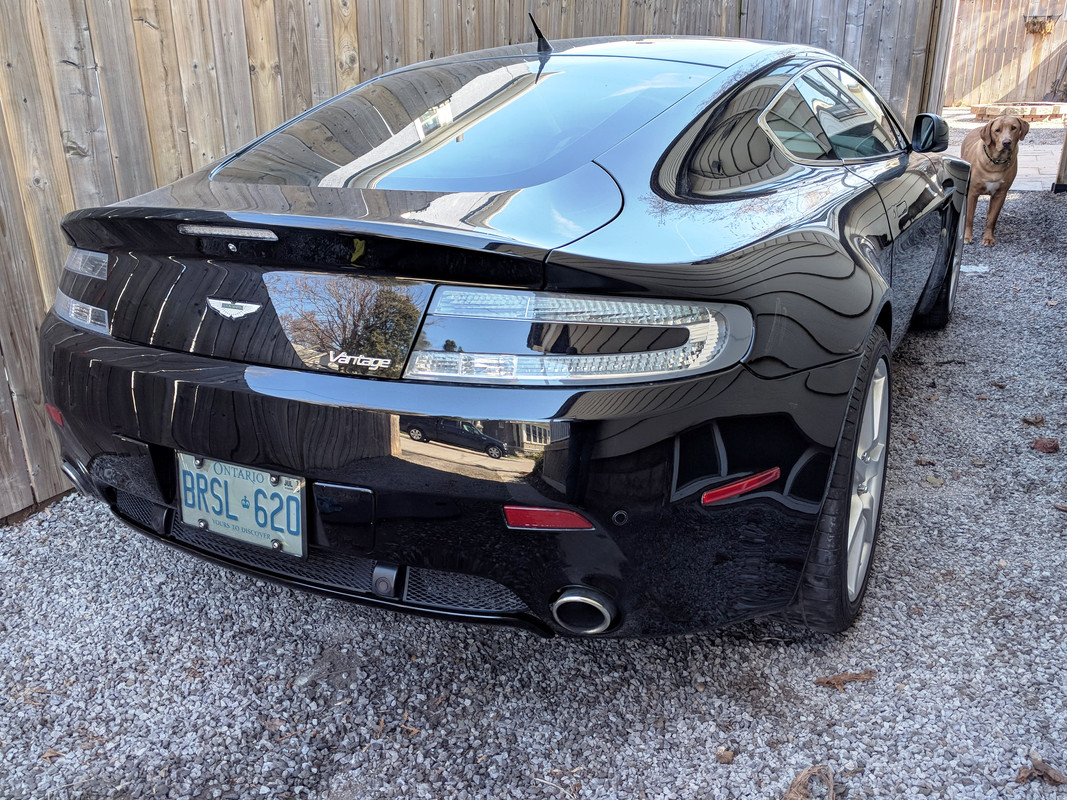
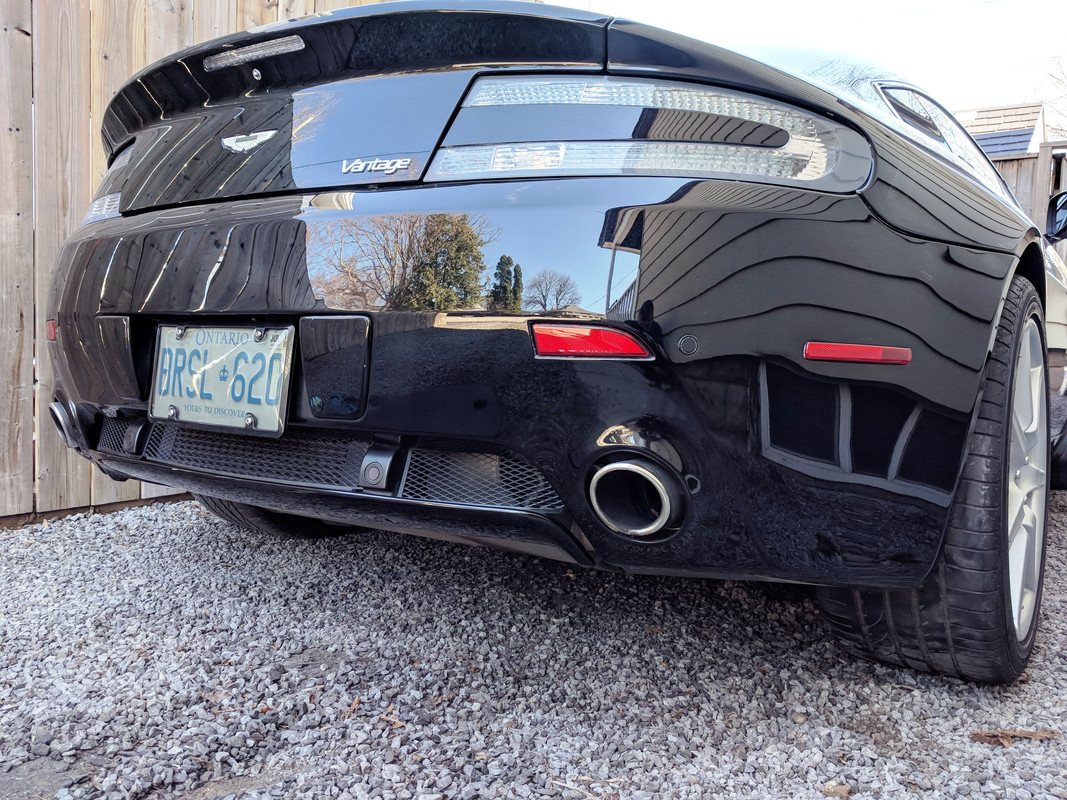
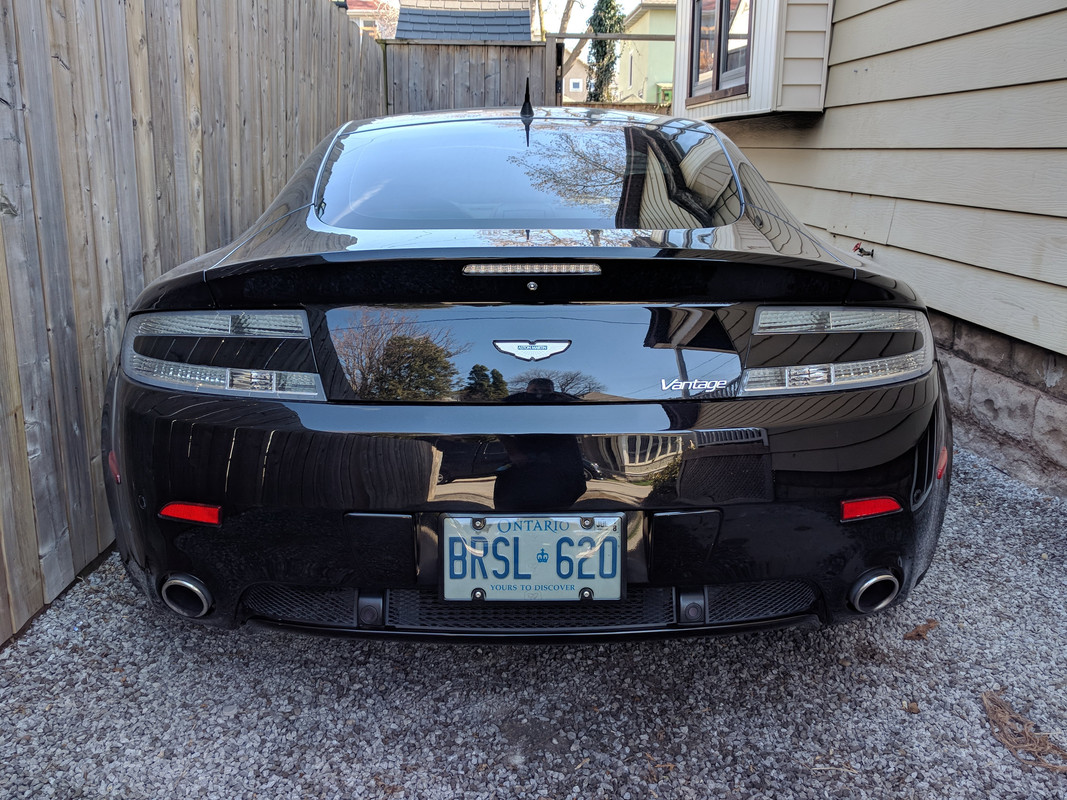
P.S. Here's a good view and first look of my freshly painted Onyx Black rear diffuser. Then the stainless license plate frame looked out of place, so upon style advice from the wife, it was swapped for a thin gloss black frame instead:
I knew the OEM 7 spoke rims wouldn't bolt right on without a mod, but given I paid $150 per rim with tire, I wasn't afraid to have a go
Here's how I did it myself for less than $20
1) Removed wheels and fit adapter onto hub
2) Torque the 3/4" supplied nuts to same spec as wheel lugs
3) Fitted wheel and loosely tightened to create interference marks in the wheel pockets then removed wheels to see contact points
4) The depth is not the issue, the studs are a larger circumference - see marks below
5) Took a measurement of the protruding stock studs - I needed 12 mm clearance depth
6) Bought a few 1/2" rotary high speed steel files and fitted to my 1/2" drill
7) Since there is already a centred groove to enlarge, it was easy to keep the drill vertical and use as a milling machine. It easily cuts the soft aluminum. Just took my time until I reached 12.5 mm depth on each of the 5 wheel pockets. Due to the clockwise rotation of the chuck, they all end up slightly right of centre so I just made them big enough to clear the stud threads
8) Then I just bolted the wheel on with no interference or damage to the OEM studs on my first try
9) Here's the view of the tire flush with the fender lip
10) Repeat on the other side, have your rear wheels re-balanced and your done
P.S. Here's a good view and first look of my freshly painted Onyx Black rear diffuser. Then the stainless license plate frame looked out of place, so upon style advice from the wife, it was swapped for a thin gloss black frame instead:
Last edited by 007V8Vantage; May 8, 2018 at 10:53 PM.
Registered User
Joined: Nov 2014
Posts: 503
From: Ottawa Canada
Rep Power: 33
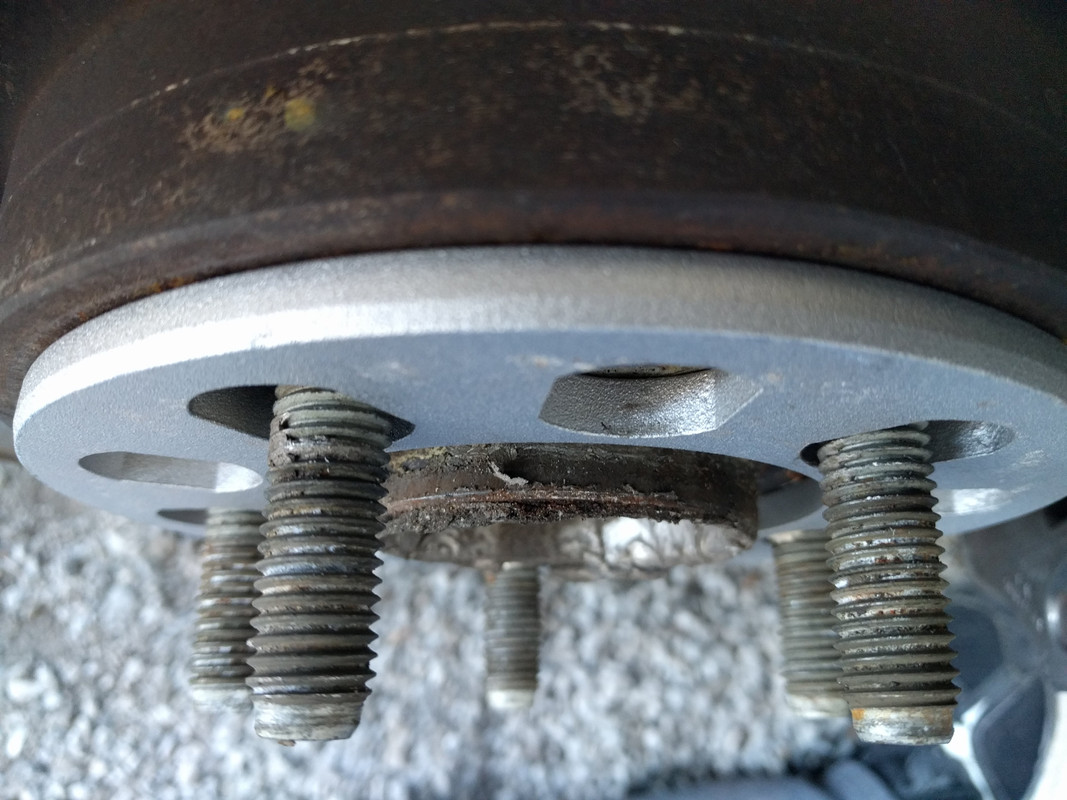
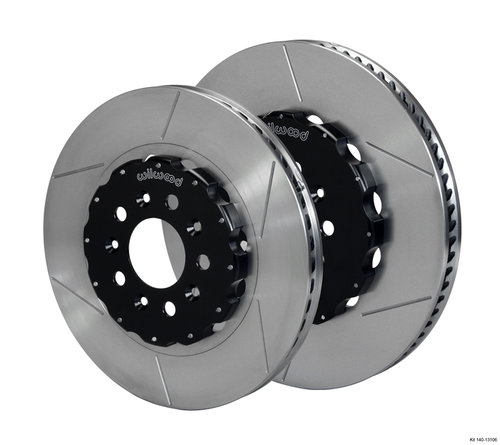
Ryan , please paint your brake rotor hubs !!!!!!!
I used the DupliColour brake caliper paint . Dries really quick , brush on several coats and it doest peel .
You can get it at crappy tire .
I used the DupliColour brake caliper paint . Dries really quick , brush on several coats and it doest peel .
You can get it at crappy tire .
Last edited by Vantagelvr; May 9, 2018 at 05:05 AM.
Thread Starter
|
Registered User
Joined: Apr 2017
Posts: 399
From: Niagara Region
Rep Power: 29
Great advice...
You're kinda stealing my thunder here, but I'll update to say:
"These rotors are done, so I haven't bothered painting them as I found a much more expensive way of getting black painted rotor hubs"
Thread Starter
|
Registered User
Joined: Apr 2017
Posts: 399
From: Niagara Region
Rep Power: 29
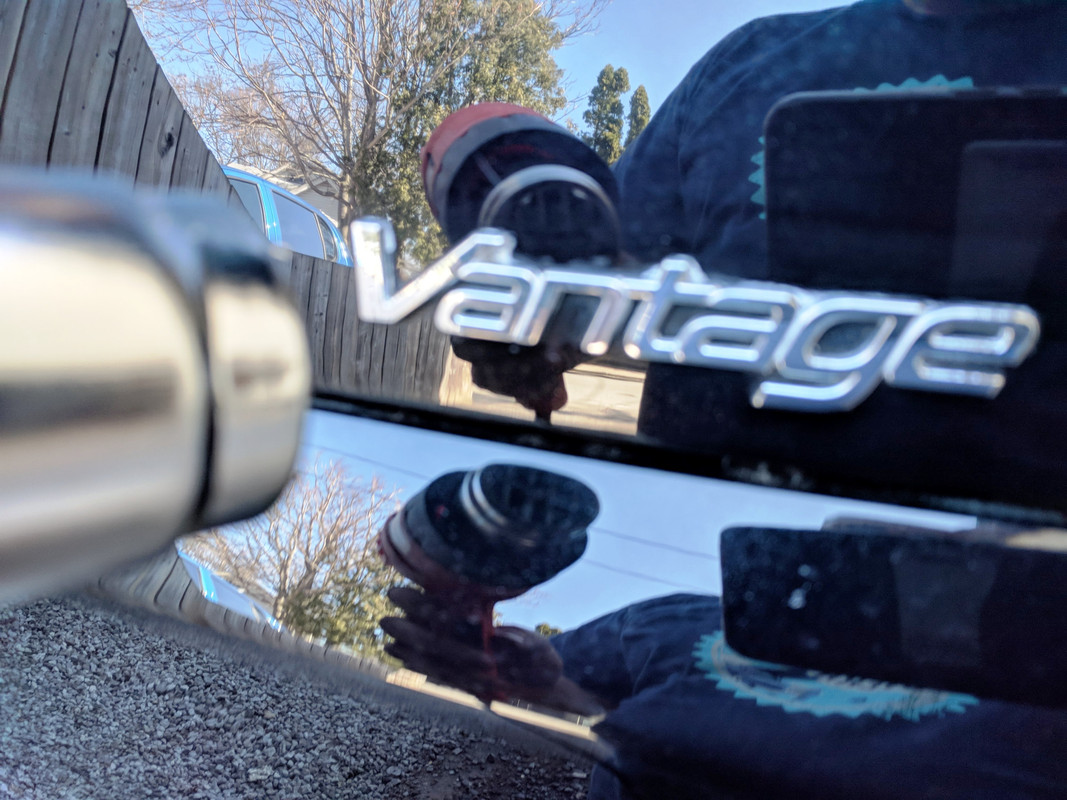
Got this idea from a fellow AMOC member with a black Vantage.
Purely for a cleaner balanced look and no need to advertise it's the entry level Aston Martin.
Yep I'm keeping the Vantage badge but steps to remove it were easy.
1) Warm glue with heat gun
2) Use fishing line to separate glue from body
3) Apply Goo Gone to remove glue residue
4) Polish and wax the paint by hand with a micro fiber towel
I like the look as a "no cost" option:
Thread Starter
|
Registered User
Joined: Apr 2017
Posts: 399
From: Niagara Region
Rep Power: 29
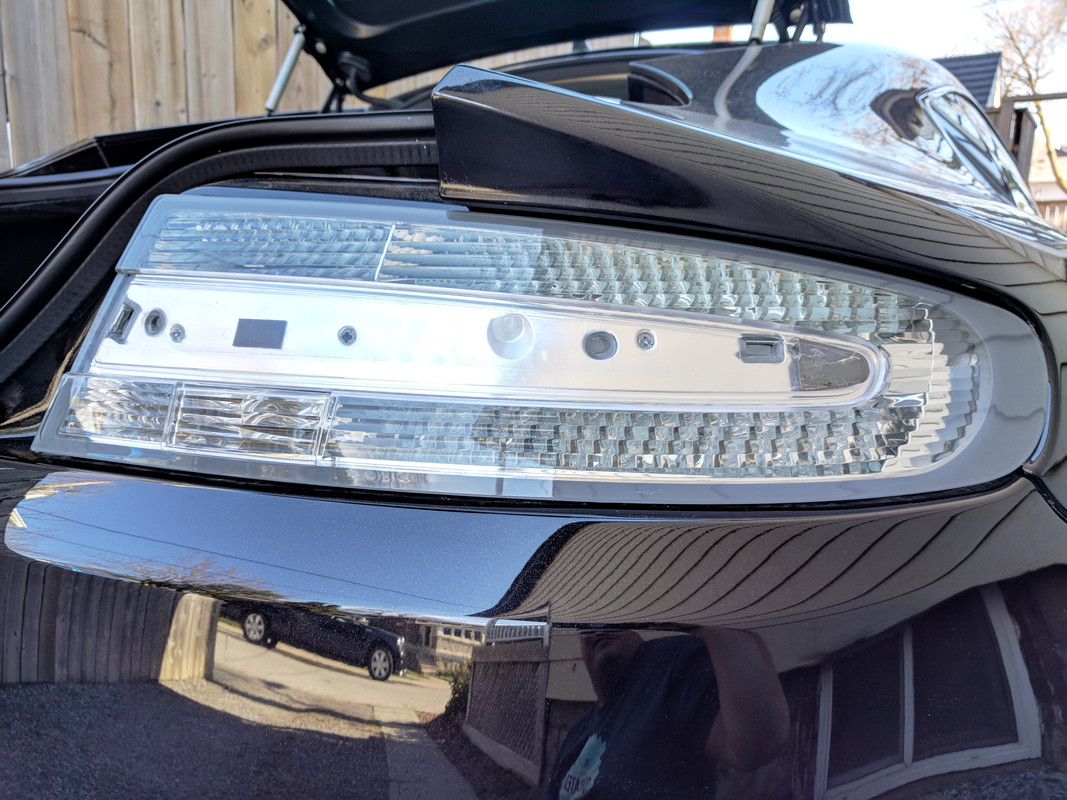
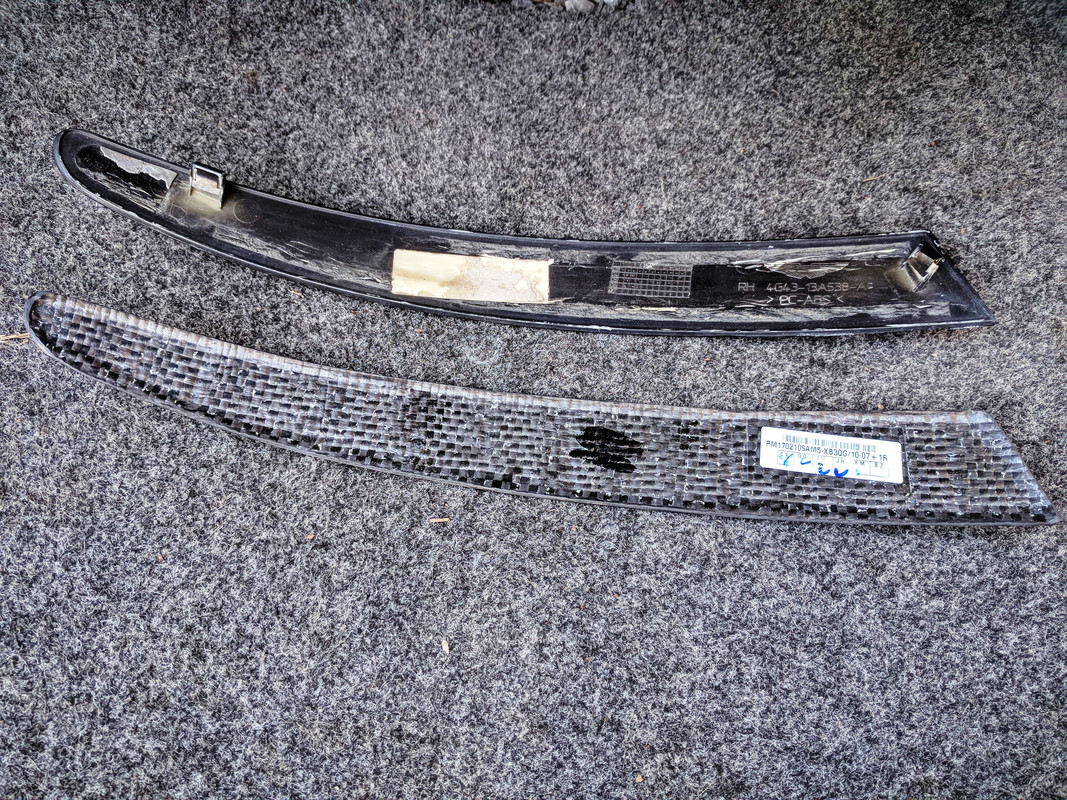
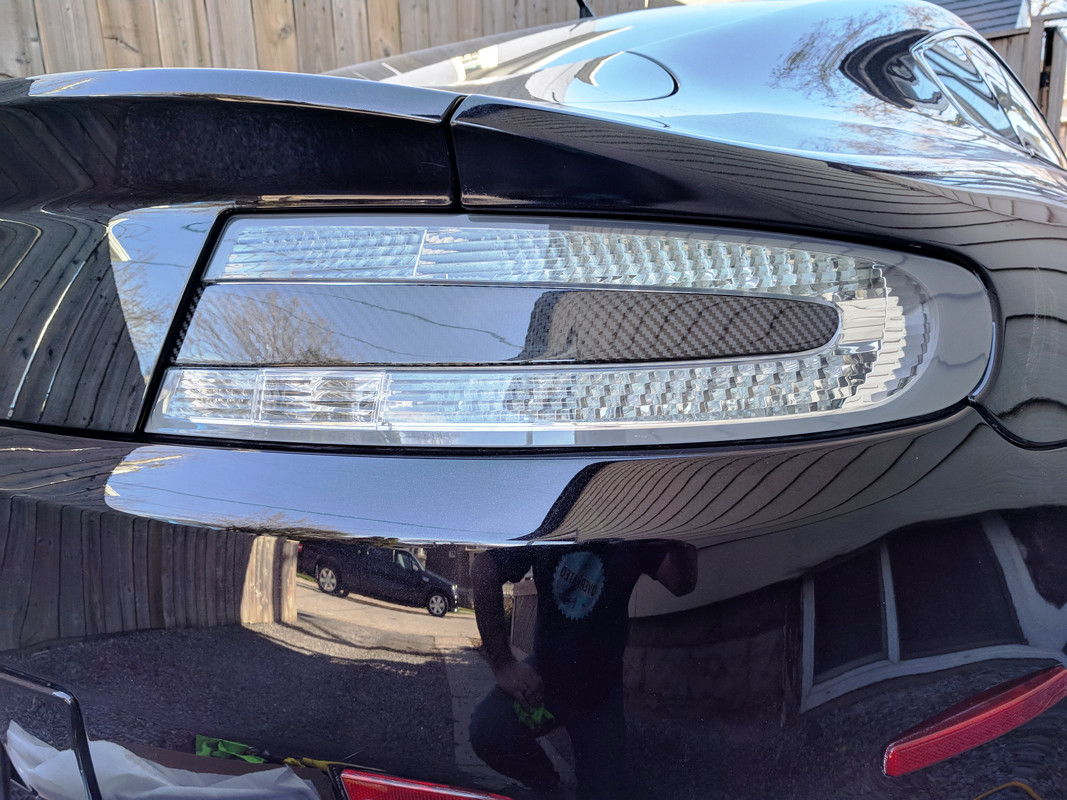
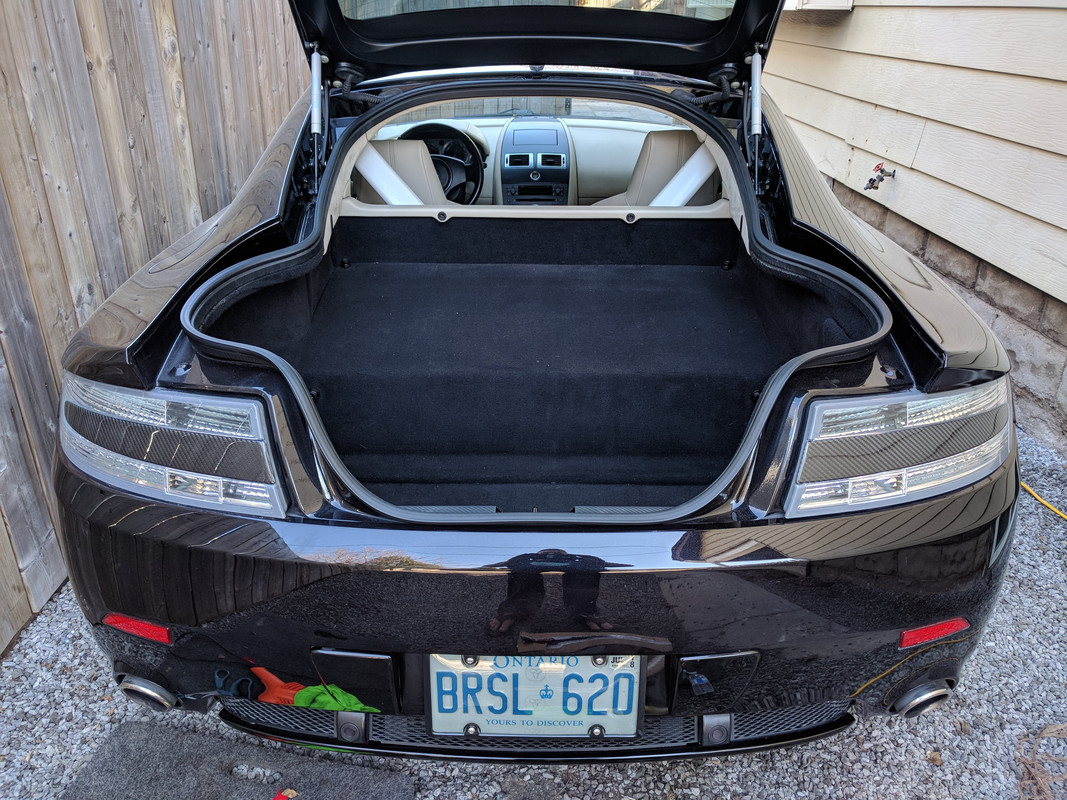
While I'm back here with the heat gun I warmed and removed the taillight inserts, replaced the 3M two way tape and applied the real carbon fiber pieces I bought online over the winter.
Second time I've swapped the inserts so this time it was "Easy Peasy"
 jpg images
Second time I've swapped the inserts so this time it was "Easy Peasy"
jpg images
Thread Starter
|
Registered User
Joined: Apr 2017
Posts: 399
From: Niagara Region
Rep Power: 29
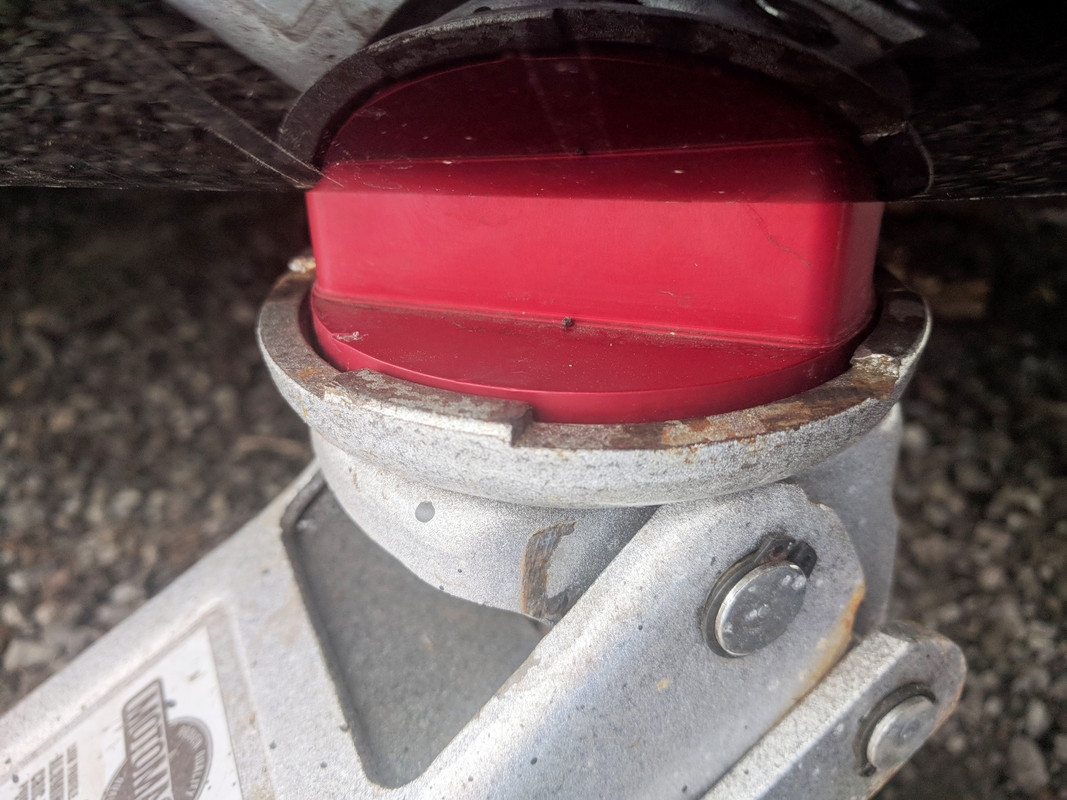
I also changed the stainless frame to black on the front plate.
Unfortunately the smoked bubble lens didn't clear when retracting.
I swapped to a smoked flat lens and we are back in business with the key fob remote working well.
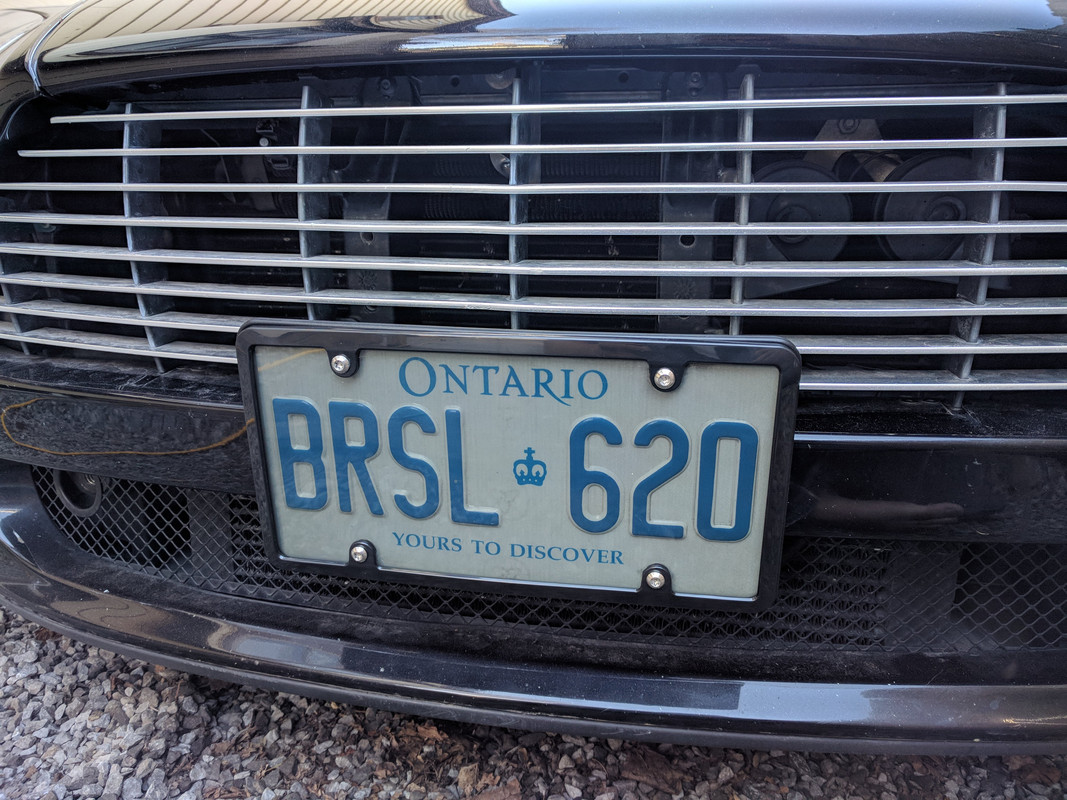

I haven't decided yet whether the front grill will be cleaned or re-coated, but it's added to my list along with touching up the black paint on the plate rail.
Unfortunately the smoked bubble lens didn't clear when retracting.
I swapped to a smoked flat lens and we are back in business with the key fob remote working well.
I haven't decided yet whether the front grill will be cleaned or re-coated, but it's added to my list along with touching up the black paint on the plate rail.
Last edited by 007V8Vantage; May 9, 2018 at 12:23 PM.