
Greetings from Niagara, Ontario, Canada


Thread Starter
|
Registered User
Joined: Apr 2017
Posts: 399
From: Niagara Region
Rep Power: 29

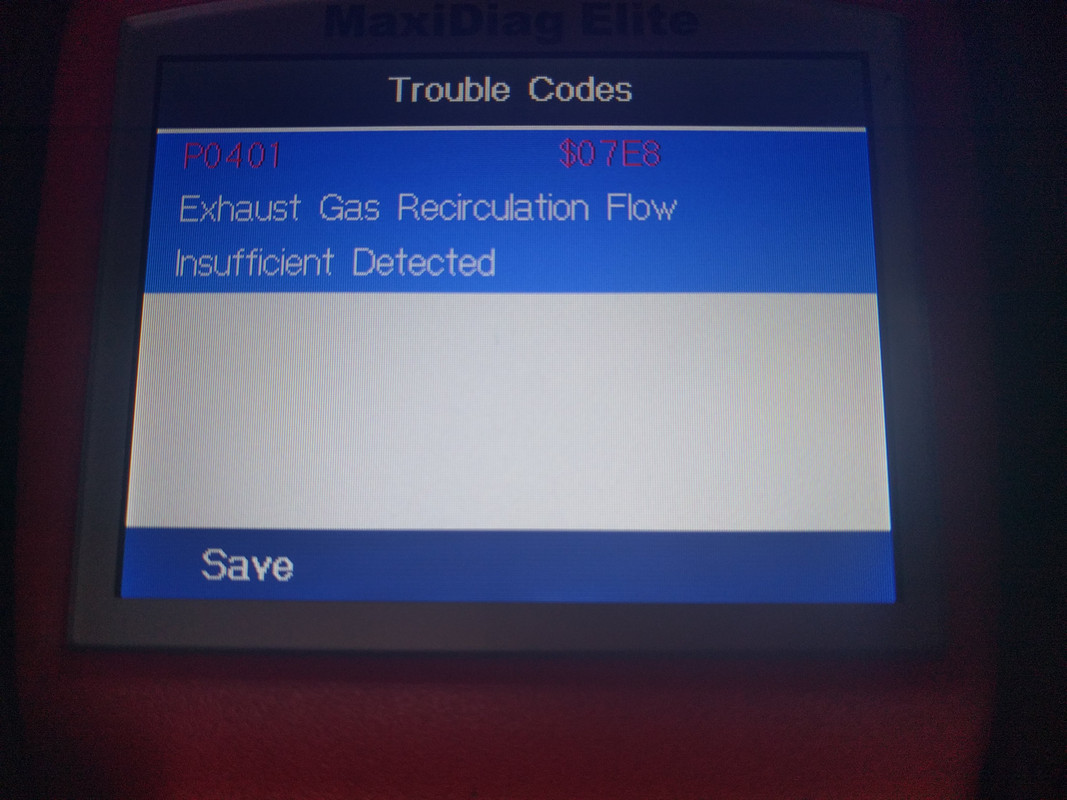
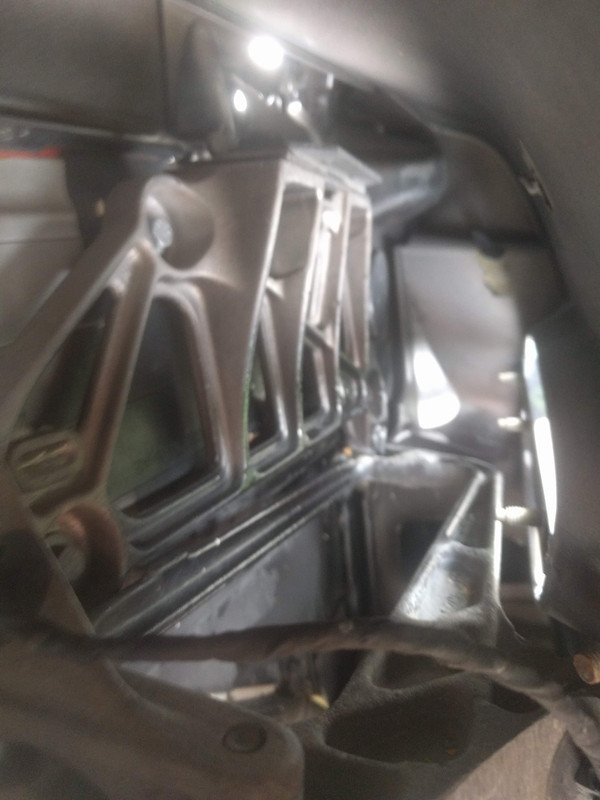
This is the emissions warning and CEL DTC you will get after eliminating the EGR with the Velocity AP headers installed:
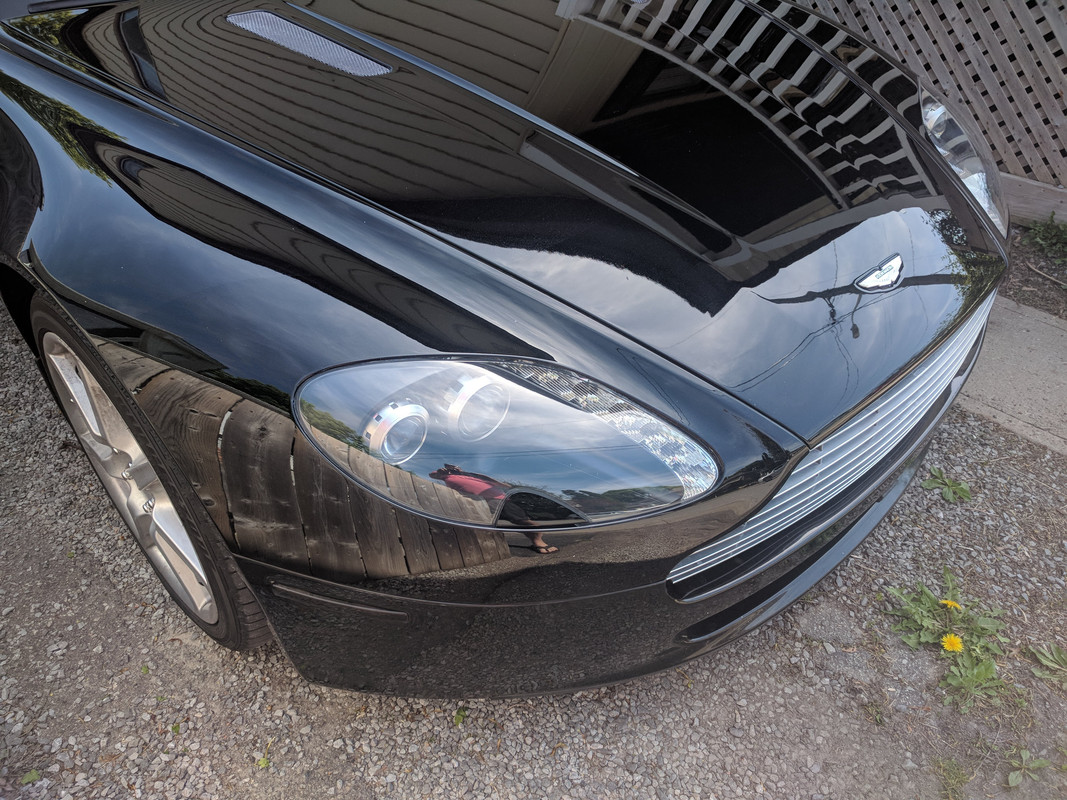
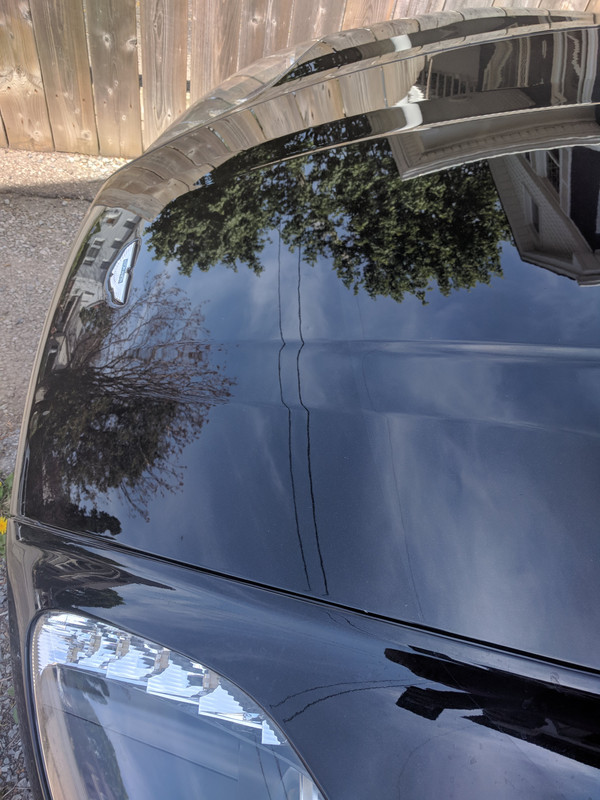
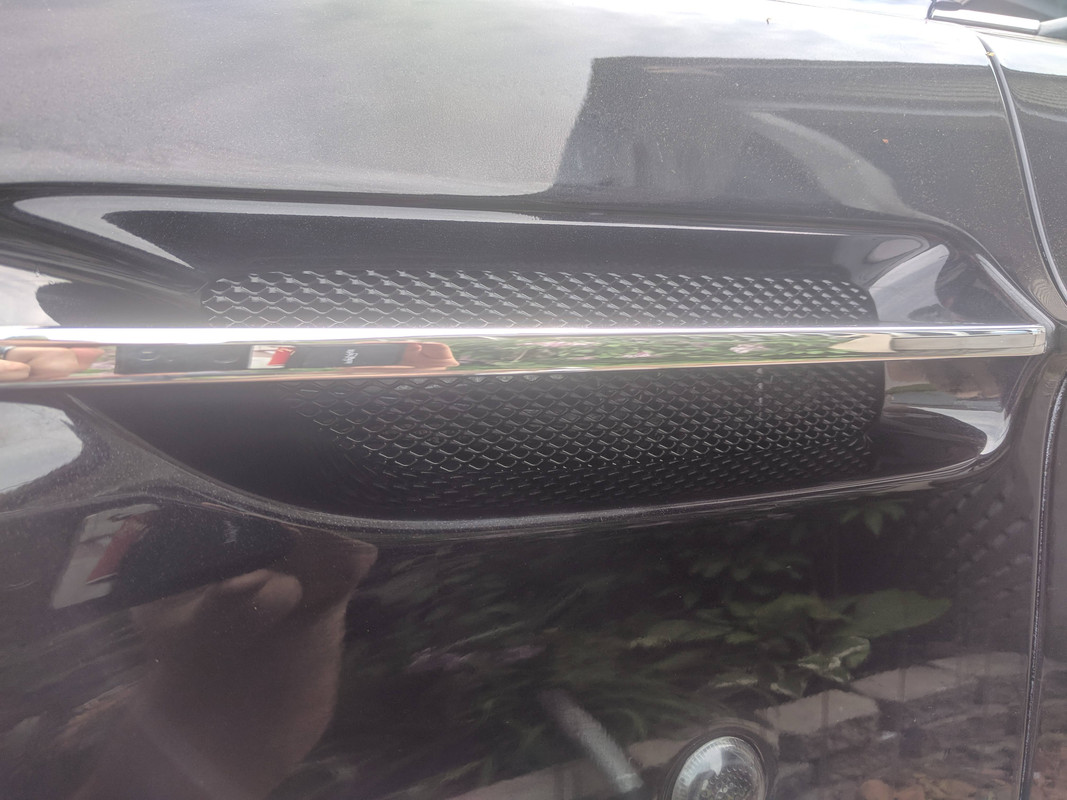
I recently had an appointment at Insultint to replace the 3M film with new clear thinner Suntek on the hood and passenger fender to match the driver's fender and headlights I did last year:
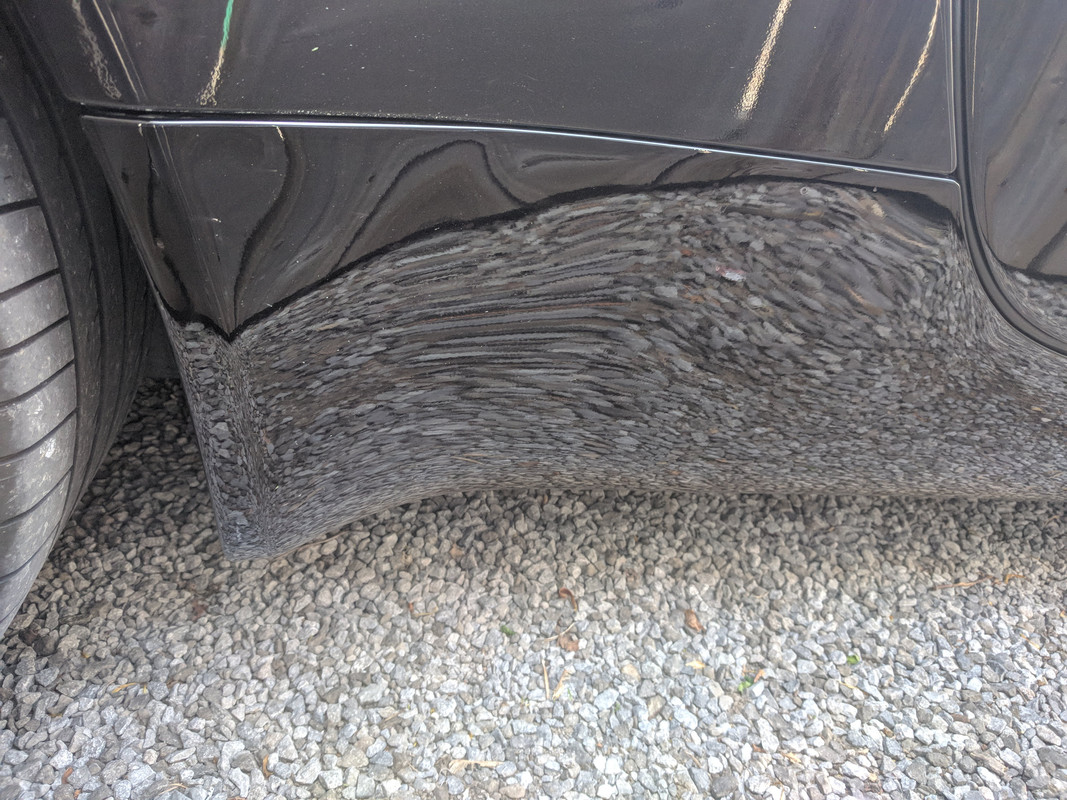
Also had a new piece installed on the freshly painted passenger rocker panel:
I recently had an appointment at Insultint to replace the 3M film with new clear thinner Suntek on the hood and passenger fender to match the driver's fender and headlights I did last year:
Also had a new piece installed on the freshly painted passenger rocker panel:
Thread Starter
|
Registered User
Joined: Apr 2017
Posts: 399
From: Niagara Region
Rep Power: 29
Basically I...
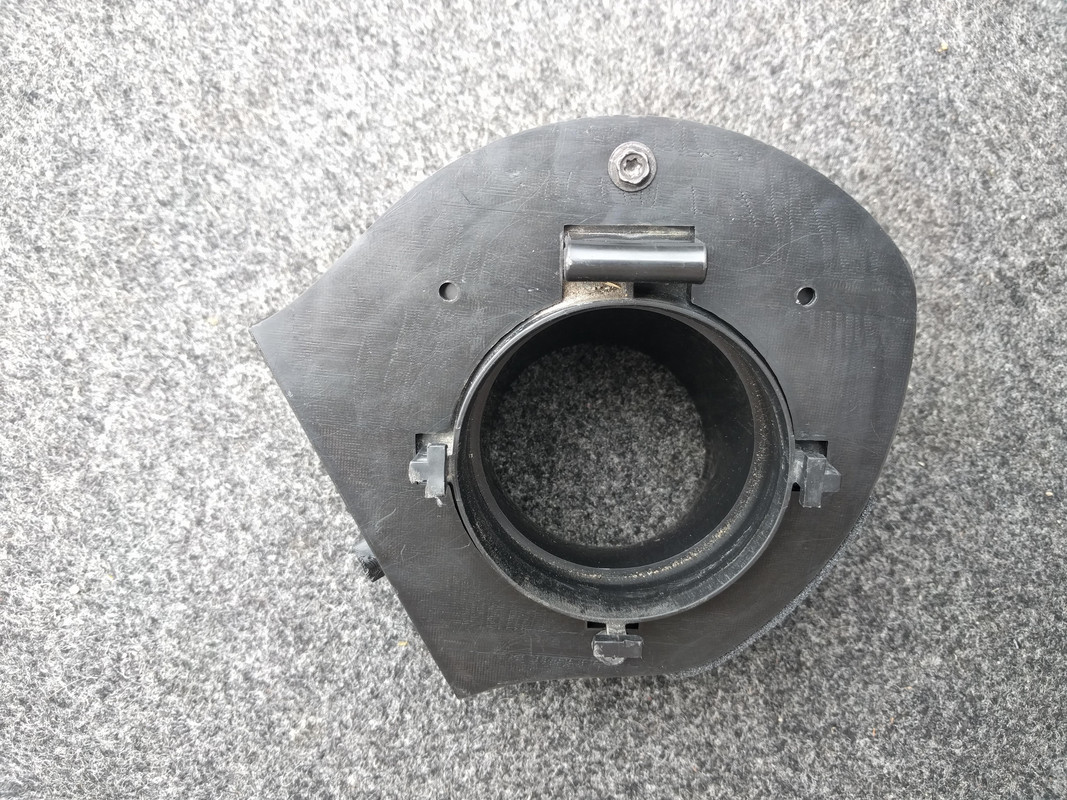
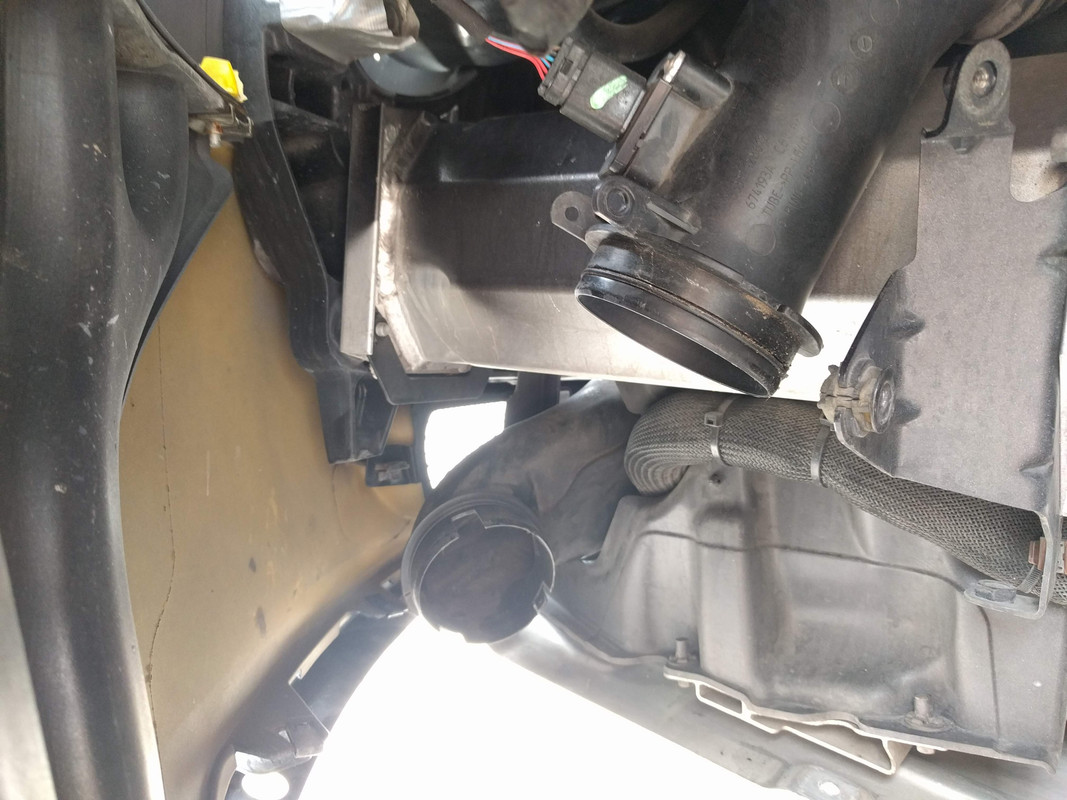
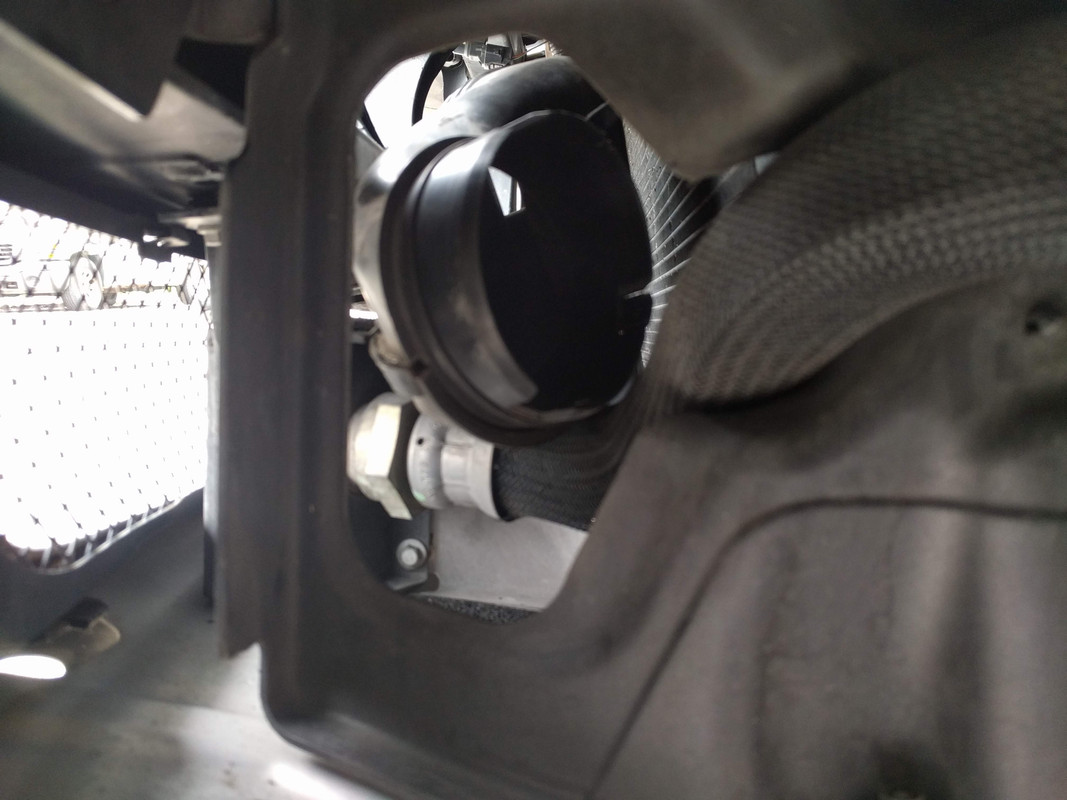
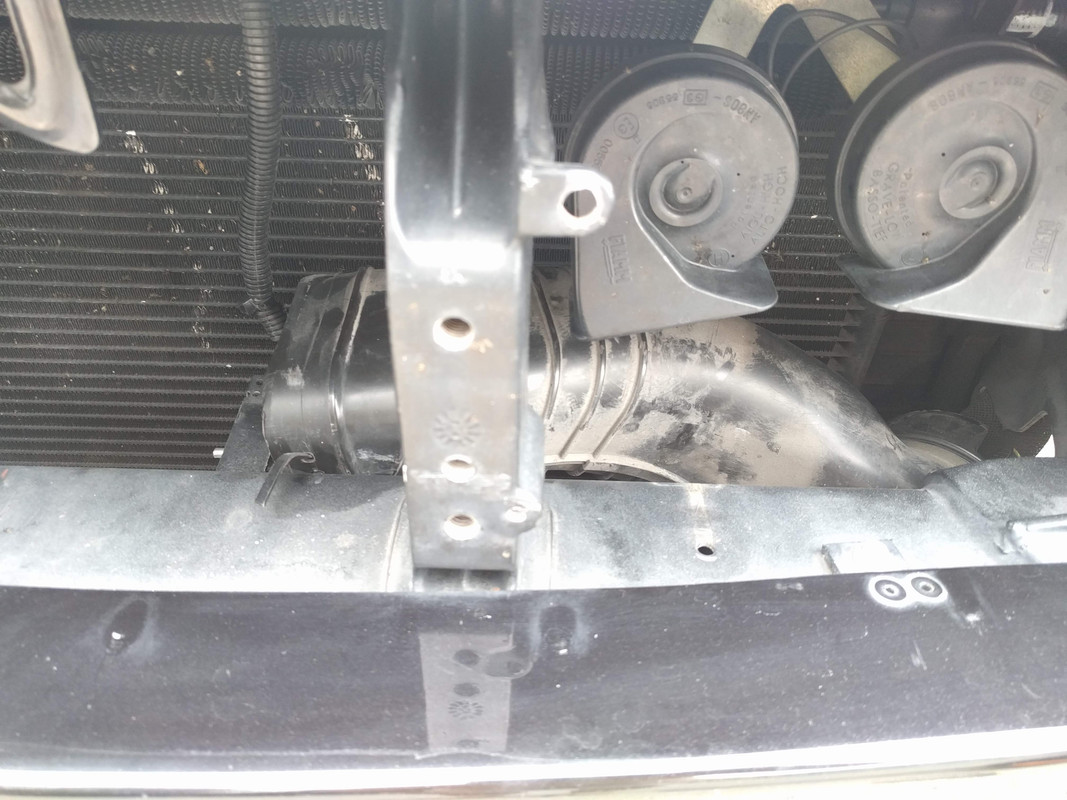
1) removed the upper air boxes secured by 3 bolts
2) removed the rest of the ducting prior to the air boxes
3) assembled the new high flow filter onto the brackets and mounted bracket to adapter with 2 screws
Then repeated everything on the other side of the car which takes half the time of the first side with the experience just gained.
I took lots of pics in case they can help someone thinking of doing this on their own Vantage:

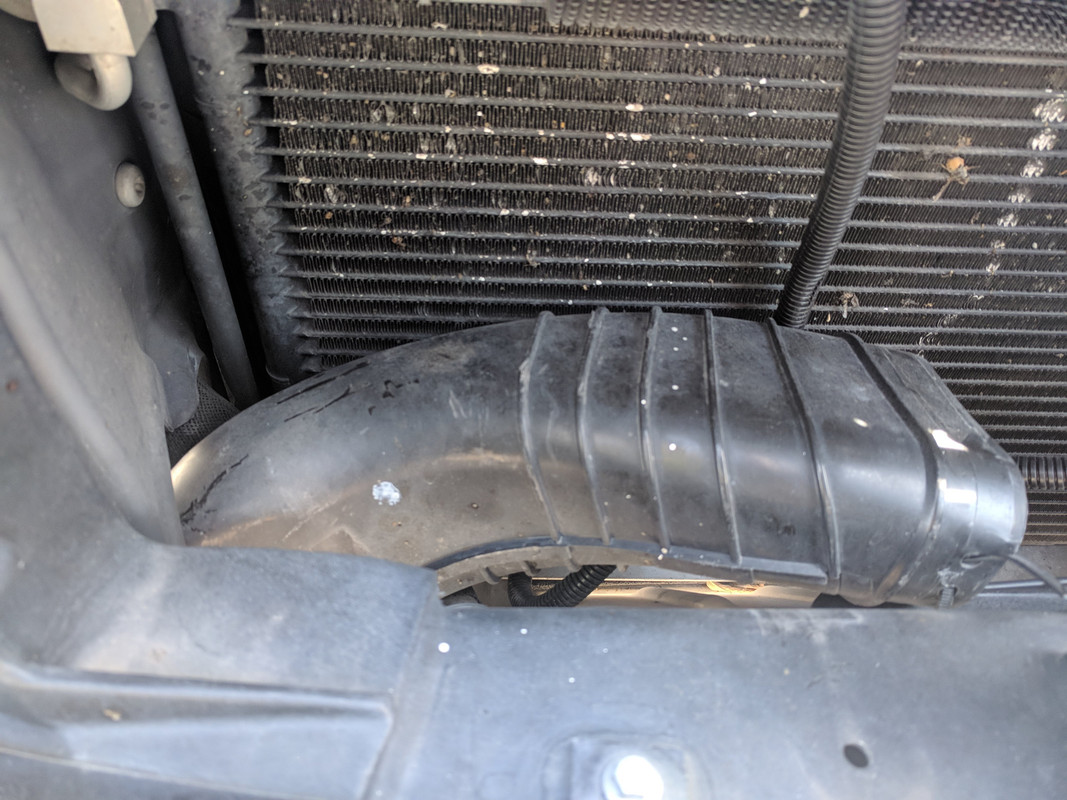
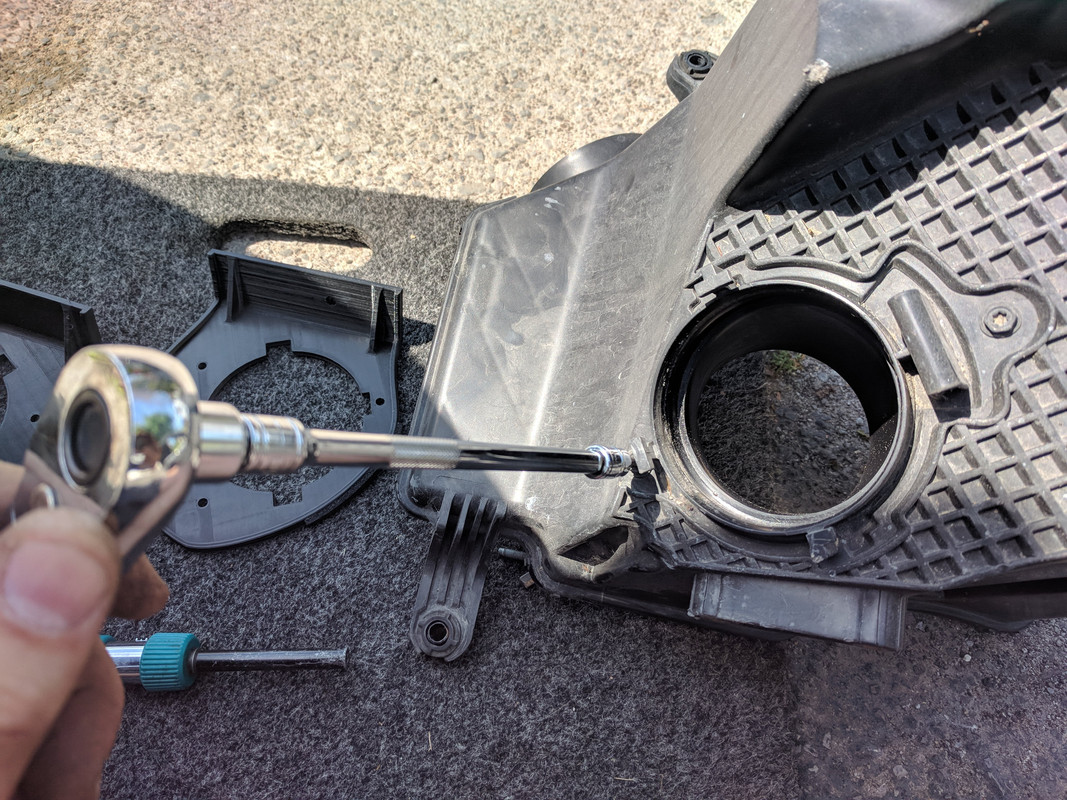

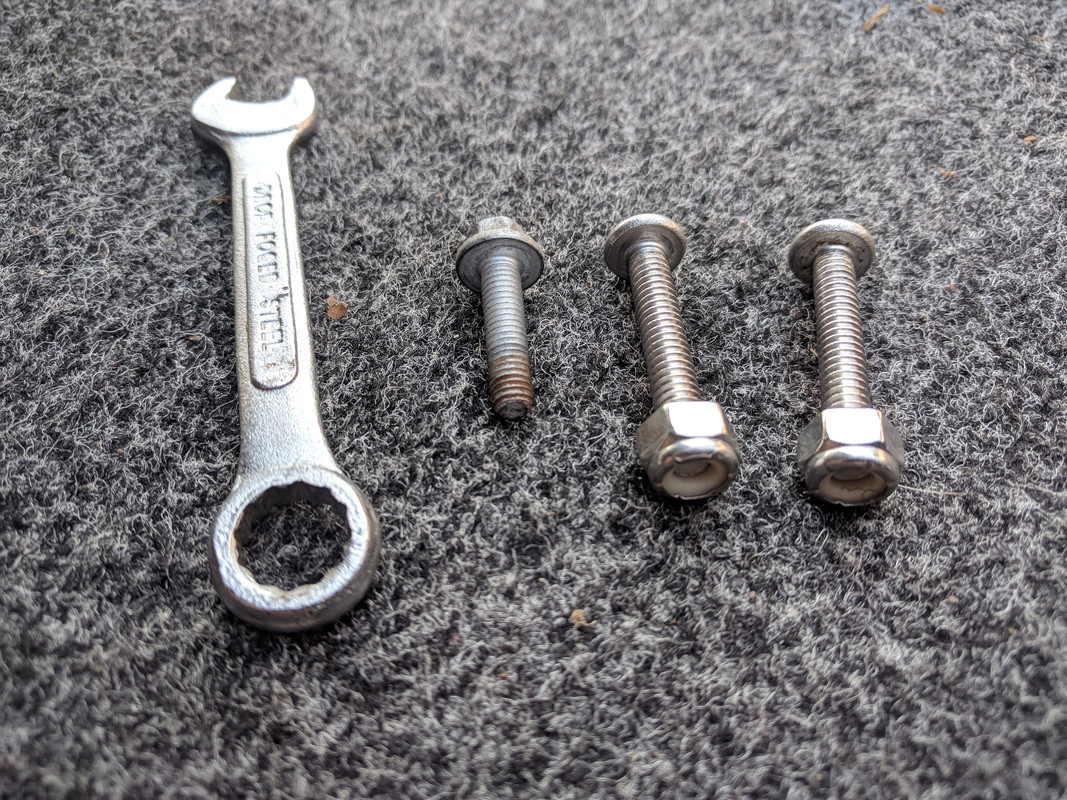
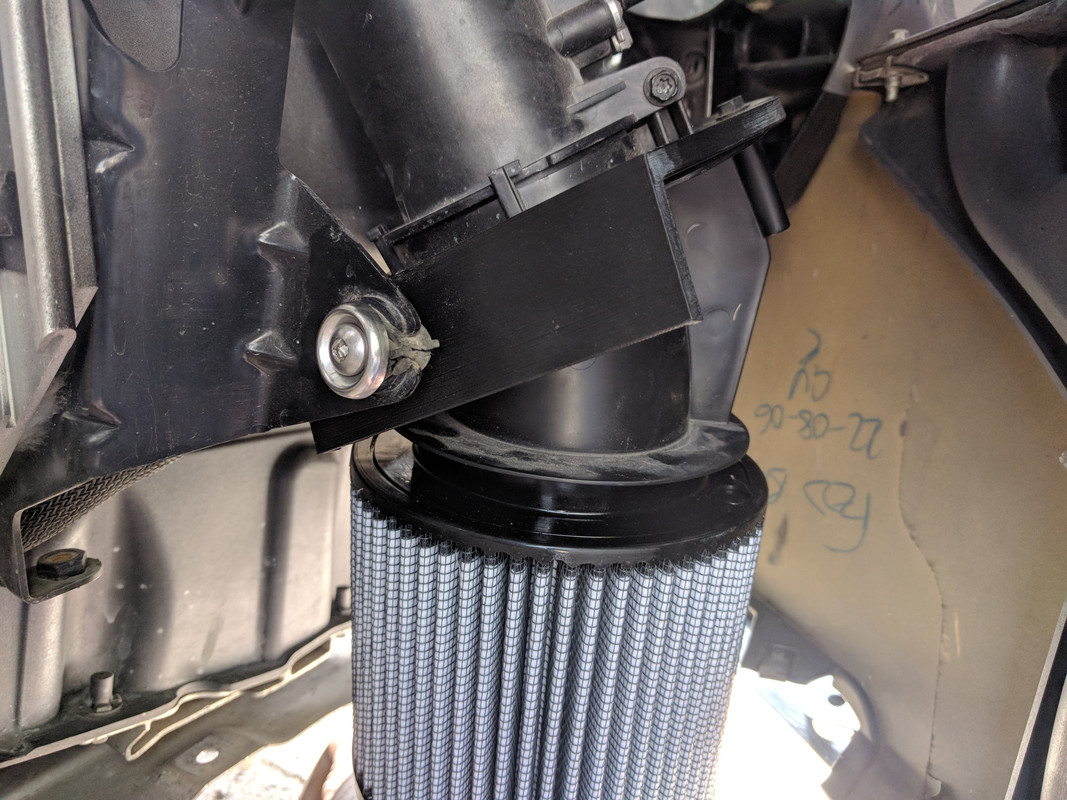
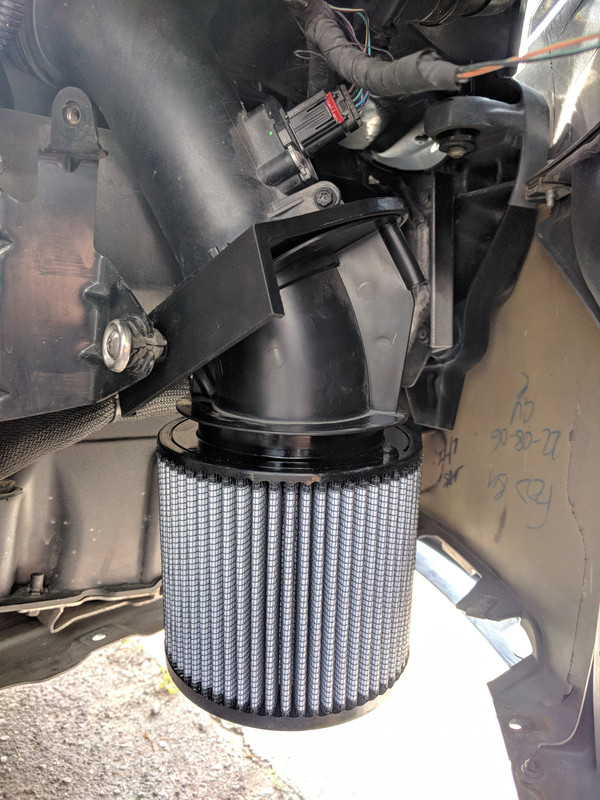
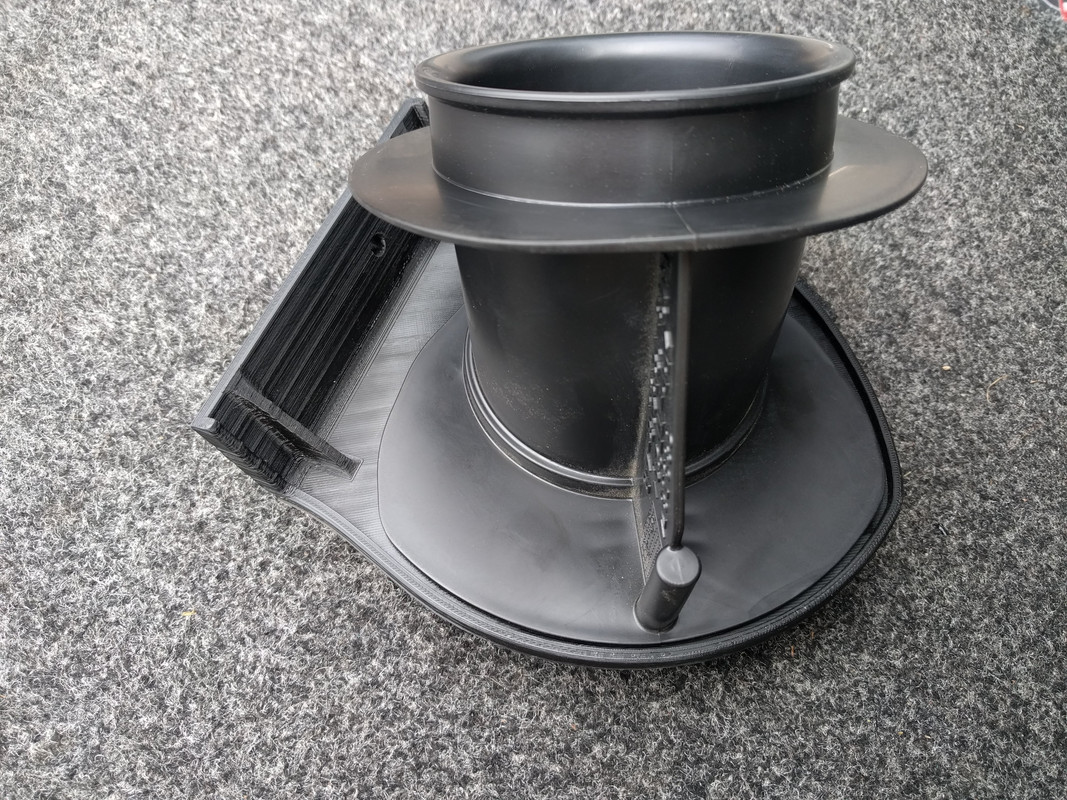
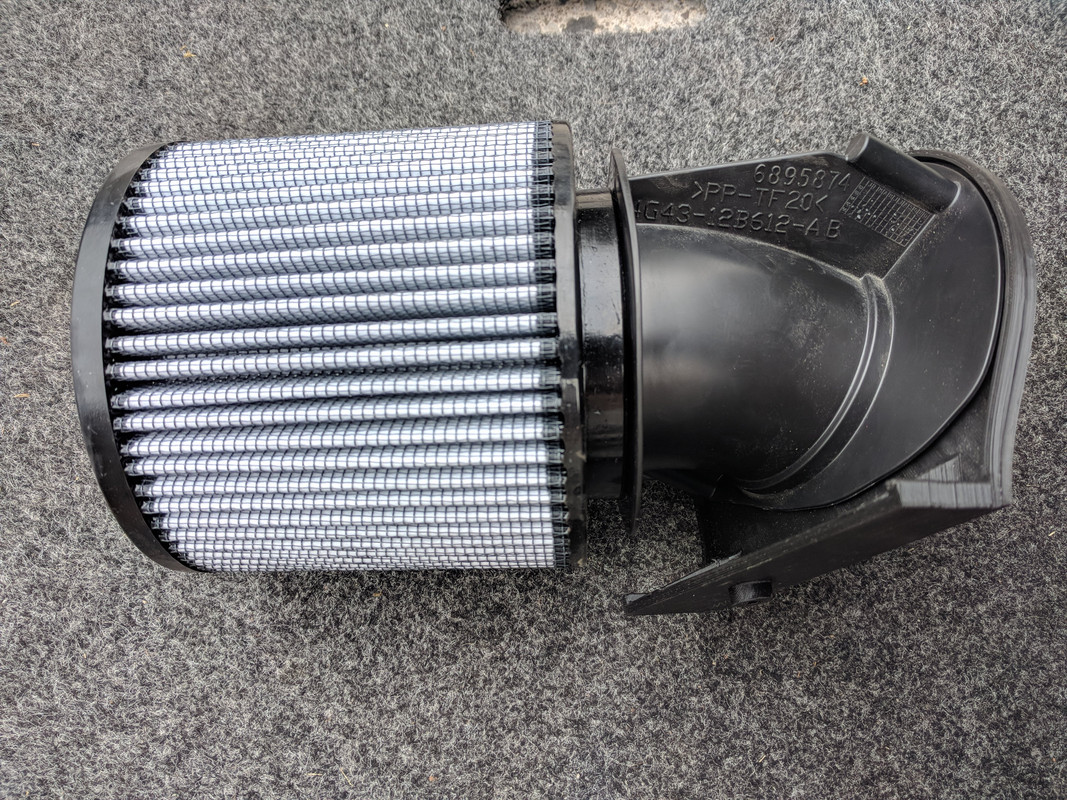
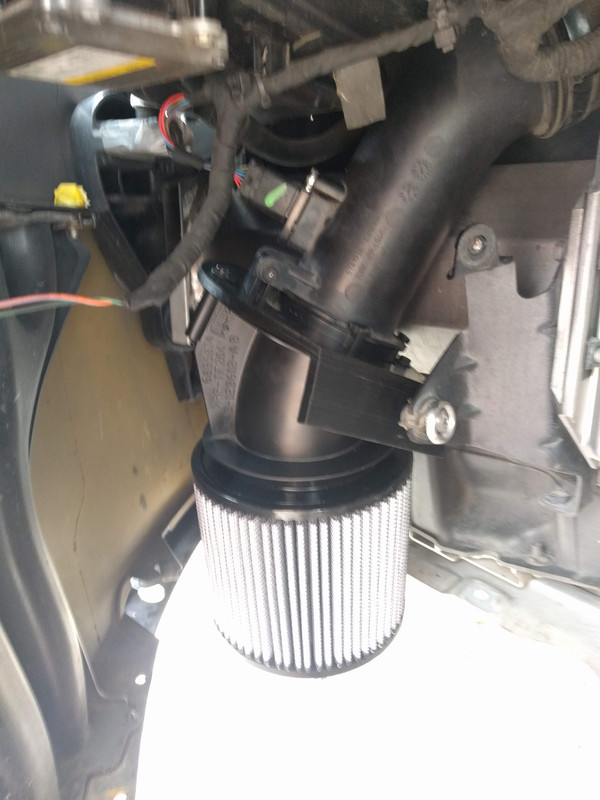
Overall a cool easy mod you can do yourself, thanks Rich the design of the brackets works well and the filter fit is A+
1) removed the upper air boxes secured by 3 bolts
2) removed the rest of the ducting prior to the air boxes
3) assembled the new high flow filter onto the brackets and mounted bracket to adapter with 2 screws
Then repeated everything on the other side of the car which takes half the time of the first side with the experience just gained.
I took lots of pics in case they can help someone thinking of doing this on their own Vantage:
Overall a cool easy mod you can do yourself, thanks Rich the design of the brackets works well and the filter fit is A+
Thread Starter
|
Registered User
Joined: Apr 2017
Posts: 399
From: Niagara Region
Rep Power: 29
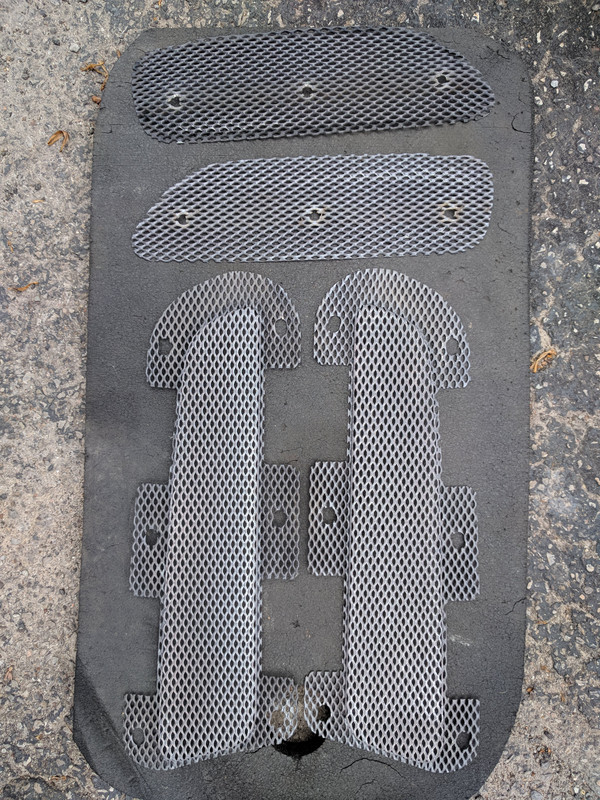
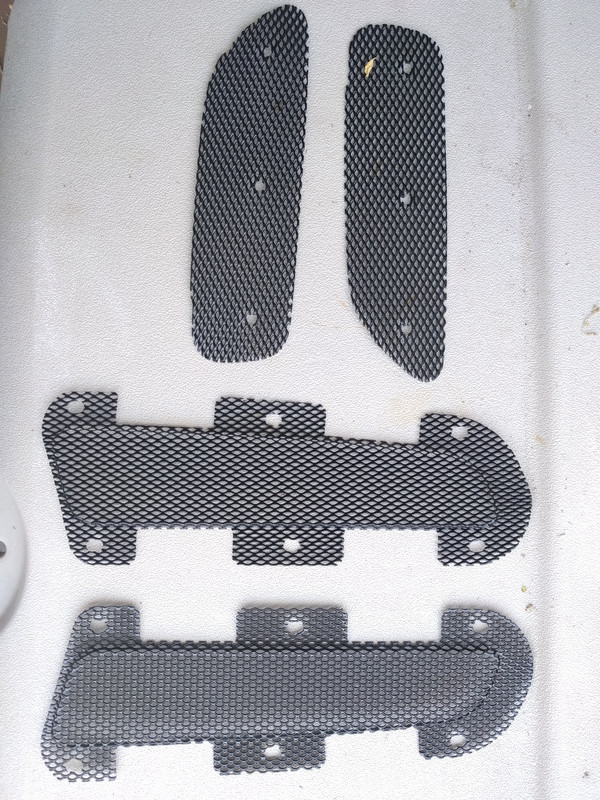
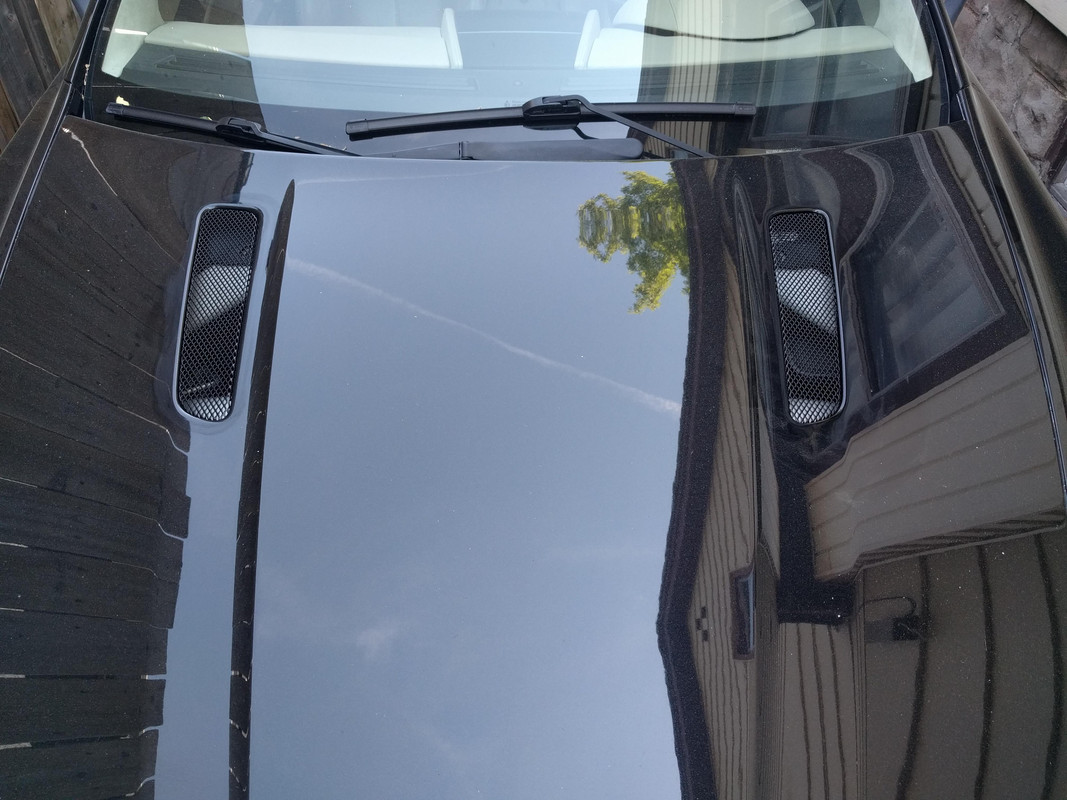
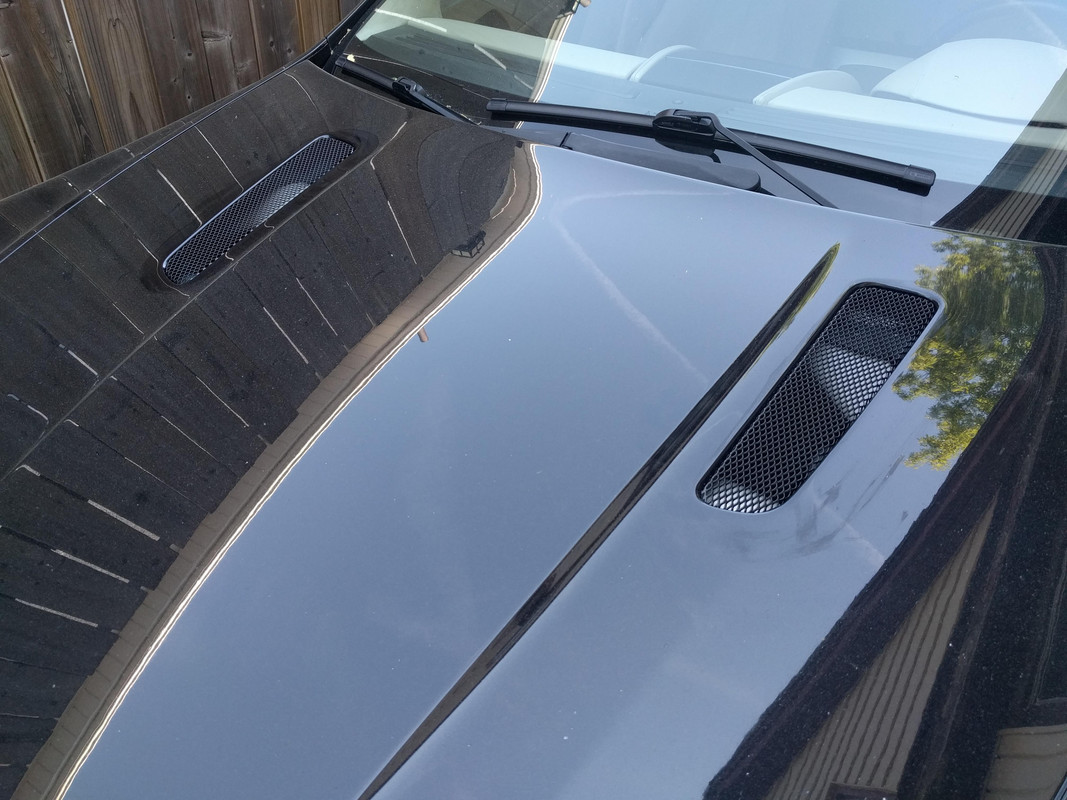
I decided on a Satin Black finish to match the front and rear grills below the bumpers. It is the last of the gray exterior trim pieces to go with my black theme. It should also be easier to keep the grill looking clean as the bright grill finish had deteriorated and needed regular polishing. It also attracted wax residue and dirt due to the texture.
Dirt won't stick to the new satin black finish easily and even if it gets a little dirty it likely won't be as noticeable.
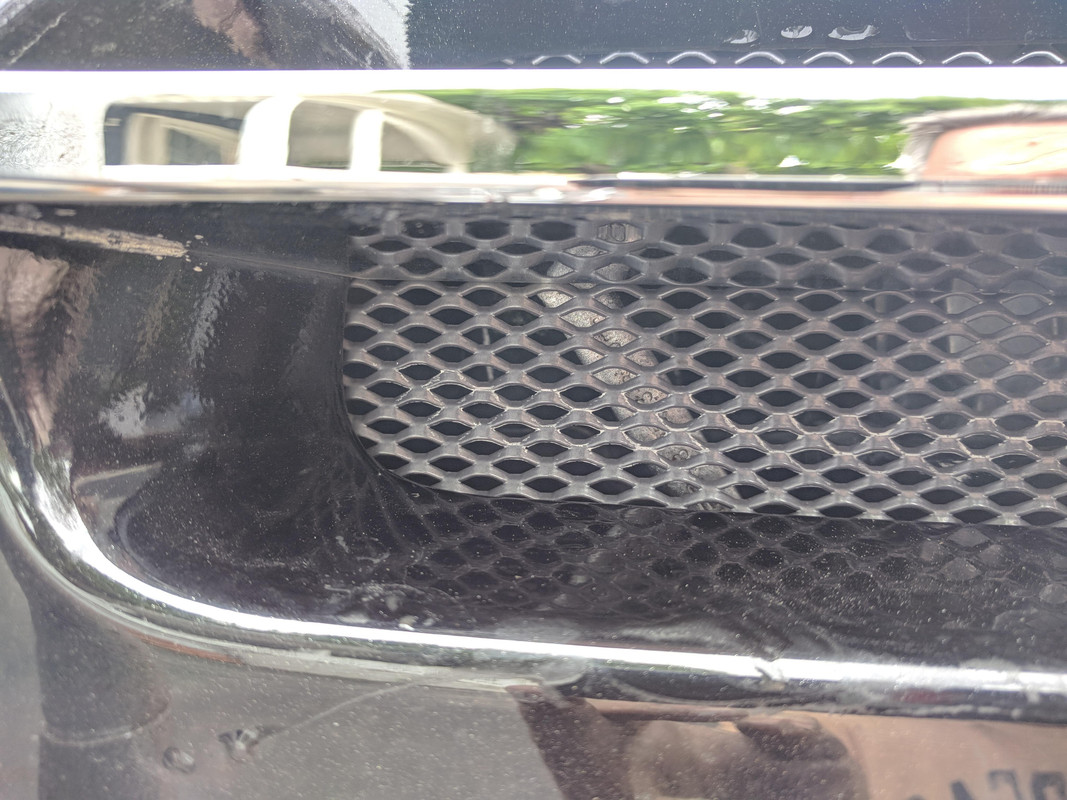
Removing the hood grills couldn't be easier, just remove the plastic nuts and slide off the studs after peeling the hood liner back to expose the vent grills.
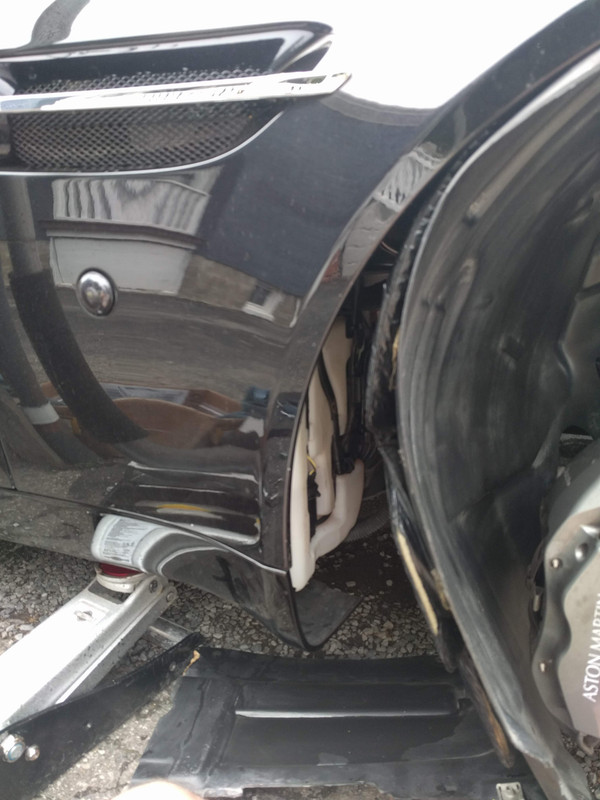
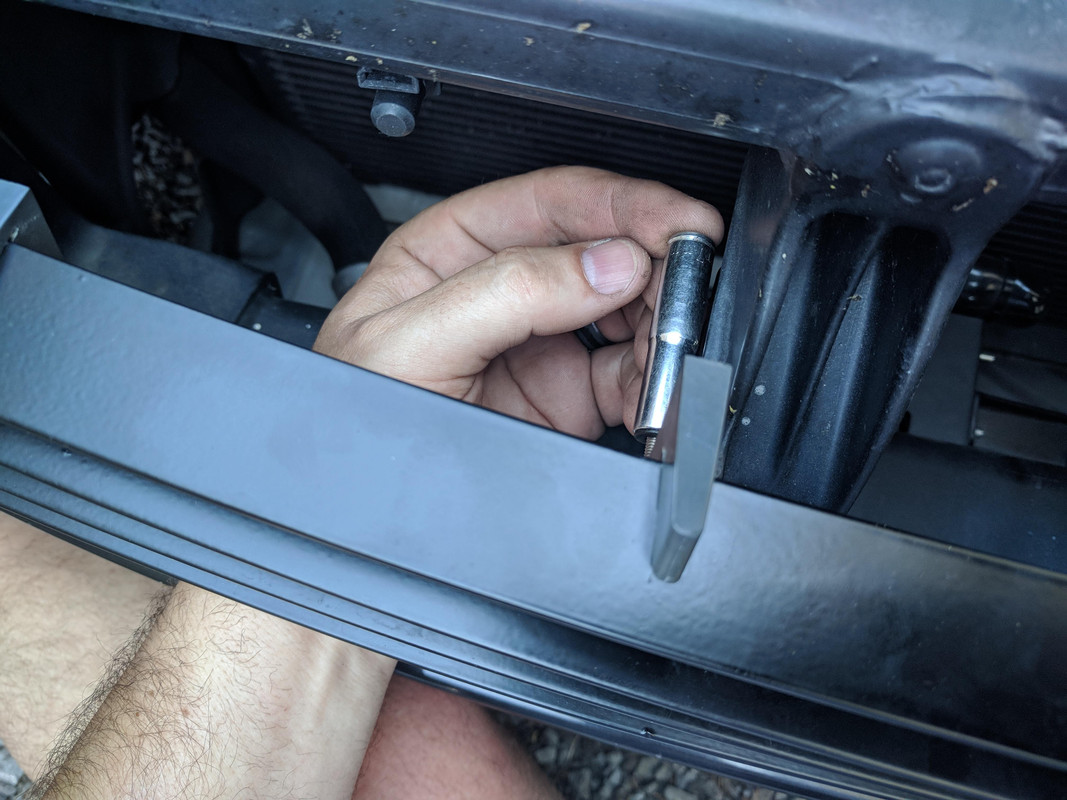
The fender vents are more of a pain to access the 3 nuts along the centre line. Of course the fender liner is removed and you can reach the closer nuts from the front end while the furthest rear is easier reached from below. Tight fit for your hands if using regular length wrenches. a ratcheting closed end wrench definitely makes it easier...
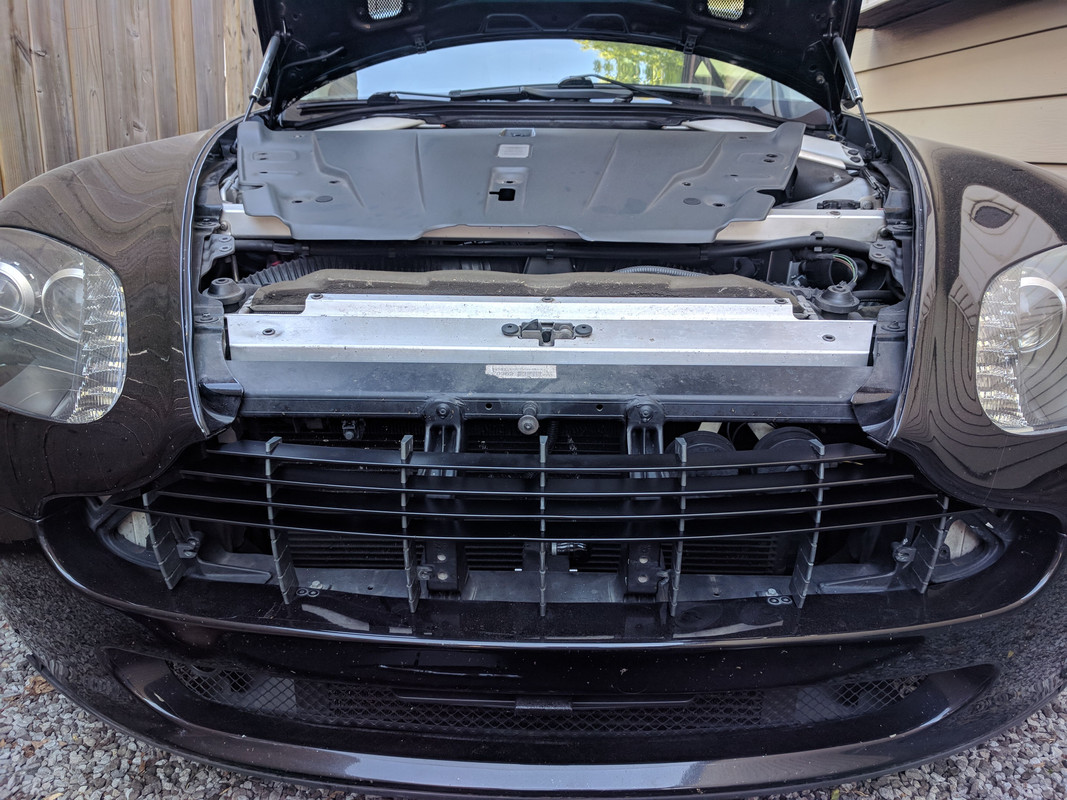
The front grill is easiest to remove as a complete unit removing nuts and screws holding it on.
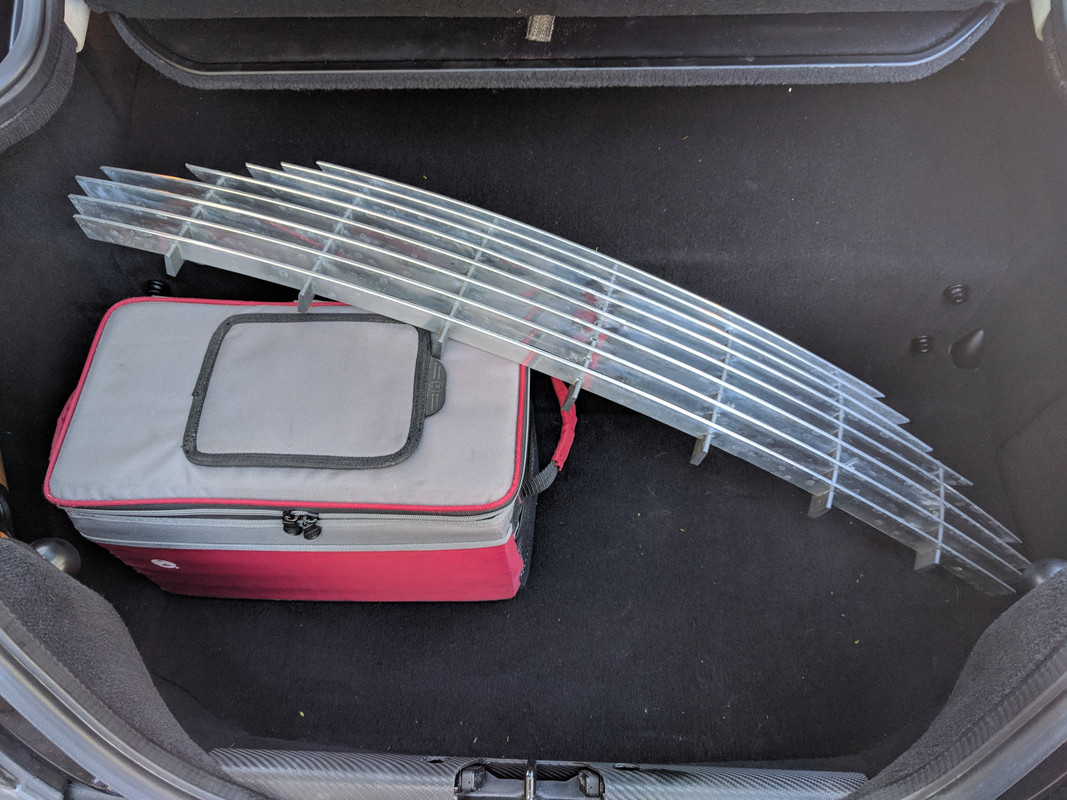
Took the 12 pieces (8 bar grill and 4 vents) to a local sandblaster and powdercoating shop. They liked that the grill pieces already had holes in them for hanging. I feel I got a great deal as cost was $70 cash for all 12 pieces.
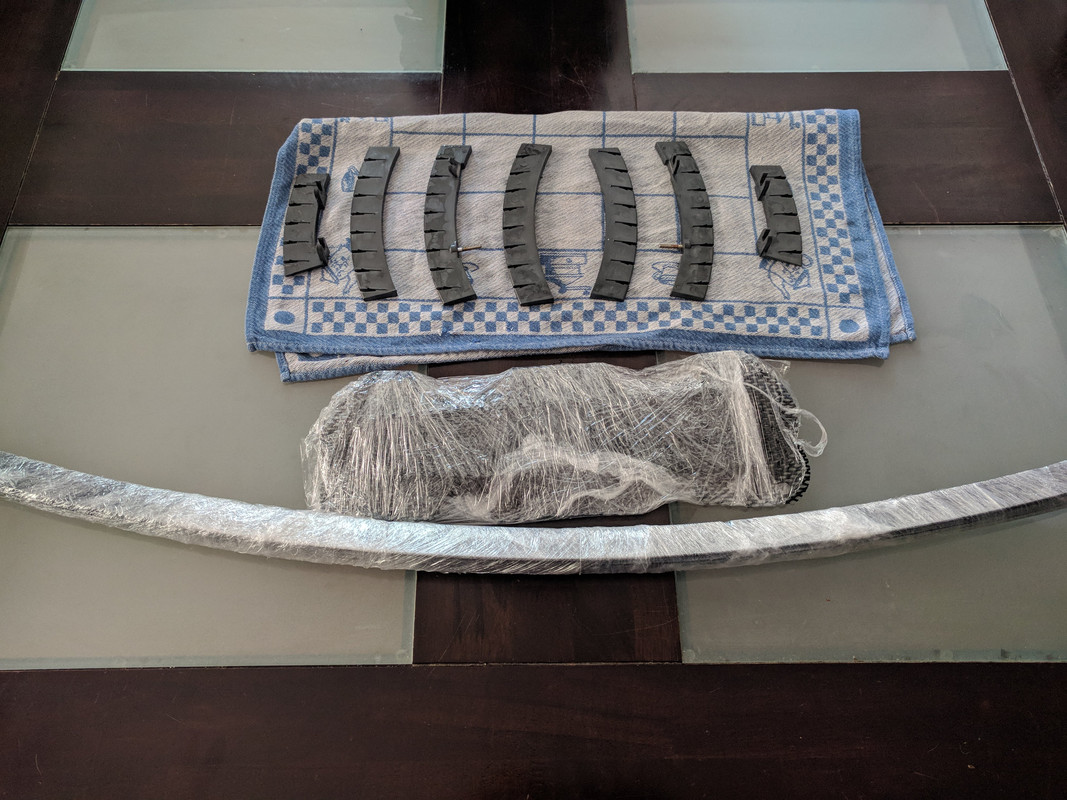
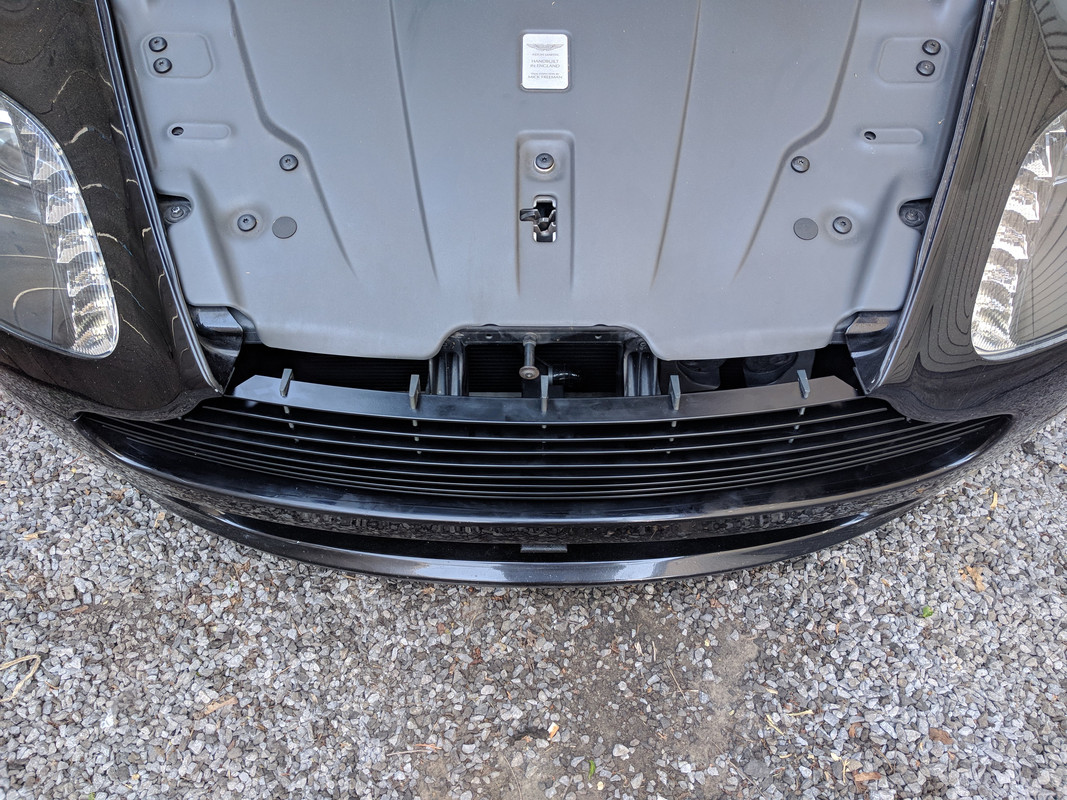
Reinstalling them is reverse of removal for the vents.
Re-installation of the grill takes a little longer as you have to insert the 8 pieces in the correct order and length back into the holders - just take your time and it's all good. Leaving some of the bottom ones out makes it easier to get your hand in to tighten top nuts without dropping them
Here are the pics - either you'll like the finished look better or worse than OEM. All that really matters though is I'm happy with the results
Dirt won't stick to the new satin black finish easily and even if it gets a little dirty it likely won't be as noticeable.
Removing the hood grills couldn't be easier, just remove the plastic nuts and slide off the studs after peeling the hood liner back to expose the vent grills.
The fender vents are more of a pain to access the 3 nuts along the centre line. Of course the fender liner is removed and you can reach the closer nuts from the front end while the furthest rear is easier reached from below. Tight fit for your hands if using regular length wrenches. a ratcheting closed end wrench definitely makes it easier...
The front grill is easiest to remove as a complete unit removing nuts and screws holding it on.
Took the 12 pieces (8 bar grill and 4 vents) to a local sandblaster and powdercoating shop. They liked that the grill pieces already had holes in them for hanging. I feel I got a great deal as cost was $70 cash for all 12 pieces.
Reinstalling them is reverse of removal for the vents.
Re-installation of the grill takes a little longer as you have to insert the 8 pieces in the correct order and length back into the holders - just take your time and it's all good. Leaving some of the bottom ones out makes it easier to get your hand in to tighten top nuts without dropping them
Here are the pics - either you'll like the finished look better or worse than OEM. All that really matters though is I'm happy with the results
Thread Starter
|
Registered User
Joined: Apr 2017
Posts: 399
From: Niagara Region
Rep Power: 29
 . Will try to capture a video! Did you do the Velocity AP clutch/flywheel when you did the headers?
Those mods would happen when the current clutch fails.
A new tune can eliminate the Rice Krispies (Snap, Crackle, Pop) if you don't like them...
Thread Starter
|
Registered User
Joined: Apr 2017
Posts: 399
From: Niagara Region
Rep Power: 29
Yeah me too need to slow done for a while as I just put the house on the market...
Registered User

Joined: Feb 2010
Posts: 1,024
From: Austin
Rep Power: 67

I still smile every time I let off following strong acceleration, will not be tuning them out!
Registered User

Joined: Aug 2016
Posts: 1,051
From: Reno, NV
Rep Power: 62
I'm doing the same in about 2 weeks, then I'm moving about 1900 miles westward
Thread Starter
|
Registered User
Joined: Apr 2017
Posts: 399
From: Niagara Region
Rep Power: 29
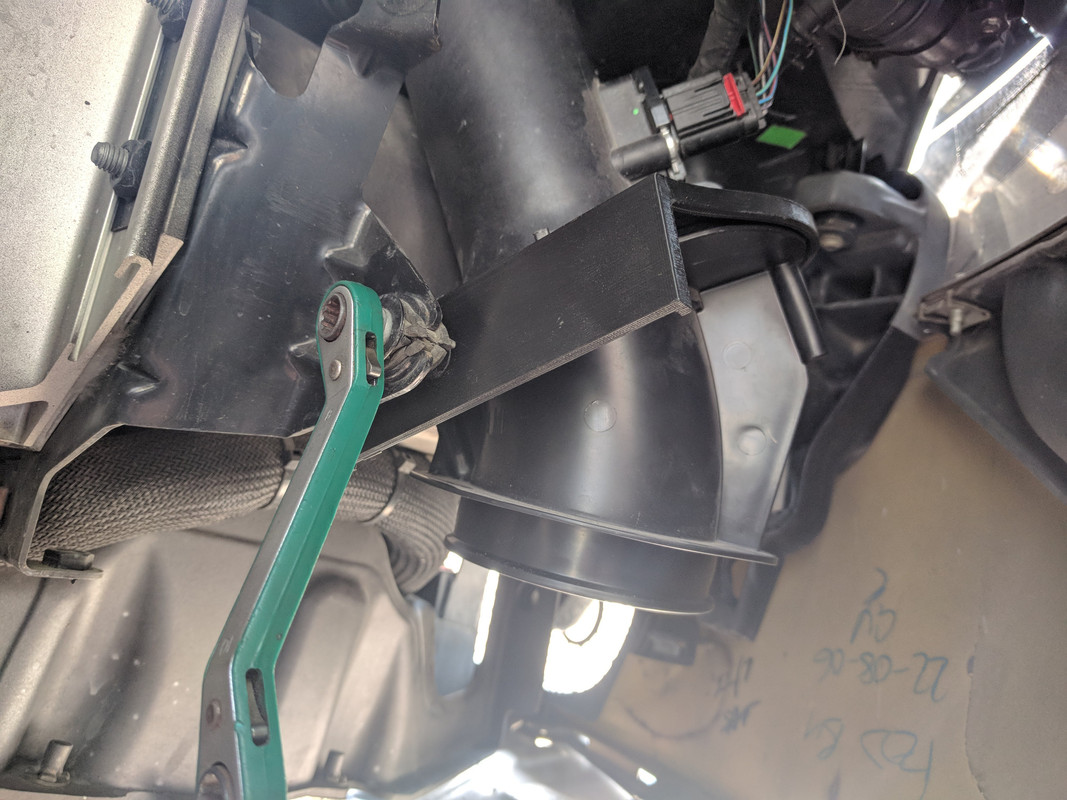
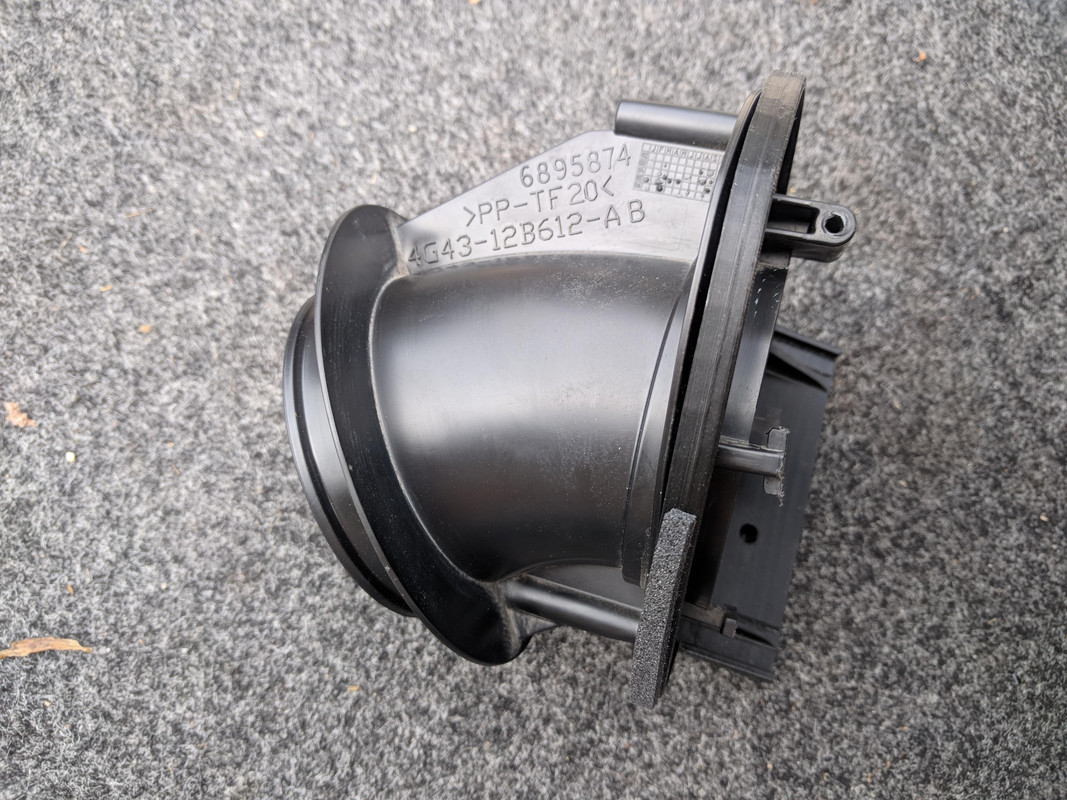
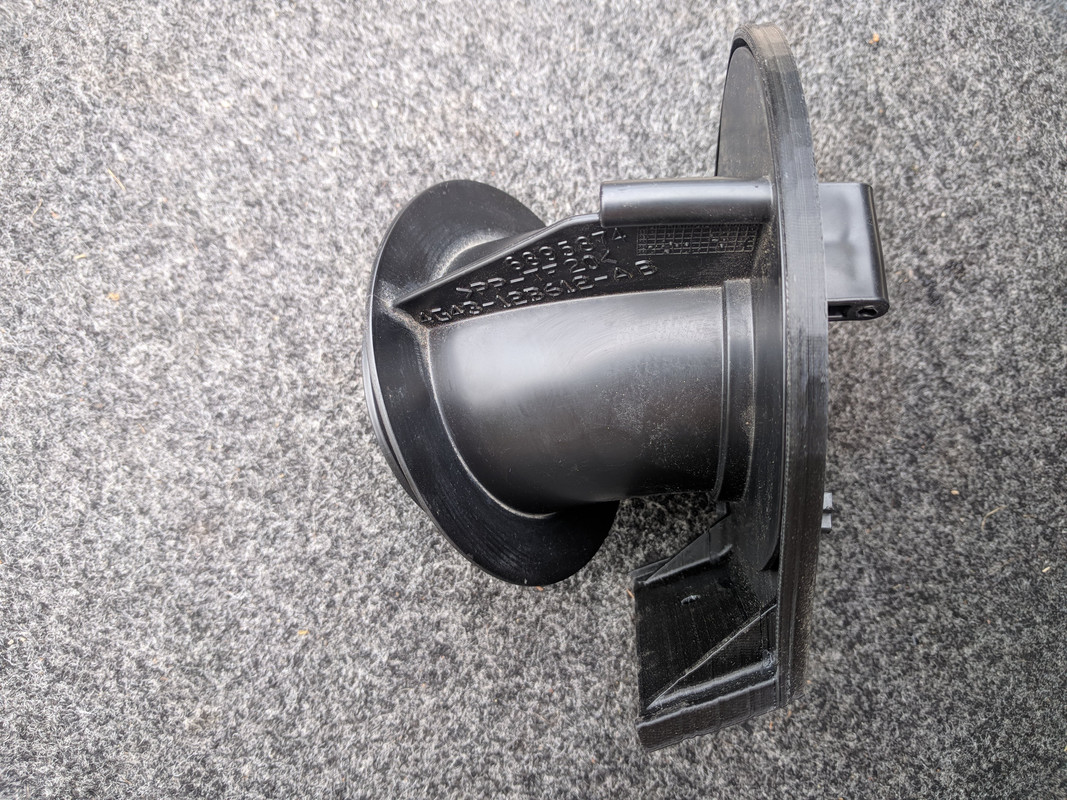
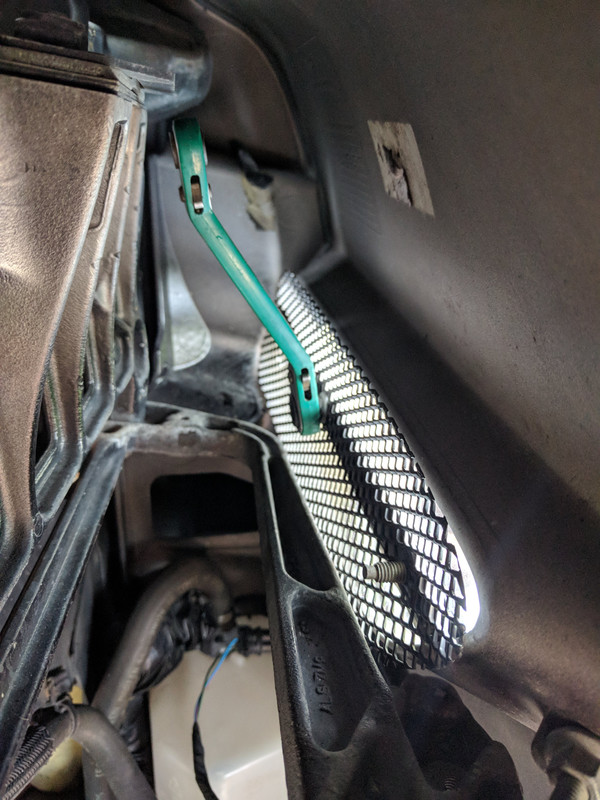
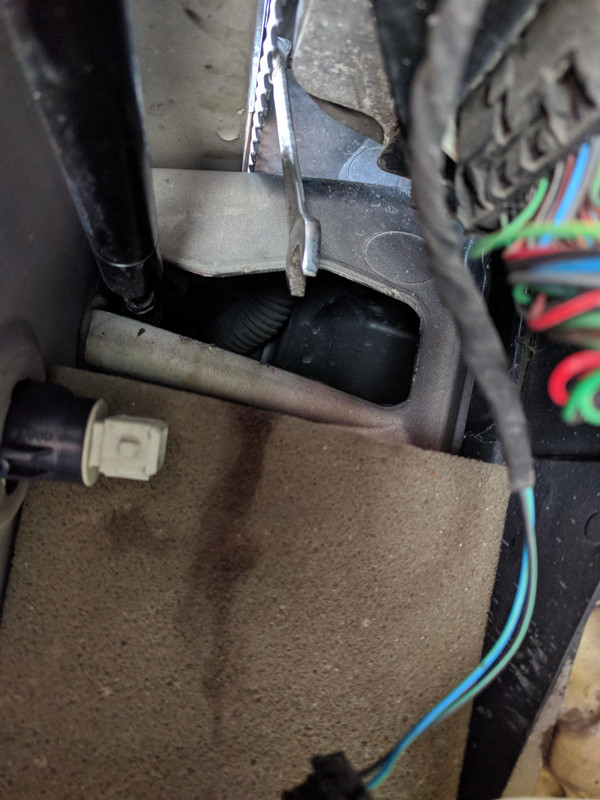
Please remove the rubber grommet and spacer from the bracket, I didn't design them to be used this way. The flange on the bracket mates to the flange on the car to spread the load, there is a extruded ring on the side of the plastic bracket that fits into the metal bracket on the car to locate the assembly.
Yesterday I was out for a nice Father's Day drive (with Fuse 22 pulled)
Registered User
Joined: Nov 2014
Posts: 503
From: Ottawa Canada
Rep Power: 33
As a treat we went out for brunch and I asked him which car are going in the Healey or the Aston ......Guess which he picked .
Thread Starter
|
Registered User
Joined: Apr 2017
Posts: 399
From: Niagara Region
Rep Power: 29
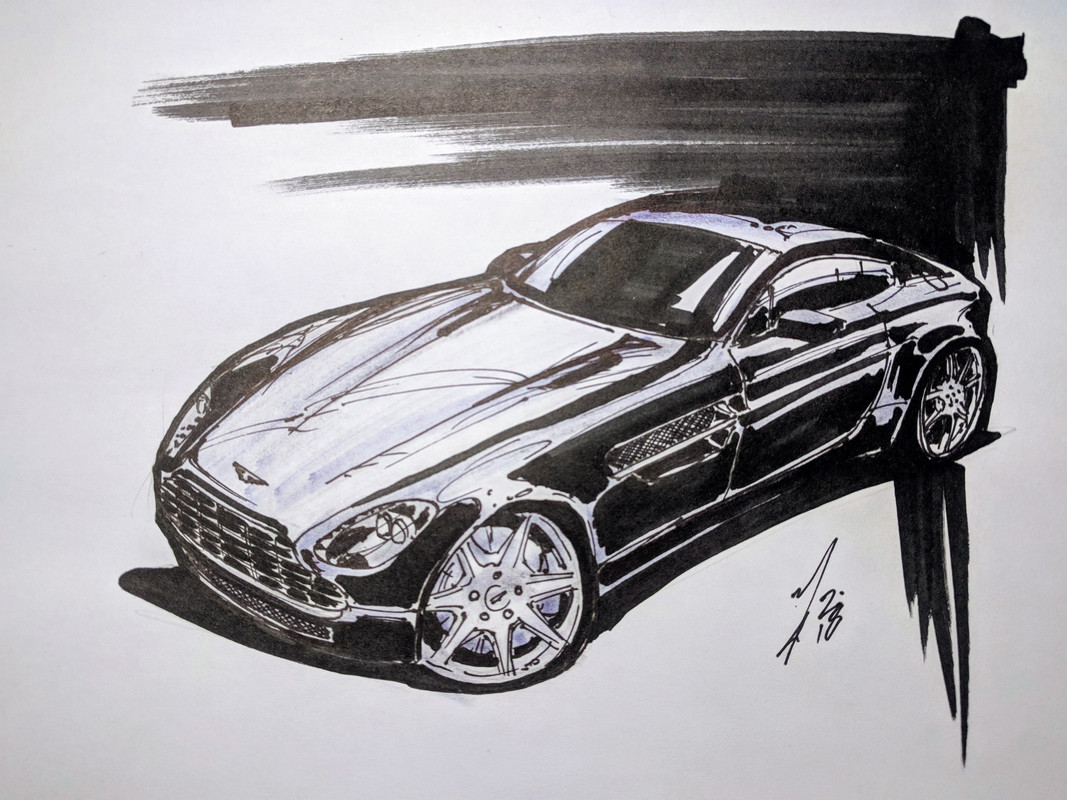
He used just black markers and spent about 1/2 hour on it.
I gave him the $20 he suggested for the original (cheapest Vantage related thing I've bought to date).
I gave him the $20 he suggested for the original (cheapest Vantage related thing I've bought to date).

Registered User

Joined: Jan 2015
Posts: 1,707
From: Florida
Rep Power: 101

Thread Starter
|
Registered User
Joined: Apr 2017
Posts: 399
From: Niagara Region
Rep Power: 29
LOL seems to happen at every cruise night

A friend of mine really likes the Lotus brand:

Stopped by his place to check out the lift he uses for them:

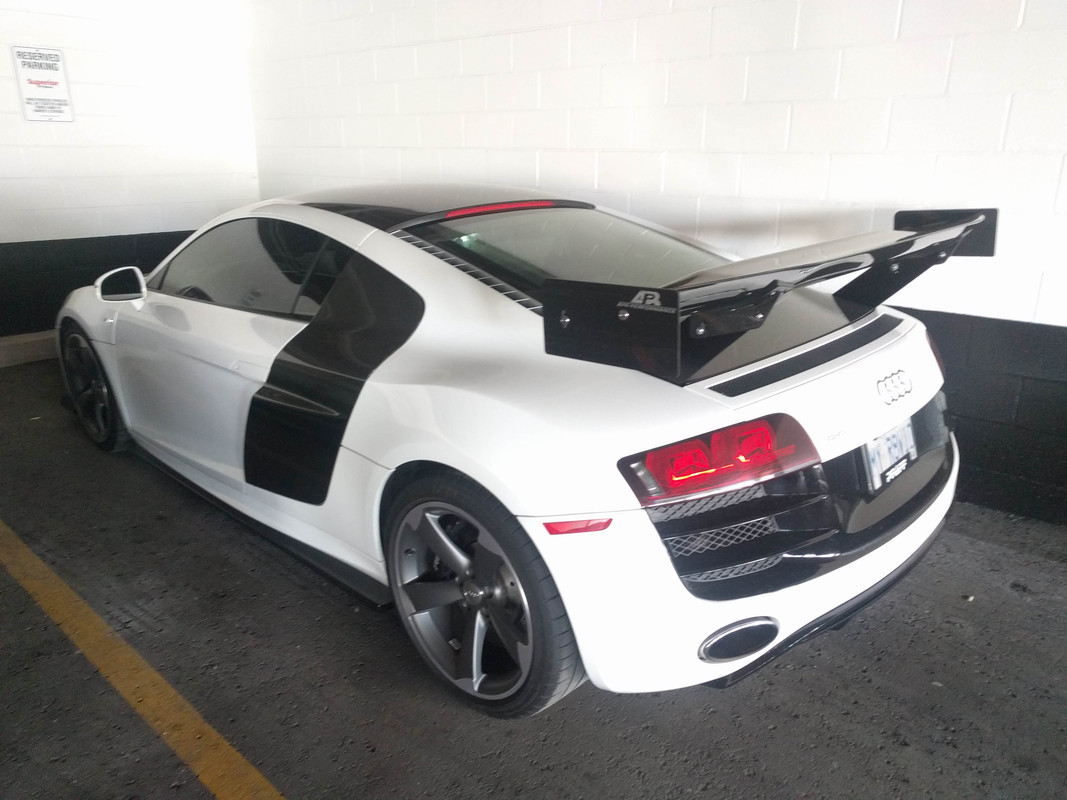
Then I went to work and saw the R8 had a huge aftermarket CF wing added to it (the brand I've seen added to Mustangs etc)
Does he really need rear downforce on a mid engine car? I'd put something on the front instead - oh well not my car:
I did however make my brother promise not to add a wing like that if he buys a R8
More updates coming soon, I'll been busy travelling for work and selling my house:
I did find time to upload some new tunes to the ECU from Chris at VelocityAP
A friend of mine really likes the Lotus brand:
Stopped by his place to check out the lift he uses for them:
Then I went to work and saw the R8 had a huge aftermarket CF wing added to it (the brand I've seen added to Mustangs etc)
Does he really need rear downforce on a mid engine car? I'd put something on the front instead - oh well not my car:
I did however make my brother promise not to add a wing like that if he buys a R8
More updates coming soon, I'll been busy travelling for work and selling my house:
I did find time to upload some new tunes to the ECU from Chris at VelocityAP
Last edited by 007V8Vantage; Jul 5, 2018 at 02:07 PM.