
Greetings from Niagara, Ontario, Canada


Basic Sponsor


Joined: Sep 2011
Posts: 2,981
From: British Columbia
Rep Power: 208


Nice build story, pretty cool DIY of items most won't even think about tackling!
Sucks I saw this too late..I was going to comment on the jack stands placed on rocks, sadly you found out "why not" to do this...
The headlamps circuit boards usually have this issue when the solder cracks on the backside, or a relay internal switch is slightly warped inside. For the board, using a mulitmeter you can check for the hair-line cracks from pin to contact route on board, once found just remove the solder and reapply. The relay I use power it and check for switch to close.
Either way, the flashers are working now so don't lose sleep over it..haha although if your **** about this I'm sure that little hose duck taped will eat your mind alive knowing it's in there and it shouldn't be! :-)
That clear relay, does it splice into the backside of the boot fusebox? Am I seeing right, it's a 14 pin relay? So 12 pins and 13+14 for coil? ..wtf, little over the top?
Registered User

Joined: Jun 2016
Posts: 1,508
From: South Jersey
Rep Power: 76


I asked the dealer who said yes but you have to pull the driver. I found out you just need to move the tire kit and it takes the bag as is. Actually fits better than my Z! Although as you can see it's way past time for a new bag.

Thread Starter
|
Registered User
Joined: Apr 2017
Posts: 399
From: Niagara Region
Rep Power: 29
Thanks Irish, and welcome to the thread
Either way, the flashers are working now so don't lose sleep over it..haha although if your **** about this I'm sure that little hose duck taped will eat your mind alive knowing it's in there and it shouldn't be! :-)
That clear relay, does it splice into the backside of the boot fusebox? Am I seeing right, it's a 14 pin relay? So 12 pins and 13+14 for coil? ..wtf, little over the top?
That clear relay, does it splice into the backside of the boot fusebox? Am I seeing right, it's a 14 pin relay? So 12 pins and 13+14 for coil? ..wtf, little over the top?
Yes looks like a 14 pin relay which didn't appear OEM to me.
I'll trace where it goes and provide an update.
Thanks for your sticky on gear oil - much appreciated as it's on my list based on what I've found so far...
Thread Starter
|
Registered User
Joined: Apr 2017
Posts: 399
From: Niagara Region
Rep Power: 29
Where did you relocate the tire kit to?
Thread Starter
|
Registered User
Joined: Apr 2017
Posts: 399
From: Niagara Region
Rep Power: 29
Here's one of the reasons I am not afraid to buy a used car privately rather than paying more for a detailed one in the used car dealer showroom.
Reminder of what the engine bay looked like during my test drive:
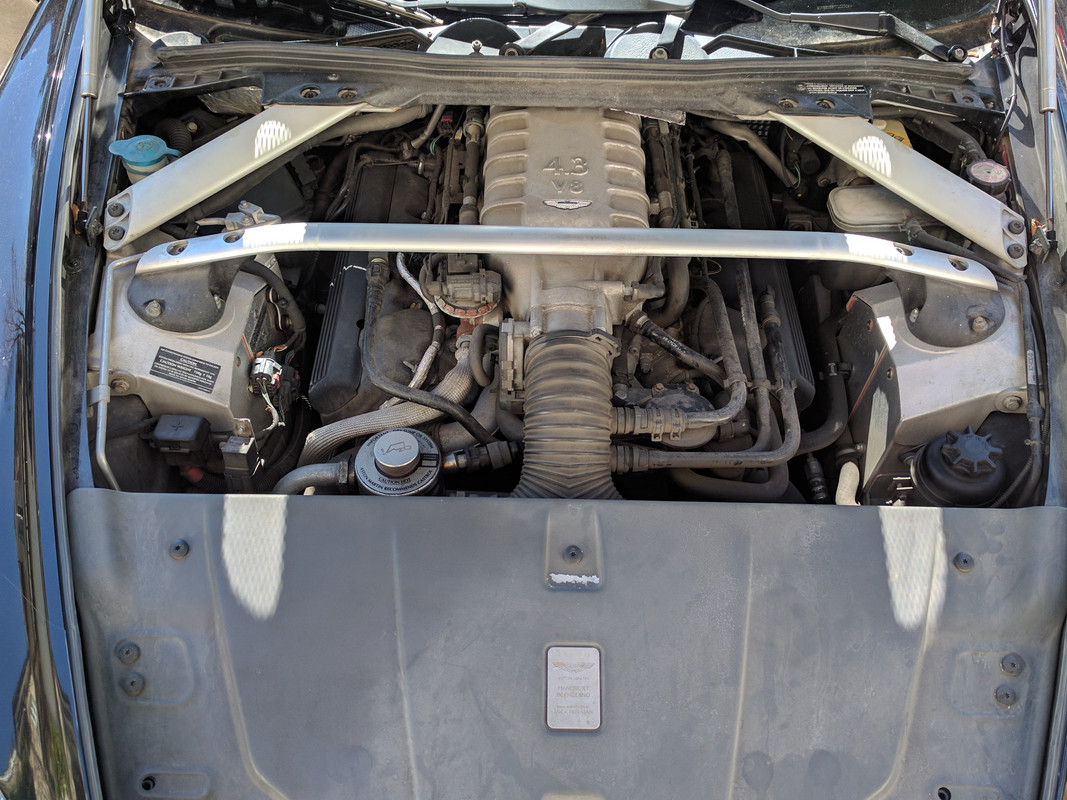
Some shots of how it looks after about a half hour of my time and a can of engine de-greaser:
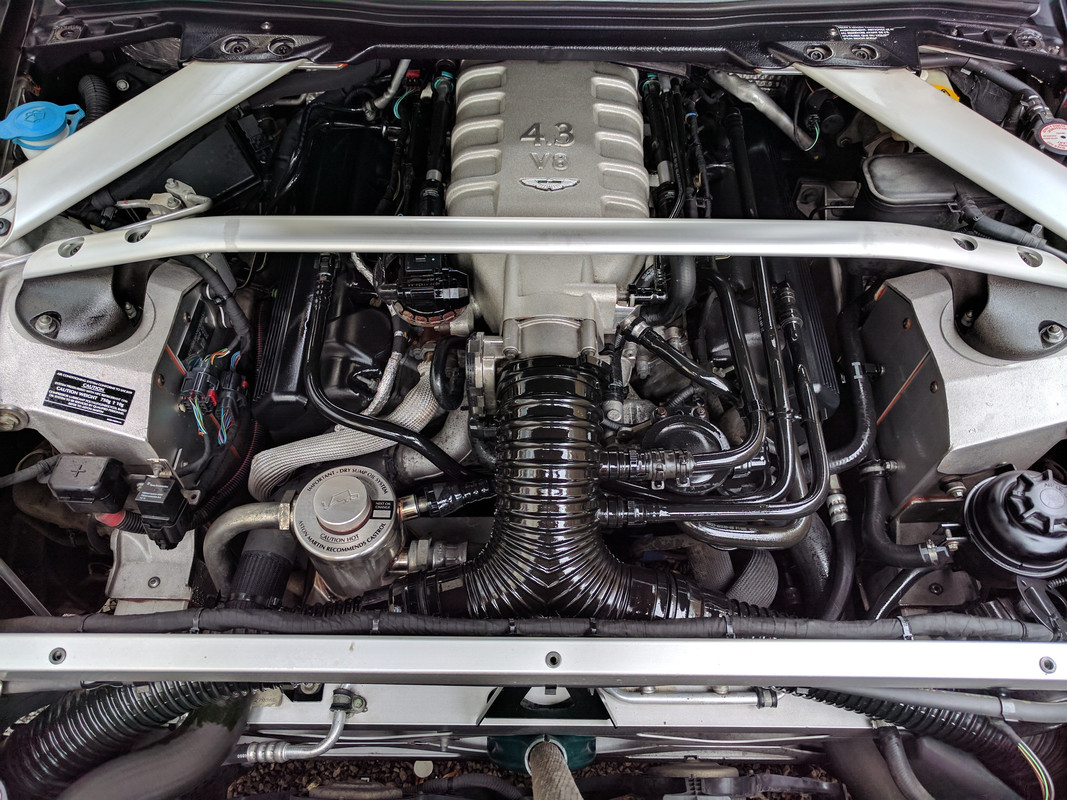

A girl at work asked me if a cat attacked my hand but no I just should have worn gloves when wiping up with a micro fiber cloth
Yes that is a Great White North snow shovel handle preforming a task my hood lift struts can no longer.
I did follow other best practices though such as not using a pressure washer, protecting and not spraying water on electrical connectors, doing this with a cold engine then running 10 minutes to help dry the engine bay...
Reminder of what the engine bay looked like during my test drive:
Some shots of how it looks after about a half hour of my time and a can of engine de-greaser:
A girl at work asked me if a cat attacked my hand but no I just should have worn gloves when wiping up with a micro fiber cloth
Yes that is a Great White North snow shovel handle preforming a task my hood lift struts can no longer.
I did follow other best practices though such as not using a pressure washer, protecting and not spraying water on electrical connectors, doing this with a cold engine then running 10 minutes to help dry the engine bay...
Last edited by 007V8Vantage; Apr 7, 2021 at 09:59 PM.
Thread Starter
|
Registered User
Joined: Apr 2017
Posts: 399
From: Niagara Region
Rep Power: 29
Question of the day...
Does this look normal and how do I fix it so cover moves with Sat Nav (GPS)
The previous owner suggested krazy glue like he did before...
Looking at the range of motion that would make it bind IMHO
The previous owner suggested krazy glue like he did before...
Looking at the range of motion that would make it bind IMHO
Last edited by 007V8Vantage; Apr 7, 2021 at 10:38 PM.
Registered User
Joined: Jun 2016
Posts: 1,508
From: South Jersey
Rep Power: 76

Thread Starter
|
Registered User
Joined: Apr 2017
Posts: 399
From: Niagara Region
Rep Power: 29

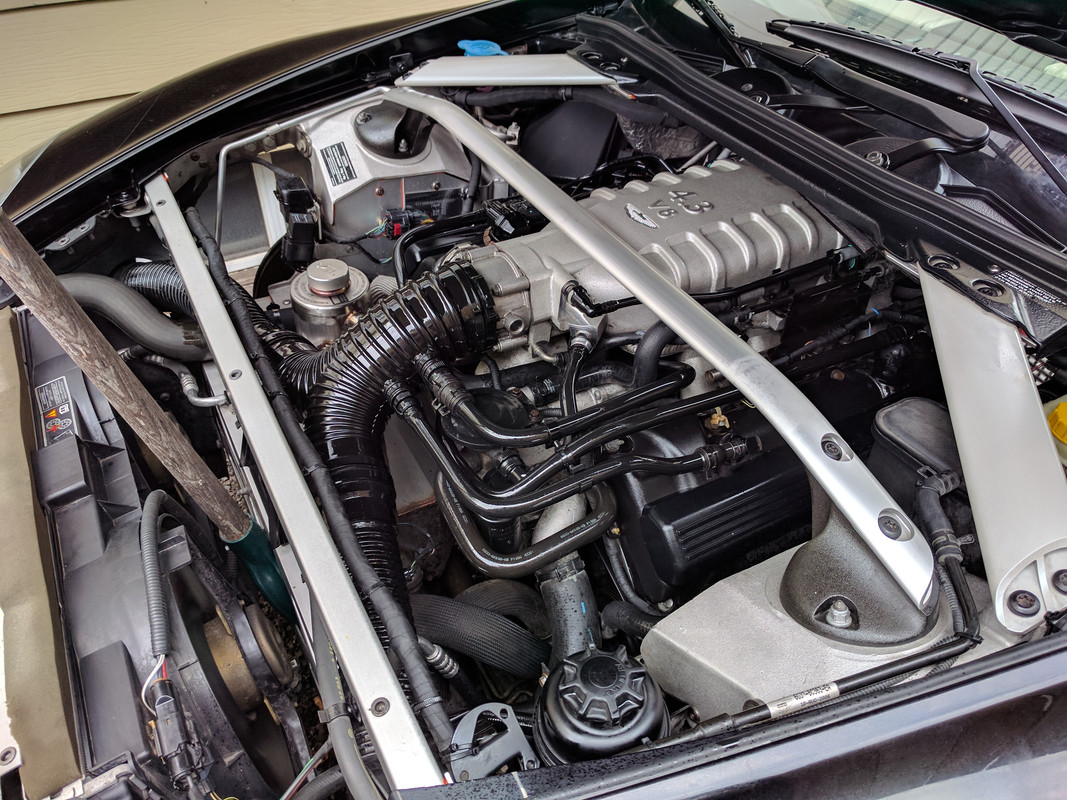
Those photos were taken when wet.
I use a protectant after the engine shampoo so that it can be maintained with a multi-surface engine bay cleaner (in a spray bottle) and a rag.

Here's a couple pics of the protectant dry which is more natural looking:


Thread Starter
|
Registered User
Joined: Apr 2017
Posts: 399
From: Niagara Region
Rep Power: 29
I really like how easy it is to remove carpets in the Aston so they can be cleaned outside the car much more thoroughly than in the car.
My steps after remove were:
1) Vacuum
2) Thoroughly pressure wash
3) Allow to dry until just damp
4) Scrub with carpet cleaner / shampoo
5) Wet / Dry vacuum
6) Hang to dry fully
I am very please with the results of my time and less than $20 of carpet cleaner / shampoo:


It took 10 minutes to get all the existing suds out of this mat!

I reattached part number labels as they fell off:


Other times I relocated them to the insulation so they wouldn't get wet:


I spray glued the package tray pieces sides back together upon completion:

Let everything drip and air dry for 24 hours after a thorough wet/dry vac to get most of the water and excess shampoo removed:

I'm missing a plastic round / square grommet that make this drivers side floor mat look low rent - please advise if you know where I can buy that piece separately. Would be a shame to have to buy new mats for that:

Not only do the carpets look great, they smell so much better even before reinstalling into the Vantage

Very happy how this went and now am just cleaning a couple of the non stained vertical carpets that were not worth removing:

My steps after remove were:
1) Vacuum
2) Thoroughly pressure wash
3) Allow to dry until just damp
4) Scrub with carpet cleaner / shampoo
5) Wet / Dry vacuum
6) Hang to dry fully
I am very please with the results of my time and less than $20 of carpet cleaner / shampoo:
It took 10 minutes to get all the existing suds out of this mat!
I reattached part number labels as they fell off:
Other times I relocated them to the insulation so they wouldn't get wet:
I spray glued the package tray pieces sides back together upon completion:
Let everything drip and air dry for 24 hours after a thorough wet/dry vac to get most of the water and excess shampoo removed:
I'm missing a plastic round / square grommet that make this drivers side floor mat look low rent - please advise if you know where I can buy that piece separately. Would be a shame to have to buy new mats for that:
Not only do the carpets look great, they smell so much better even before reinstalling into the Vantage
Very happy how this went and now am just cleaning a couple of the non stained vertical carpets that were not worth removing:


Registered User
Joined: Nov 2014
Posts: 503
From: Ottawa Canada
Rep Power: 33
Looking better day by day .
I enjoy seeing the results of guys doing DIY on these cars . So many guys say "oooh its an Aston Martin it has to go to the dealer " clearly the answer is no it doesnt , I do as much as I can myself as well and will continue to . I intend on even doing my own clutch when its time .
The thing I dont get is why/how did the previous owner let the car get to be in such a state ,obviously too much money and no care about the car . I could never let any of my vehicles get to be in that condition .
Keep up the great work .