When you click on links to various merchants on this site and make a purchase, this can result in this site earning a commission. Affiliate programs and affiliations include, but are not limited to, the eBay Partner Network.
You cant't un-bolt the adapter plate from the chassis and lift the whole thing out?
Seat is slammed all the way back against the rear parcel shelf.
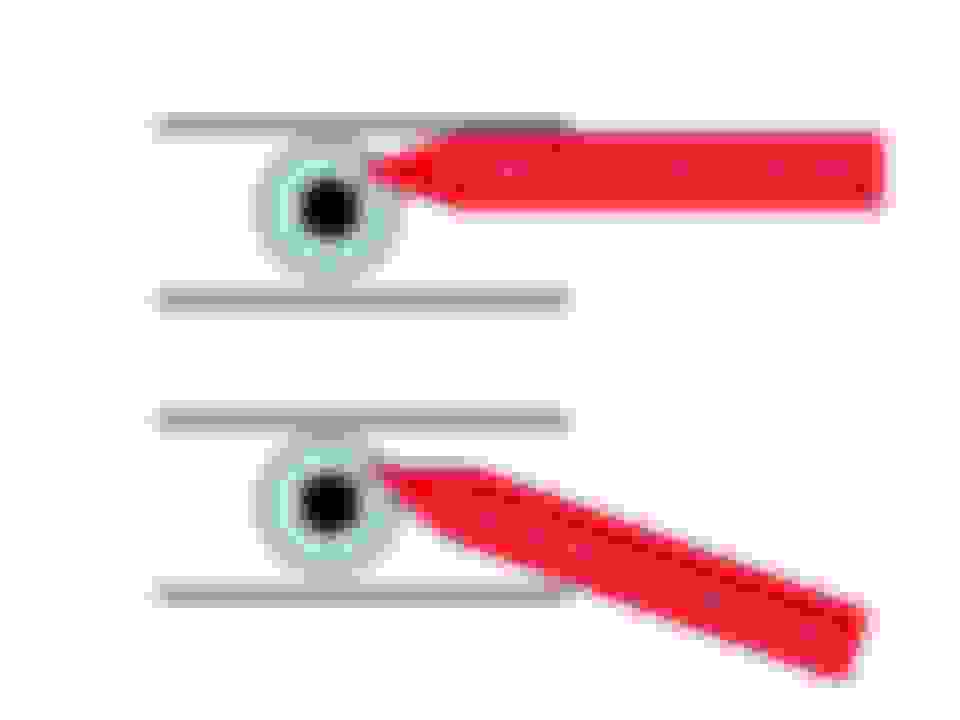
Per above all four bolts are blocked by the sliders, the front to ever so slightly and the rears completely. I was really hopeful this would be the solution early on.
Maybe you can try to JB-Weld an old driver bit to the rounded head of the screw to see if it would work or use a oscillating saw and cut a slot in the head of the screw to use a flat screwdriver ??
Maybe you can try to JB-Weld an old driver bit to the rounded head of the screw to see if it would work or use a oscillating saw and cut a slot in the head of the screw to use a flat screwdriver ??
The biggest challenge is there is only about 3 inches between the bolt and the seat above. An oscillating saw would not fit (a dremmel may). It is also a button head and I put blue Loctite on it. Ideally I�m trying to avoid sawing metal in the car if possible but this is a possible option.
I would try to use a small, sharp chisel and try working horizontally from the front.
Work in 2 steps:
first make a nice groove into the bolt head
second loosen the bolt using this groove.
Thanks for the guidance, this is unfortunately looking like the only option.
I�m going to wait for the seat manufacture to send me the other bits needed to correctly install my drivers seat, and get that installed first. I am then going to take the car to a race shop near my house to see if they have any ideas in person before I undertake your suggested approach. Thanks!
Drilling through the seat itself would be the absolute last resort! I�m going to take it by a race shop and a high end body shop I know well before that happens to see what ideas they have.
I drove an SRF last week � What a great day. My lap times came down all day with a personal best in the last session. I actually hung with the young guy's. Had it twisted up a few times, but I did not crash it and it was still running when I left
era2076,
Your picture of the Spec Racer Ford brought back many memories of my own SCCA racing days with a (then) Sports Renault. (This was in 1985-1987.) These cars are great to race, and I learned a lot about suspension alignment in the process. My major claim to fame was beating Dorsey Schroeder 1 time out of 2 and Robbie Buhl 2 times out of 3. Dorsey later went on to become the Trans Am champion, and Robbie ultimately raced in Indy Car for a number of years, nearly winning the Indy 500 one year.
Compared to the Vantage, a Spec Racer is all about maintaining momentum. They don't have the horsepower to make up for a subpar corner exit speed. They also need an optimal amount of trail-braking into the corners, but that's true of most types of cars on-track.
Your fabrication work on both of your cars is most impressive. Good luck with the cars' development!
We spent several hours measuring stuff today and we finally isolated where our error is coming from. I measured the seat bucket with a large caliper and the bucket width was consistent within .040 so clearly there is no error there. We bolted the frame assembly into the car and then lowered the seat into the frame and there was a large gap between the frame and the seat. We removed the frame from the car and measured the distance between the chassis inserts side to side. Then we remounted the frame to the seat and checked the distances between the mounting holes (on the bench) and wa --lah the error comes from the bends in the seat frames.
As Eric found out the end of the slider needs too be radius-ed to allow the flanged OEM bolt to clear. The shiny cap bolt is an M8 matching the OEM thread. It accepts a 6mm hex key.
Once we got it reassembled and measured the rear mounting holes were of the correct width, but the fronts were to wide. We used a clamp and squeezed the rails together until the correct measurement was achieved. This took very little force. We used zip ties to hold the rails at the right distance. We then put the chair back in the car and tried to bolt it in which was our most successful attempt yet. We were able to get 5 of the 6 bolts fully threaded. We need to open the slider holes in the risers to match the diameter of the holes in the sliders. Another problem is not having the slider fully positioned and clamped when we put the seat in so we are drilling new holes in the middle of the risers so that we can have the slides centered and fully clamped to the riser when we put the seat in the car.
Here is a picture with the seat installed. The seat is in the most forward position. I don't have a picture of the front, but it is similar clearance. The two front bolts are very accessible so I am confused why Eric is experiencing the trouble he is. If we had to grind out the slider bolt there is room to do it.
Once we finally get the thing bolted in we are going to fabricate spreaders to hold the mounting holes at the proper distances on the bench. Then we will fabricate a new submarine sub-frame to accommodate that dimension.


 Thinking ahead - what would "1 holes properly located do for you?